33 C
Dubai
Tuesday, April 29, 2025
Home Blog

How to Configure VNet Peering in Azure

Introduction

Azure Virtual Network is used for the Virtual Network Peering empowers users to flawlessly communicate with virtual networks in Azure. VNet Peering in Azure allows the traffic of one virtual network to communicate to another virtual network. This is basically used for database failover, disaster recovery, or cross-region data replication.VPN gateways are used in an encrypted connection in the region but VNet Peering provides connection sharing in different regions.

Prerequisites

  • Create a resource group
  • Create a two virtual network
  • Create a two virtual machine

Benefits of VNet Peering in Azure

  • Seamless Network Connectivity – Connects two Azure Virtual Networks (VNets) to enable private, low-latency, and high-bandwidth communication between resources in different VNets.
  •  Cross-Region Connectivity – Enables communication between VNets in different Azure regions using Global VNet Peering, facilitating distributed applications and disaster recovery setups.
  • Shared Services Access – Allows multiple VNets to access common resources like firewalls, domain controllers, and monitoring tools without the need for a VPN or ExpressRoute.
  • Hybrid Network Integration – Supports hybrid architectures by peering VNets with a network that connects to on-premises environments via VPN Gateway or ExpressRoute.
  • Cost Optimization – Reduces costs compared to VPN gateways by eliminating bandwidth charges for data transfer within the same region and minimizing network complexity.

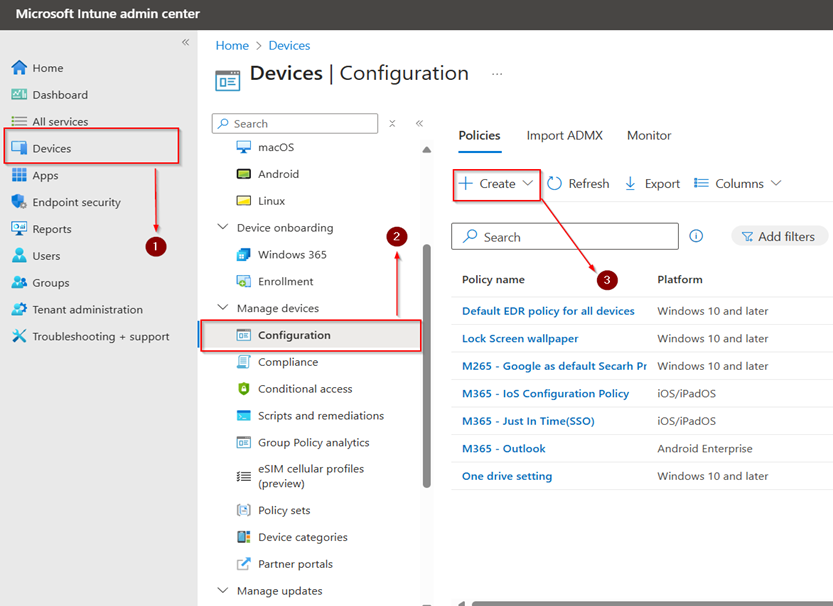
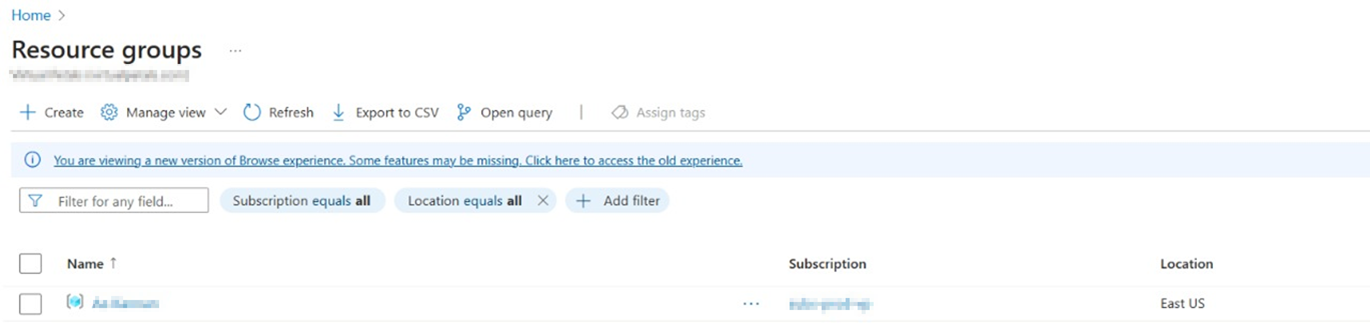
Step 1 : Open azure portal and Create a resource group.

Step 2 : Do review and create the resource group.

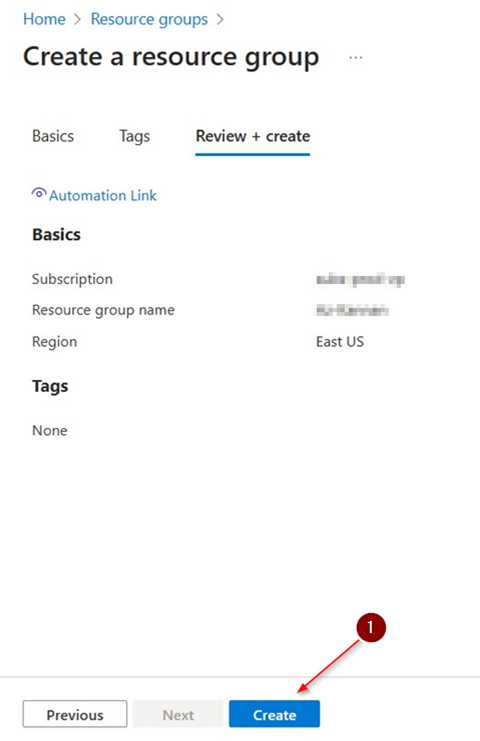
Step 3 : Once the validation done we can create it.

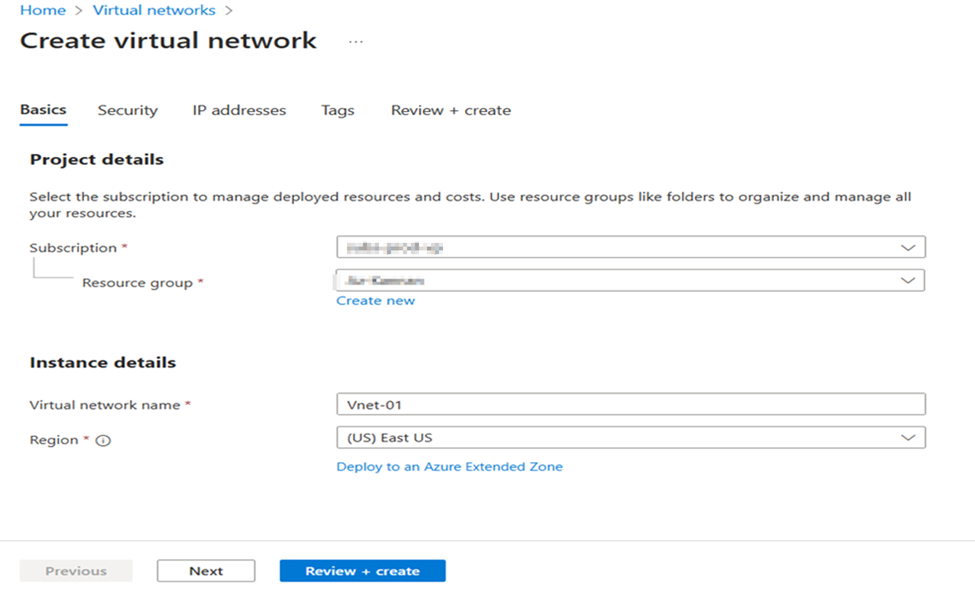
Step 4 : Let’s start create a Virtual network one.

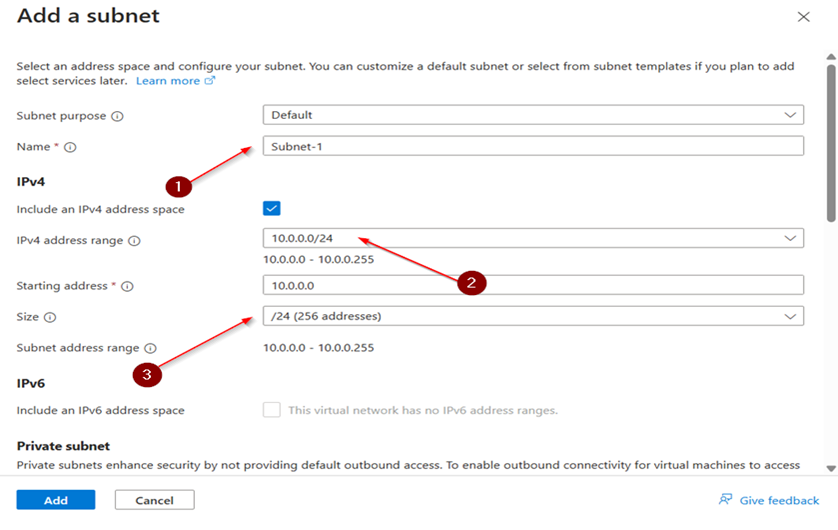
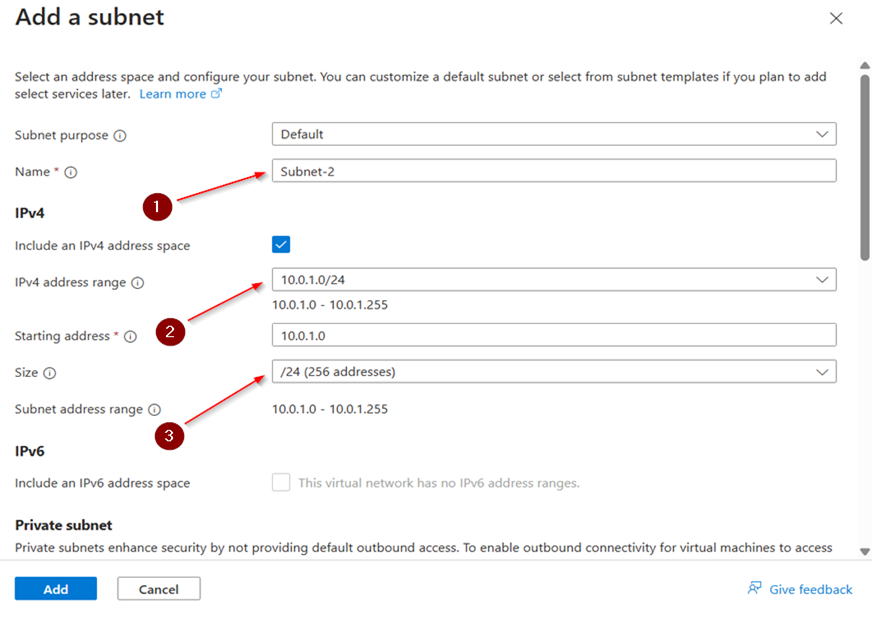
Step 5 : Goto IP addresses select Add a subnet and enter the target IP address.

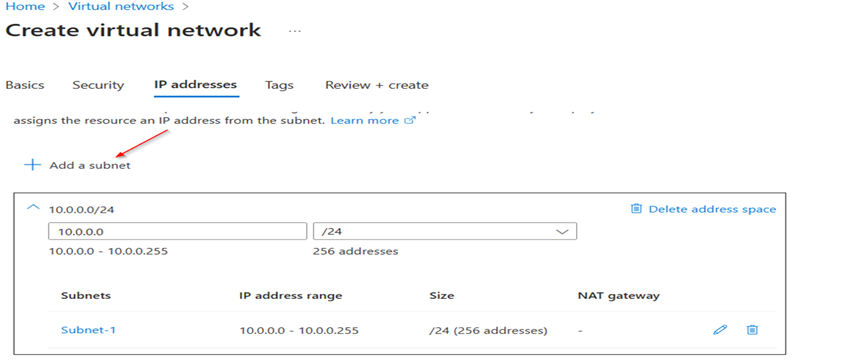
Step 6 : Enter the name for subnet & give IP address range,size and click Add.

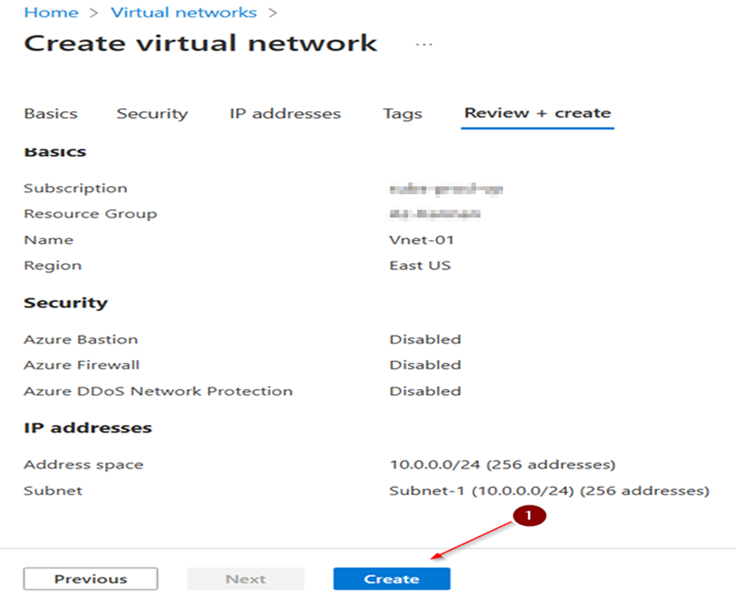
Step 7 : Select Review+create and Create.

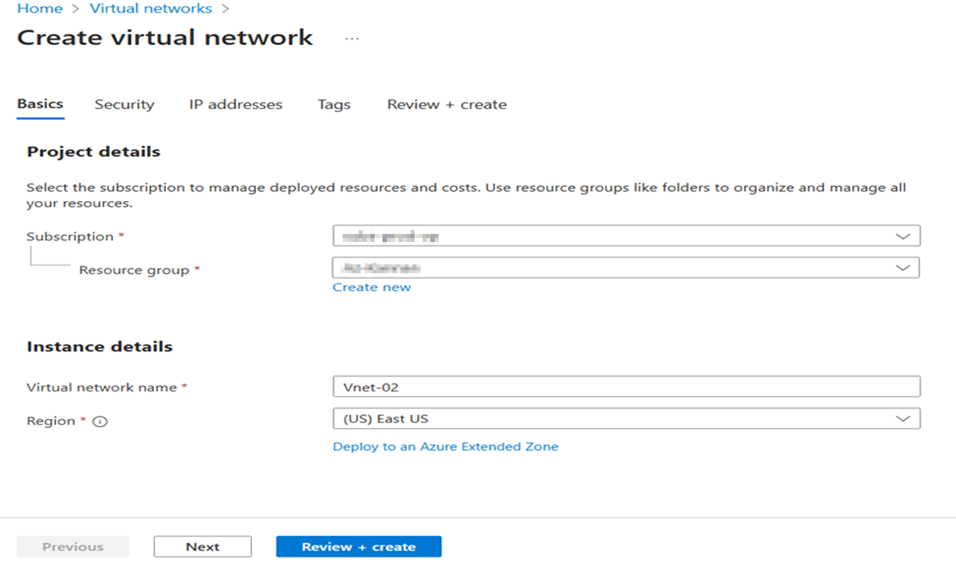
Step 8 : Now we have created the vnet 1.Let’s start create the vnet 2 by following these steps.

Step 9 : Goto IP addresses select Add a subnet and enter the target IP address.

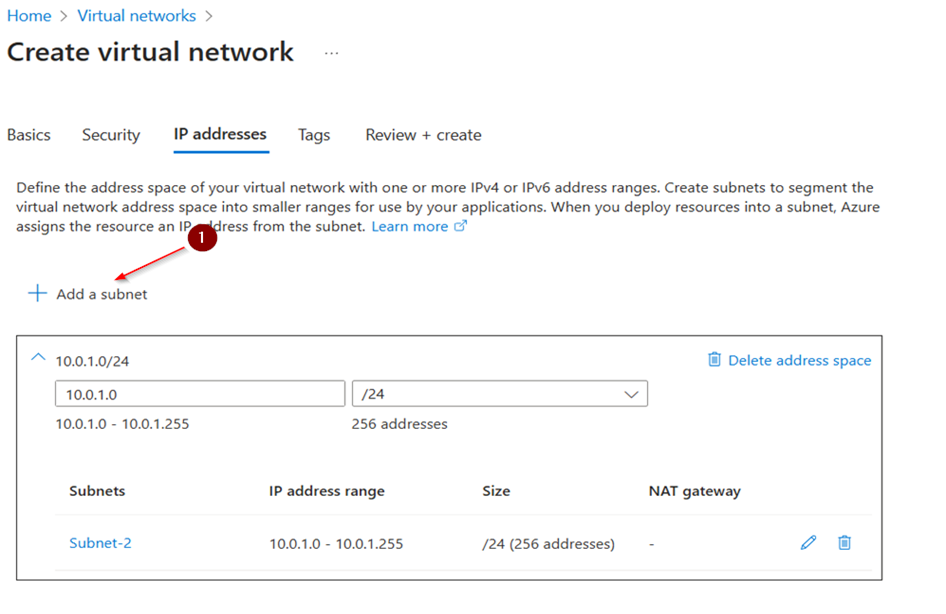
Step 10 : Enter the name for subnet & give IP address range,size and click Add.

Step 11 : Select Review+create and Create.

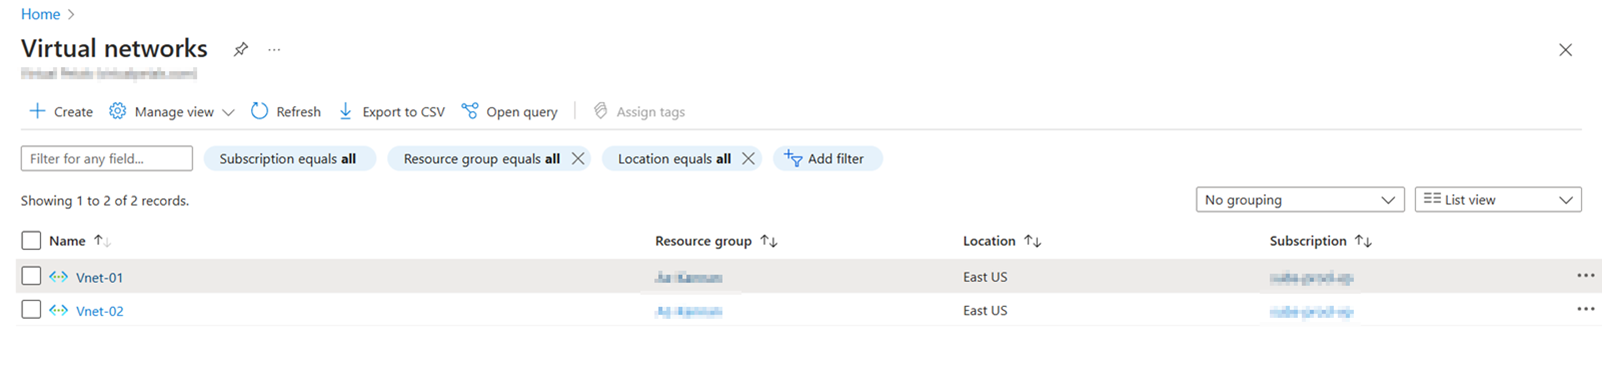
Step 12 : Here’s the two virtual networks that we created.

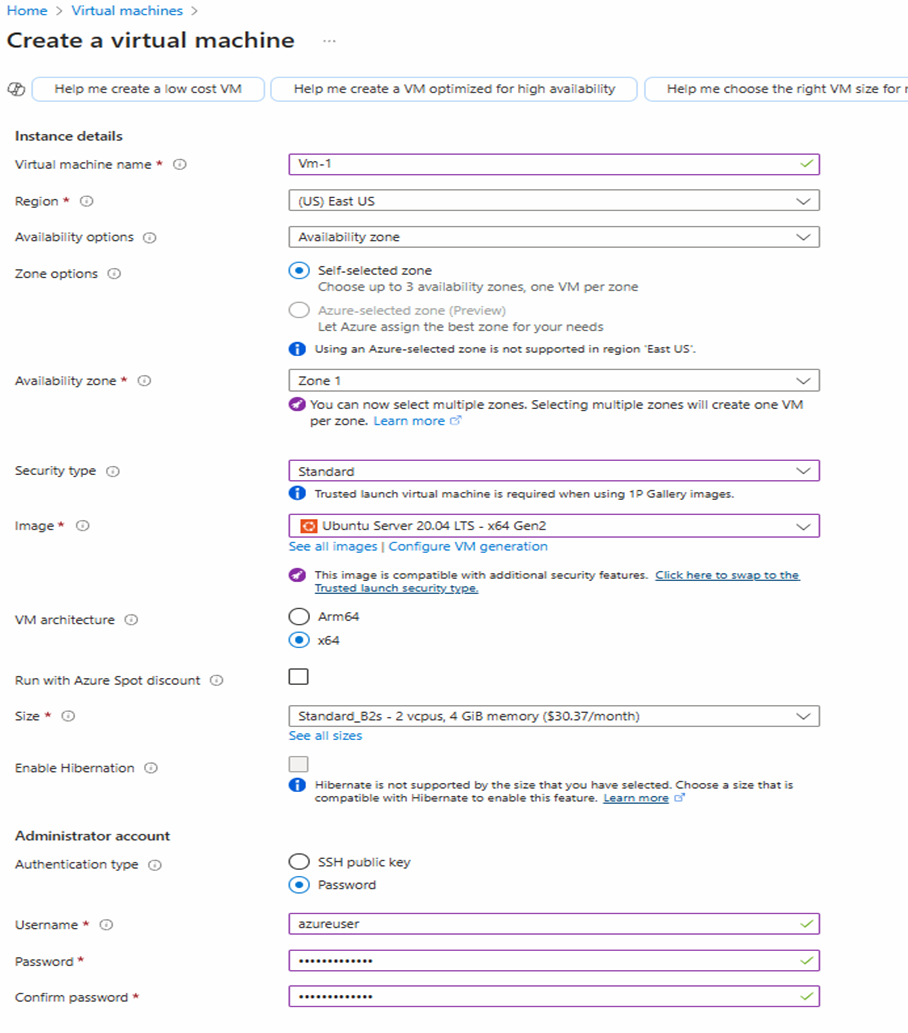
Step 13 : Let’s start a create the first Virtual Machine by following these steps.

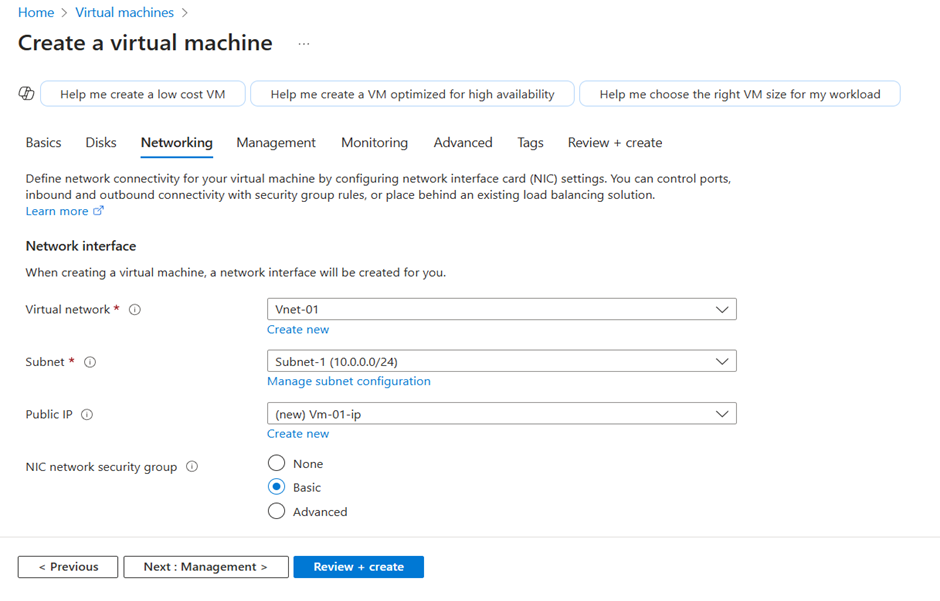
Step 14 : Goto Networking section & follow these steps.

Step 15 : Once the validation done click create.

Step 16 : We created the first virtual machine,Now start a create the second Virtual Machine by following these steps.

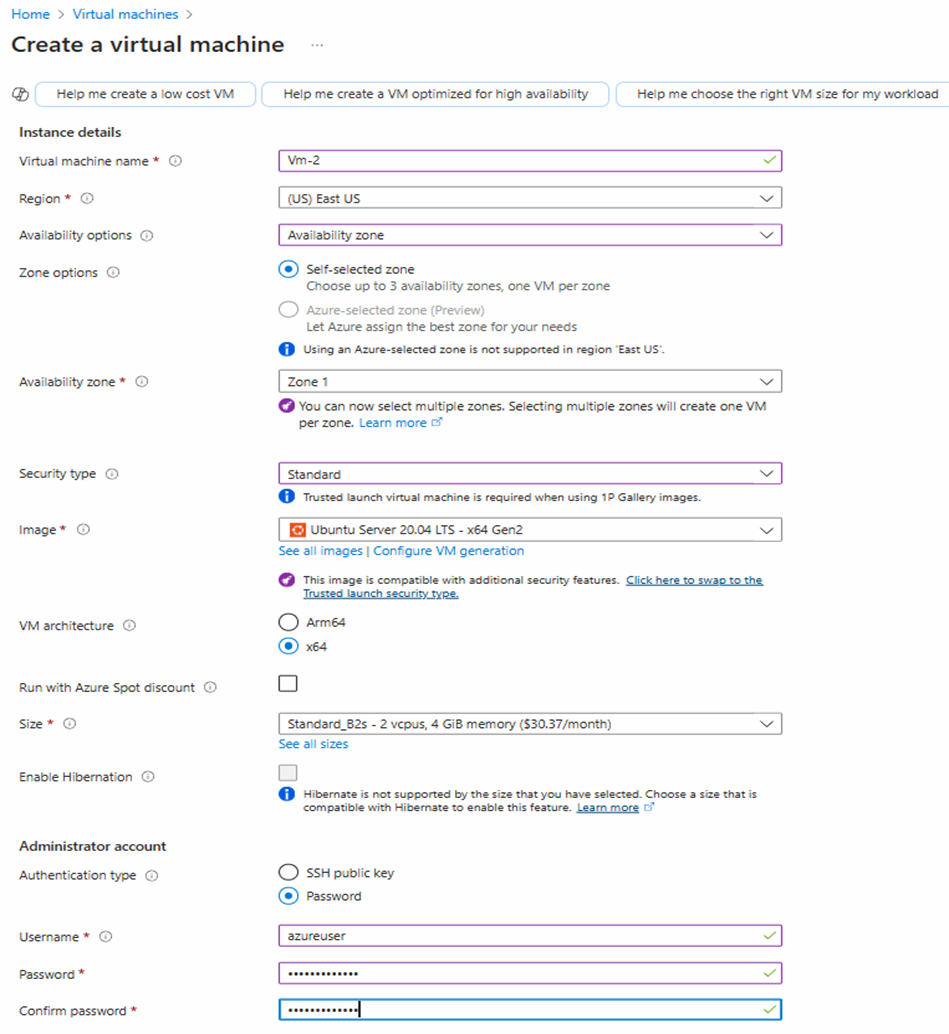
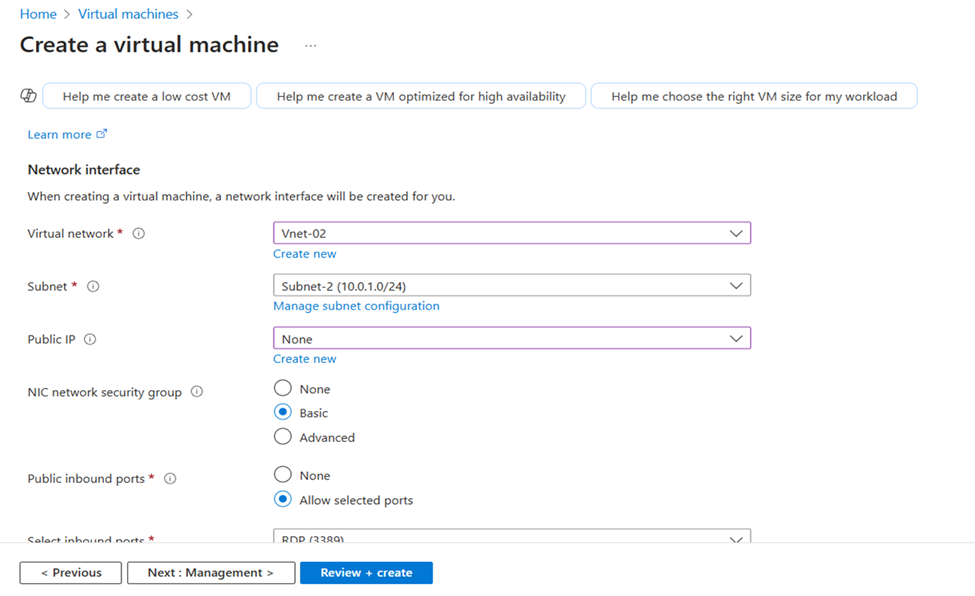
Step 17 : Goto Networking section & choose Public IP as “None”.

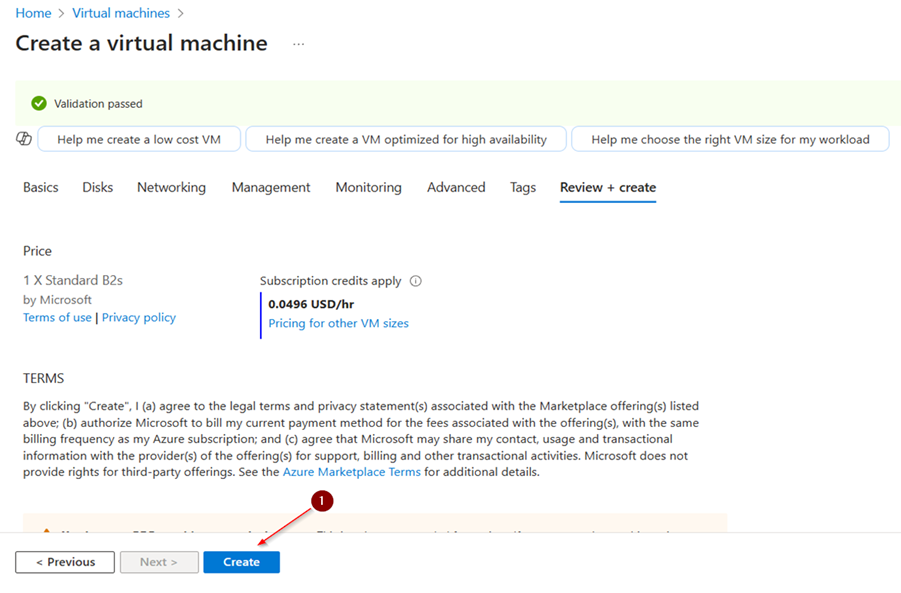
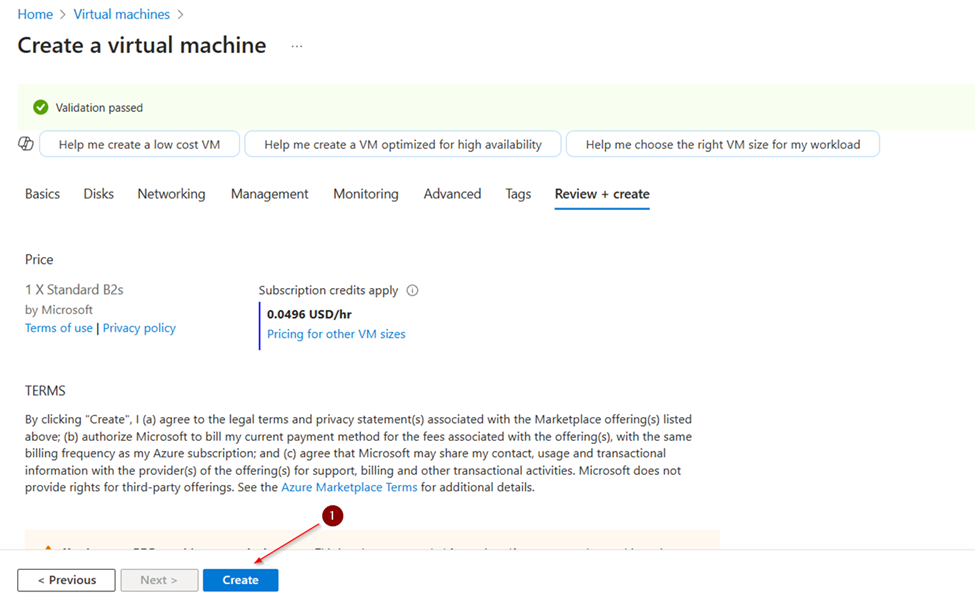
Step 18 : Check for validation,once the validation done click create.

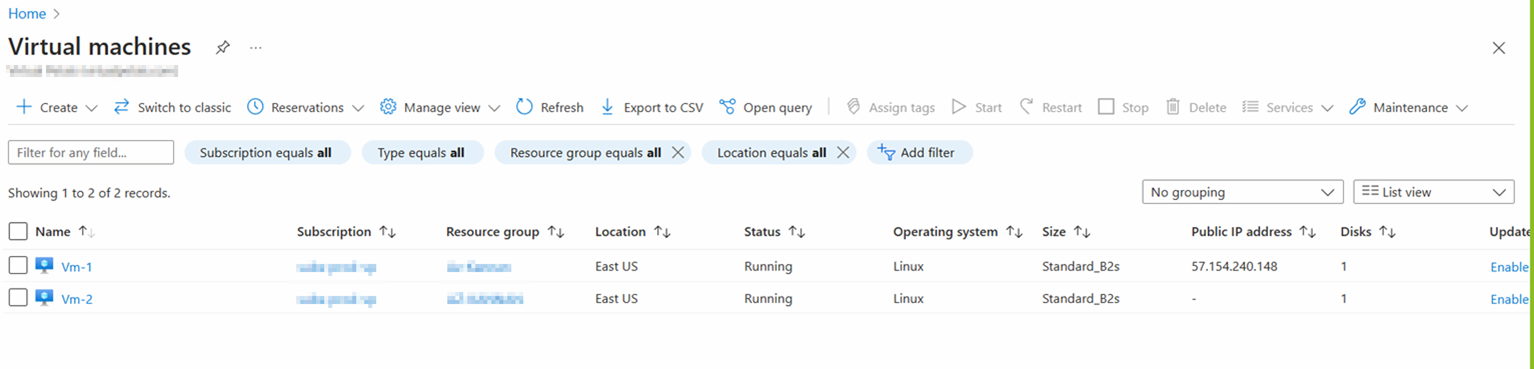
Step 19 : These are the two virtual machines that we have created.

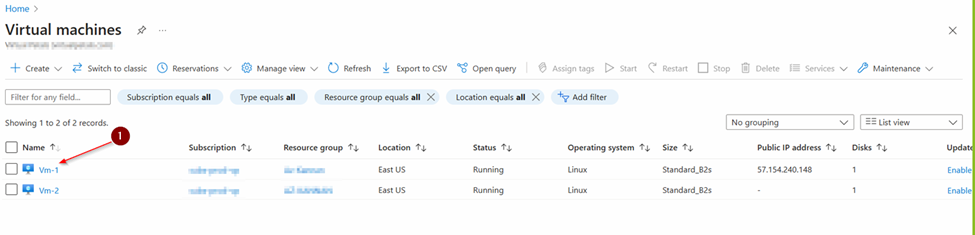
Step 20 : Select & open the VM 1 that we created.

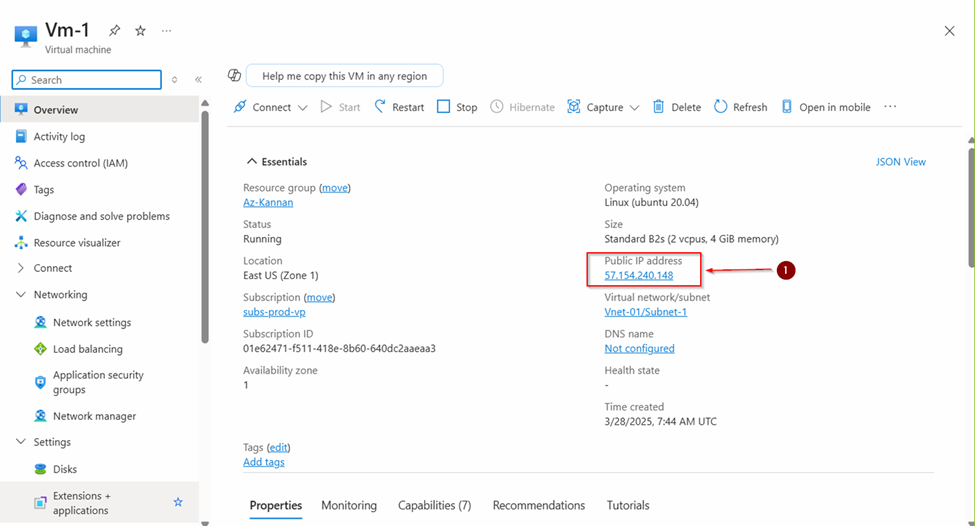
Step 21 : Copy the Public IP address from VM 1.

Step 22 : Open “Command Prompt” & type ssh and username,@paste the IP address & click enter to connect vm 1.

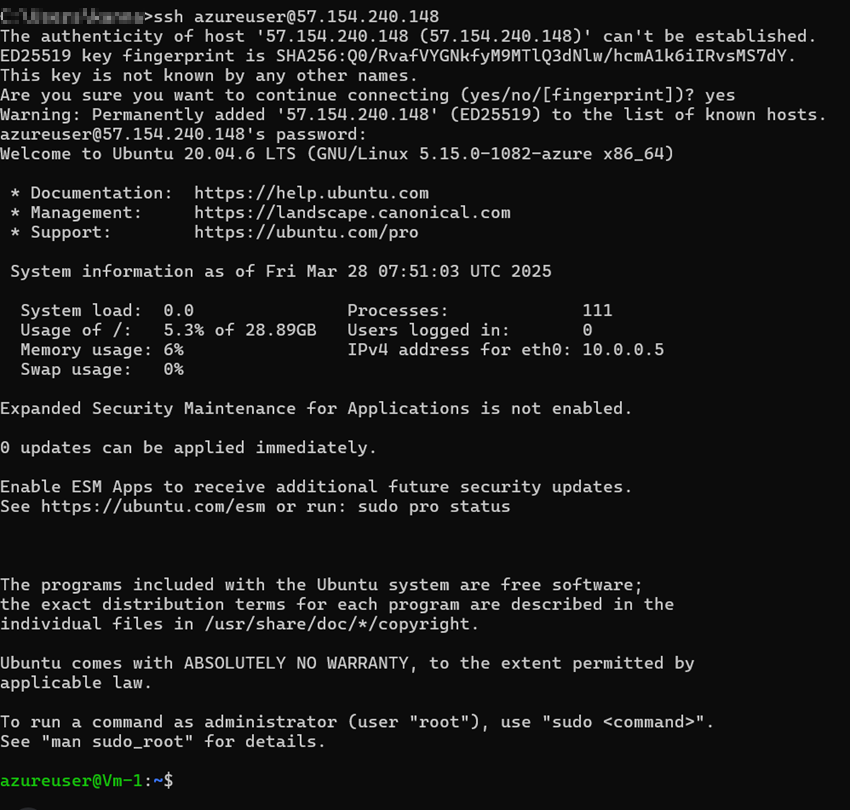
Now we are into the vm 1.

Step 23 : We are going to use Vnet peering to communicate 2 VM’s ,open Virtual Network 1 that we created.

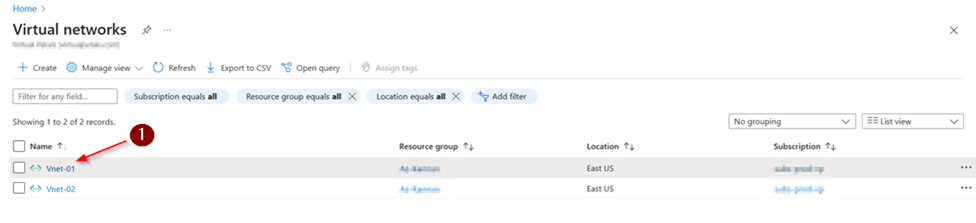
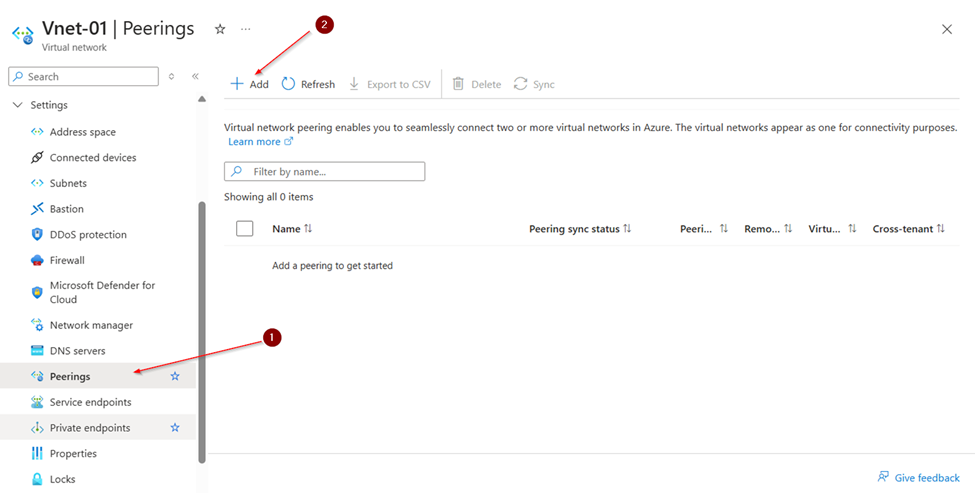
Step 24 : Open Vnet 1 & select Peerings and click Add.

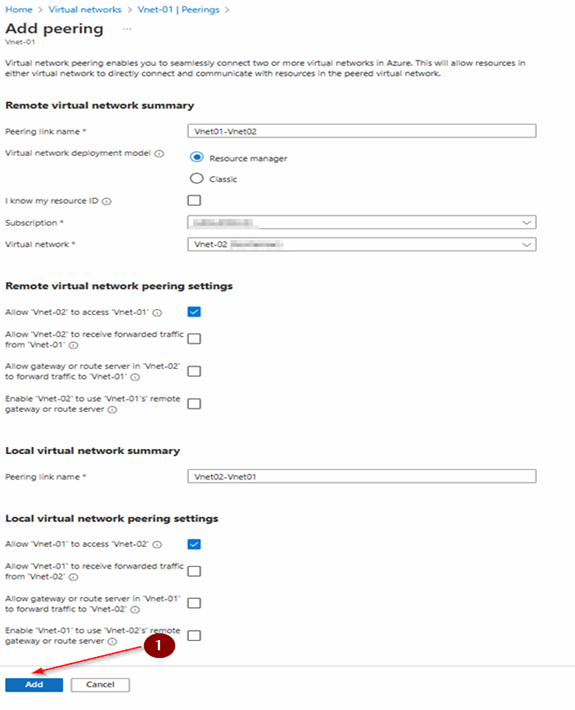
Step 25 : Follow these steps to complete the Peering & click Add.

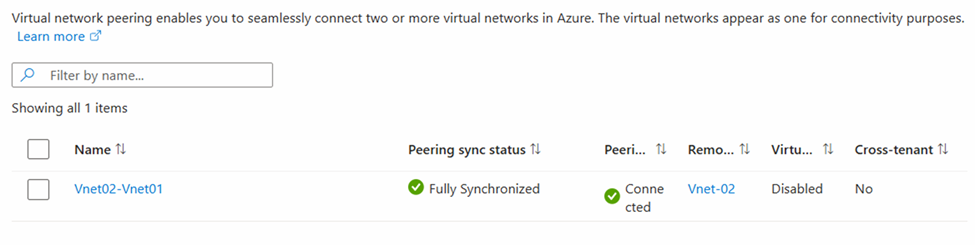
Step 26 : We can see the peering status.

Step 27 : Open “Command Prompt” & type ssh and username,@copy the Private IP address from VM 2 & paste it ,select enter & give yes,Now you can communicate to VM 2.

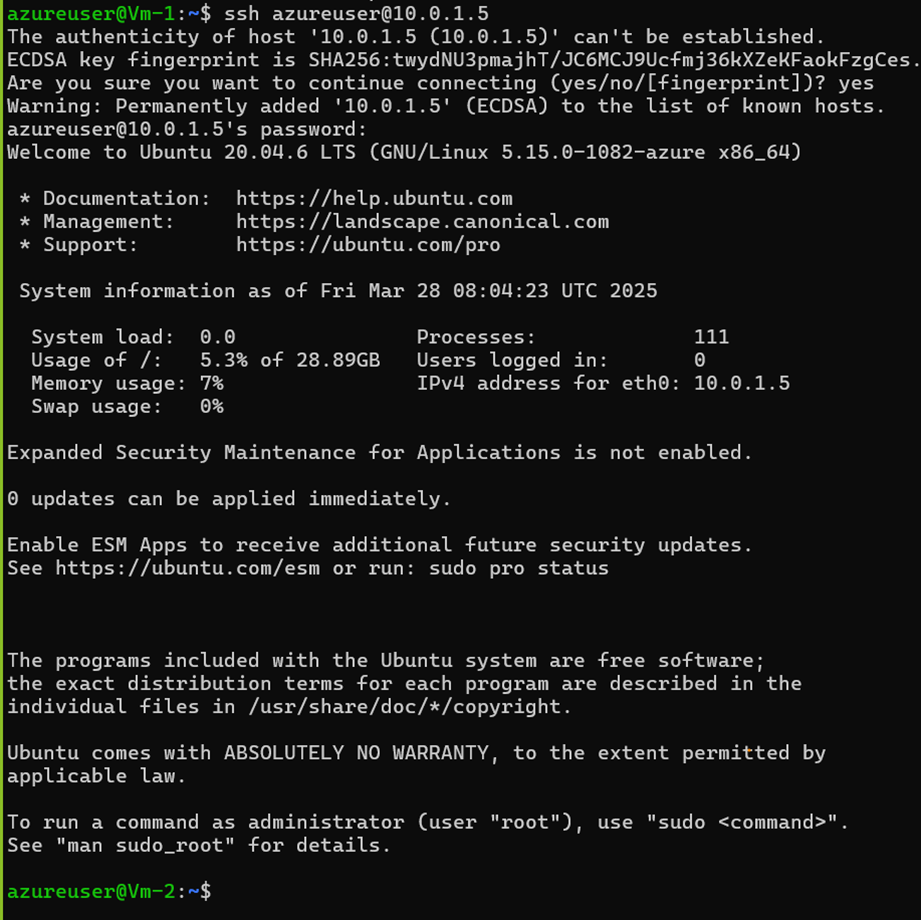
Now we are into the Vm 2 successfully by using peering concept.

How to Configure Automatic Time Zone Settings on Windows Using Intune

In this guide, I will walk you through the steps to configure the time zone settings on Windows devices using Intune. With Intune, you can easily manage time zone settings for Windows 10/11 devices, whether you prefer to set them automatically or manually adjust them for specific regions. These settings can be configured during the Autopilot Out-of-Box Experience (OOBE) or after the Autopilot setup.

For instance, if your organization operates across various geographic regions and has devices grouped into Entra security groups based on location, you can create region-specific time zone policies using Intune’s Settings Catalog. This approach ensures that devices in each region are aligned with the local time zone.

Opting for automatic time zone configuration simplifies management by eliminating the need to create multiple Entra security groups or maintain separate time zone policies for each region. This ensures a seamless experience, reducing administrative overhead while keeping your devices synchronized with the correct time zone.

How to Manually Configure Time Zones Using Intune

Manually setting time zones means assigning a specific time zone for each region, one at a time, using a policy in the Settings catalog. To do this, you’ll need an Entra security group for the devices in each region and create a separate policy for each area

Steps to Configure Time Zones in Intune

1. Access Intune Admin Center

Go to Devices > Configuration and click Create > New Policy.

Select Platform: Windows 10 and later and Profile type: Settings Catalog.

2. Provide Basic Details

On the Basics tab, give your policy a Name and Description, then click Next to move to the configuration settings.

3. Set the Time Zone

  1. Click on + Add settings and open the Settings picker.
  2. Search “time zone” and check the box to configure time language settings.

Enter the appropriate Time Zone ID in the text box (e.g., India Standard Time).

  • Assignments: Click Add Groups and select the Entra security group containing Windows 10/11 devices. As a best practice, start with a group with test devices, and once testing proves successful, you can expand the deployment by including additional devices in the group.

Review + create: Review the deployment and click on Create to start the deployment process

End User Experience

I first tested the manual time zone configuration method and confirmed if the time zone was set as per the policy. This device was set to GMT Standard Time. After applying this policy, it changed to Mountain Standard Time. The device now reflects the updated time zone as Mountain Standard Time when checked using the tzutil /g command

Configure Time Zone on Windows to Automatic

Enable Location Services for Applications

Microsoft recommends enabling location services for apps using the Policy CSP: Privacy/LetAppsAccessLocation. To do this, you’ll first need to create a Settings Catalog policy and set it to “Force allow.” Here’s how to do it:

  1. Sign in to the Intune admin center.
  2. Go to Devices > Configuration > Create > New Policy.
  3. Choose Windows 10 and later as the platform and select Settings Catalog as the profile type.
  4. On the Basics tab, provide a name and description for the policy, then click Next to move to the Configuration settings.

Configuration Settings:

  1. Click on + Add settings and then Settings picker.
  2. In the search box, type let apps access location.
  3. Select the Let Apps Access Location checkbox and set it to Force to allow
  • Assignments: Click Add Groups and select the Entra security group containing Windows 10/11 devices. As a best practice, start with a group with test devices, and once testing proves successful, you can expand the deployment by including additional devices in the group.
  • Review + Create: Review the deployment and click on Create to start the deployment process

How To Set Up Daily Email Reminders From Outlook.com Using Power Automate

What is Power Automate?

Power Automate is an online workflow service that automates actions across the most common apps and services. For example, you can create a flow that posts a message on a Microsoft Teams channel whenever an issue is created in Jira or your favorite planning tool. These types of integrations can help the various tools you use everyday work better together.

When you sign up, you can connect to hundreds of services and can manage data in the cloud or in on-premises sources like SharePoint and Microsoft SQL Server. The list of applications you can use with Power Automate grows constantly.

What can you do with Power Automate?

You can use Power Automate to automate workflows between your favorite applications and services, sync files, get notifications, collect data, and much more.

For example, you can automate these tasks:

  • Instantly respond to high-priority notifications or emails.
  • Capture, track, and follow up with new sales leads.
  • Copy all email attachments to your OneDrive for Business account.
  • Collect data about your business and share that information with your team.
  • Automate approval workflows.

Get Daily Email Reminders From Outlook.com Using Power Automate

STEP 1: Sign In to Power Automate.

  • Navigate to Power Automate Portal.[https://make.powerautomate.com/]
  • Sign in with your Microsoft account associated with your Outlook.com email.
  • Power Automate Homepage.

STEP 2: Select The Template

  • Click on Templates in the left-hand navigation menu.
  • Search Remainder > Click the first option (Get Daily remainders from your Outlook.com email)
  • Sign in with your Microsoft account associated with your Outlook.com email.
  • Click the Continue.

STEP 3: Create A Flow

  • Click the first action. [every day]
  • To customize your Schedule & Setup and Return Back.
  • Click the plus symbol > Click Add an action.
  • Search Email in the search box > Click The Send an email (V2) Under The Office 365 Outlook
  • Fill The To Address [Email], Subject [Daily Remainder], Body [You have a remainder! Choose what you want to be remainded of]
  • Save the flow by clicking Save at the top-right corner.

STEP 4: Test Your Flow

  • To ensure everything is set up correctly, click Test and choose Manually.
  • Run the flow and check your email inbox for the reminder.
  • To view your flow > Back To Power Automate Portal > Click My Flows

Restricted Access to External Storage Providers in Outlook on the Web

Step 1:

Connect to Exchange Online PowerShell

You can use the Connect-ExchangeOnline cmdlet to create a PowerShell session to Exchange Online. Both MFA and non-MFA accounts can be connected using the below cmdlet

Connect-ExchangeOnline 

Step 2:

To retrieve the Outlook mailbox policies along with the status of external cloud storage providers, run the following cmdlet

Get-OwaMailboxPolicy | Format-Table Name, AdditionalStorageProvidersAvailable

Before

Output:

Outlook Web App ? Settings (Gear icon) ? Mails ? Attachments ? Storage accounts

Step 3:

To set the Outlook policies to restrict additional storage providers in Outlook, execute the following cmdlet

Set-OwaMailboxPolicy -Identity OwaMailboxPolicy-Default -AdditionalStorageProvidersAvailable $false

After running this command

After

Output:

Also, you can check its enforcement on Outlook web by following the navigation below

Outlook Web App ? Settings (Gear icon) ? Mails ? Attachments ? Storage accounts

The “AdditionalStorageProvidersAvailable” parameter in the above cmdlet will control the access to storage providers in OWA.

To check its effectiveness, run the below PowerShell cmdlet.

Get-OwaMailboxPolicy | Where-Object {!$_.AdditionalStorageProvidersAvailable} | Select-Object -ExpandProperty Name 

Ensure MailTips Are Enabled For End Users

Introduction

MailTips is a Microsoft Exchange feature designed to provide real-time notifications to end users while composing emails. These notifications help prevent common mistakes, such as sending emails to external recipients, exceeding large audience thresholds, or contacting recipients with automatic replies enabled. By enabling MailTips, organizations can enhance email communication efficiency and reduce errors. This guide explains how to ensure MailTips are enabled for all end users using PowerShell.

Step 1:

Open PowerShell as Administrator …Type “Connect-ExchangeOnline” This command automatically connects to the PowerShell Gallery

Step 2:

Enter your credentials to proceed with authentication.

Step 3:

Run the following commands to enable the MailTips for End Users.

$TipsParams = @{
MailTipsAllTipsEnabled = $true
MailTipsExternalRecipientsTipsEnabled = $true
MailTipsGroupMetricsEnabled = $true
MailTipsLargeAudienceThreshold = ’25’
}

Set-OrganizationConfig @TipsParams

Step 4:

To Verify, Use this command:

“Get-OrganizationConfig | Select-Object MailTipsAllTipsEnabled, MailTipsExternalRecipientsTipsEnabled, MailTipsGroupMetricsEnabled, MailTipsLargeAudienceThreshold”

Step 5:

Open Outlook start create a new mail with any external recipient (e.g“user@domain.com”) we will receive a warning notification.

Once we reached the recipient limit(25) we will get a notification.

Find Licensed & Unlicensed Users in Microsoft 365 Using PowerShell

INTRODUCTION:

Managing Microsoft 365 licenses effectively is crucial for organizations to ensure compliance and avoid unnecessary costs. PowerShell provides a straightforward way to identify licensed and unlicensed users within your tenant. With just a few commands, you can gain insights into your license usage, streamline administration, and make informed decisions about license allocation. This guide will help you get started with PowerShell to manage your Microsoft 365 licensing efficiently.

STEP 1:

Open Windows Powershell

Open Windows Powershell As Administrator.

STEP 2:

Microsoft Graph Powershell

  • To Install Microsoft Graph Powershell, Put The Command. [ Install-Module -Name Microsoft.Graph ]
  • To Check Microsoft Graph Version. [ Get-InstalledModule Microsoft.Graph ]

STEP 3:

To View What Modules Are Installed, Put The Command. [ Get-InstalledModule ]

STEP 4:

Microsoft Graph

Connect The Microsoft Graph, Put The Command. [ Connect-Graph -Scopes User.Read.All, Organization.Read.All ]

STEP 5:

Find Licensed User

  • To Find Licensed User, Put The Command. [ Get-MgUser -Filter ‘assignedLicenses/$count ne 0’ -ConsistencyLevel eventual -CountVariable licensedUserCount -All -Select UserPrincipalName,DisplayName,AssignedLicenses | Format-Table -Property UserPrincipalName,DisplayName,AssignedLicenses ]
  • To Find Number Of Licensed Users, Use This Command. [ Write-Host “Found $licensedUserCount licensed users.” ]

STEP 6:

Find UnLicensed User

  • To Find UnLicensed User, Put The Command. [ Get-MgUser -Filter ‘assignedLicenses/$count eq 0’ -ConsistencyLevel eventual -CountVariable unlicensedUserCount -All ]
  • To Find Number Of UnLicensed Users, Use This Command. [ Write-Host “Found $unlicensedUserCount unlicensed users.” ]

STEP 7:

Find Without An Assigned License Excluding Guests

  • To Find Without An Assigned License Excluding Guests. [ Get-MgUser -Filter “assignedLicenses/`$count eq 0 and userType eq ‘Member'” -ConsistencyLevel eventual -CountVariable unlicensedUserCount -All ]
  • To Find Number Of UnLicensed Users (Excluding Guests), Use This Command. [ Write-Host “Found $unlicensedUserCount unlicensed users (excluding guests).” ]

CONCLUSION:

Identifying licensed and unlicensed users in Microsoft 365 using PowerShell is a powerful way to manage your organization’s resources effectively. By automating the process, you can ensure compliance, optimize license usage, and reduce costs. Regular audits using these scripts will help maintain an organized and efficient Microsoft 365 environment.

× How can I help you?