Azure B2C is allowing white label URLs through Azure Front Door now. it was a long ask from the community. In order to achieve this. The custom domain has to be added in Azure Front door and Azure B2C custom domain so that it can allow it seamlessly to pass through the URLs with custom domains. So that b2clogin.com or Microsoft domains are not visible in the URLs.
You can allow multiple login URLs through the Azure front door. So that several apps can share the same Azure B2C Tenant.
For Example, all below URLs can share the same Azure B2C. When you manage these URLs via Azure front door. you can allow the front door to manage the SSL. so that you don’t have to worry about managing them and renewing them. Also, it supports self-managed SSL certificates via key Vault.
- https://loginapp1.azure365pro.com
- https://loginapp2.azure365pro.com
- https://loginapp3.careexchange.in
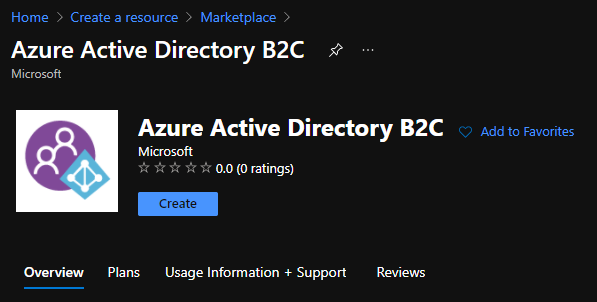
Now let’s see how to do it. Create a B2C tenant –
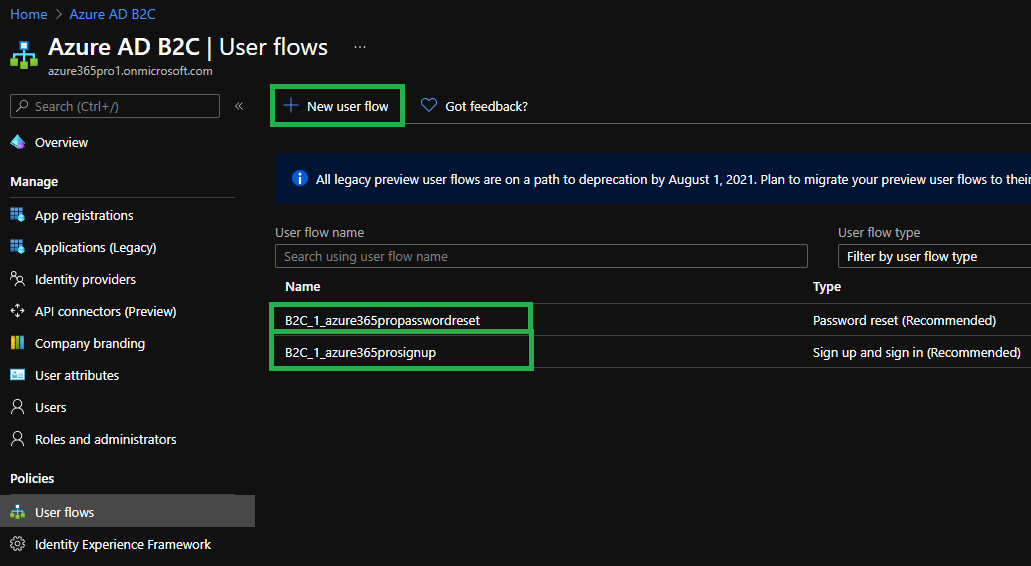
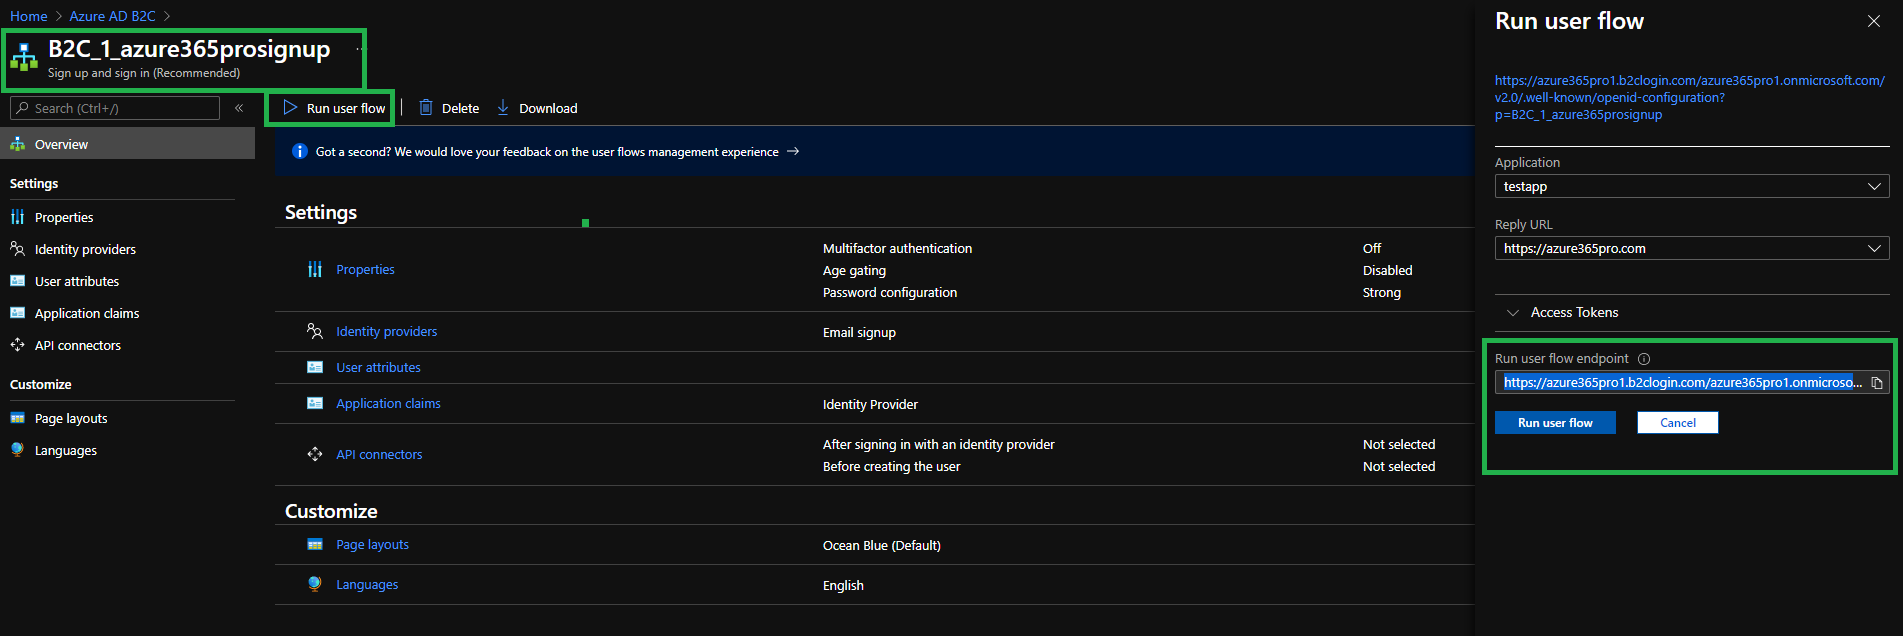
Setup – Recommended Default Signup-Sign in / password reset flows by clicking new user flow
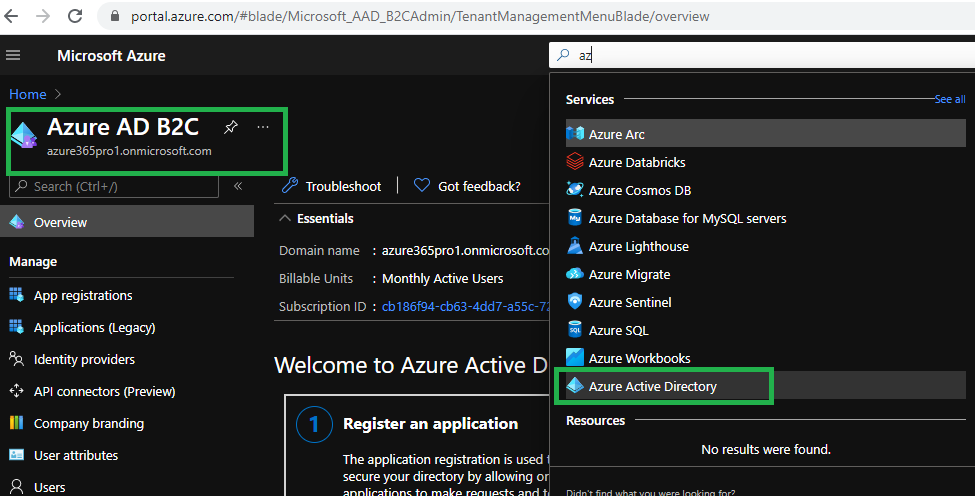
Go to Azure Active Directory from the B2C tenant – Please note that you are not leaving the b2c tenant in this case. Azure B2C will trust the custom domains only within this Azure B2C tenant
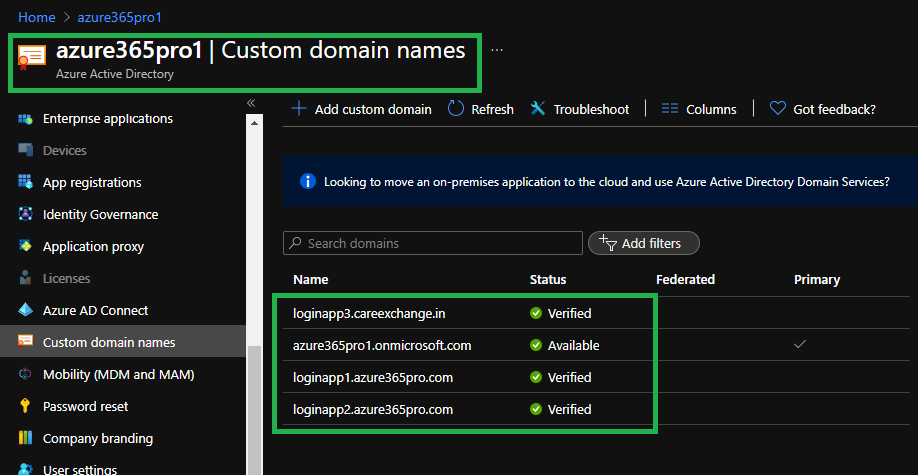
Add all the custom domains needed and verify them using DNS records.
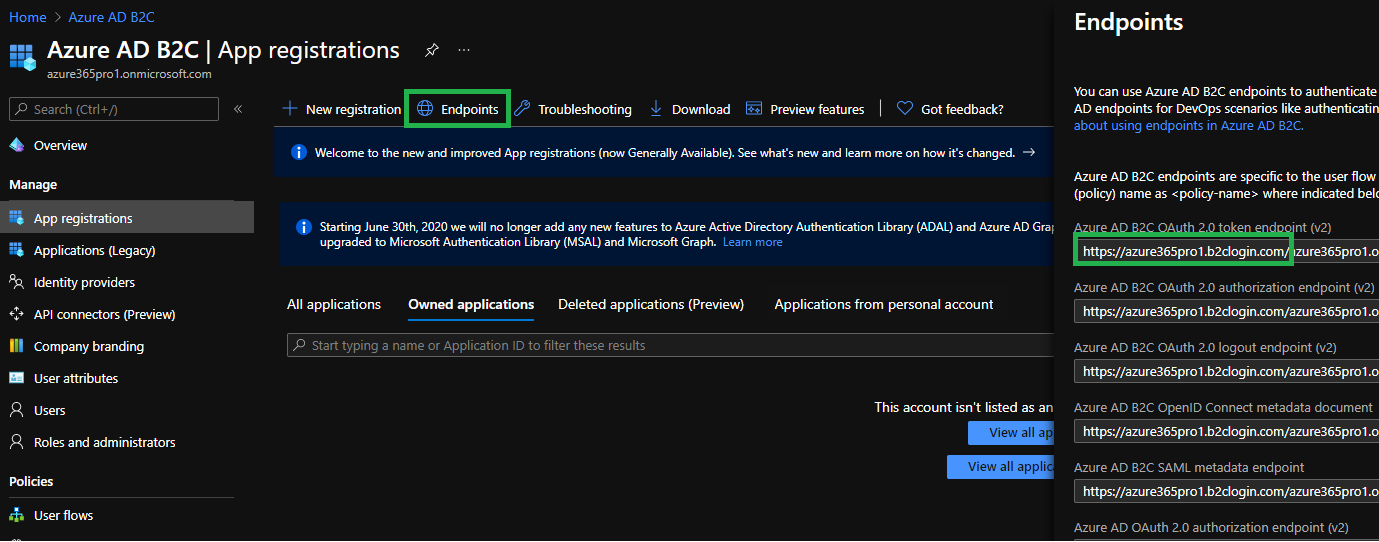
Get the backend b2c domain from azure B2C – App Registrations – Endpoints – azure365pro1.b2clogin.com for example.
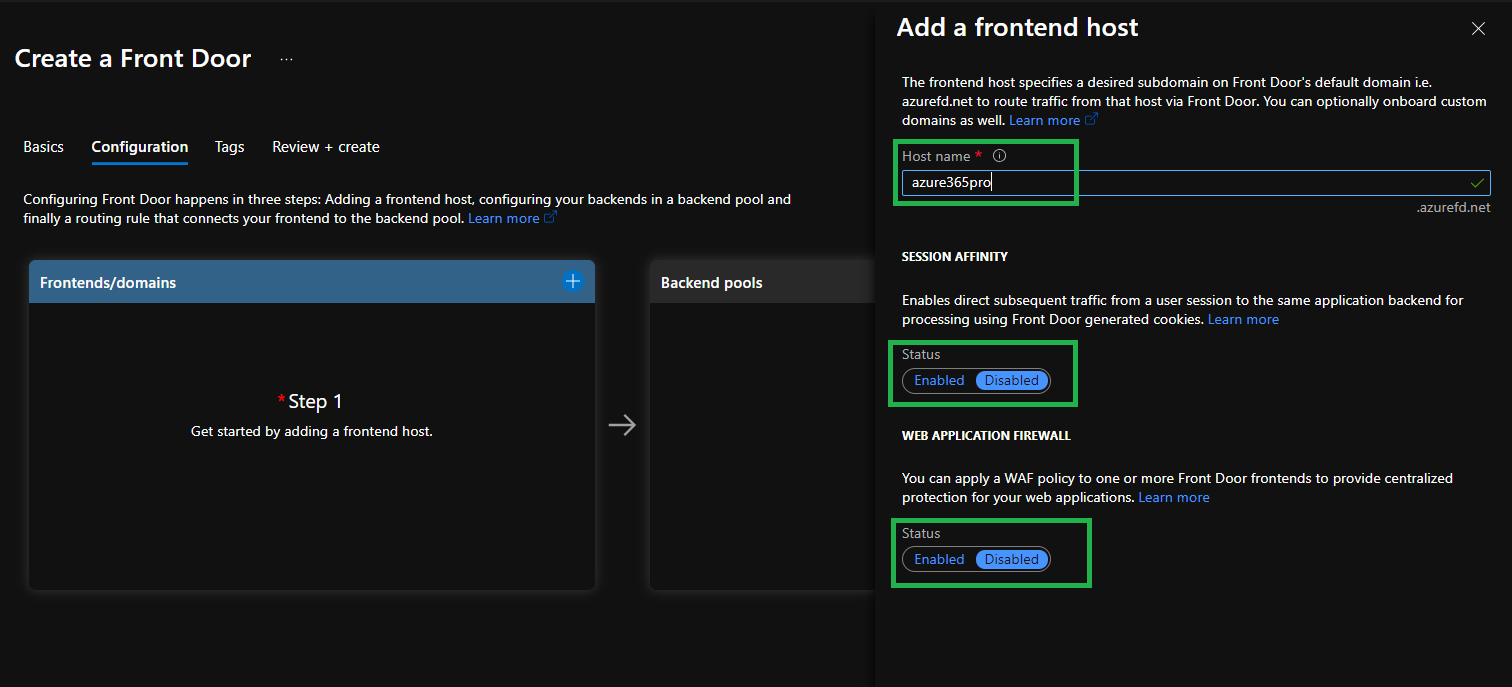
Create a front door – azure365pro –
- Session Affinity (Disabled)
- Web Application Firewall (Disabled)
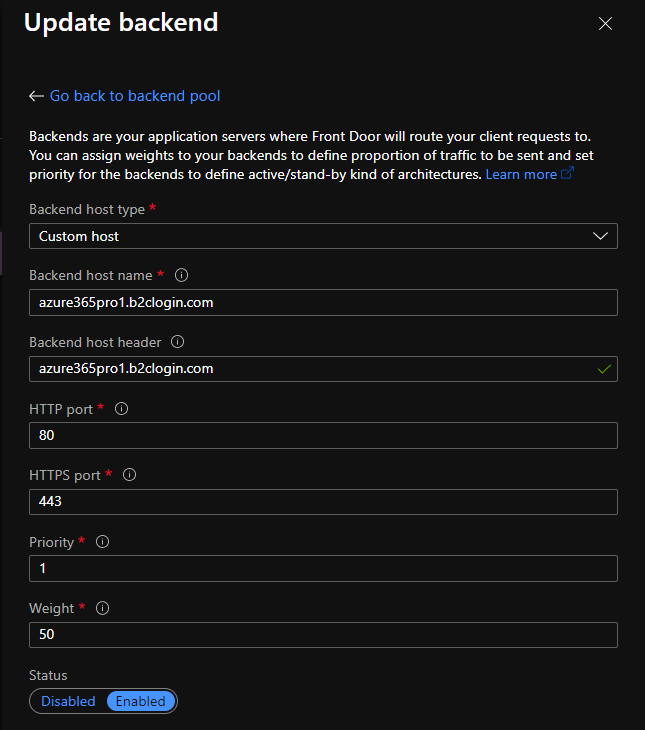
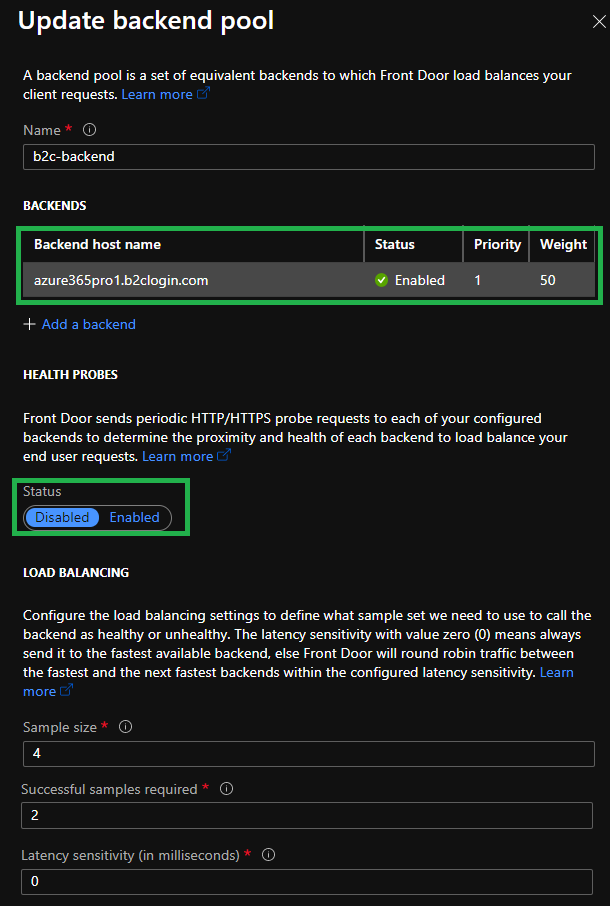
Add a backend pool now – In my case it’s azure365pro1.b2clogin.com
Health Probes (Disabled)
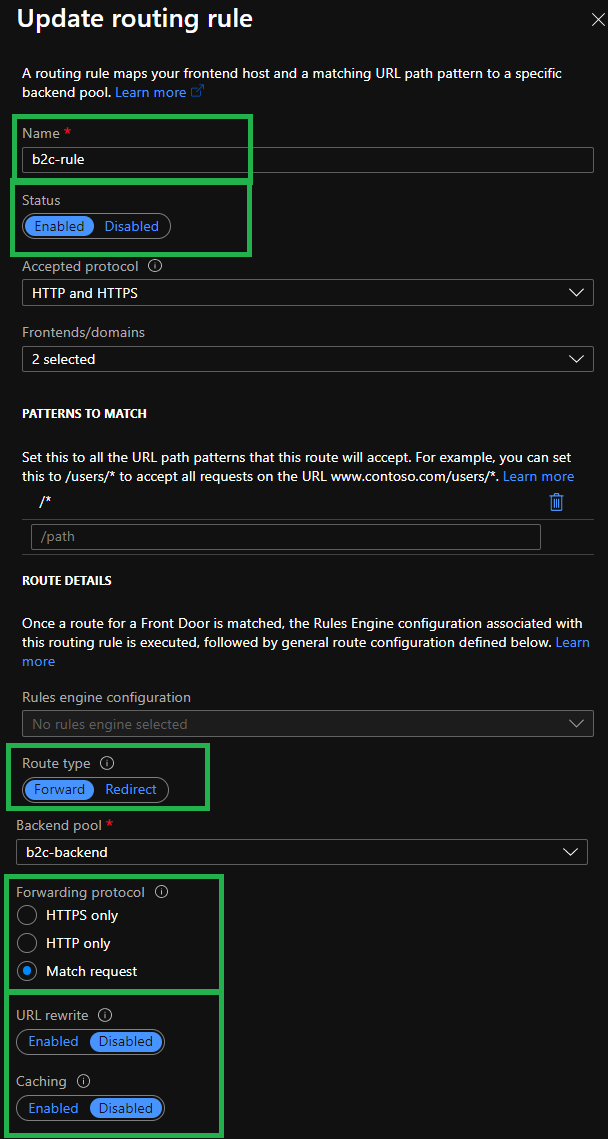
Add a rule –
Route Type – Forward
Forwarding request – Match Request
Add a custom domain – verify the CNAME records – Some DNS providers will not allow you to add a CNAME record if the txt record exists which you created earlier.
So delete those txt records if you verified the custom domains already. and add the CNAME record for the front door.
Enable Custom Domain HTTPS – Let front door manage by SSL. Peace of mind.
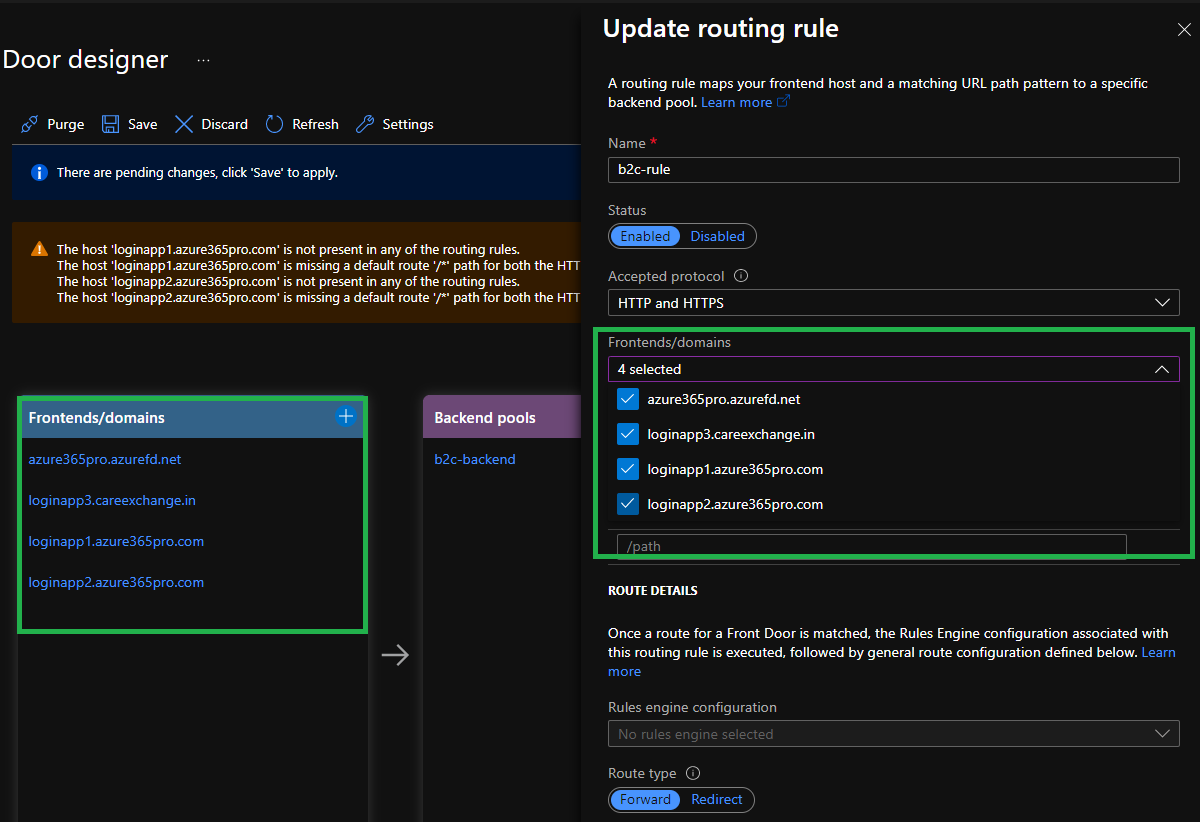
Now update the routing rule to use additional frontend domains.
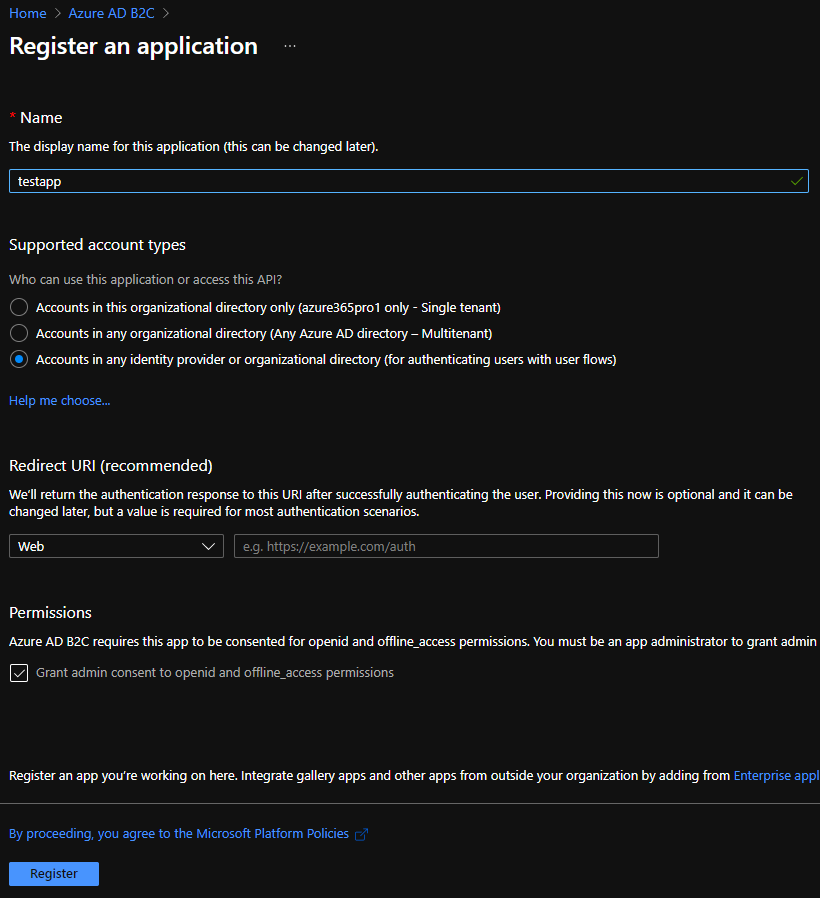
Create an app registration
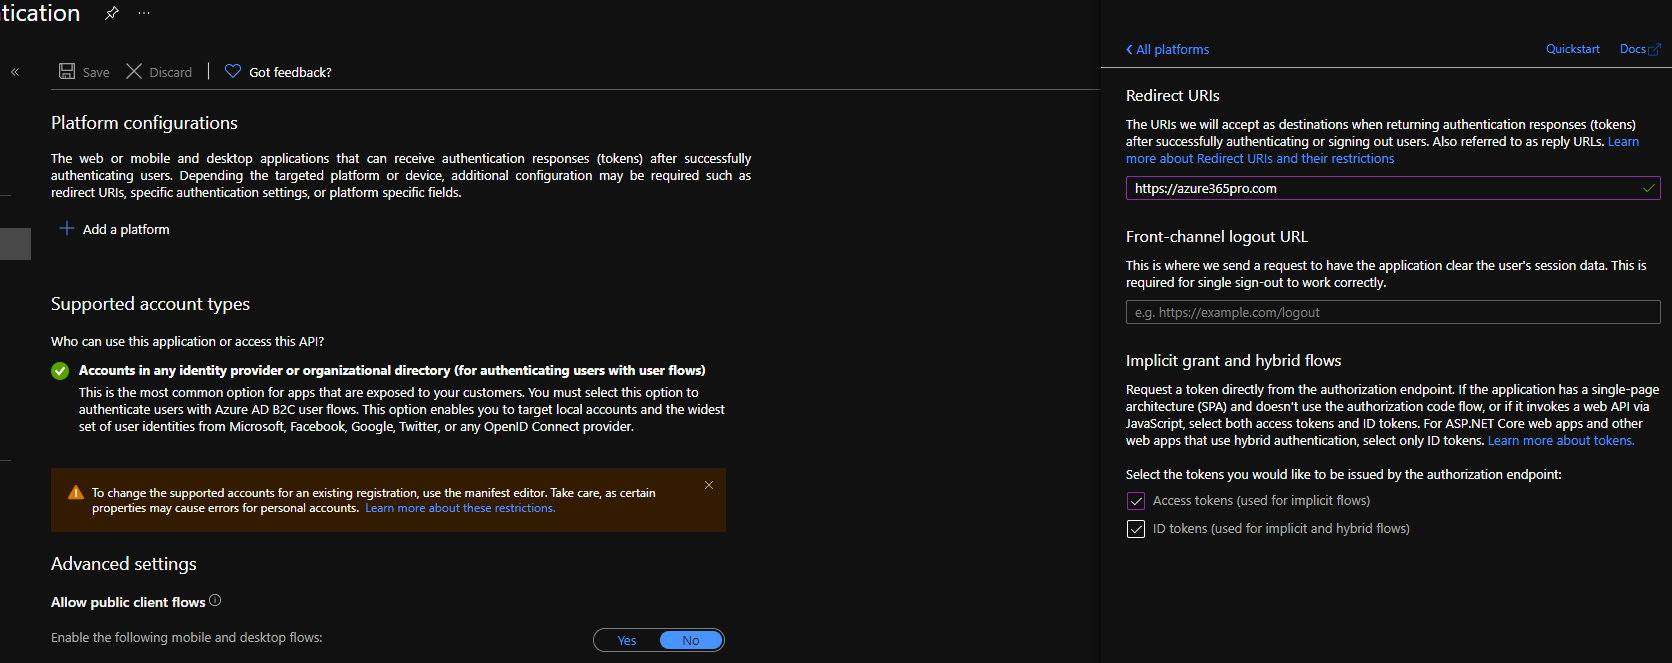
Add some redirect uri in the app we created. Enabling access tokens / ID tokens. In a later blog we can discuss about re direct uris
Take the user flow endpoint URL – To make sure the page is opening as that we can confirm that we have a working configuration.
My Default URL
https://azure365pro1.b2clogin.com/azure365pro1.onmicrosoft.com/oauth2/v2.0/authorize?p=B2C_1_azure365prosignup&client_id=769fce93-5a5b-487b-b42e-3cb93cafb494&nonce=defaultNonce&redirect_uri=http%3A%2F%2Flocalhost%2Fazure&scope=openid&response_type=id_token&prompt=login
Replacing by Azure B2C Tenant ID with azure365pro1.onmicrosoft.com
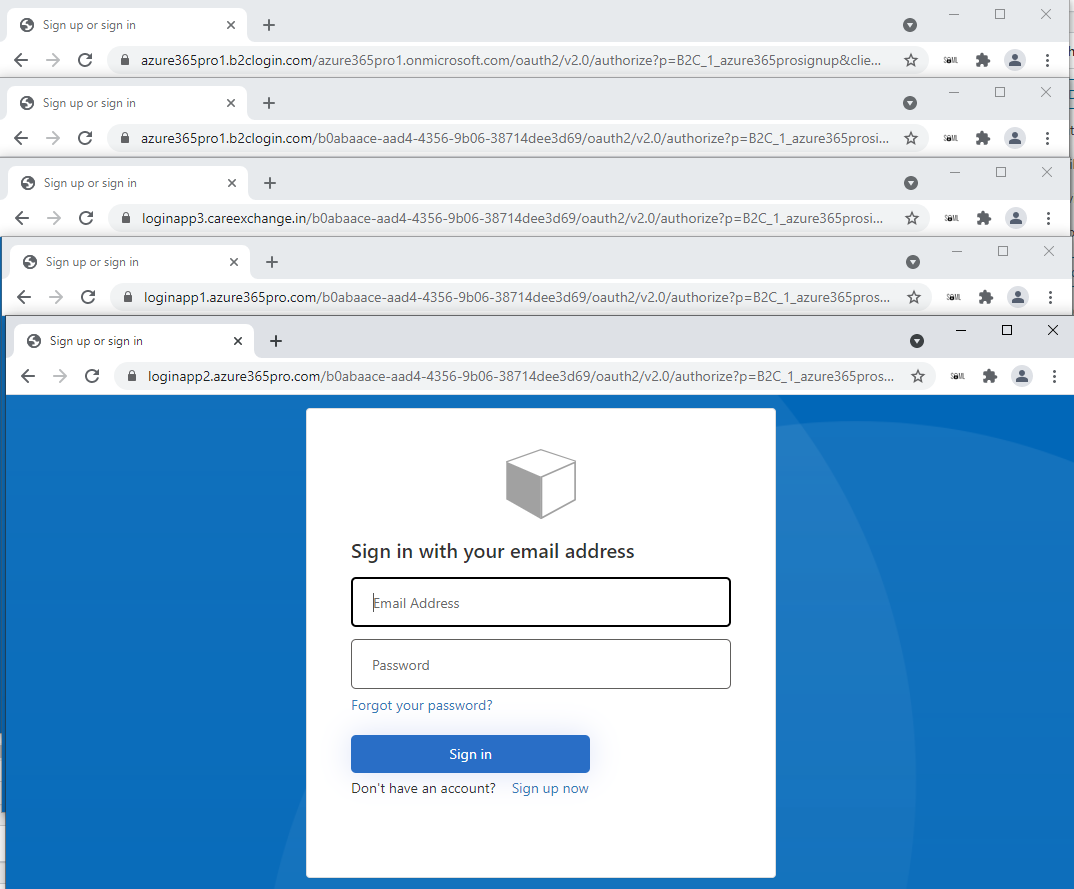
https://azure365pro1.b2clogin.com/b0abaace-aad4-4356-9b06-38714dee3d69/oauth2/v2.0/authorize?p=B2C_1_azure365prosignup&client_id=769fce93-5a5b-487b-b42e-3cb93cafb494&nonce=defaultNonce&redirect_uri=http%3A%2F%2Flocalhost%2Fazure&scope=openid&response_type=id_token&prompt=login
https://loginapp1.azure365pro.com/b0abaace-aad4-4356-9b06-38714dee3d69/oauth2/v2.0/authorize?p=B2C_1_azure365prosignup&client_id=769fce93-5a5b-487b-b42e-3cb93cafb494&nonce=defaultNonce&redirect_uri=http%3A%2F%2Flocalhost%2Fazure&scope=openid&response_type=id_token&prompt=login
https://loginapp2.azure365pro.com/b0abaace-aad4-4356-9b06-38714dee3d69/oauth2/v2.0/authorize?p=B2C_1_azure365prosignup&client_id=769fce93-5a5b-487b-b42e-3cb93cafb494&nonce=defaultNonce&redirect_uri=http%3A%2F%2Flocalhost%2Fazure&scope=openid&response_type=id_token&prompt=login
https://loginapp3.careexchange.in/b0abaace-aad4-4356-9b06-38714dee3d69/oauth2/v2.0/authorize?p=B2C_1_azure365prosignup&client_id=769fce93-5a5b-487b-b42e-3cb93cafb494&nonce=defaultNonce&redirect_uri=http%3A%2F%2Flocalhost%2Fazure&scope=openid&response_type=id_token&prompt=login
Now you can see URLs are live through the front door – fully white-label URLs from azure b2c through the azure front door.





Proud of you! How far you have come along! Keep going on places
Thank you so much S !