")
Introduction
This article will guide you through deploying a Windows virtual machine on Azure using Terraform for infrastructure as code. You will learn how to set up your Azure account, configure your Terraform environment, write Terraform code to define your VM and associated resources, and deploy your VM to Azure using Terraform
Prerequisites
- Azure subscription
- Install and configure Terraform
- Visual Studio Code
Solution Diagram:
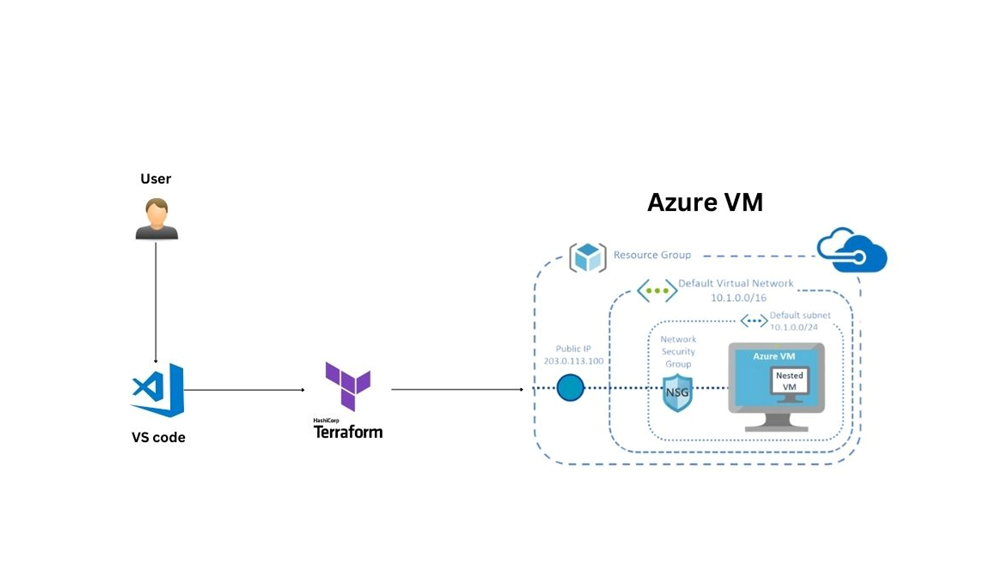
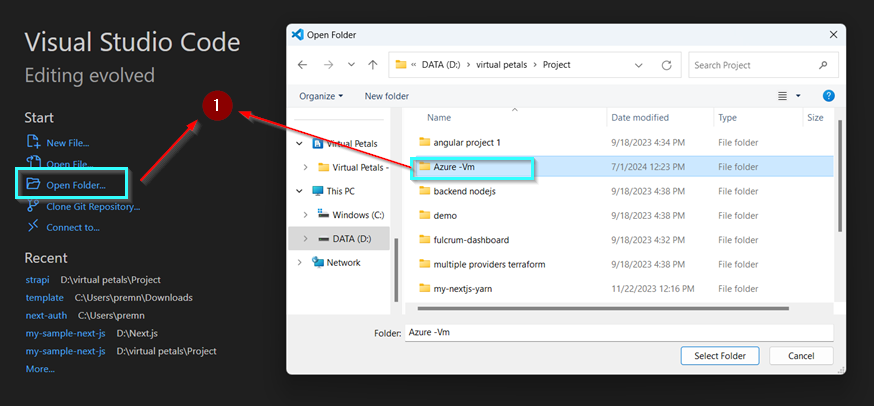
Step 1:
Create a file directory in your local location
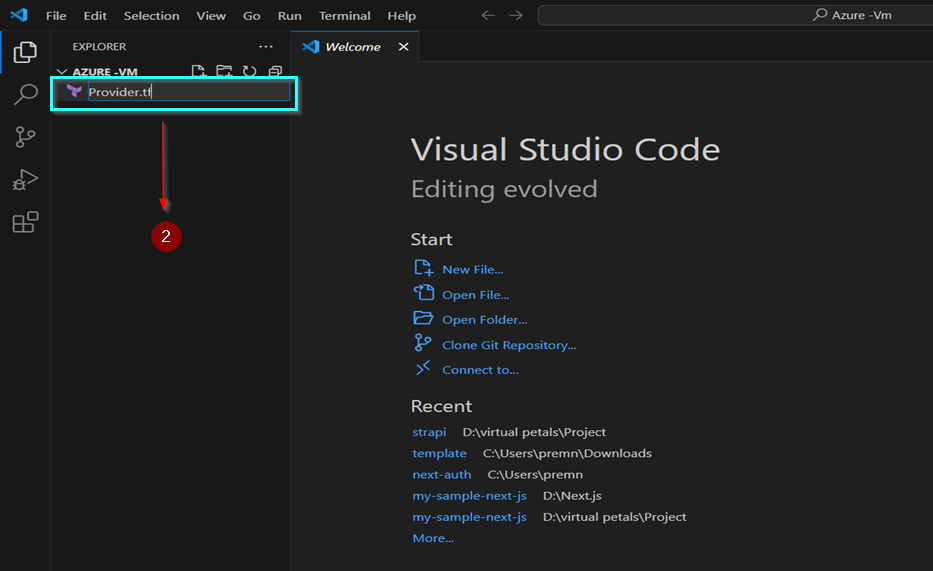
Step 2:
Create a named Provider.tf file.
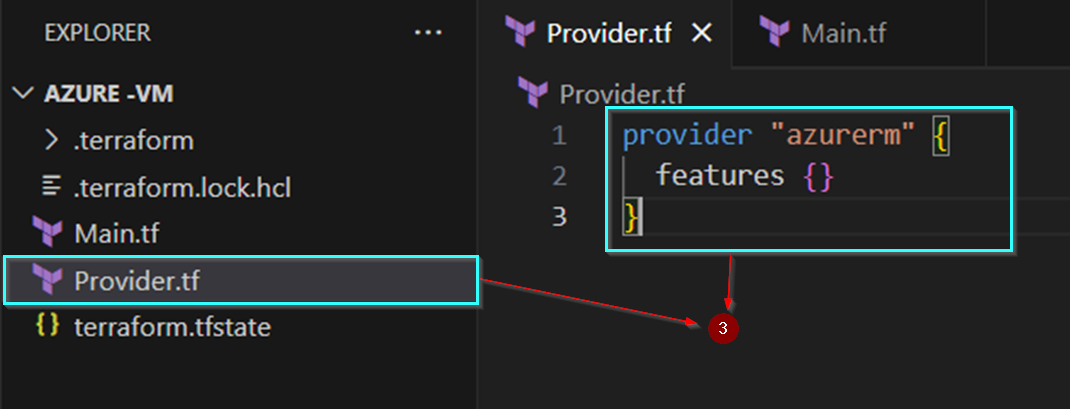
Step 3:
Insert the following code in Provide.tf file.
provider “azurerm” {
features {}
}
Step 4:
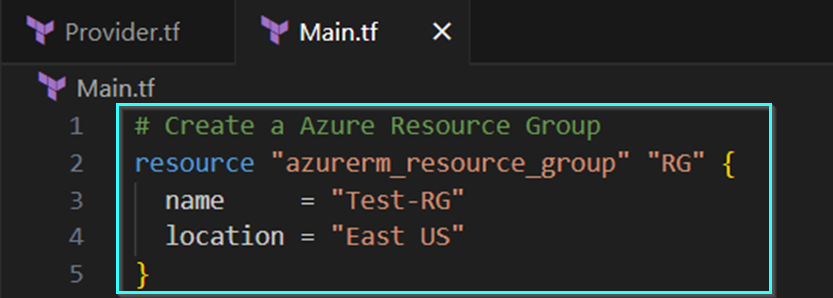
In Main.tf file use the following code to create a resource group (RG).
# Create a Azure Resource Group
resource “azurerm_resource_group” “RG” {
name = “Test-RG”
location = “East US”
}
Step 5
In Main.tf file use the following code to create a Virtual Network and Subnet
# Create an Azure Virtual Network
resource “azurerm_virtual_network” “VNET” {
name = “Test-VNET”
address_space = [“10.0.0.0/16”]
location = azurerm_resource_group.RG.location
resource_group_name = azurerm_resource_group.RG.name
}
# Create a Subnet
resource “azurerm_subnet” “AzureSubnet” {
name = “AzureSubnet”
resource_group_name = azurerm_resource_group.RG.name
virtual_network_name = azurerm_virtual_network.VNET.name
address_prefixes = [“10.0.1.0/24”]
}
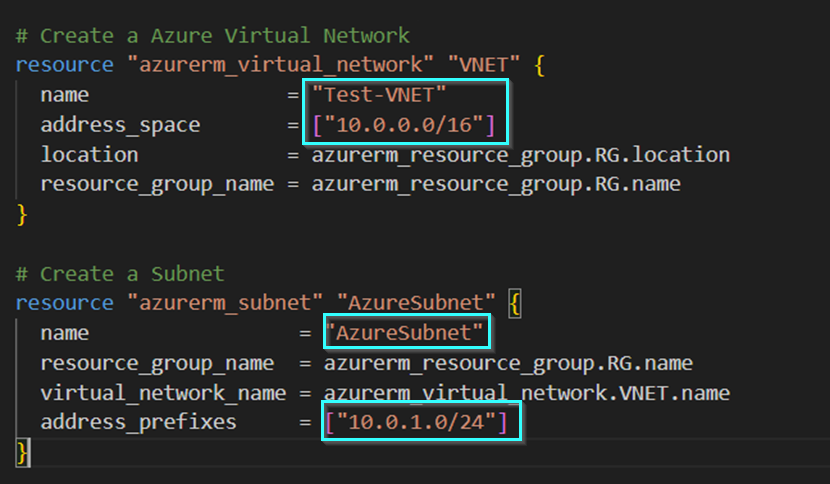
Note: As per your requirement you can choose the IP address space
Step 6
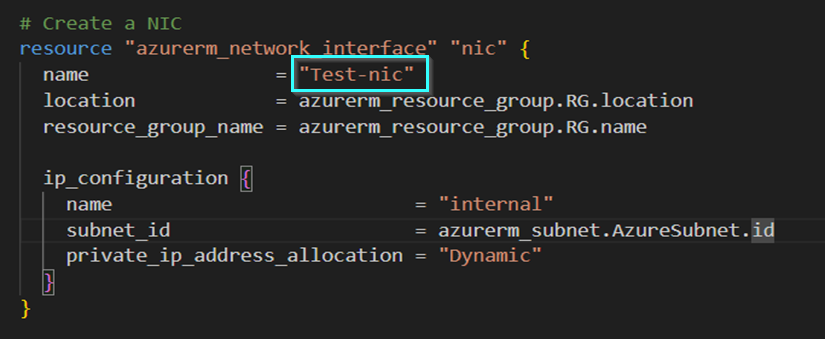
Create a Network Interface Card (nic) using the following code
# Create a NIC
resource “azurerm_network_interface” “nic” {
name = “Test-nic”
location = azurerm_resource_group.RG.location
resource_group_name = azurerm_resource_group.RG.name
ip_configuration {
name = “internal”
subnet_id = azurerm_subnet.AzureSubnet.id
private_ip_address_allocation = “Dynamic”
}
}
Step 7
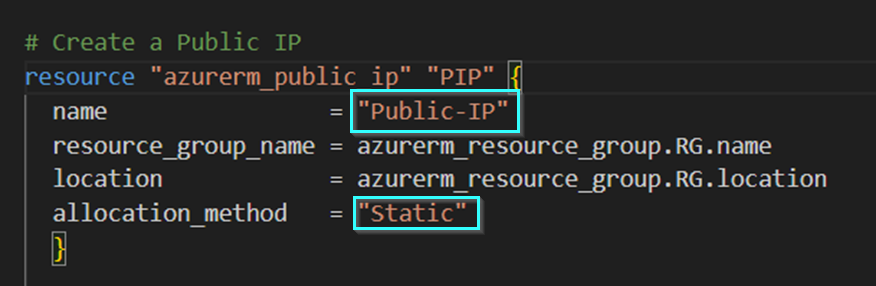
Create a Public IP address for VM access.
# Create a Public IP
resource “azurerm_public_ip” “PIP” {
name = “Public-IP”
resource_group_name = azurerm_resource_group.RG.name
location = azurerm_resource_group.RG.location
allocation_method = “Static”
}
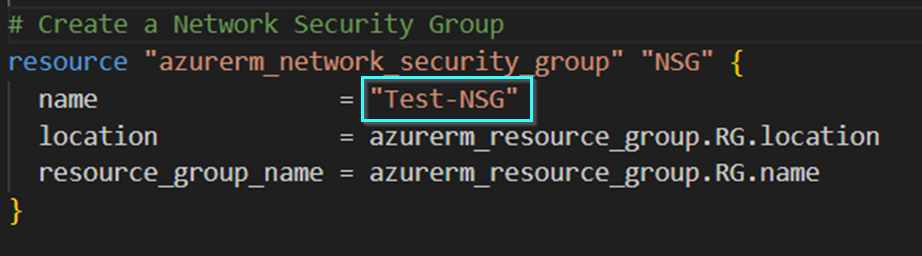
Step 8
Create a Network Security Group (NSG) for securing your VM
# Create a Network Security Group
resource “azurerm_network_security_group” “NSG” {
name = “Test-NSG”
location = azurerm_resource_group.RG.location
resource_group_name = azurerm_resource_group.RG.name
}
Step 9
Create a Windows Virtual Machine.
# Create a Azure Virtual Machine
resource “azurerm_windows_virtual_machine” “VM” {
name = “Test-VM”
resource_group_name = azurerm_resource_group.RG.name
location = azurerm_resource_group.RG.location
size = “Standard_B2ms”
admin_username = “azureadmin”
admin_password = “Tf@$$w0rd1234!”
network_interface_ids = [
azurerm_network_interface.nic.id,
]
# Create a OS disk
os_disk {
caching = “ReadWrite”
storage_account_type = “Standard_LRS”
}
source_image_reference {
publisher = “MicrosoftWindowsServer”
offer = “WindowsServer”
sku = “2022-Datacenter”
version = “latest”
}
}

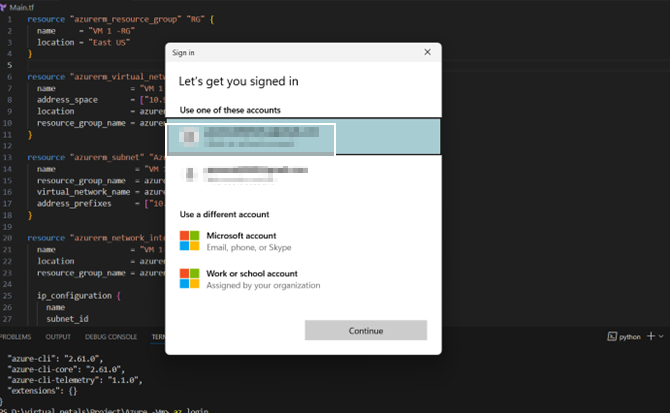
Note:
Before running this configuration file, ensure that you have the Azure CLI installed and that you have authenticated using the az login command. Additionally, replace the placeholders for subscription_id, client_id, client_secret, and tenant_id with your own values. After executing the az login command, the Microsoft Azure sign-in page will appear automatically, as shown in the snapshot below.
STEP 10
Download and install on a local machine
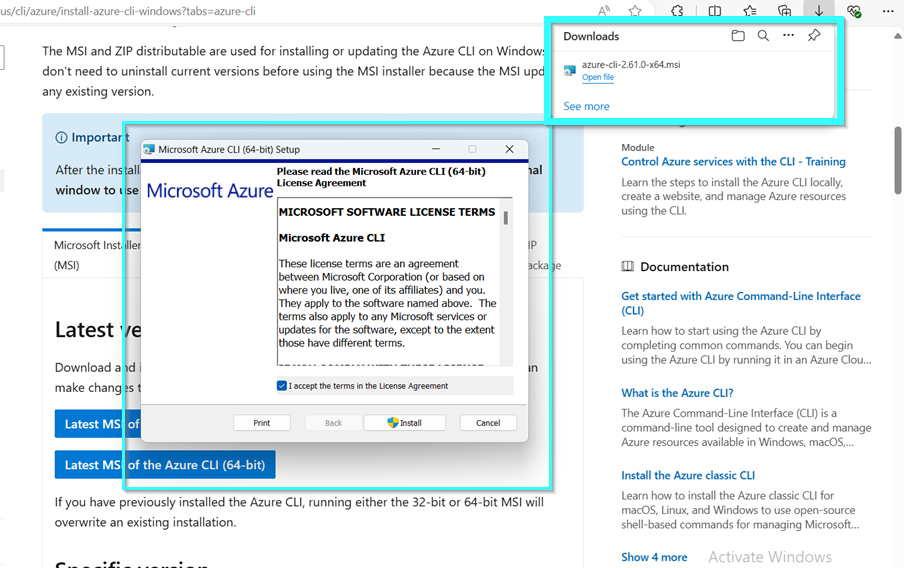
STEP 11
After Downloading Run This Command In Terminal
az login
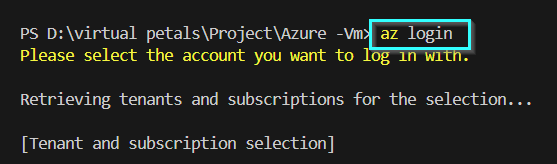
Step 12
login azure Portal
STEP 13
Download the Terraform software and install it on your local machine. Then, use the VS Code terminal to run the command terraform init.

Key commands in Terraform
- Terraform init – Initialize a terraform working directory. Example: terraform init
- Terraform plan – Generate and show an execution plan. Example: terraform plan
- terraform apply – Build or change infrastructure. Example: terraform apply
- terraform show – Show the state file in a human-readable format: terraform show
STEP 1
In Terminal type terraform init command

STEP 2
In Terminal type terraform plan command
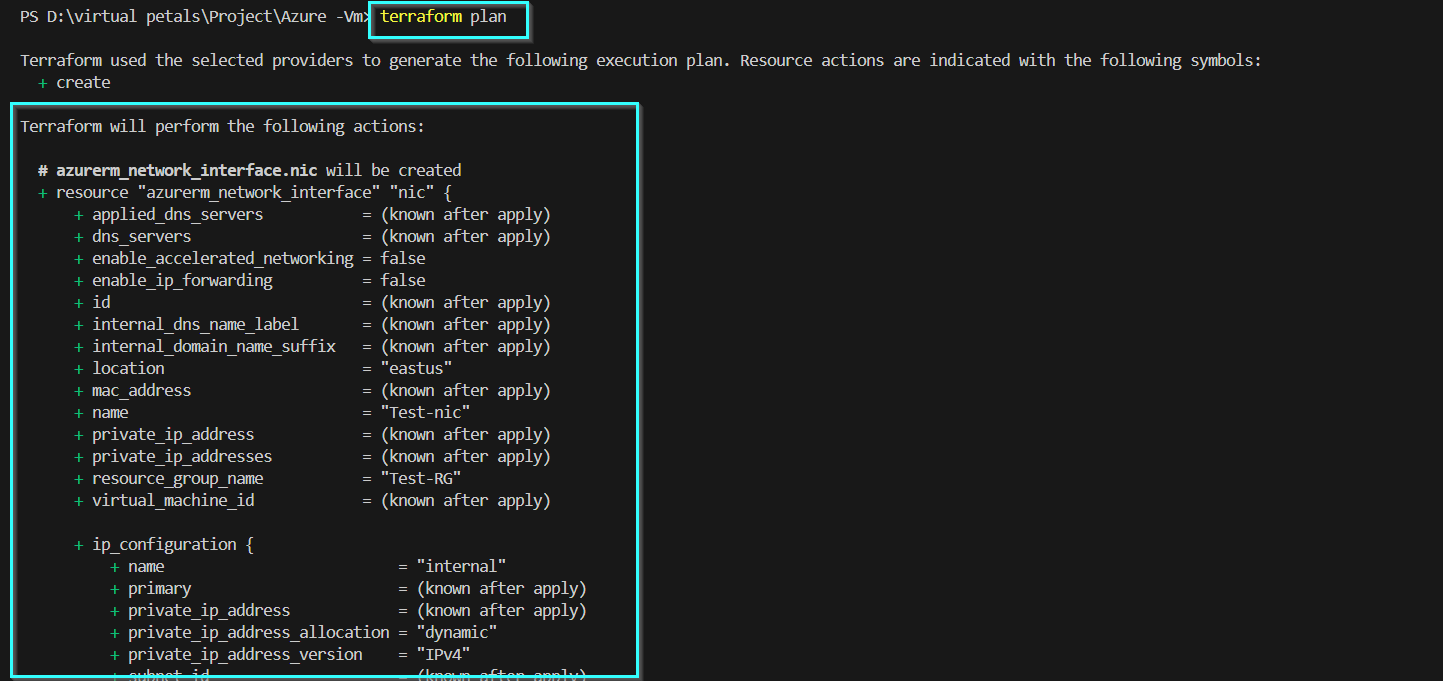
STEP 3
Open the terminal and type terraform apply -auto-approve command
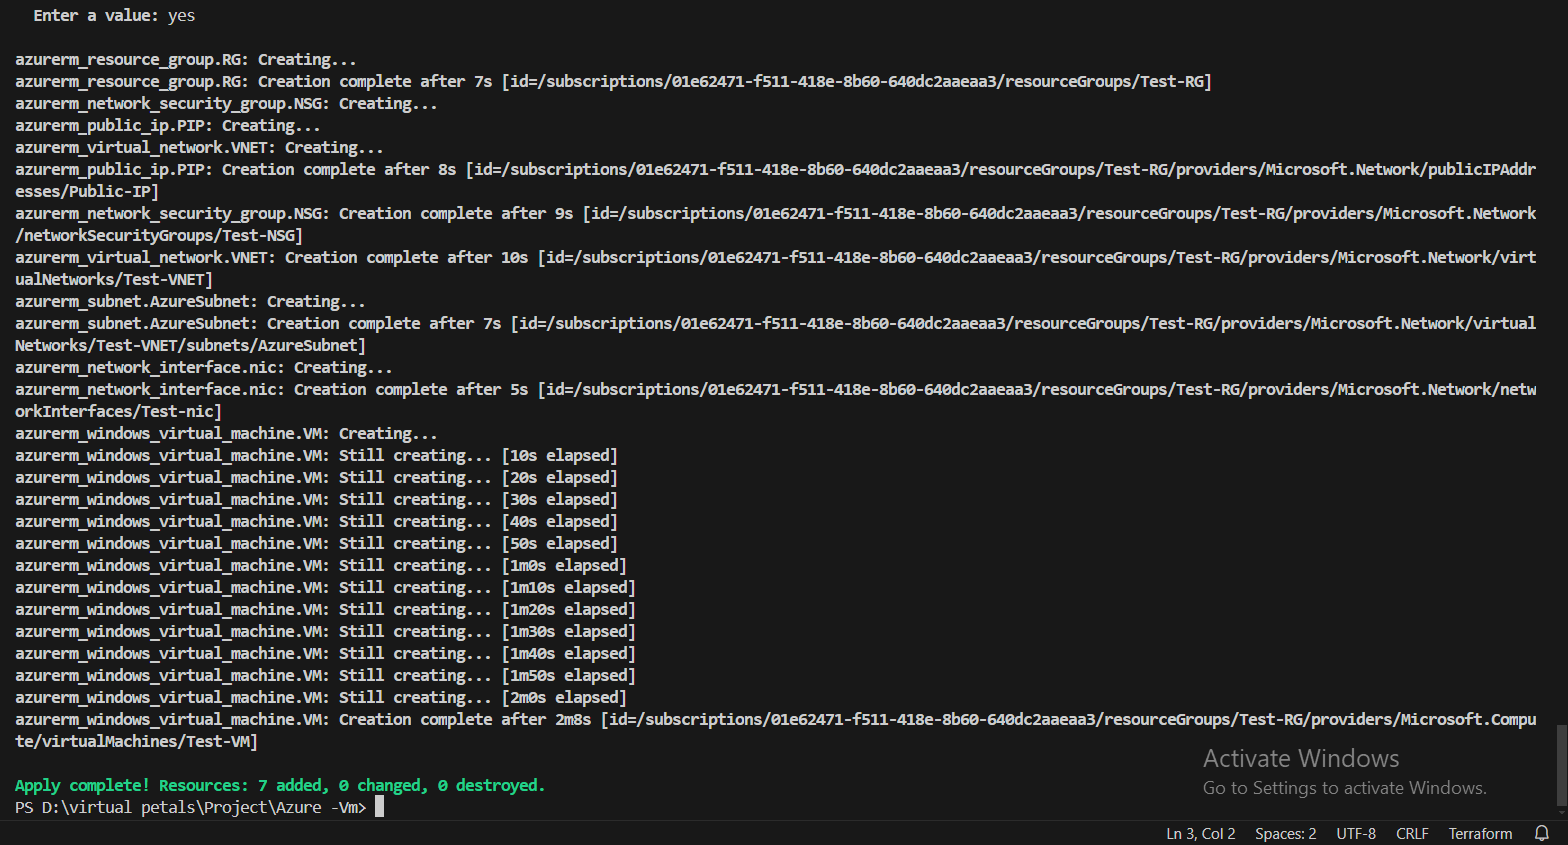
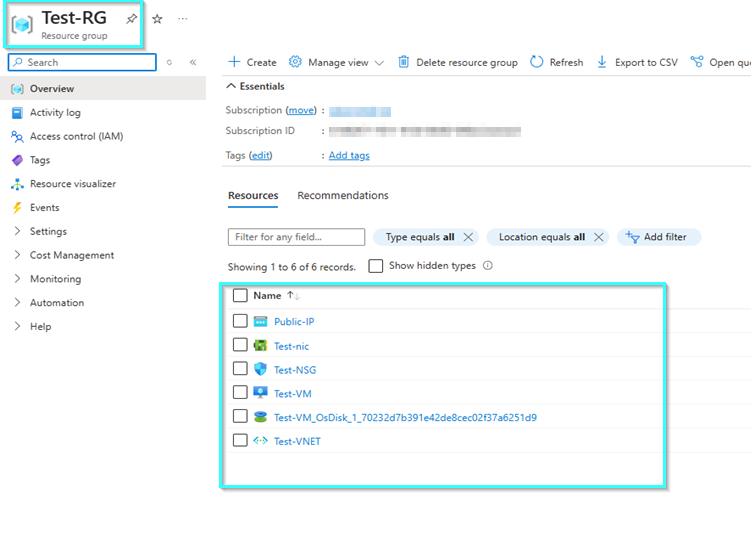
It successfully created the Azure infrastructure
OUTPUT
Conclusion
How to deploy Azure virtual machines using Terraform code Infrastructure as Code (IaC). If you have any questions, don’t hesitate to comment below.

 using Terraform and Infrastructure as Code (IaC). This comprehensive tutorial walks you through every step of the process, from setting up your environment and writing Terraform configuration files to provisioning and managing Azure resources. Whether you are a beginner or an experienced cloud professional, this guide will help you streamline your deployment process, improve infrastructure consistency, and achieve scalable cloud solutions with ease)