C# Client doesn’t have specific features like choose multi writer flag . So better do to do it using Web Client.
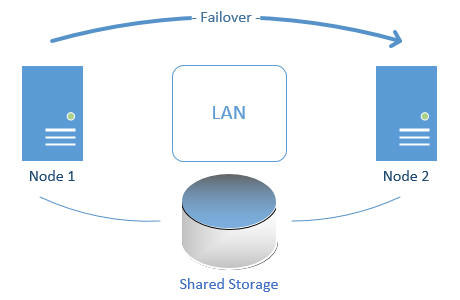
The multi-writer option allows VMFS-backed disks to be shared by multiple virtual machines. Used by Third-party cluster-aware applications like RedHat 6 or later with GFS File systems and Oracle RAC Clusters.
If the SCSI Controller is not added, Machine needs to be offline in order to do it.
Lets see how to do it.
Edit Settings of the First Node in the Cluster.
Add SCSI Controller Add
In SCSI Bus Sharing : None
Change Type : Vmware ParaVirtual
Now Add the Hard Disk in the First node in the Cluster
Now Choose
- Thick Provision Eager Zeroed
- Sharing Multi Writer
- Choose Virtual Device Node you just created.
- In my Case SCSI Controller 1 – SCSI 1:0
- Disk mode – Independent Persistent
Now All done with the First Node. if you need more Shared Disks on the Same Virtual Machine. You can use the Same Physical Controller you Created
Additional Disk2 will be SCSI 1:1
Additional Disk3 will be SCSI 1:2
Now Edit Settings Copy the Disk File Name you just Created. For Example – [DataStore1]Vmname/Vmname_1.vmdk
Note : From Third Disks onwards You have to Choose Manage other disks in order to change its settings.
Now go to Second Node in the Cluster –
Add SCSI Controller Add
In SCSI Bus Sharing : None
Change Type : Vmware ParaVirtual
Now Add Existing Disk –
Now Choose
- Thick Provision Eager Zeroed
- Sharing Multi Writer
- Choose Virtual Device Node you just created.
- In my Case SCSI Controller 1 – SCSI 1:0 Matching the First Node to be precise.
- Disk mode – Independent Persistent
Disadvantage of doing this Now Storage Vmotion is not Possible.
Good to know –
| Actions or Features | Supported | Unsupported | Notes |
| Power on, off, restart virtual machine | |||
| Suspend VM | |||
| Hot add virtual disks | Only to existing adapters | ||
| Hot remove devices | |||
| Hot extend virtual disk | |||
| Connect and disconnect devices | |||
| Snapshots | Virtual backup solutions leverage snapshots through the vStorage APIs; for example, VMware Data Recovery, vSphere Data Protection. These are also not supported. | ||
| Snapshots of VMs with independent-persistent disks | Supported in vSphere 5.1 update2 and later versions | ||
| Cloning | |||
| Storage vMotion | Neither shared nor non-shared disks can be migrated using Storage vMotion due to the virtual machine stun required to initiate the storage migration. | ||
| Changed Block Tracking (CBT) | |||
| vSphere Flash Read Cache (vFRC) | Stale writes can lead to data loss and/or corruption | ||
| vMotion | Supported for ORAC only and limited to 8 ESX/ESXi hosts |
If its a Red HAT VM . Below ensures that the disks falling out of order will not cause issues in ASM
- shut down your virtual machine
- right-click on the VM’s entry in the left-hand panel and select Edit Settings
- click on the Options tab
- select the Advanced -> General item on the left and click on the Configuration Parameters
- Click on the Add Row button
- Click Add Row.
- In the Name column, enter
disk.EnableUUID - In the Value column, enter
TRUE - Click OK and click Save.
- Power on the virtual machine.
Reference –


Good notes Satheshwaran!
Thank you Sameer.
thanks Satheshwaran i was trying to do a ocfs2 file sharing and i need this configuration to put it working thanks a lot