")
Step 1: Access SharePoint
- Open a web browser and navigate to the Microsoft 365 portal (https://portal.office.com).
- Sign in with your Microsoft 365 account credentials (if not already signed in).
Step 2: Navigate to SharePoint Home
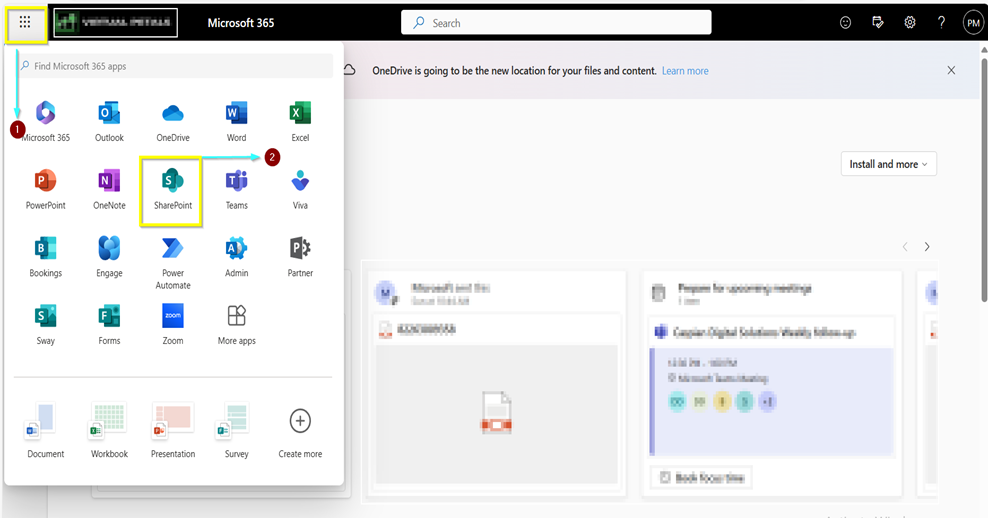
- Click on the “App launcher” (waffle icon) in the top left corner of the Microsoft 365 portal.
- In the app launcher, click on “SharePoint” to access SharePoint Home.
Step 3: Create a New SharePoint Site
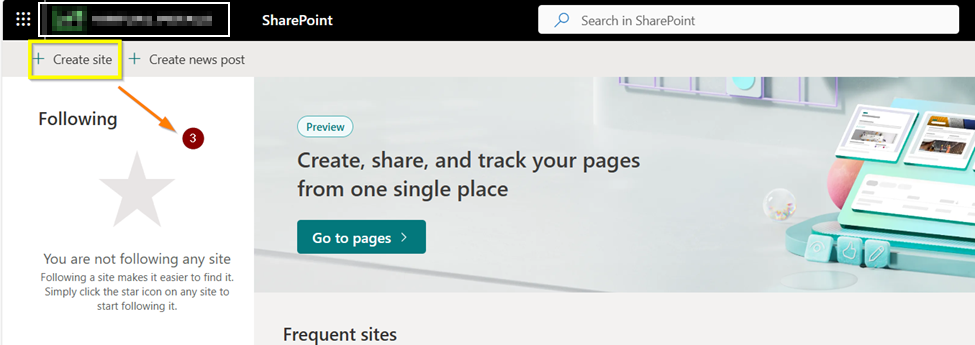
In SharePoint Home, you will see a list of your frequently visited sites and recent activities. To create a new site, click on the “+ Create site” button
You will be presented with a choice of site templates. Common options include Team site, Communication site, or others depending on your needs
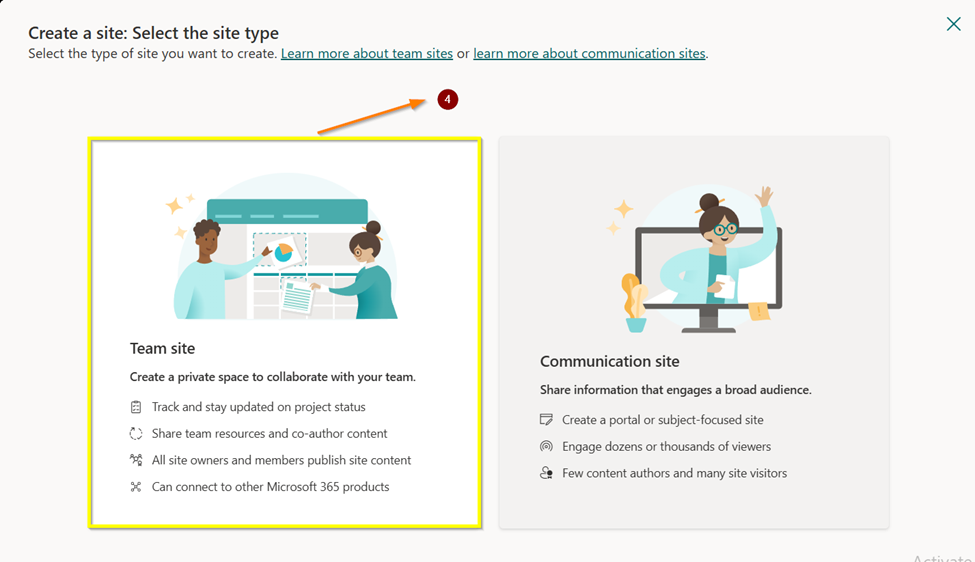
Choose the appropriate template for your site’s purpose
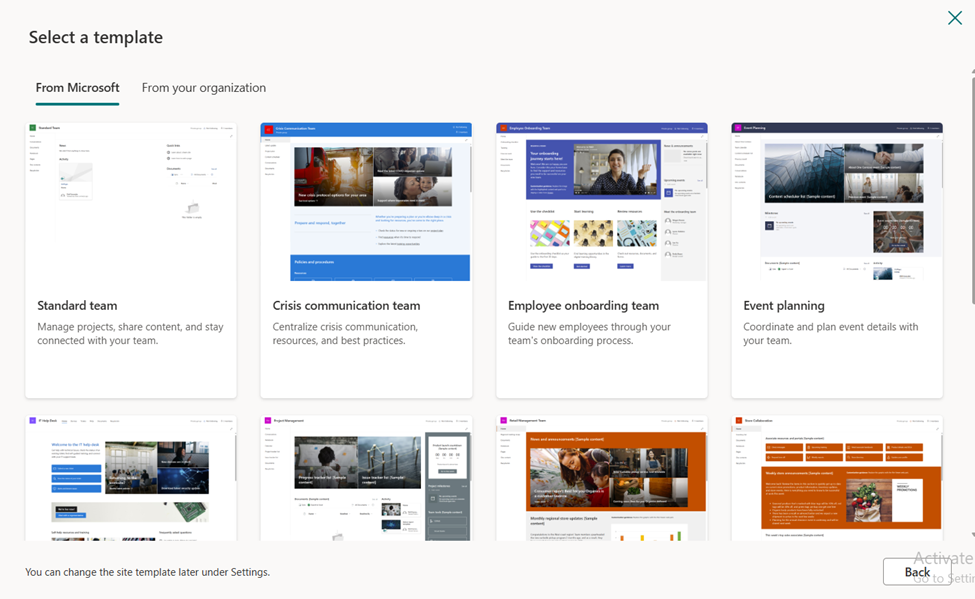
- After choosing the appropriate template. A Preview of the chosen template will be seen
- Then “Click” on Use template
Step 4: Fill in the required information for your site
- Site name: Give your site a descriptive name.
- Site description: Provide a brief description of the site’s purpose.
- Click “Next” to continue
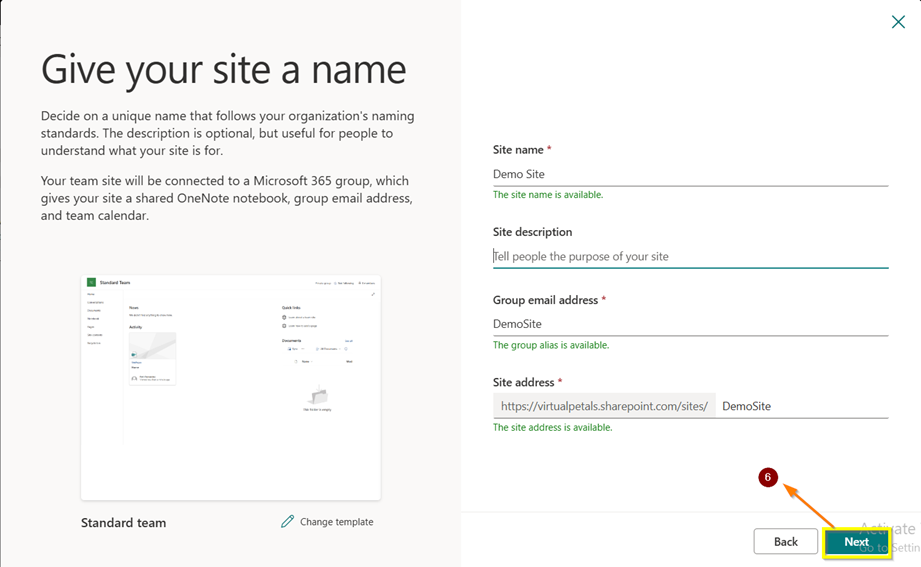
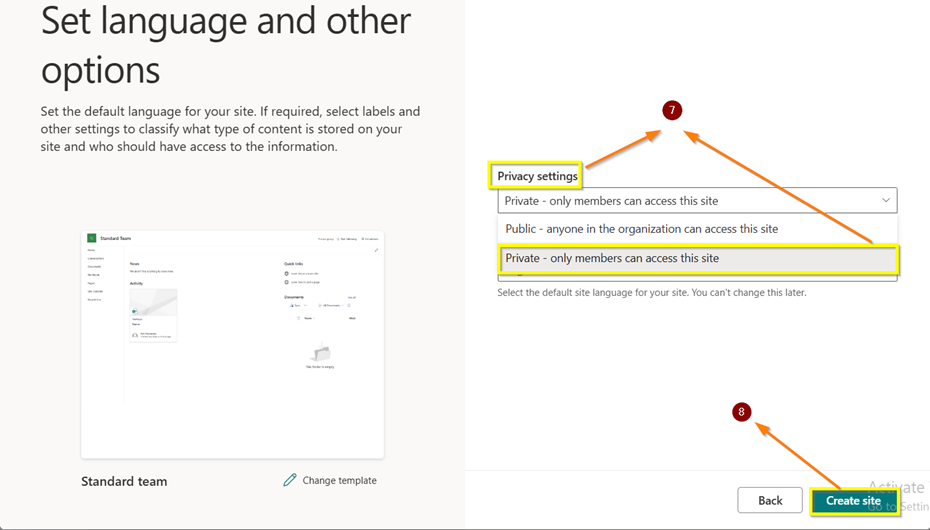
- Privacy settings: Choose whether your site should be public (everyone can access) or private (restricted access).
- Click “Create” to continue.
Step 5: Configure Site Settings
- Depending on the template you selected, you may have additional options to configure site settings. These can include choosing a site owner, setting permissions, and selecting navigation options. Fill in these details as needed.
- Click “Finish” or “Create” to create your SharePoint site

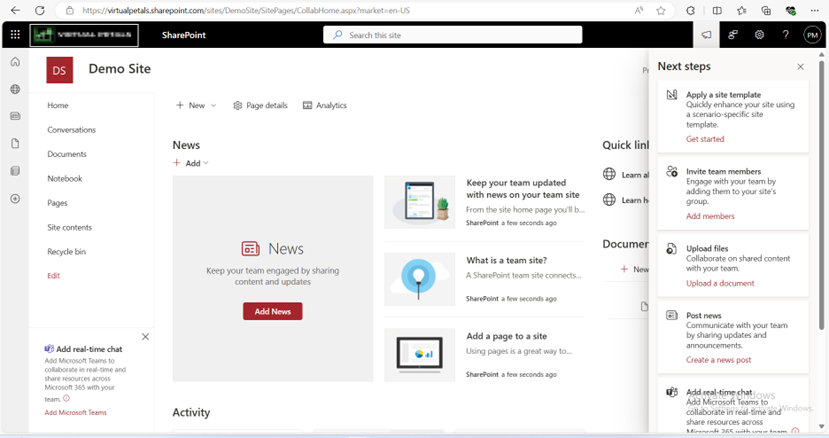
Step 6: Access and Customize Your Site
- Your new SharePoint site is now created. You can access it by clicking on its name in SharePoint Home.
- Once on your site, you can customize it further by adding document libraries, lists, pages, and other SharePoint components based on your requirements
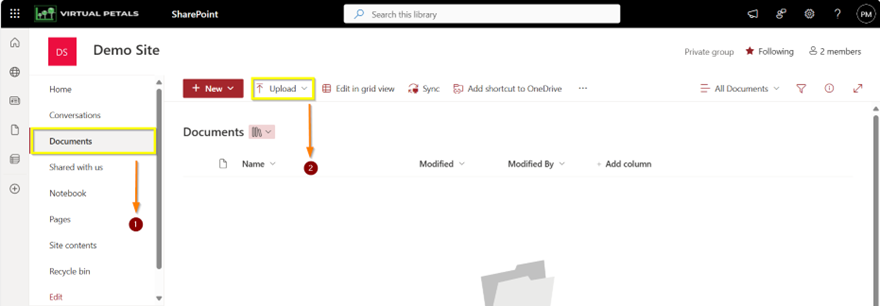
Adding documents in SharePoint Site
- Open the SharePoint site library
- Select Upload at the top of the Documents library
- In the Add a document dialog box, select Choose Files to upload an individual file. Depending on the version of SharePoint that you’re using, you may also be able to upload multiple files by holding down either the Ctrl or Shift key and selecting more than one file.
- When you’ve selected the file or files to upload, select OK
