Discovery Search was introduced in Exchange 2010 but it doesn’t support NEAR operator
It was supporting AND,OR operators
So happy that Exchange 2013 does support NEAR operator .
Lets see how to use it efficiently
—
Let say I want to Search a Mail Content has below in my Whole Organization
“One day Alan was asleep in his bed dreaming”
—
How to Search Efficiently to acquire better results ?
If am going to search for a name “Alan” in my Whole Org its going to return a plenty of results
Lets Say , You remember just about Alan and Bed alone.
Approximately where Alan and Bed have 4 words in-between, You can Increase the numbers as per your wish and depends on your criteria.
This example is just for your better understanding – Please Customize it as per your wish
Search Criteria would be – Where Alan and Bed Could be Near 6 words
Criteria Would be – (Alan NEAR(6) Bed)
How to Do it ?
Step 1:
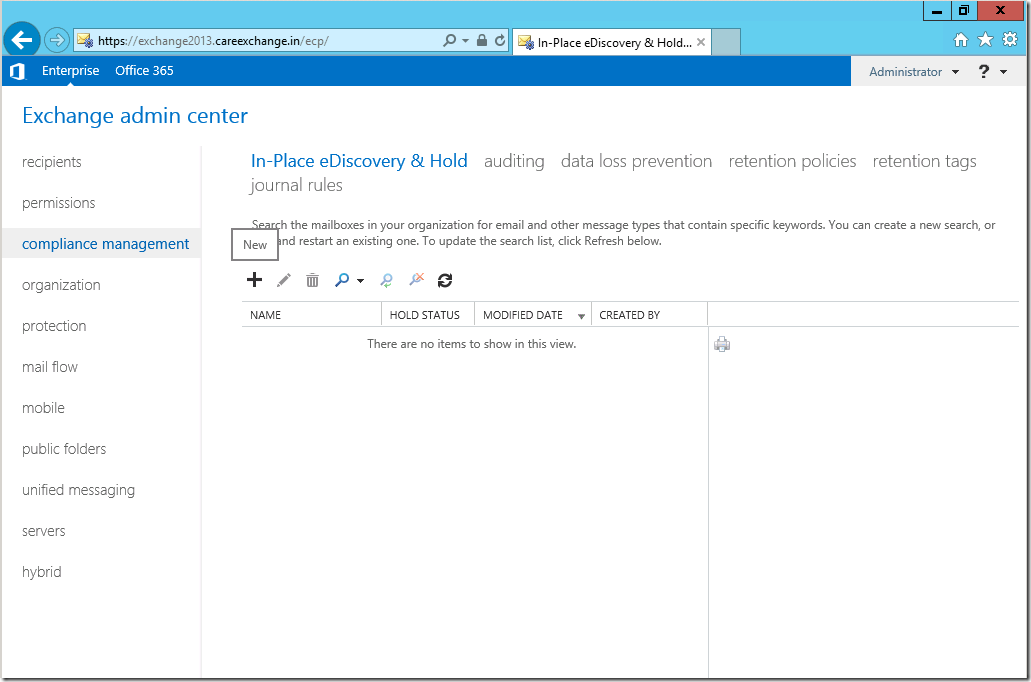
Login to Exchange Administration Center (EAC) in Exchange 2013
Step 2:
Compliance Management – Choose New
Step 3:
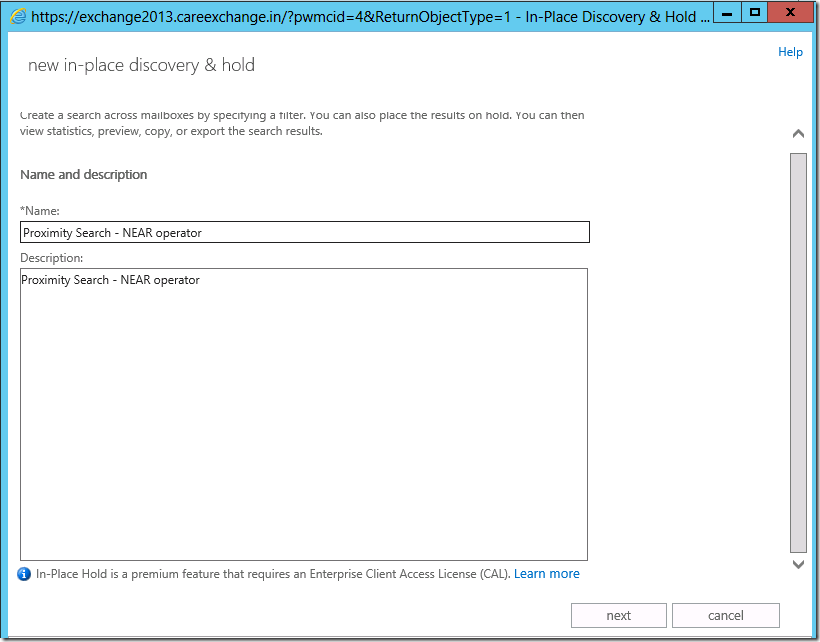
Type a Friendly name for your search – And Description if required
Step 4:
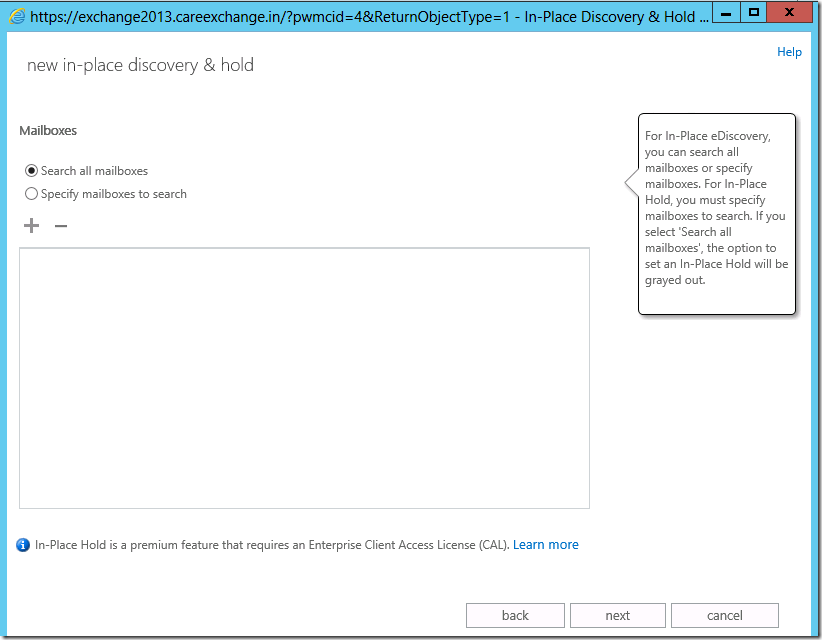
You can choose the mailboxes to search or you can search all the mailboxes
Step 5:
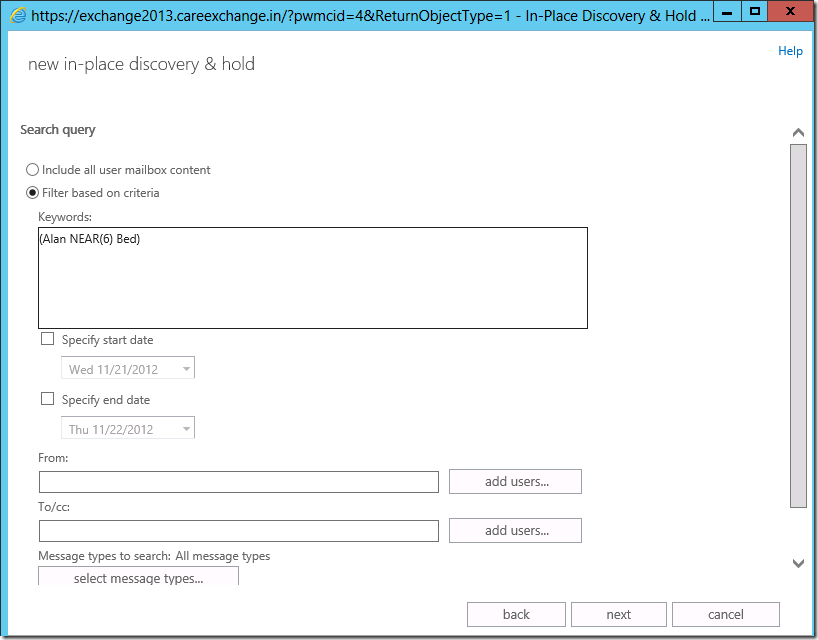
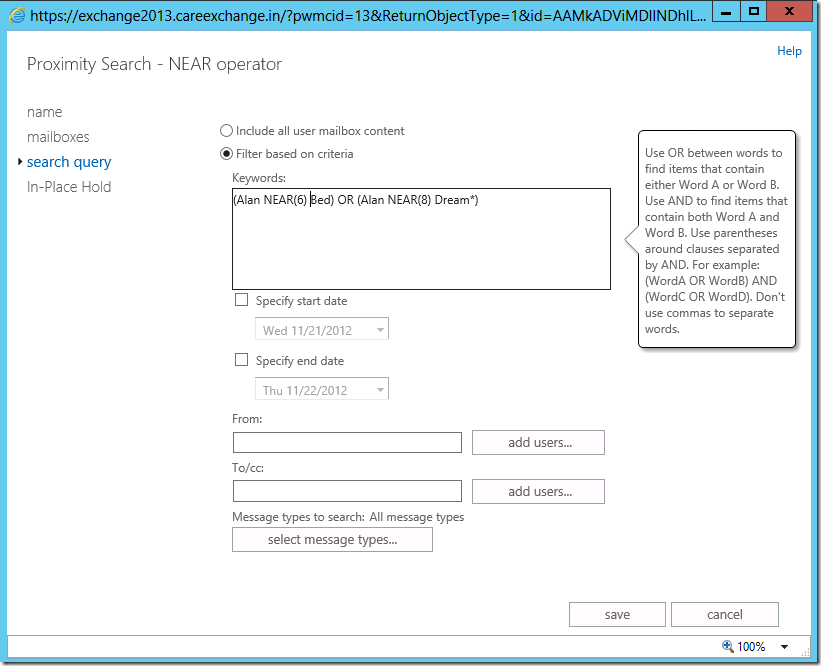
Now my Criteria is
Criteria –
(Alan NEAR(6) Bed)
Explanation – Alan and Bed – both are within 6 words
Specify a Date if you wish to narrow down your search more
Also you can make a Search like – (Note – use can use also OR,AND operators)
Criteria – (Alan NEAR(6) Bed) OR (Alan NEAR(8) Dream*)
Explanation –
Alan and Bed – both are within 6 words
OR
Alan and Dream(Wildcard –Anything starts with Dream) – both are within 8 words
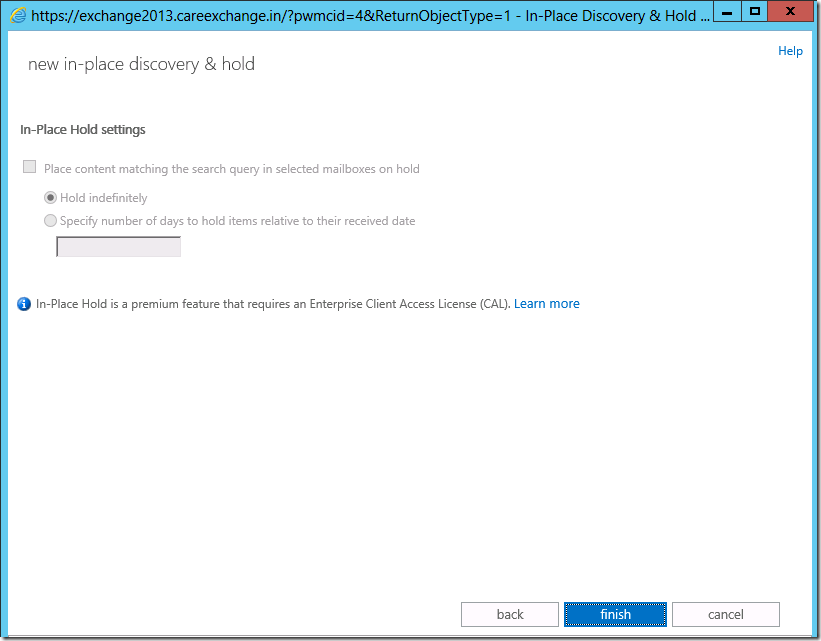
Step 6:
Choose Finish
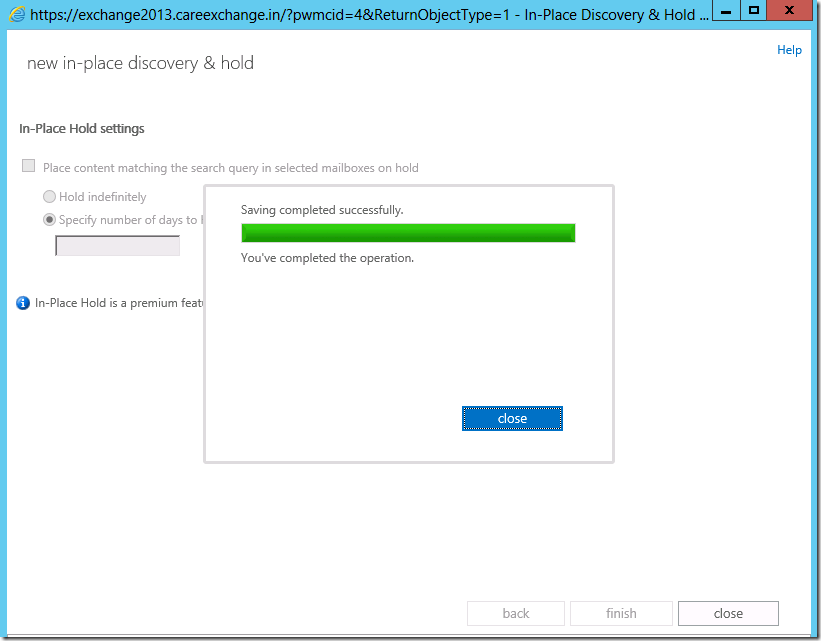
Step 7:
Now your Search will be saved – Choose Close
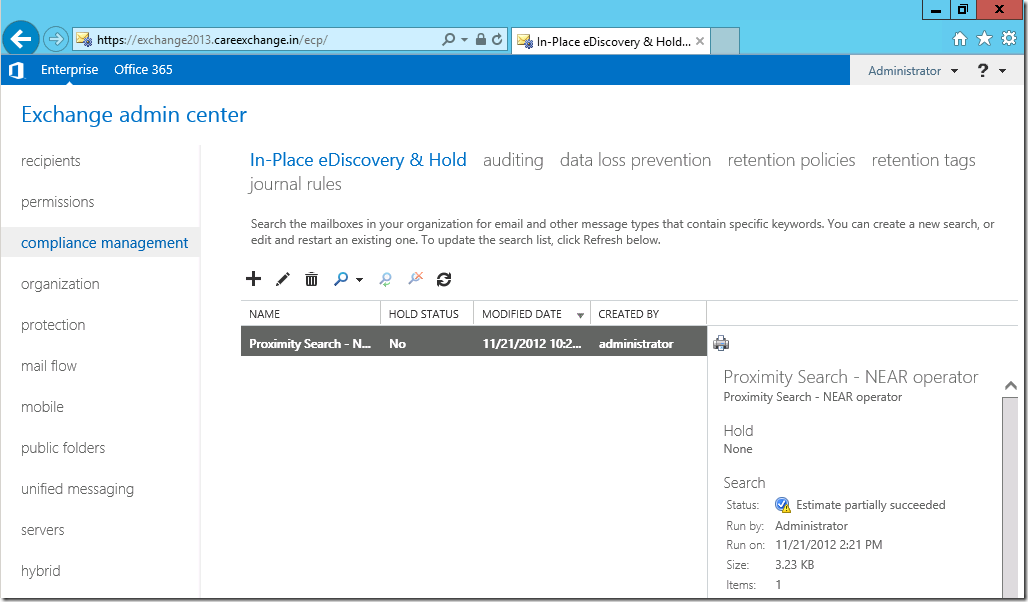
Step 7:
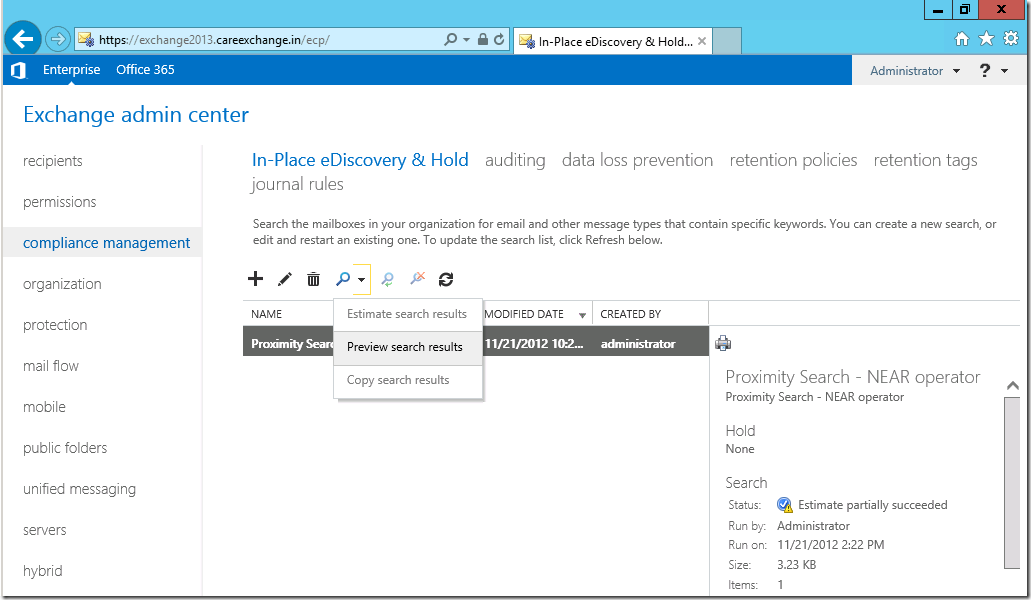
Now you can see Estimate partially Succeeded and number of items Returned
Step 8:
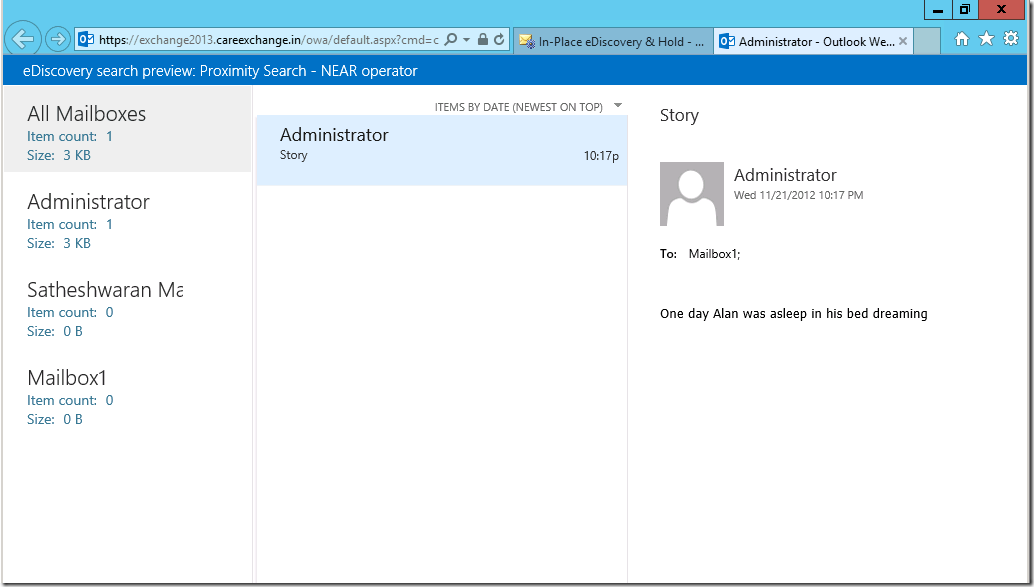
You can Preview your Search results- where viewing the results is more convenient in exchange 2013
Preview Results
Step 8:
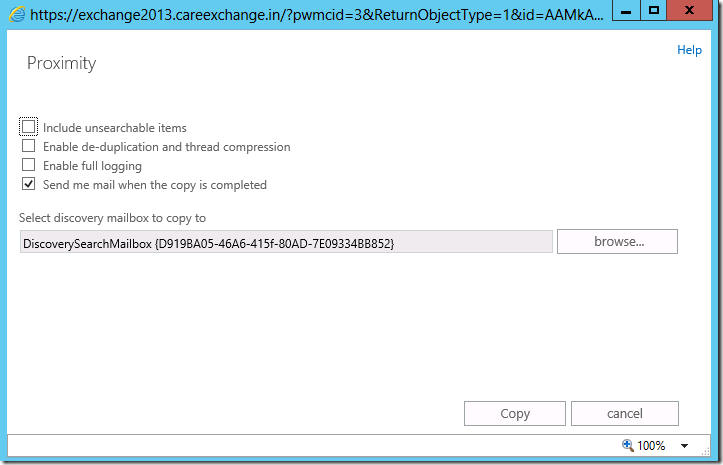
To Copy the Results
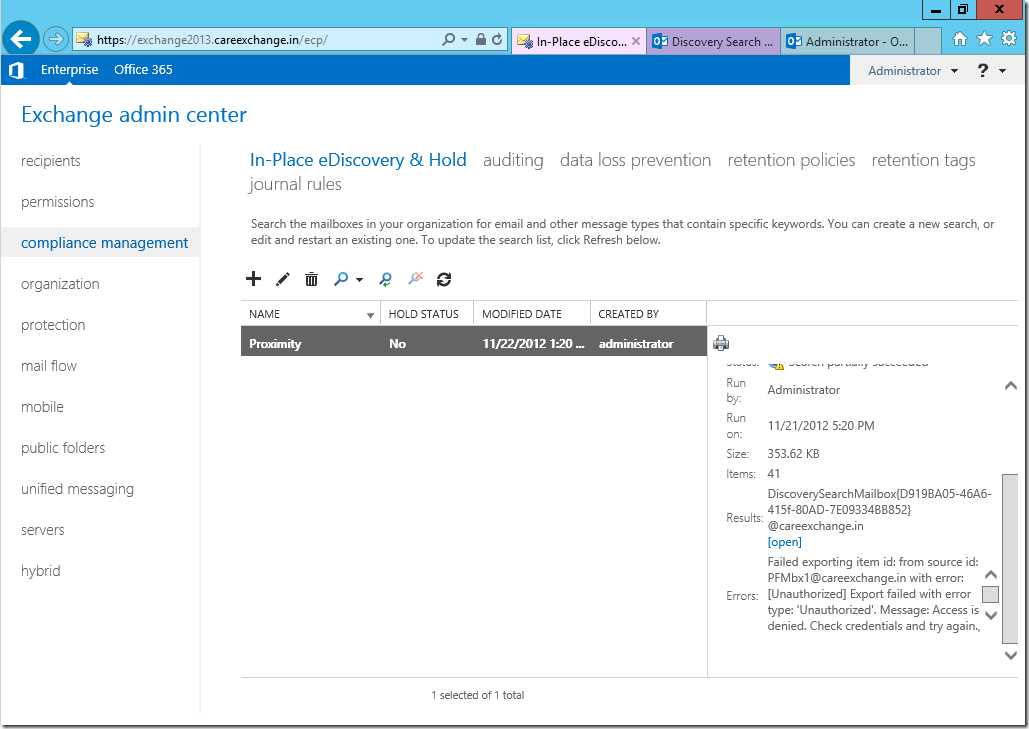
Choose Copy Results – You can copy Search results to a Discovery mailbox
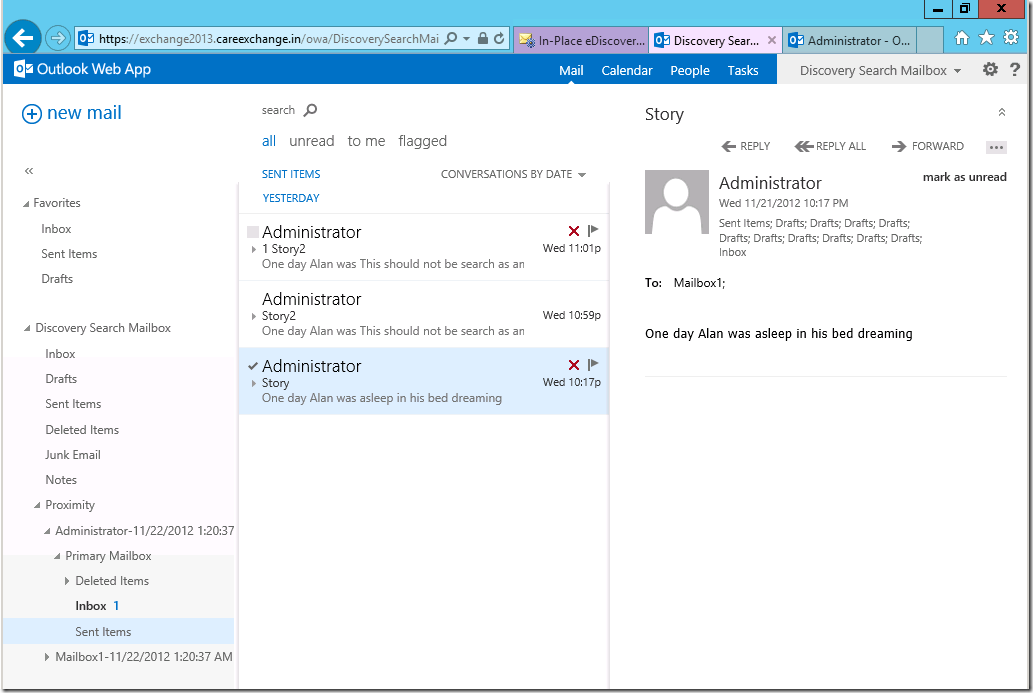
To View the Content in a mailbox – Choose Open in Right side of the Results
Now you can see all the Results in the Discovery Mailbox
Step 9:
If you want to Extract the Content to a PST
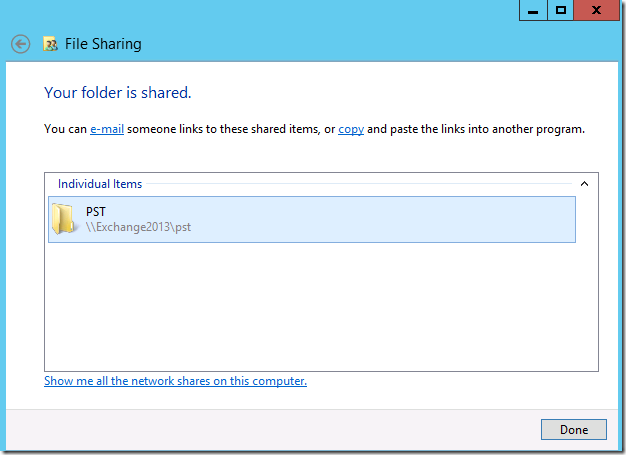
Create a Share –
Add Mailbox Import Export Permission –
New-ManagementRoleAssignment –Role "Mailbox Import Export" –User Administrator
Close and Reopen Shell-
New-MailboxExportRequest –Mailbox DiscoverySearch* –FilePath "\\ServerName\ShareName\SearchResults.pst"
You can add the PST File to an Outlook and use the Search Results
Hope it helped you for better understanding !!



Nice Explanation 🙂
Thanks Sunder !
Hey Sateesh,
All the articles are really awesome, You are doing a great job. you are Gems 🙂
Regards
Amit Raj Singh
Thanks a lot Amit.
Am happy with your comments !
Why search status is showing “Estimate partially Succeeded” instead of “Estimate Succeeded” ? what is the difference between them?
Why search status is showing “Estimate partially succeeded” instead of “Estimate succeeded”? what is the difference between them?