33 C
Dubai
Monday, May 5, 2025
Home Blog Page 19

Migrate PHP and MySQL Site to Azure App Service


Let’s migrate a Phpmysql site from Godaddy to Azure App Service and Mysql

Go to Marketplace; let’s create a resource group

Web App + Database

Lets use PHP run time stack

It auto-creates MySQL with the wizard with proper private DNS zone

Generated resources after creation

App service is online now

Created Windows 10 VM and Installed SQL Workbench in the same vNet to connect to MySQL and App service FTP easily

You can download SSL and connection information from here.

Connect using MySQL Workbench

Enter the obtained password

Import your old database using .SQL export and import

Choose Target schema

Now DB is imported.

Now you can see Tables have been created.

You can see appropriate tables populated

Let’s load a test PHP file to test DB connectivity , You can see the FTP Credentials

Connect to App Service using FTP

if you are using WinSCP

Placed this file to test mySQL connectivity.

<?php
$servername = "azure365pro-com-server.mysql.database.azure.com";
$username = "izmayfiuav";
$password = "8EHW56653KRSH5MZ$";
$database_name "azure365pro-com-database";
 
// Create connection
$conn = new mysqli($servername, $username, $password, $database_name);
 
// Check connection
if ($conn->connect_error) {
  die("Connection failed: " . $conn->connect_error);
}
echo "Connected successfully";
?>

Connection failed: Connections using insecure transport are prohibited while –require_secure_transport=ON.

if you turn off secure transport

if you turn off secure transport

or use SSL from the PHP side (Recommended)

&amp;lt;?php
$servername = "azure365pro-com-server.mysql.database.azure.com";
$username = "izmayfiuav";
$password = "8EHW56653KRSH5MZ$";
$database_name "azure365pro-com-database";
$options = array(
    PDO::MYSQL_ATTR_SSL_CA =&amp;gt; '/DigiCertGlobalRootCA.crt.pem'
);
// Create connection
$conn = new mysqli($servername, $username, $password, $database_name, $options);
 
// Check connection
if ($conn-&amp;gt;connect_error) {
  die("Connection failed: " . $conn-&amp;gt;connect_error);
}
echo "Connected successfully";
?&amp;gt;

Azure AD Identity Governance Access Reviews

Find inactive users or Guest users using Azure AD Identity Governance Access Reviews. It requires an E5 License

The inactivity Period can be from 1 to 730 days

Login to Azure Portal – Azure Active Directory – Identity Governance – Create an Access Review

First, let’s do a review for all users. Inactive for 90 Days.

Review Quarterly lasts for 6 days.

No Auto Apply , No Change happens when Reviewer don’t responds

Create an Access Review

Reviews can be listed here.

Upon completion of Access review – Email is generated for reviewers

Results can be seen here in the azure portal.

If you want to limit the access review only to guest users

You can create a Dynamic Group to List all guest users and Assign Access reviews for the selected group

So that review can happen only for guest users. Approve / Deny / Don’t know

Approve

Deny

Don’t know

Managing Office 365 Groups

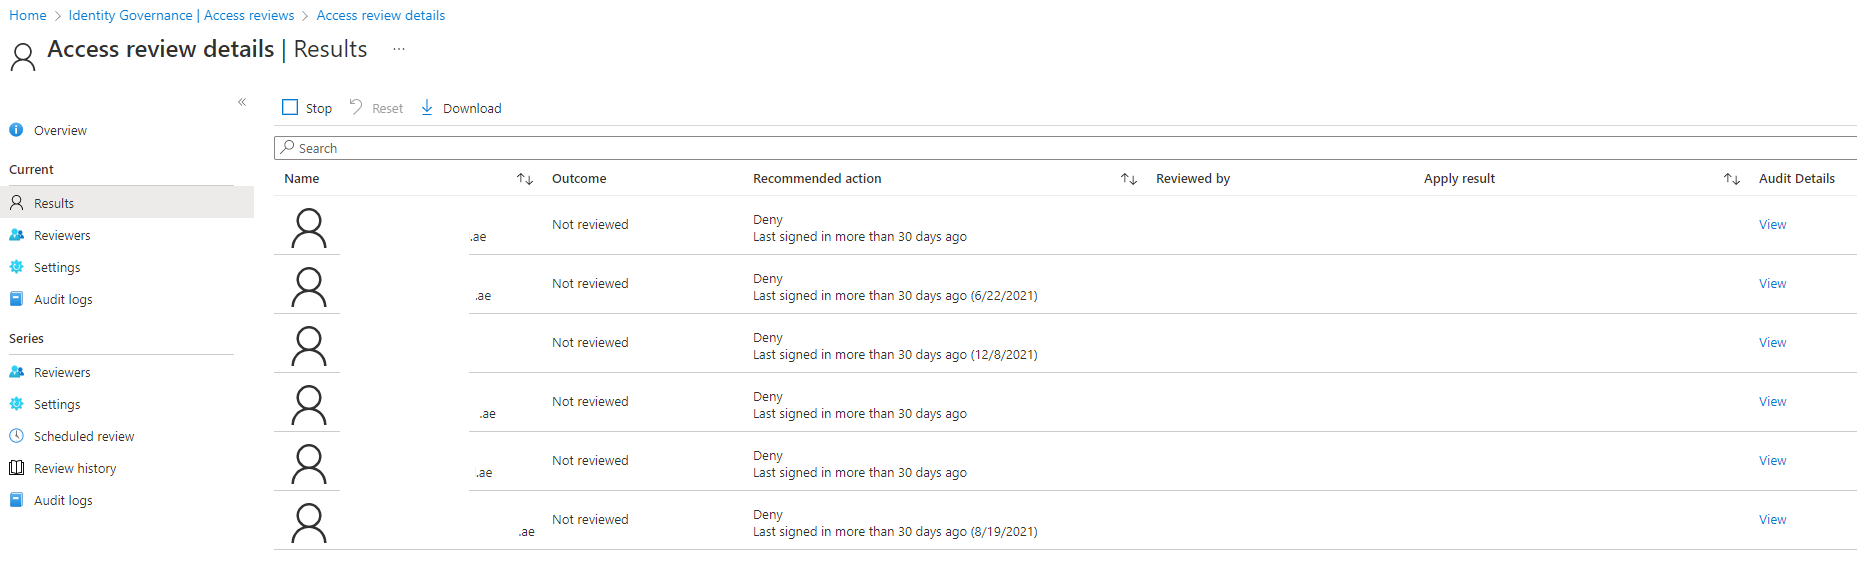
Managing Office 365 Groups is a key factor in Office 365 Implementation. if you don’t manage your Office 365 Groups Properly. It goes unmanageable from a governance point of view. As most of the below products allow group creation by default. So it’s wise to place a restriction on a top-level and manage the members who can create teams for mid and large Organizations.

  • Outlook
  • SharePoint
  • Yammer
  • Microsoft Teams
  • Microsoft Stream
  • Planner
  • PowerBI
  • Roadmap

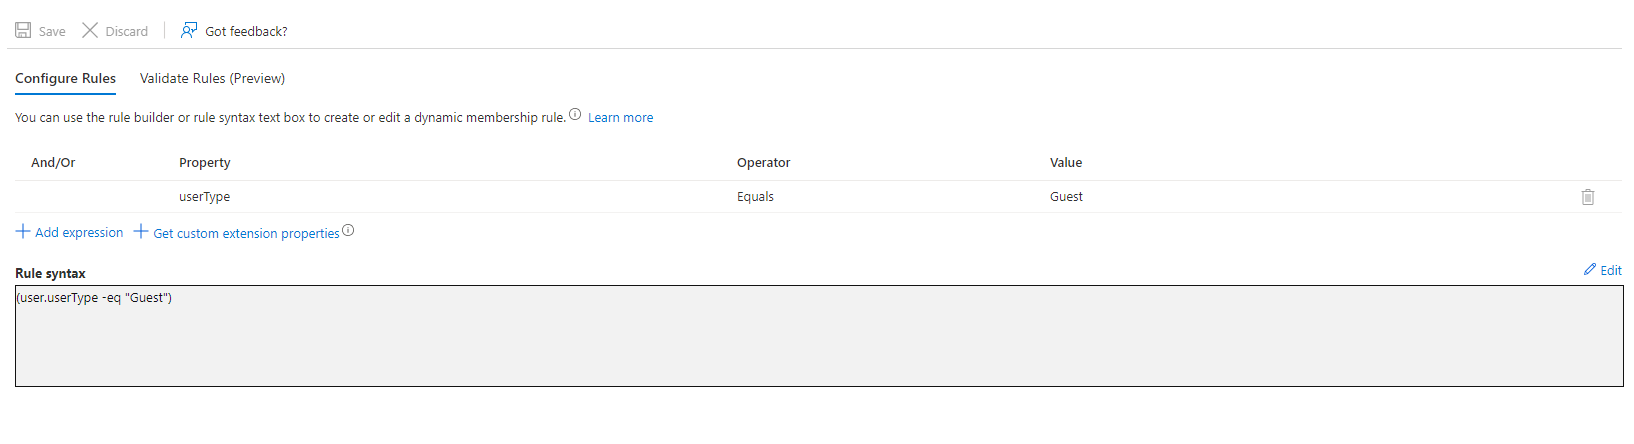
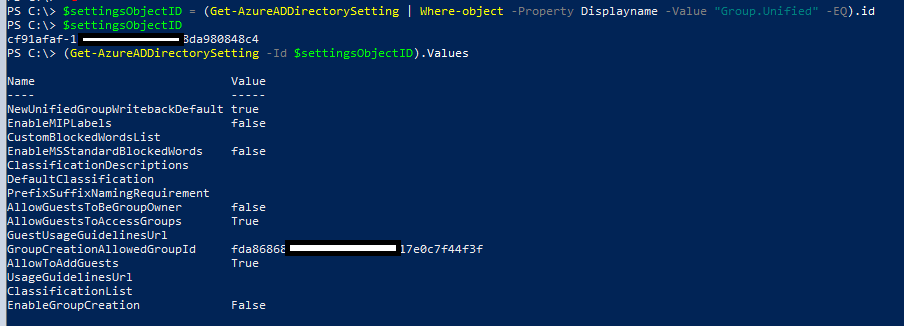
Once you map a group/group ID,

you can nest them or use Azure AD premium License to have dynamic membership for the security group to allow limited users to create teams for example. Yes, you can configure the naming policy and group expiration policies later. Purpose: Disable Teams Creation by all users. Only members of this security group can create Teams

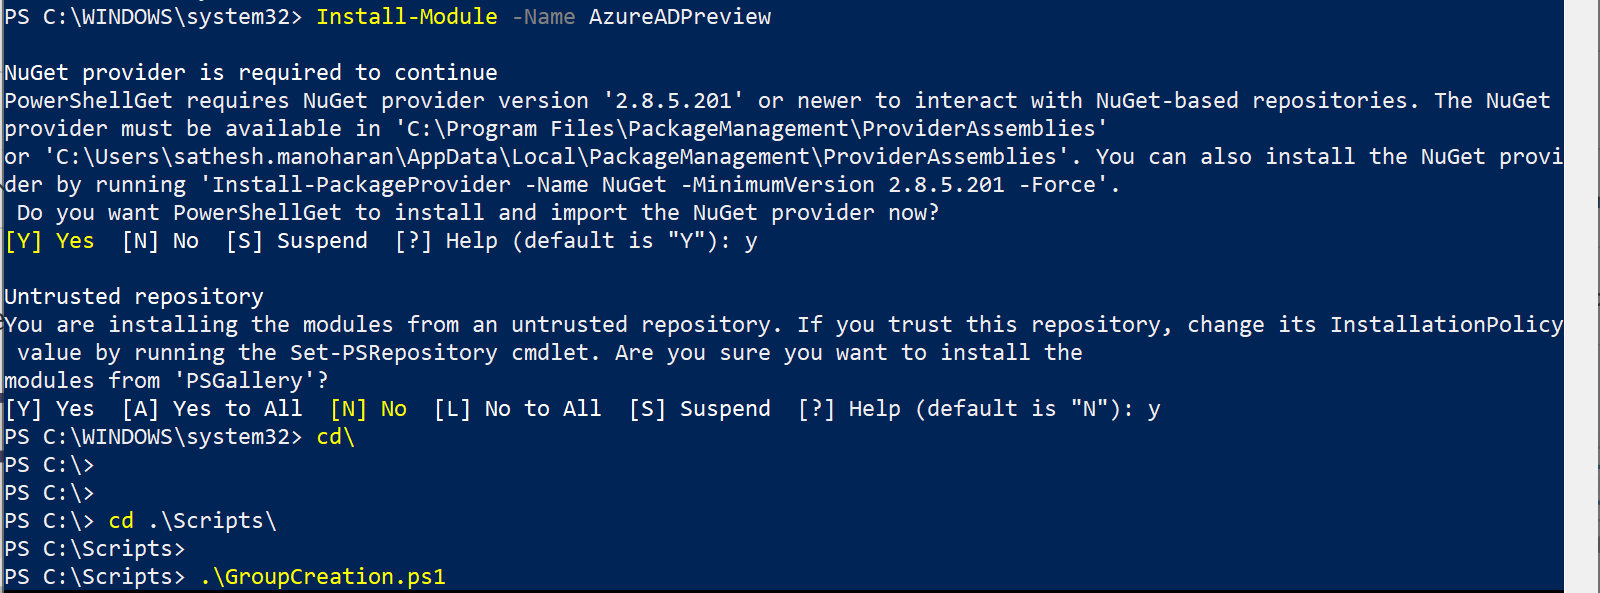
Let’s see how to create group creators.

azureadpreview.png
Install AzureADPreview

If you don’t install AzureADPreview, you will get a command not recognized. If you already have azureAD module. you need to uninstall and install the same.

Uninstall-Module AzureAD
Install-Module AzureADPreview

if you already installed it. running the script should initiate connect-azureAD

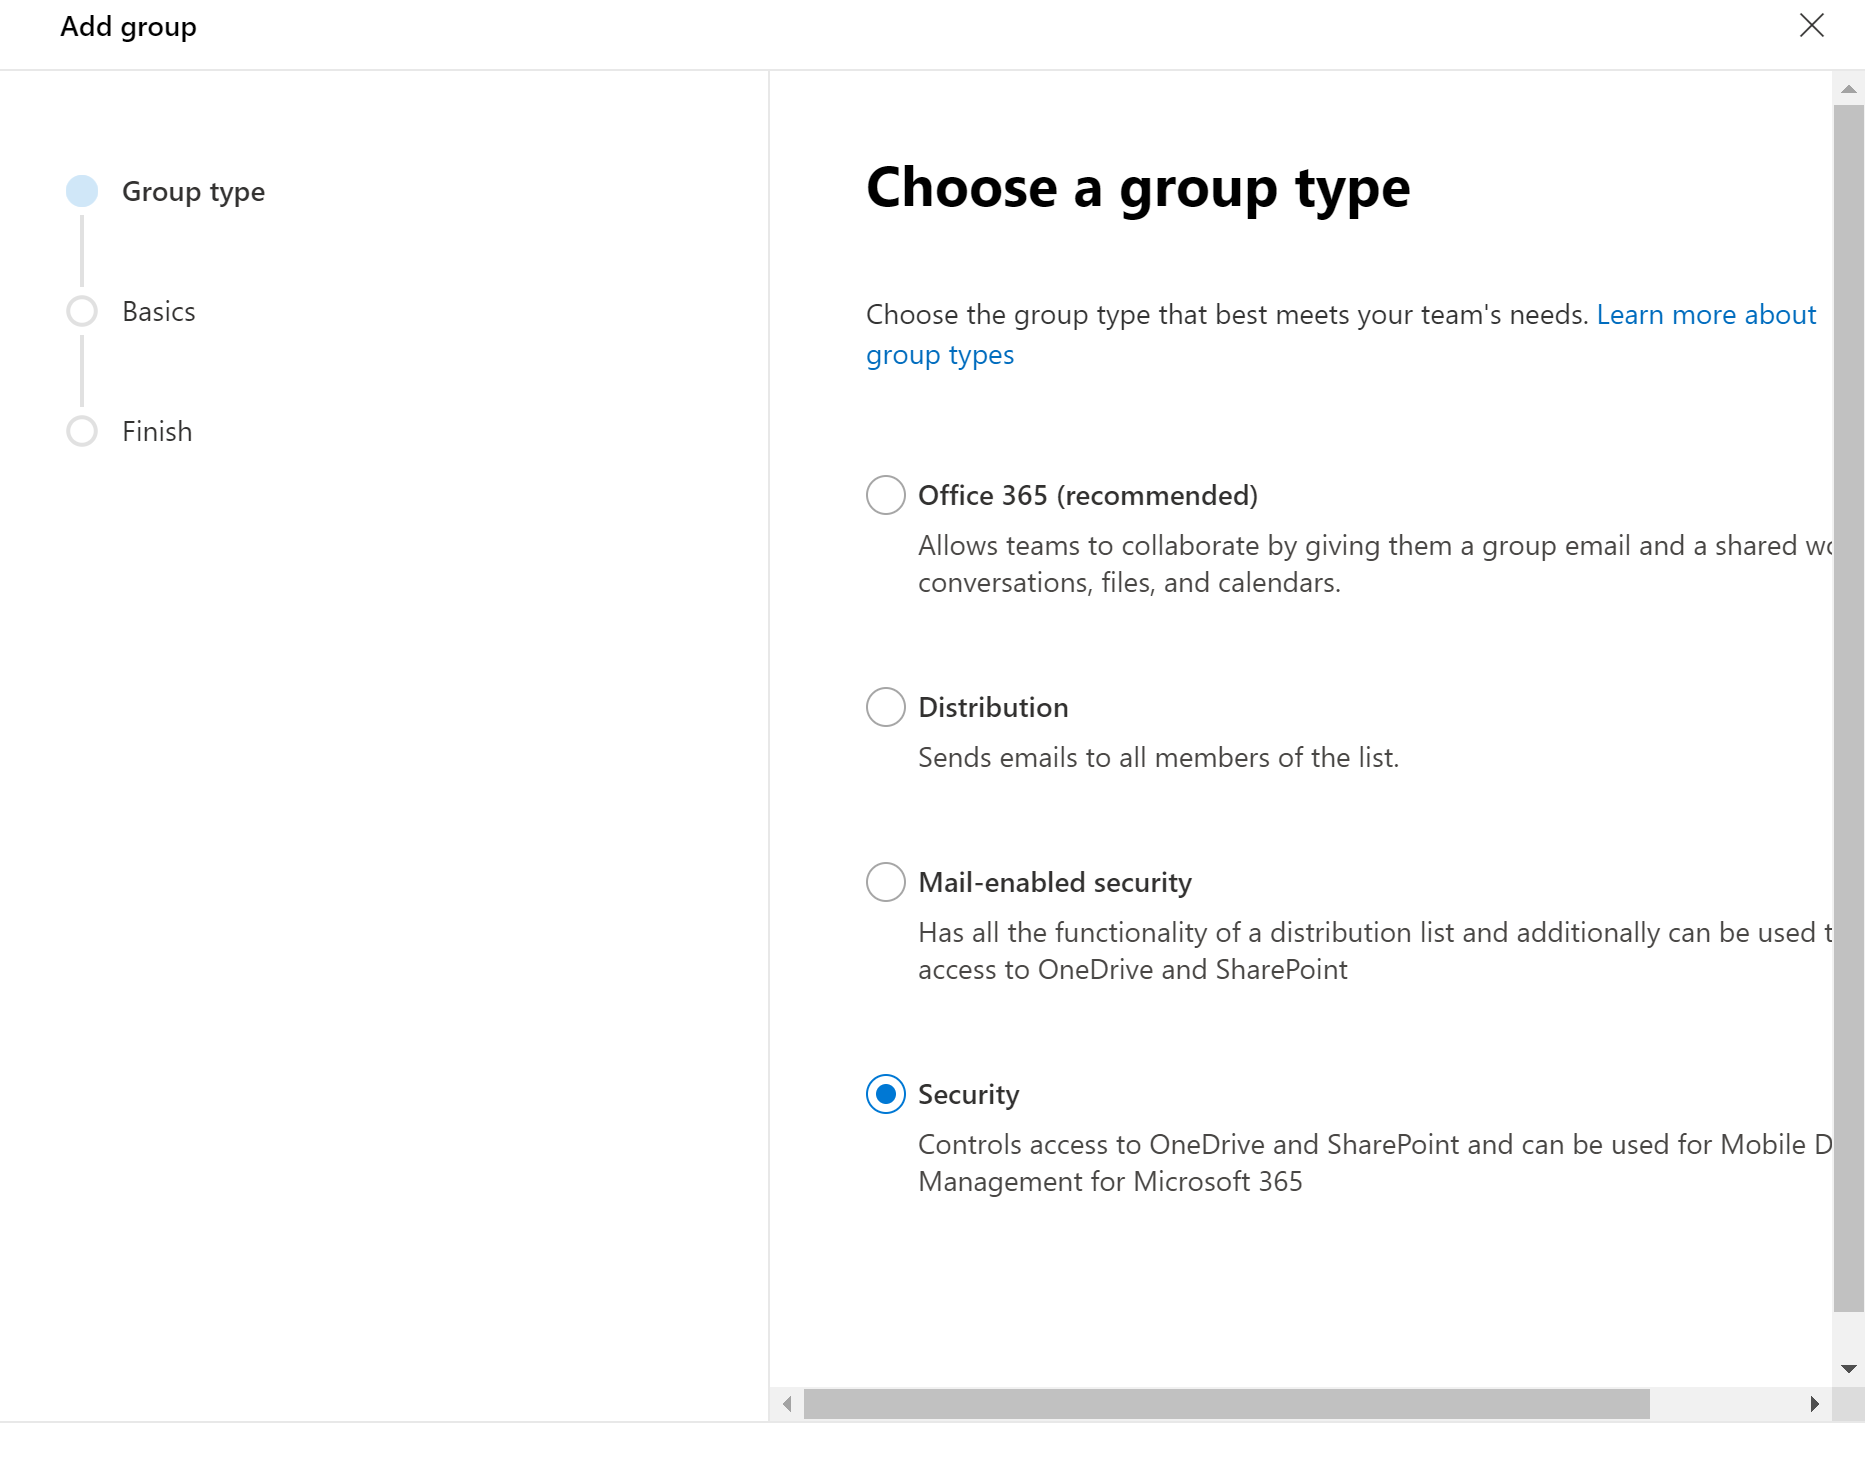
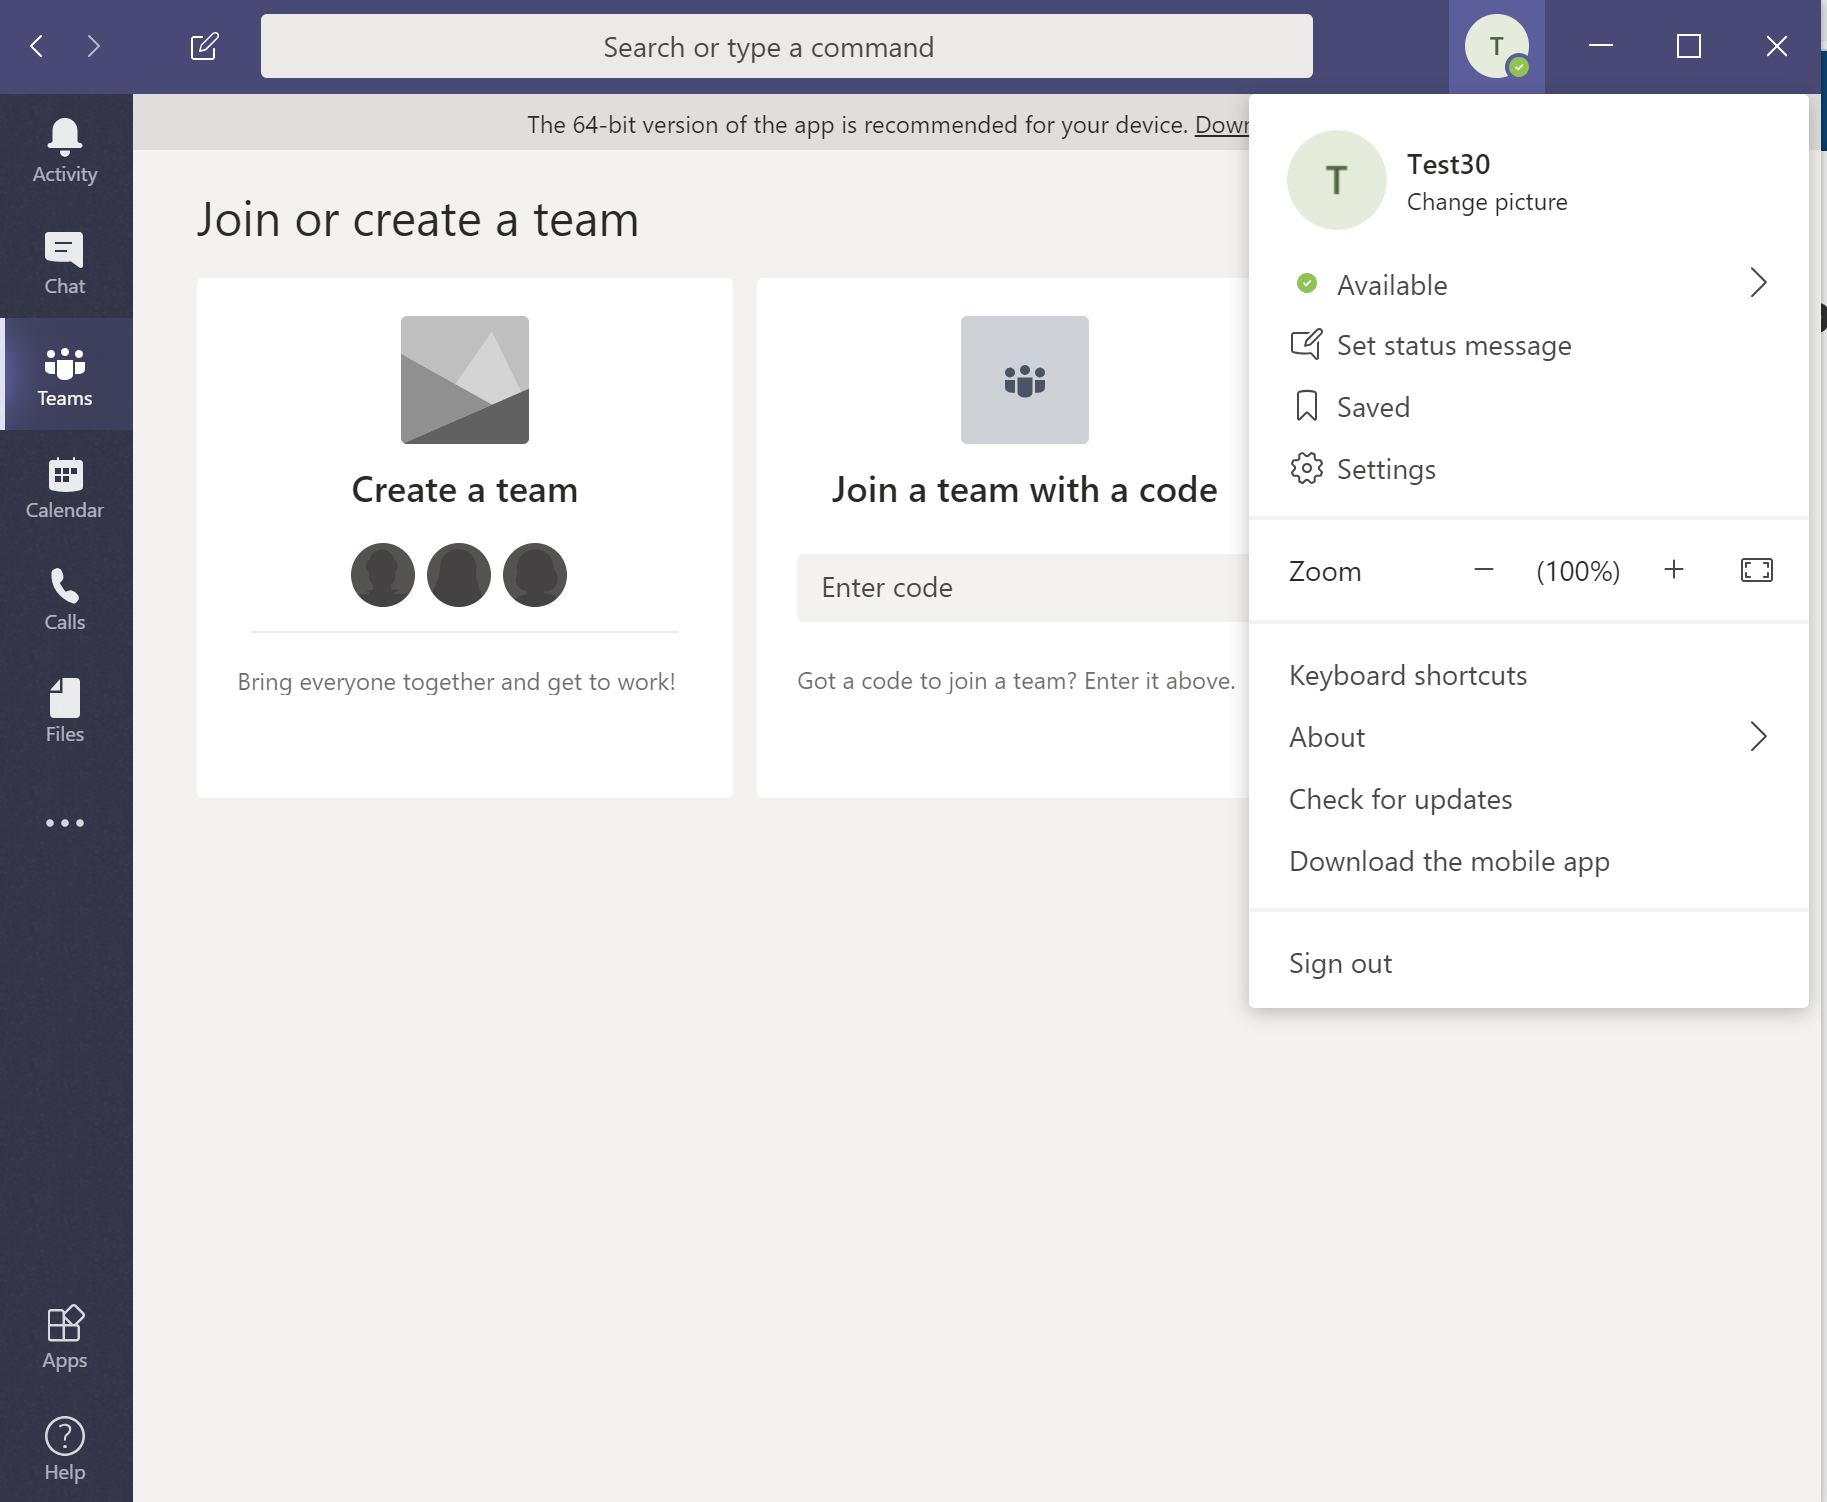
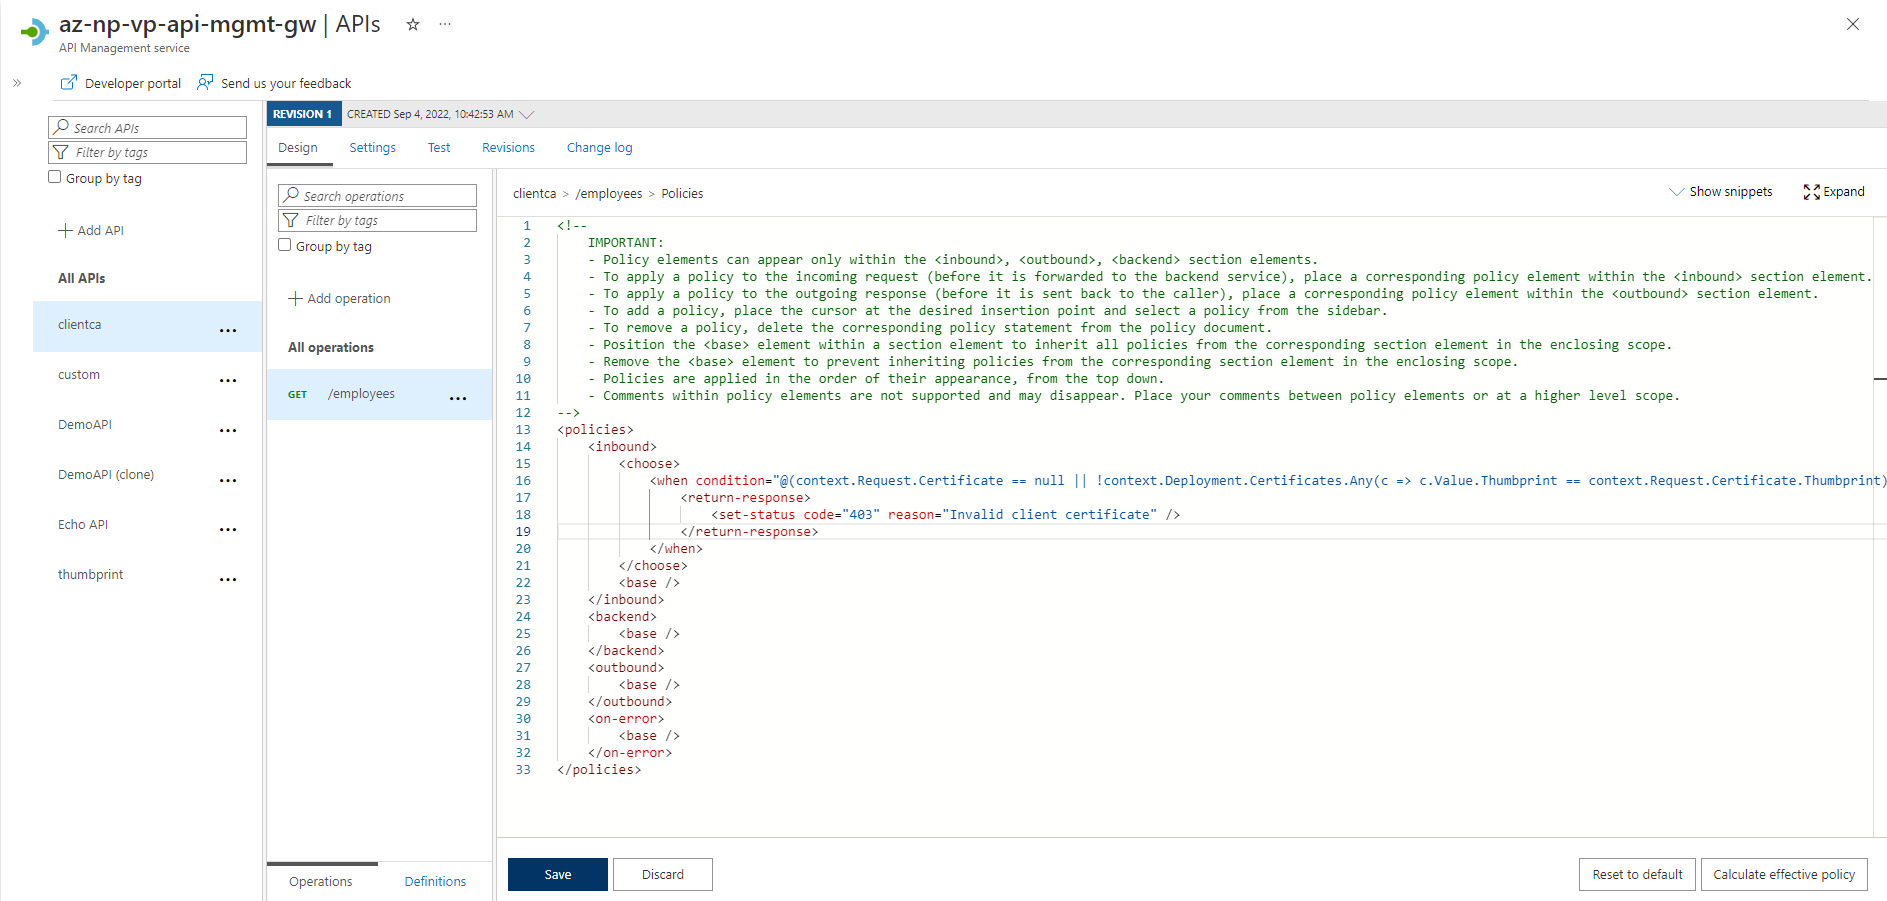
Office 365 Admin Center – Groups – Create a Security Group

Office 365 - Groups Creator
SecurityGroup.png

Save the below script as ps1 fill the group name in the first line, save and run it.


$GroupName = "Office 365 - Groups Creator"
 $AllowGroupCreation = "False"
 Connect-AzureAD
 $settingsObjectID = (Get-AzureADDirectorySetting | Where-object -Property Displayname -Value "Group.Unified" -EQ).id
 if(!$settingsObjectID)
 {
       $template = Get-AzureADDirectorySettingTemplate | Where-object {$_.displayname -eq "group.unified"}
     $settingsCopy = $template.CreateDirectorySetting()
     New-AzureADDirectorySetting -DirectorySetting $settingsCopy
     $settingsObjectID = (Get-AzureADDirectorySetting | Where-object -Property Displayname -Value "Group.Unified" -EQ).id
 }
 $settingsCopy = Get-AzureADDirectorySetting -Id $settingsObjectID
 $settingsCopy["EnableGroupCreation"] = $AllowGroupCreation
 if($GroupName)
 {
     $settingsCopy["GroupCreationAllowedGroupId"] = (Get-AzureADGroup -SearchString $GroupName).objectid
 }
  else {
 $settingsCopy["GroupCreationAllowedGroupId"] = $GroupName
 }
 Set-AzureADDirectorySetting -Id $settingsObjectID -DirectorySetting $settingsCopy
 (Get-AzureADDirectorySetting -Id $settingsObjectID).Values

User is not a member of this Security Group

The user is a member of the security group to get a create team option.

Retrieving Assigned Group ID after implementing

$settingsObjectID = (Get-AzureADDirectorySetting | Where-object -Property Displayname -Value "Group.Unified" -EQ).id
(Get-AzureADDirectorySetting -Id $settingsObjectID).Values

Let’s see how to check which group is assigned to create teams – GroupCreationAllowedGroupID – Search with this group ID in Azure AD portal.

Redirect APEX domain to www using Azure Front Door

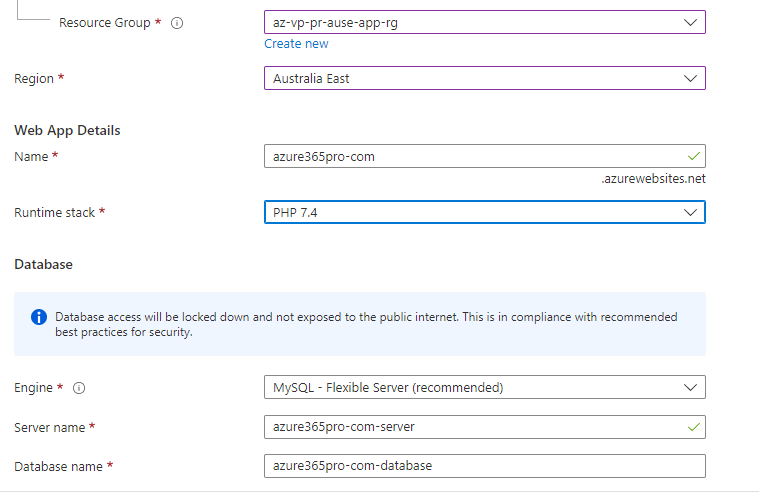
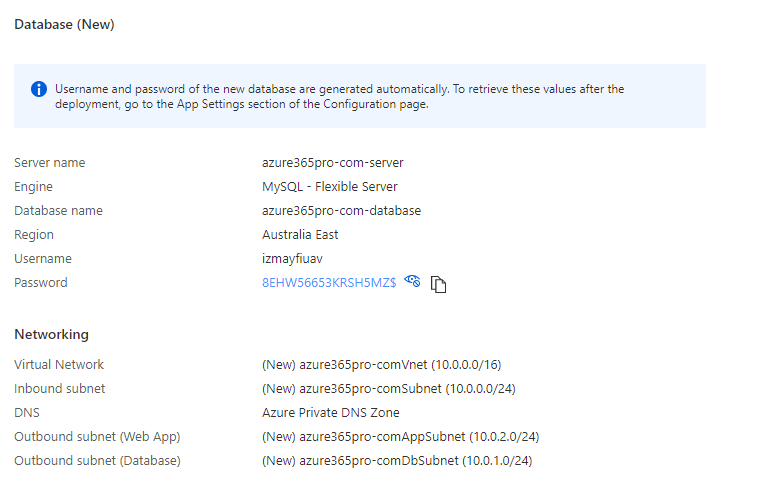
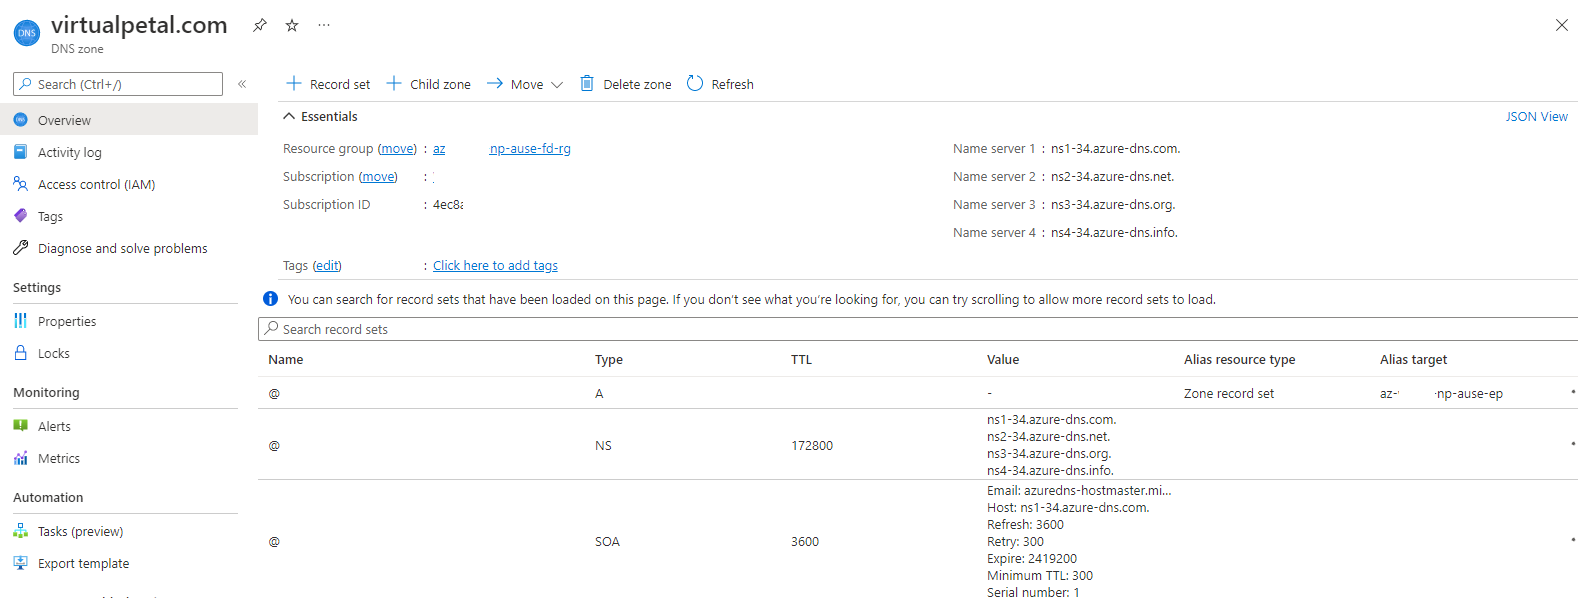
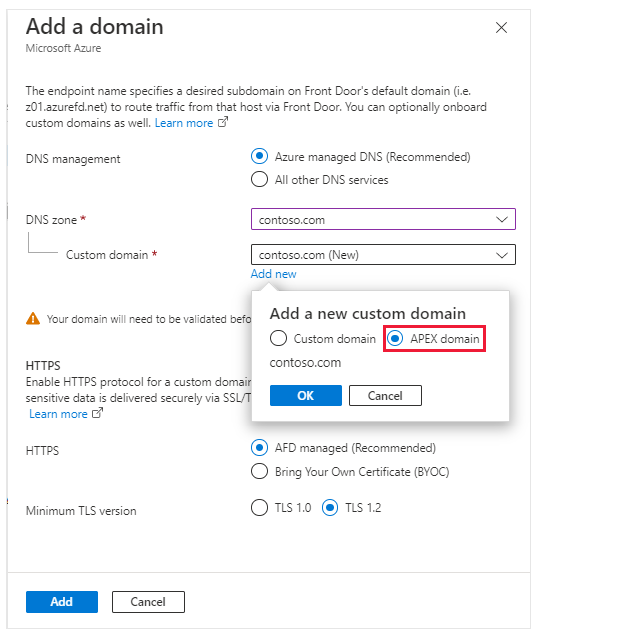
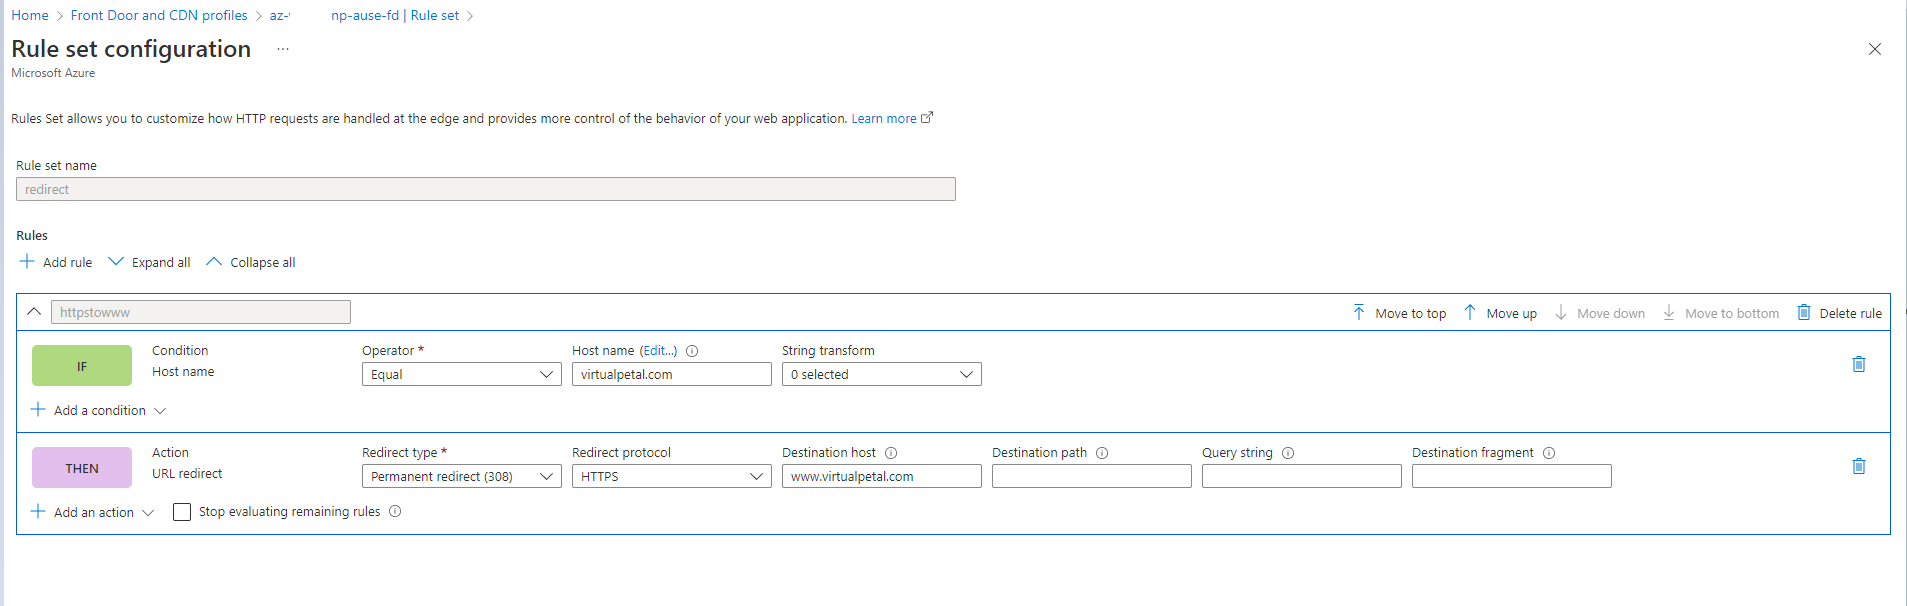
To handle an APEX or naked domain (azure365pro.com) to redirect to https://www.azure365pro.com main requirement is that the Domain should use Azure Manage DNS;

In this requirement, All Application URLs are using https://www.azure365pro.com so all APEX domains azure365pro.com had to redirect to https://www.azure365pro.com

Let’s configure the azure DNS zone

Configured DNS Zone in Azure – Changed my name servers from my provider to use them in my case updated from GoDaddy

In Azure Front Door

Configured Azure Front Door Managed certificate for naked or APEX domain and www.azure365pro.com

Configured Certs and CNAME records

Now let’s redirect using the ruleset

if the hostname is azure36pro.com redirect to https://www.azure365pro.com

if the Hostname is azure365pro.com

redirect to https://www.azure365pro.com

Secure APIs using Client Certificate in API Management

Let’s see how to secure API using Client Certificate in Azure API management

  • Make sure you have SSL added on Custom Domain
  • Negotiate Certificate is Checked

Now let’s generate a Custom Client Certificate to be used on the Client Side using Windows Powershell

New-SelfSignedCertificate -DnsName "azure365pro", "azure365pro" -CertStoreLocation "cert:\LocalMachine\My" -NotAfter (Get-Date).AddYears(10) -FriendlyName "CAazure365pro" -KeyUsageProperty All -KeyUsage CertSign, CRLSign, DigitalSignature
 
$mypwd = ConvertTo-SecureString -String "123" -Force -AsPlainText
 
Get-ChildItem -Path cert:\localMachine\my\4D589CA579F672252668920A54D52DEDB16A9688 | Export-PfxCertificate -FilePath "C:\Scripts\certs.pfx" -Password $mypwd

Now Cert is ready

Add Certificates

you can use key vault – in this case and uploading directly

Now update the Inbound policy as below to use thumbprint directly without uploading the certificate to API management


if you want to use from the uploaded client certificates list use below


Now lets call the API using Client Certificate using postman

Add the certificate

if you call the call the API without a certificate

if you call the call the API with the client certificate

Enabling Azure AD Password Protection for Active Directory Servers

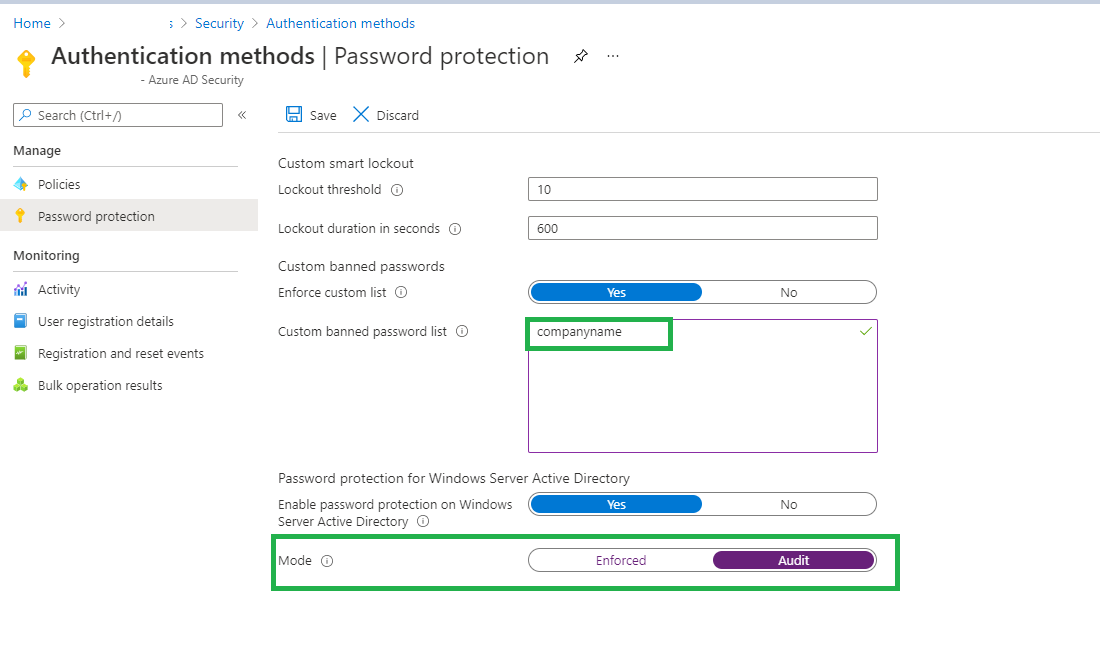
Whatever password complexity you apply through group policies, users will always find a way to use the simplest and most used password on the internet like P@$$w0rd, As Active Directory doesn’t have any native feature to protect from this user behavior, Azure AD Password protection comes to the rescue to provide the intelligence of the most used passwords used on password spray attacks so that you keep your users safe from password spray attacks. Even though passwordless is the future. it’s going to take some time to reach there as there are so many legacy dependencies in every brownfield environment.

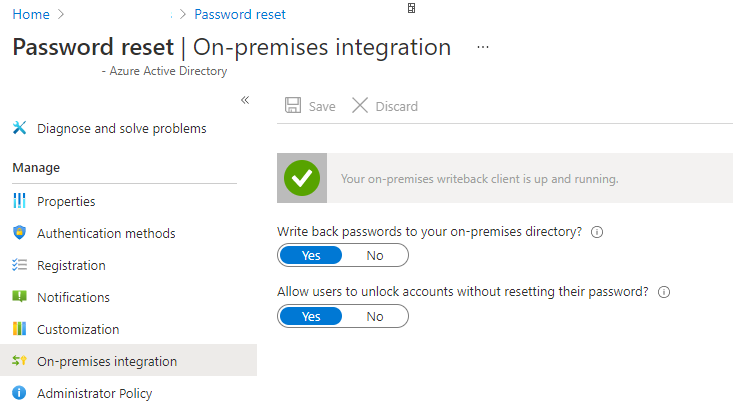
It’s recommended to have Password Writeback enabled so that users can reset in both places either Cloud or OnPrem seamlessly. You can check the status of password write back, it shows healthy in the below screenshot (Your on-premises writeback client is up and running). As password protection works only with Azure AD Premium P1 or P2, you can enable the password to write back which comes with the same set of licenses as well through Azure AD Connect.

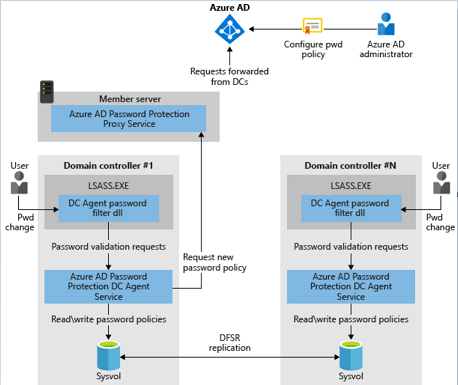
Let’s see how to implement them. As there is no minimum forest functional level or forest functional level for the agent or the proxy. you can implement in any environment. but what we observed is installing them on Windows Server 2012 R2 is a bit hectic as it requires .NET 4.7.2 versions to be installed. Installing them on Windows Server 2019 was seamless as the .NET was pre-installed.

There are two URLs need to be reached by Azure AD Password Protection Proxy to talk to Azure AD to gain the updates.

https://login.microsoftonline.com
https://enterpriseregistration.windows.net

It’s better to allow them directly as they are standard Microsoft URLs, if you have a proxy and if you don’t want to bypass them you have to update config files which are not covered in this article.

On High Availability, you don’t have to worry as these Azure AD Password Protection Proxy going down doesn’t affect the environment. Only the new signatures (updated banned list for example) will not be updated until the Azure AD Password Protection Proxy server coming up. Unless you have a very large environment you certainly don’t have to bring multiple servers to maintain High availability for this. if you have a good backup we are good. if you have multiple sites you don’t have to bring multiple Proxy servers to each site as its updates the default SYSVOL shares of domain controllers which will be replicated throughout the forest with standard mechanisms as the domain controllers don’t have to speak to the internet directly.

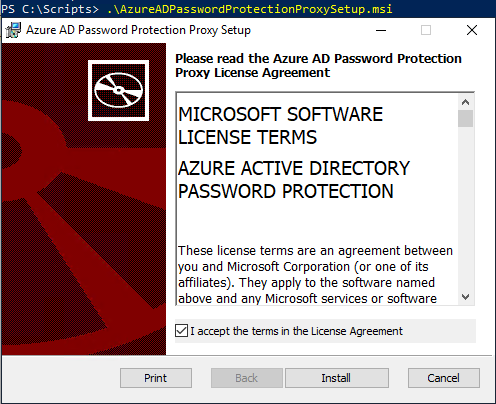
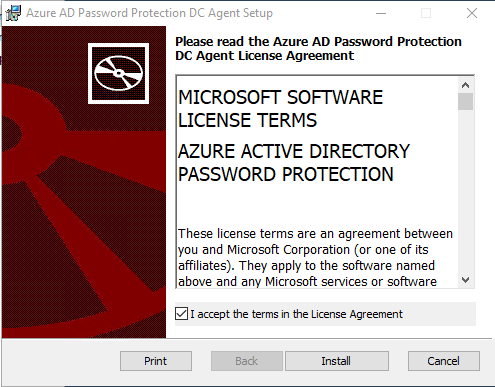
You need a dedicated server on your primary site where the majority of users are in terms of resetting their passwords so that any new changes on the custom password banned list gets updated immediately for you majority of users, Even though you can bring multiple proxy servers on multiple sites to improve that, we don’t have such requirement though on this particular case.
let’s see how to download and install the proxy setup,

Download Azure AD Password Protection for Windows Server Active Directory from Official Microsoft Download Center

Open Powershell – Run as administrator – Browse to AzureADPasswordProtectionProxySetup.msi and open it so that it opens with elevated privileges.

Open Powershell to Import AzureADPasswordProtection Module to check the Proxy status

Import-Module AzureADPasswordProtection

To check the status of the proxy use the below PowerShell command.

Get-Service AzureADPasswordProtectionProxy | FL

Now let’s register the proxy with Azure AD with your Global Admin Credentials

Register-AzureADPasswordProtectionProxy -AccountUpn 'yourglobaladmin@yourdomain.com'

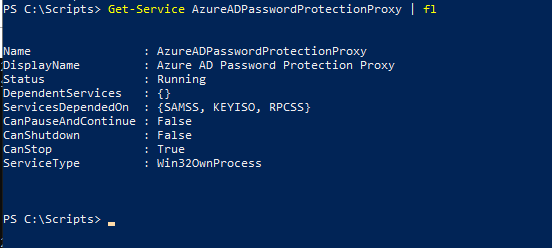
Once your proxy agent is healthy. let’s make sure one of the domain controllers can access the Proxy agent to get the updates to the SYSVOL shares to replicate them to the whole environment.

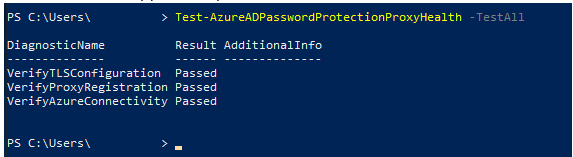
To Verify Health using Powershell –

Test-AzureADPasswordProtectionProxyHealth -TestAll


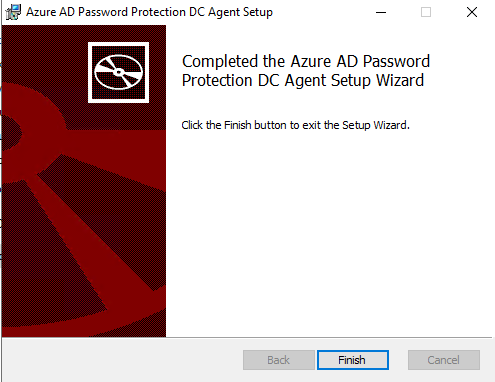
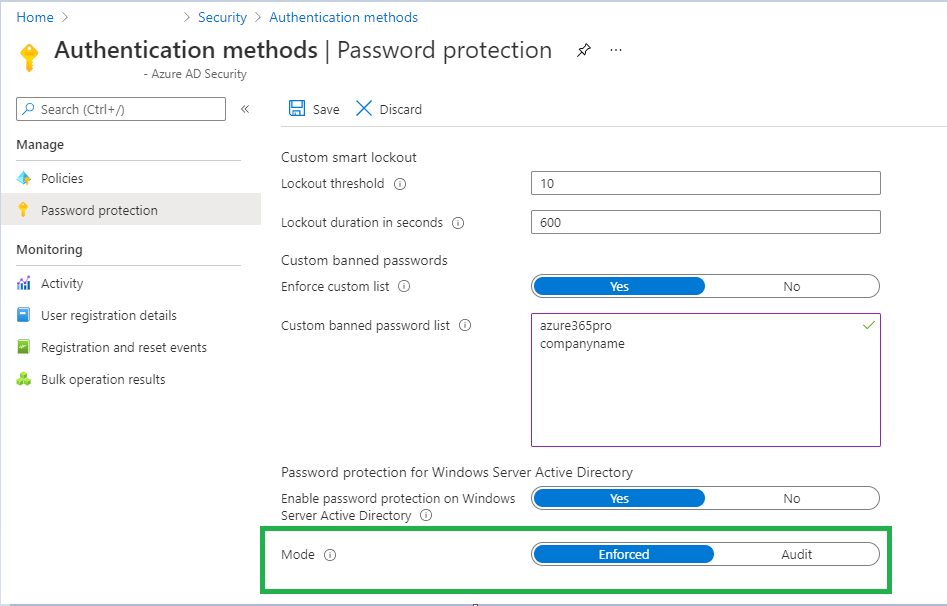
Run as administrator – AzureADPasswordProtectionDCAgentSetup.msi install them on all domain controllers. before installing them on Domain Controllers make sure you are running the password protection on Audit mode. (it’s on Audit mode by default). So that you don’t affect the users.

Now let’s install the AzureADPasswordProtectionDCAgentSetup.msi on all domain controllers. As the password protection mode is on audit mode it’s not going to enforce anything.

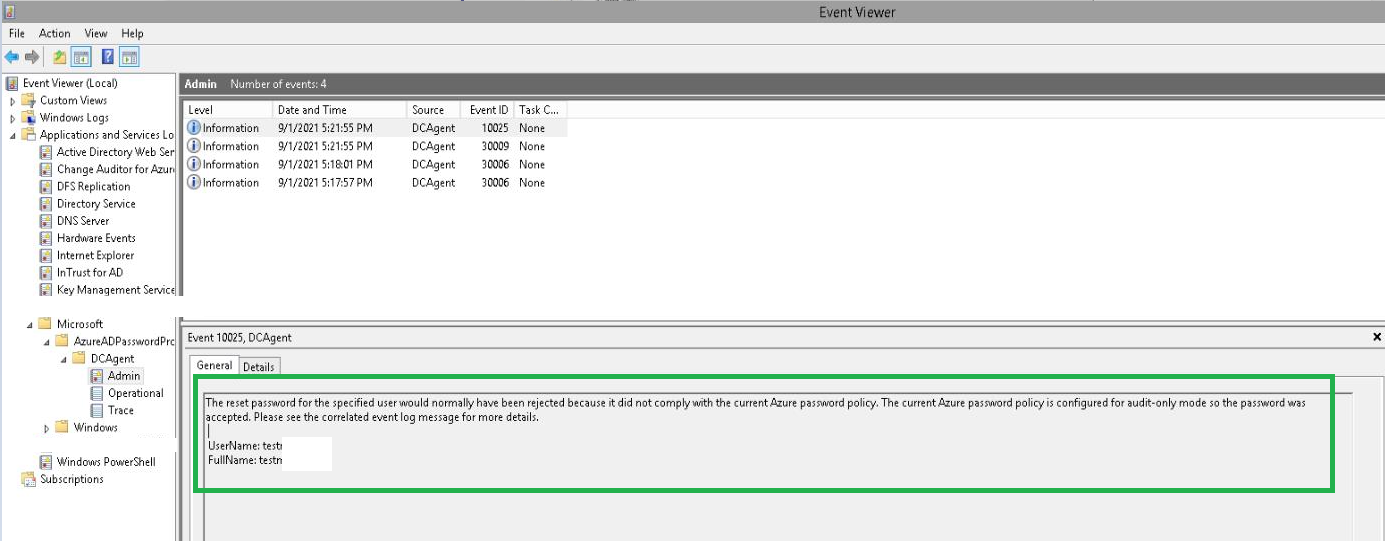
Once you install them they come online with Audit mode.

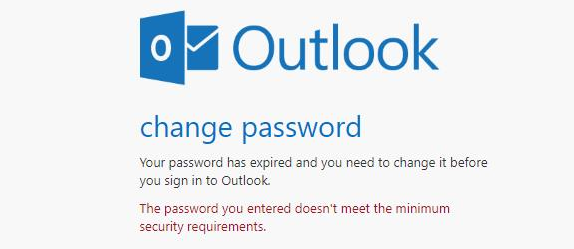
if you try to reset with a simple password “Password@1234” 10025 is generated with Audit only

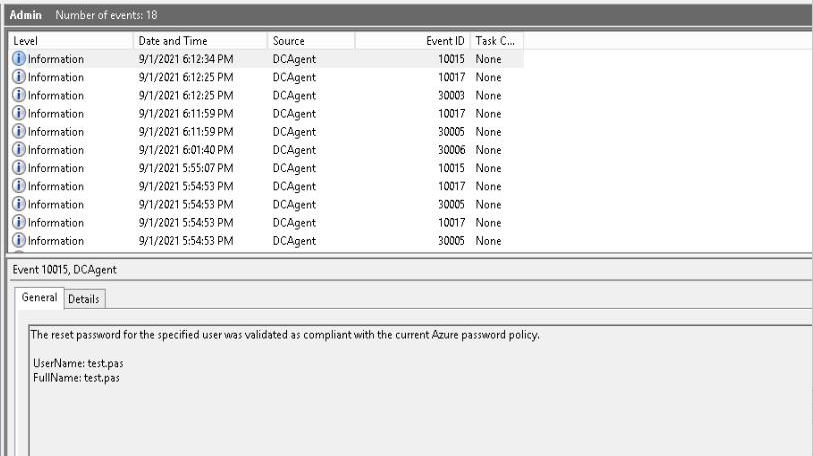
Event Logs location on Domain Controllers – \Applications and Services Logs\Microsoft\AzureADPasswordProtection\DCAgent\Admin

if the password is healthy 10015 is generated.

Once you feel everything is working as expected you can enforce them.

Resetting with a simple password

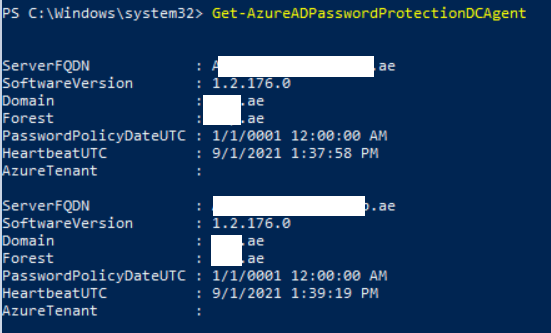
You can list the installed Domain Controller agents using the below command

Get-AzureADPasswordProtectionDCAgent

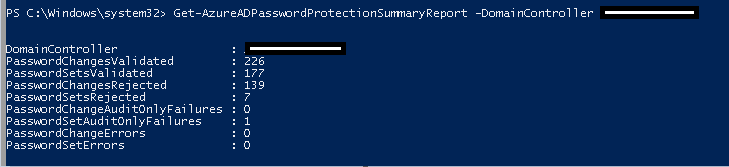
Also, you can get a summary using the below PowerShell which queries the event viewer and gets you collective results.

Get-AzureADPasswordProtectionSummaryReport -DomainController DCName

Once all you users reset the password after this is enabled. you are well protected from Password Spray attacks in your environment

× How can I help you?