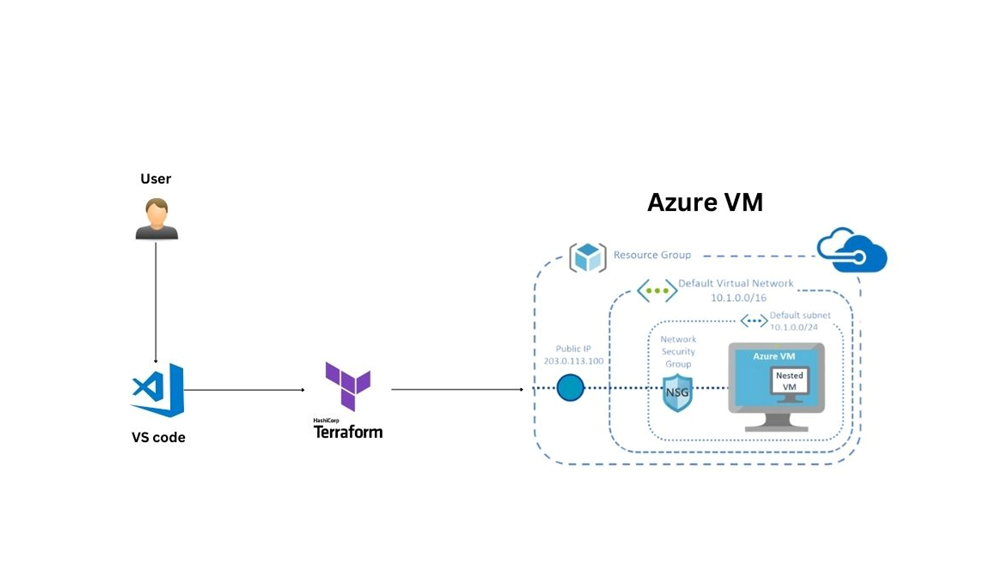
Maester
Maester, within the context of Azure, is a background service used in Microsoft Azure Machine Learning to manage and control compute resources effectively. Its main role is to ensure that compute instances, clusters, and jobs are monitored, and it handles the orchestration and scheduling of compute resources across various Azure Machine Learning workloads.
Set up Maester in Azure DevOps
Azure DevOps is a great way to automate the daily running of Maester tests to monitor your tenant. You can use Azure DevOps to run Maester tests on a schedule, such as daily, and view the results in the Azure DevOps interface.
- Azure DevOps comes with a free tier that includes 1,800 minutes of Maester test runs per month (unlimited hours if you use a self-hosted agent).
- Azure DevOps has native integration with Microsoft Entra including single sign on, user and group management as well as support for conditional access policies.
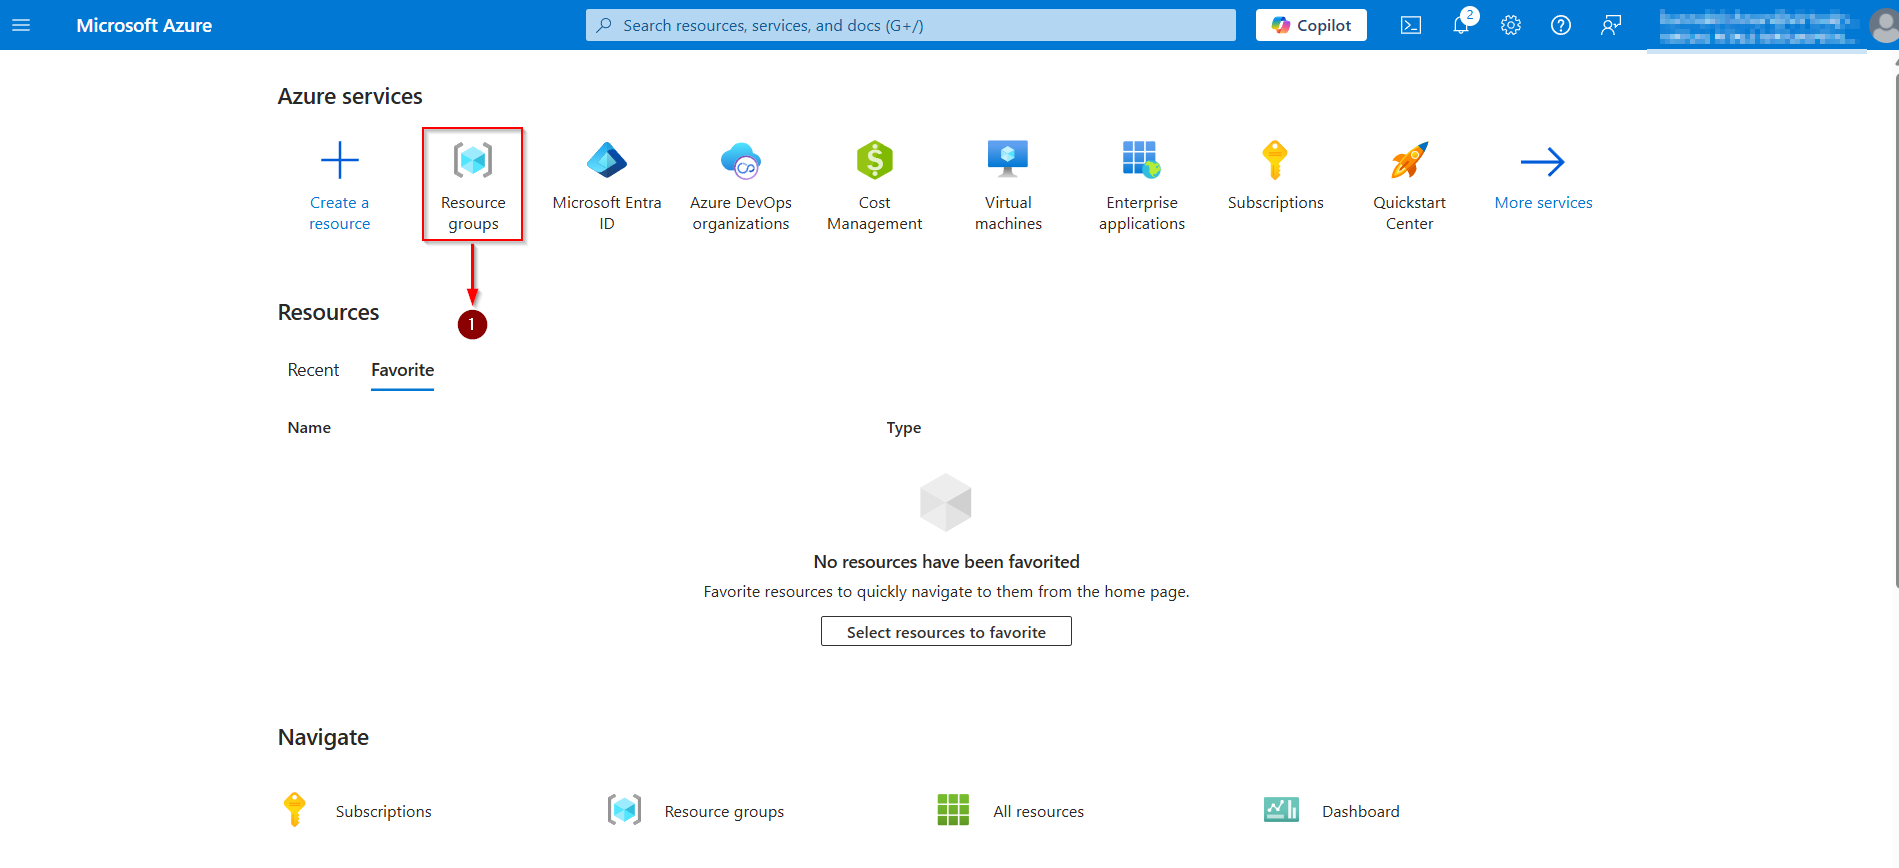
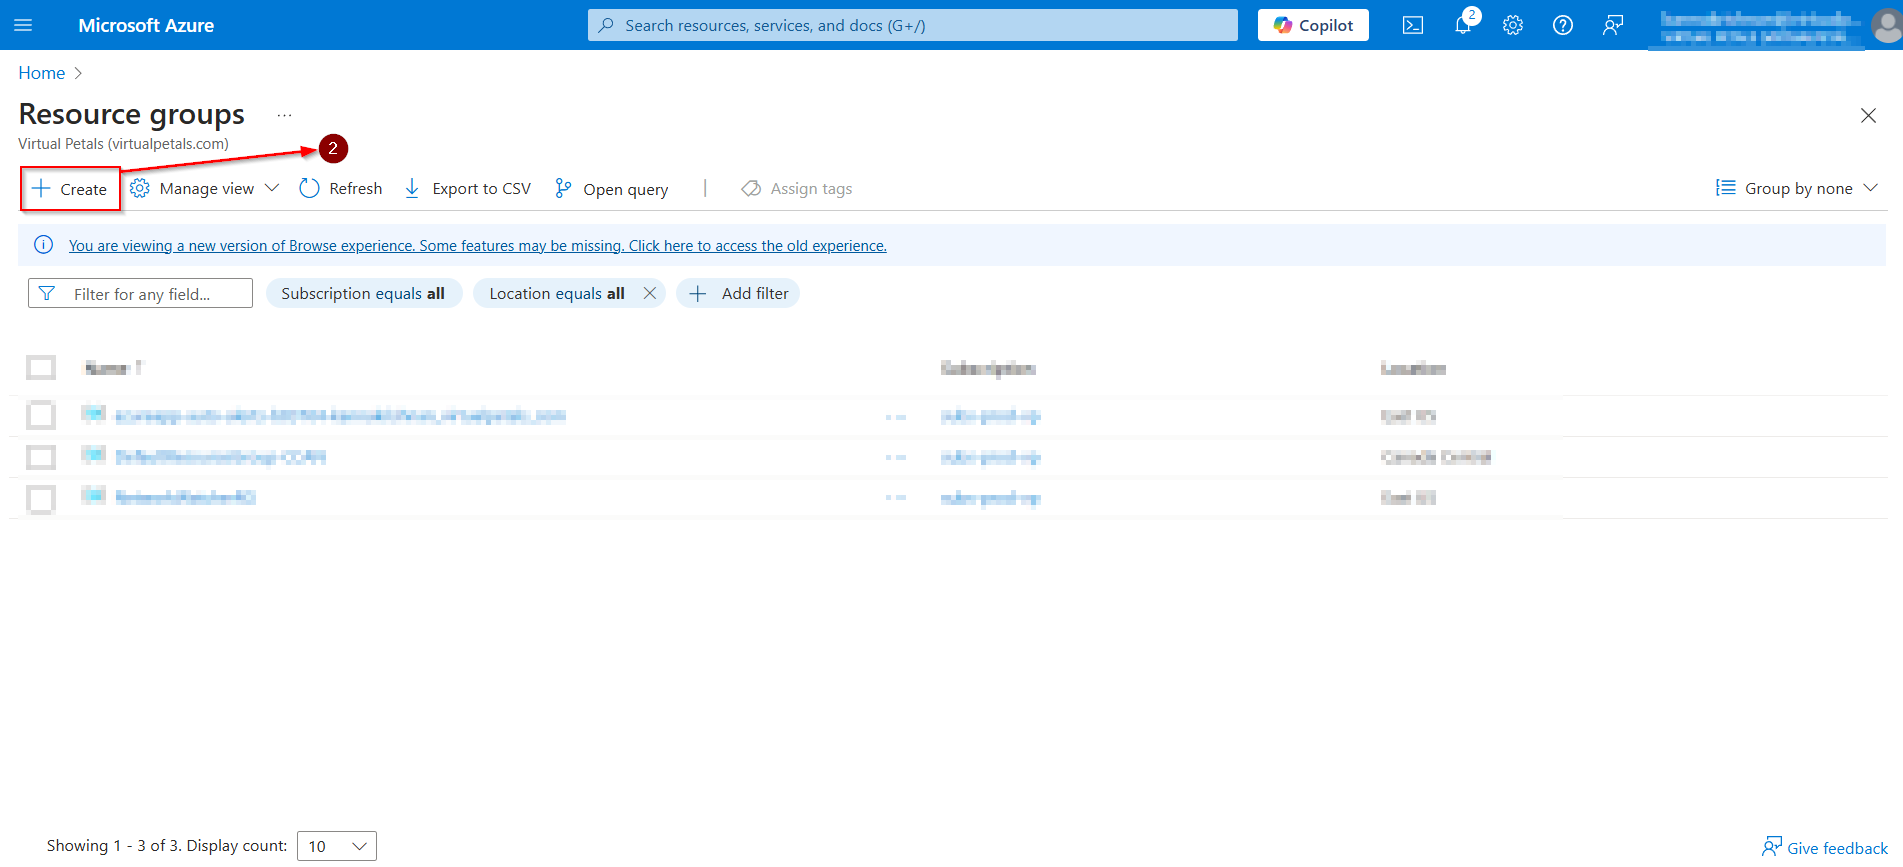
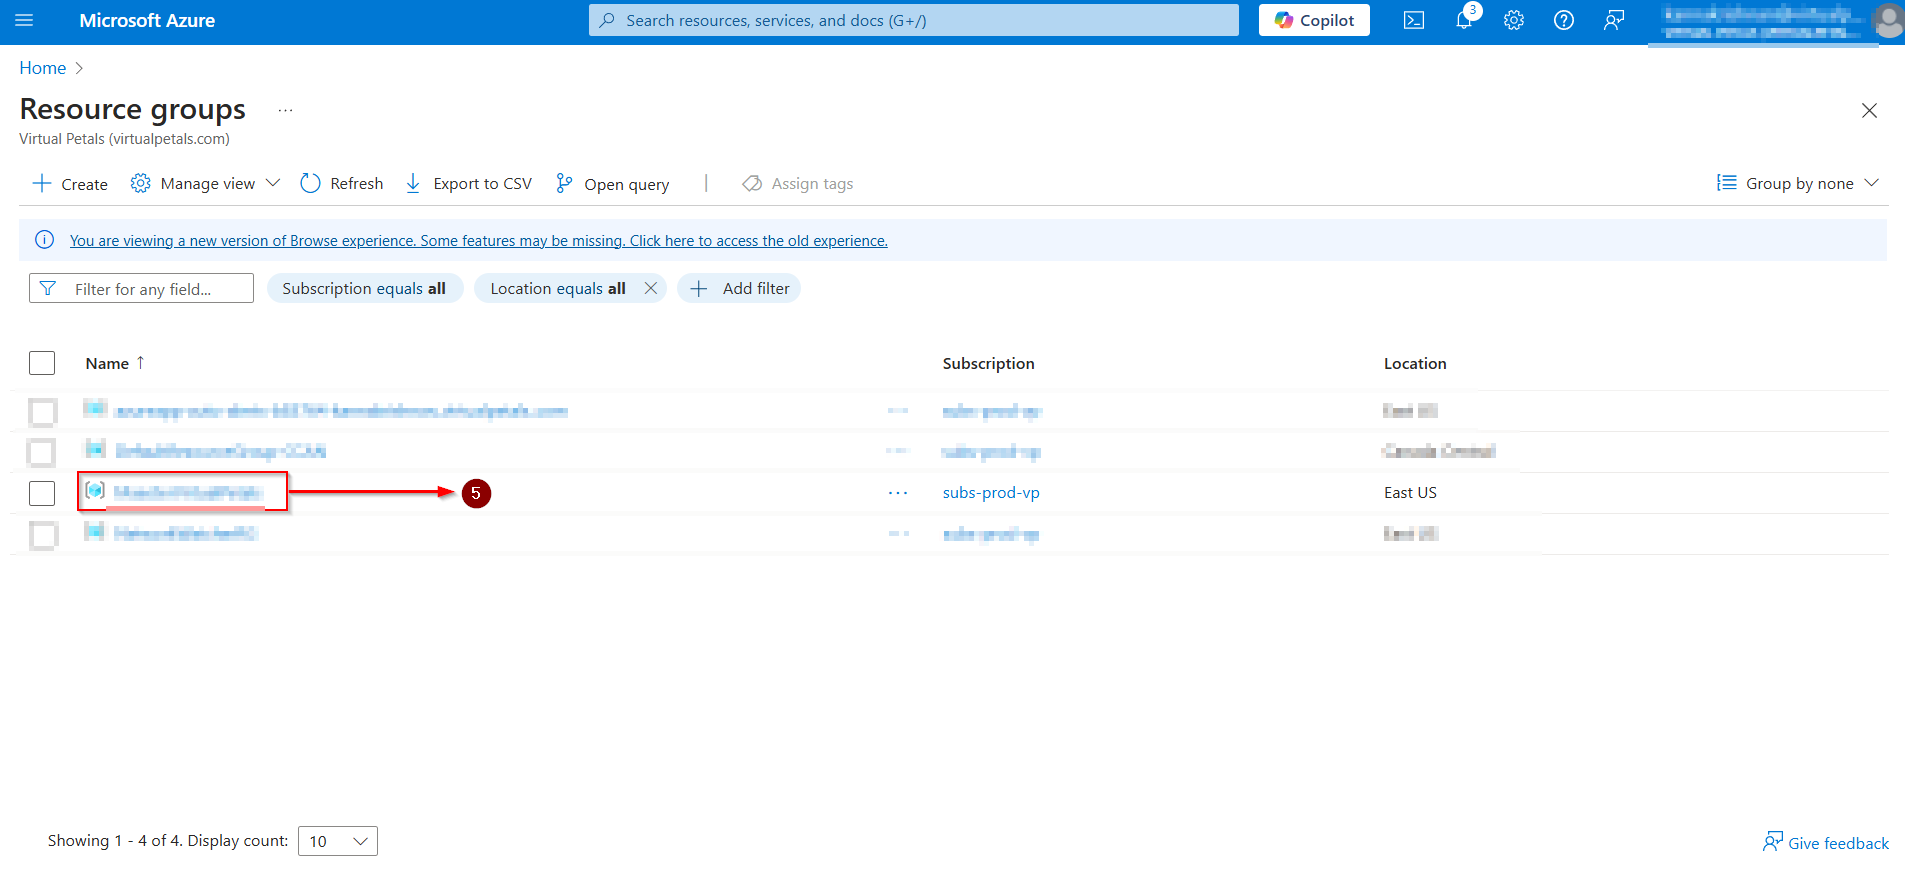
STEP-1: CREATE A RESOURCE GROUP
- Browse to the Azure portal and open the Resource group.
- Enter a name for the resource group (e.g. Maester-Resource-Group).
- Select any region.
- Select Review + create > Create.
- Resource group create successfully.
Browse to the Azure portal and open the Resource group.
Enter a name for the resource group (e.g. Maester-Resource-Group).
Select Region.
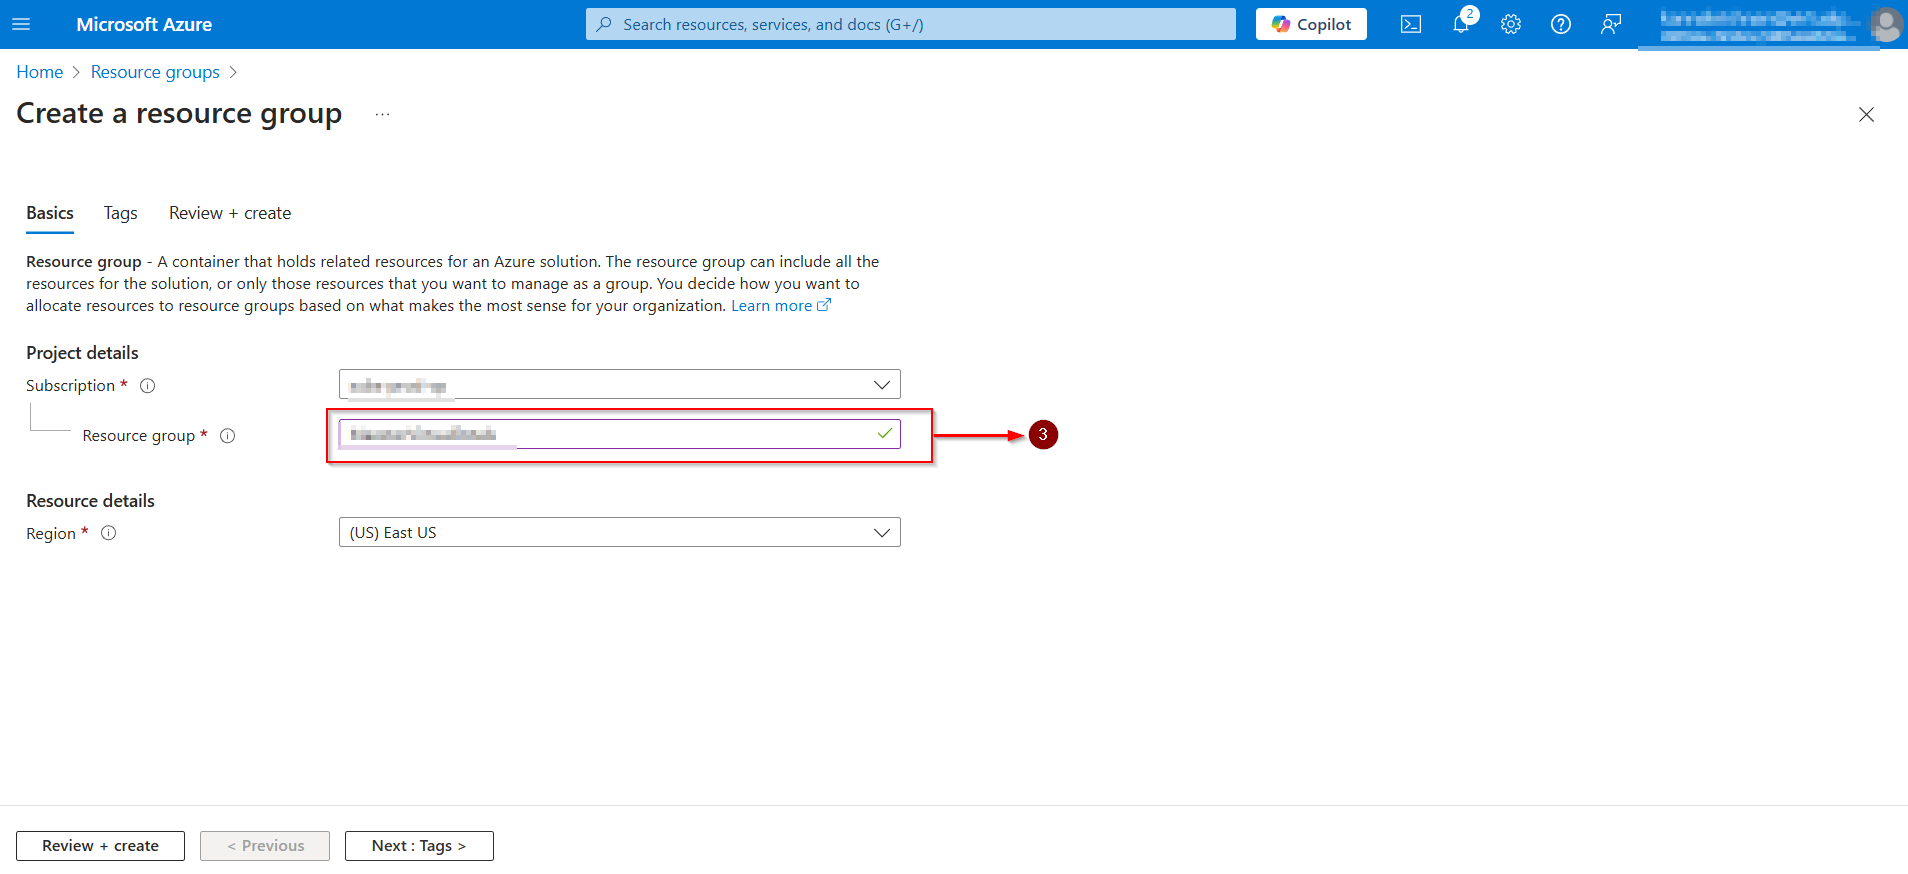
Select Review + Create > Create.
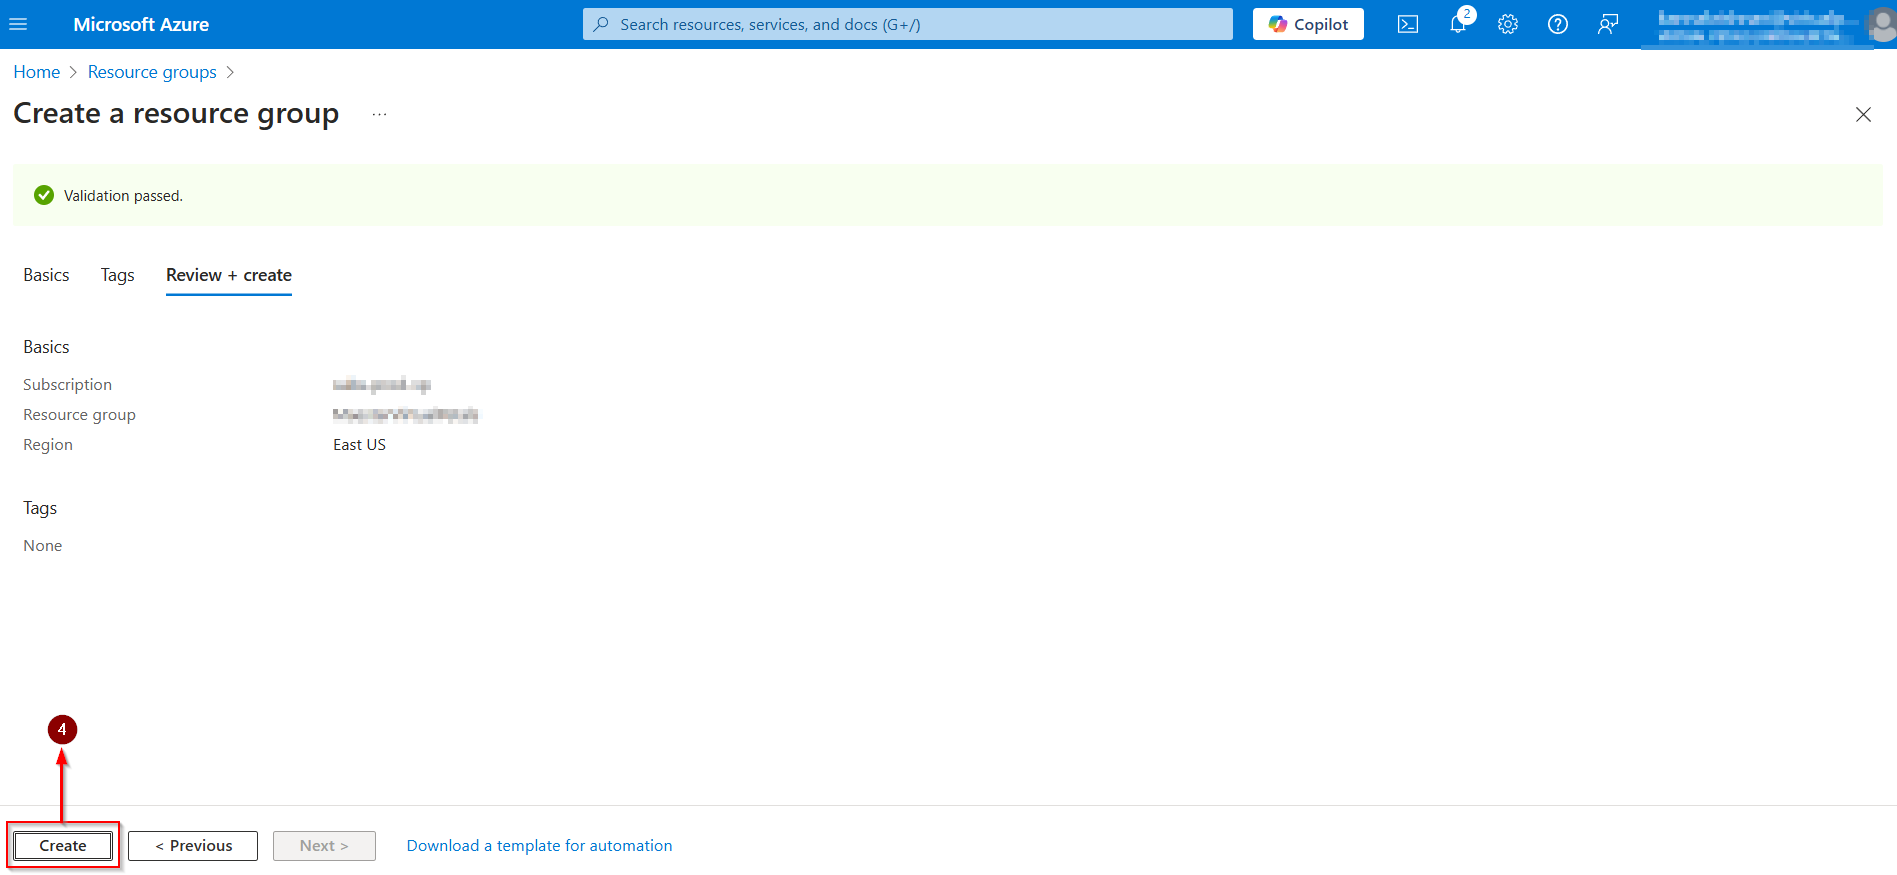
Resource group create successfully.
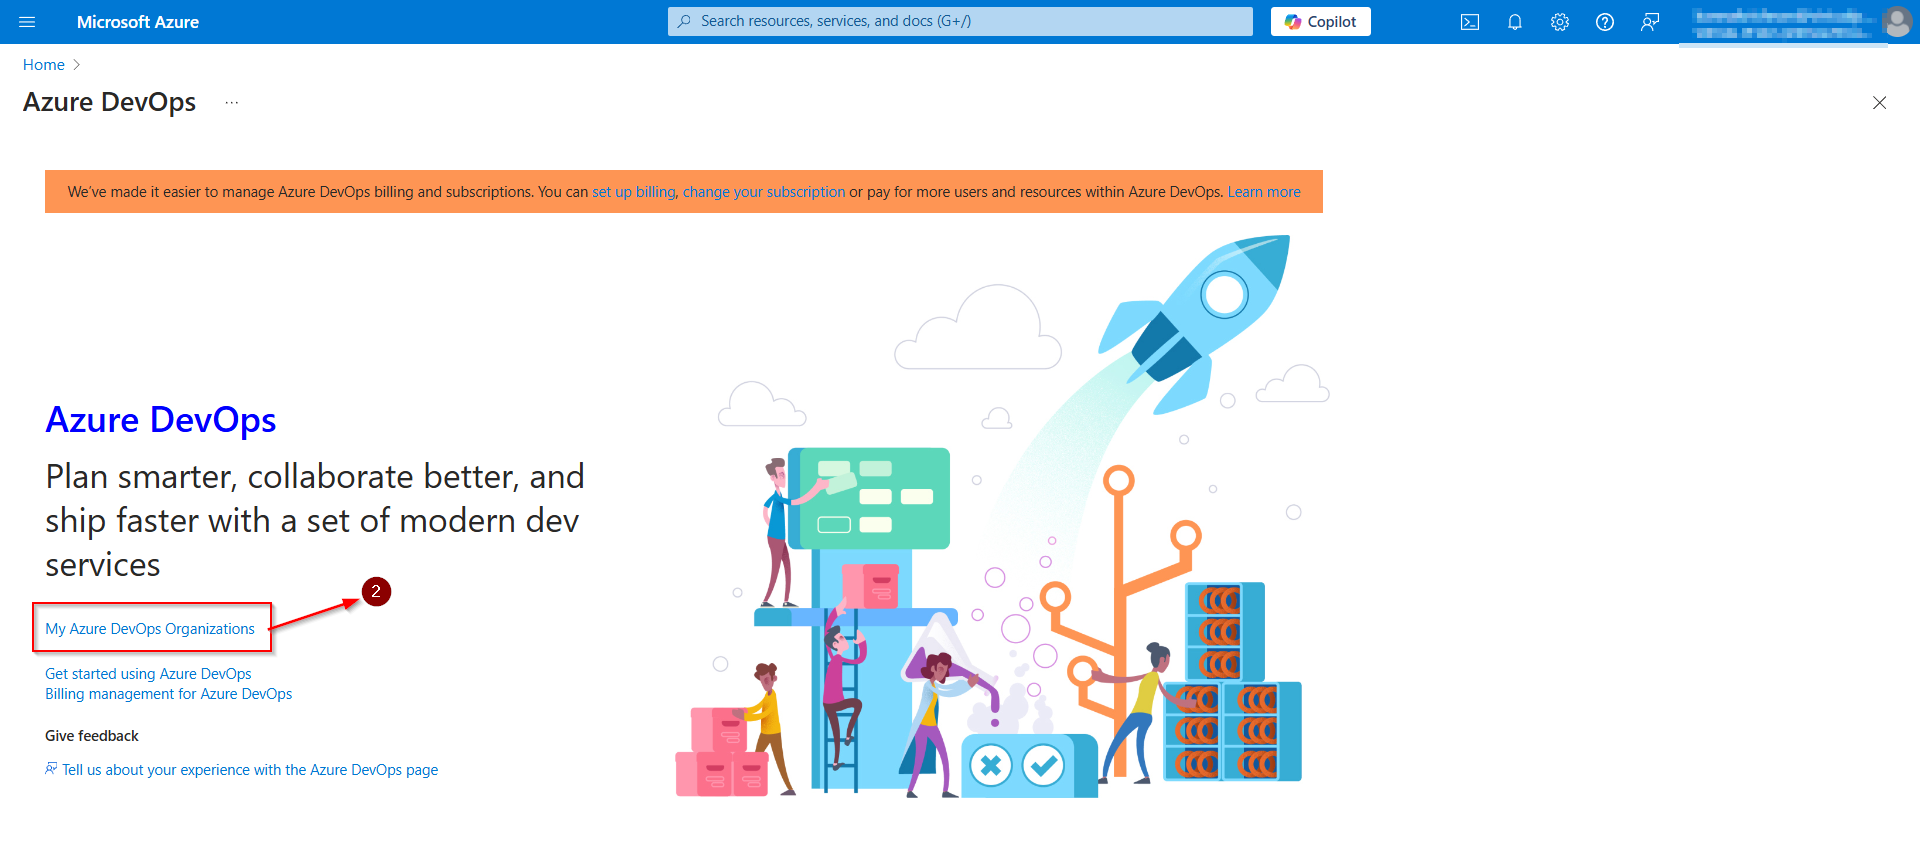
STEP-2: CREATE A ORGANIZATION IN AZURE DEVOPS
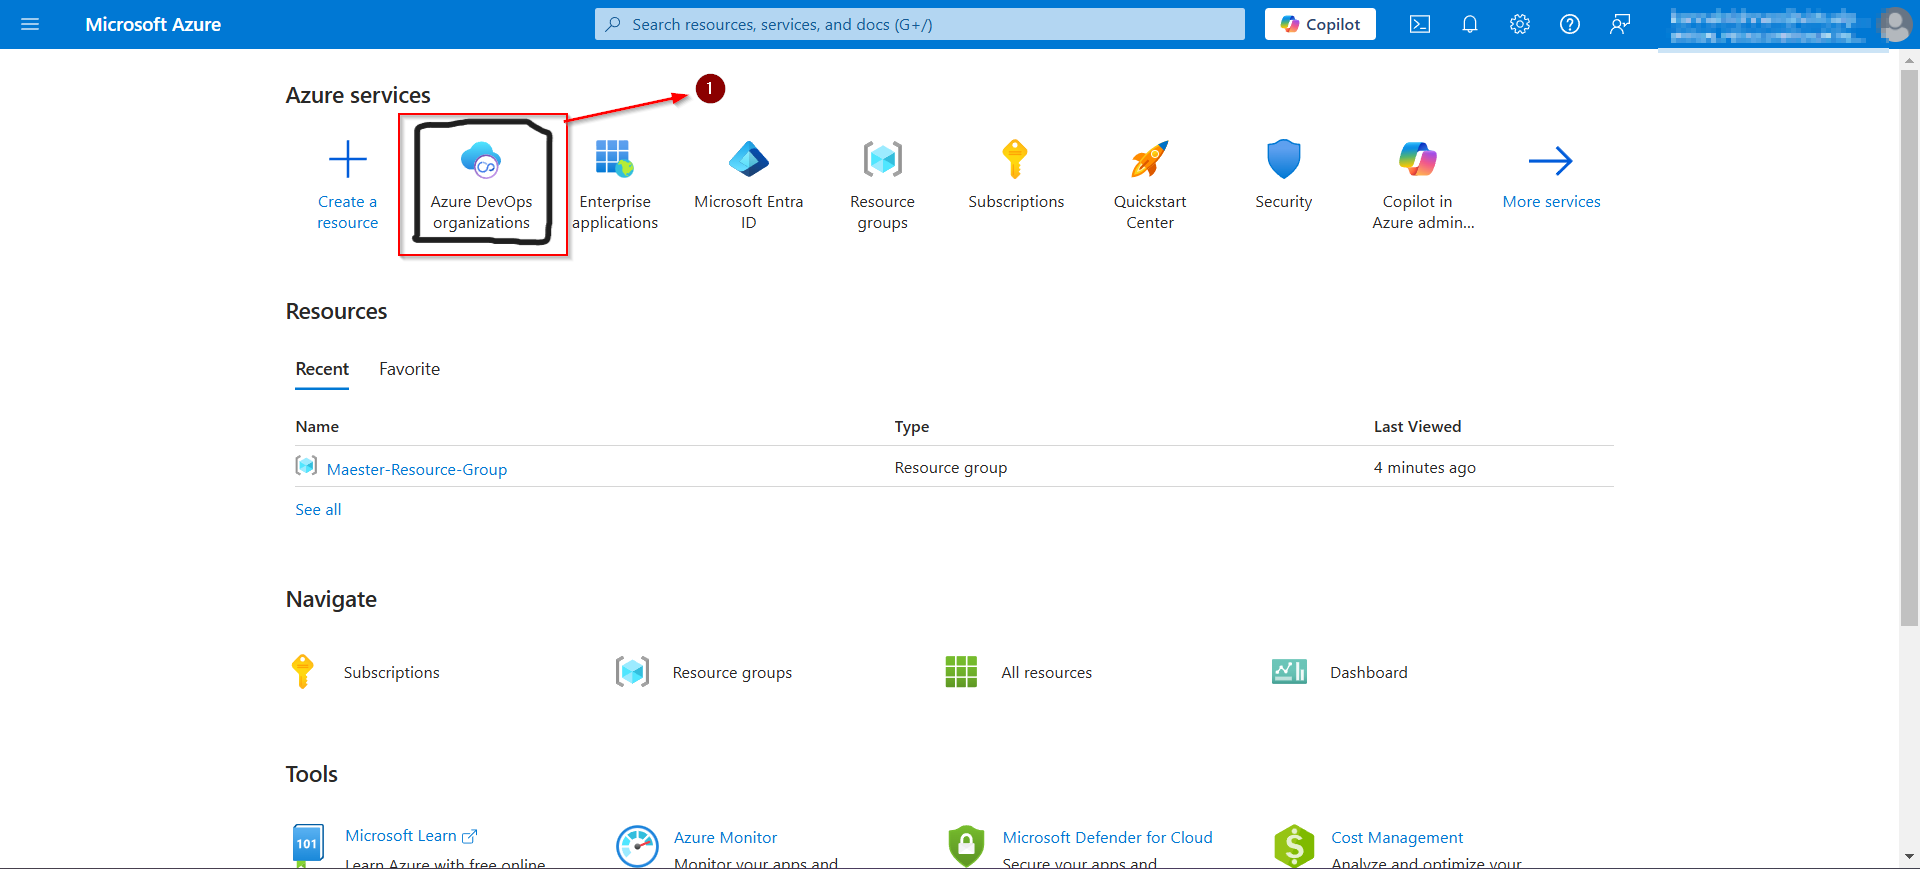
- In azure portal, Search Azure DevOps organization.
- Sign in to Azure DevOps.
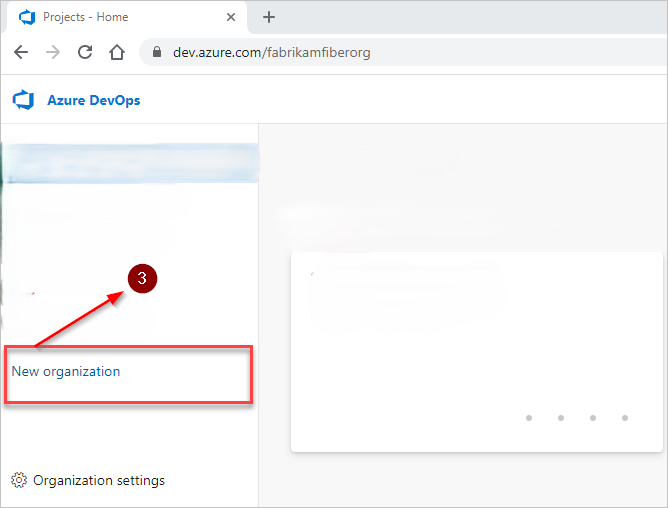
- Select New organization.
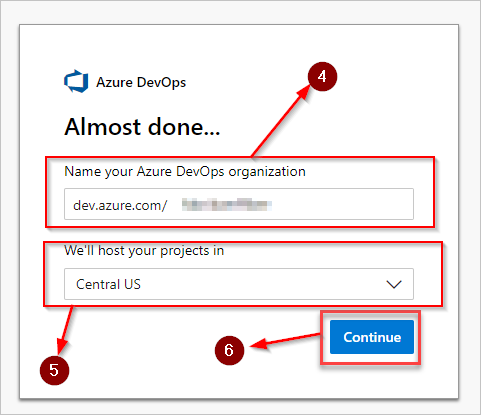
- Enter the name for your organization, select its hosting geography, and then select Continue.
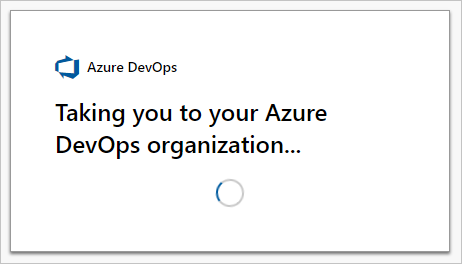
- Create organization successfully.
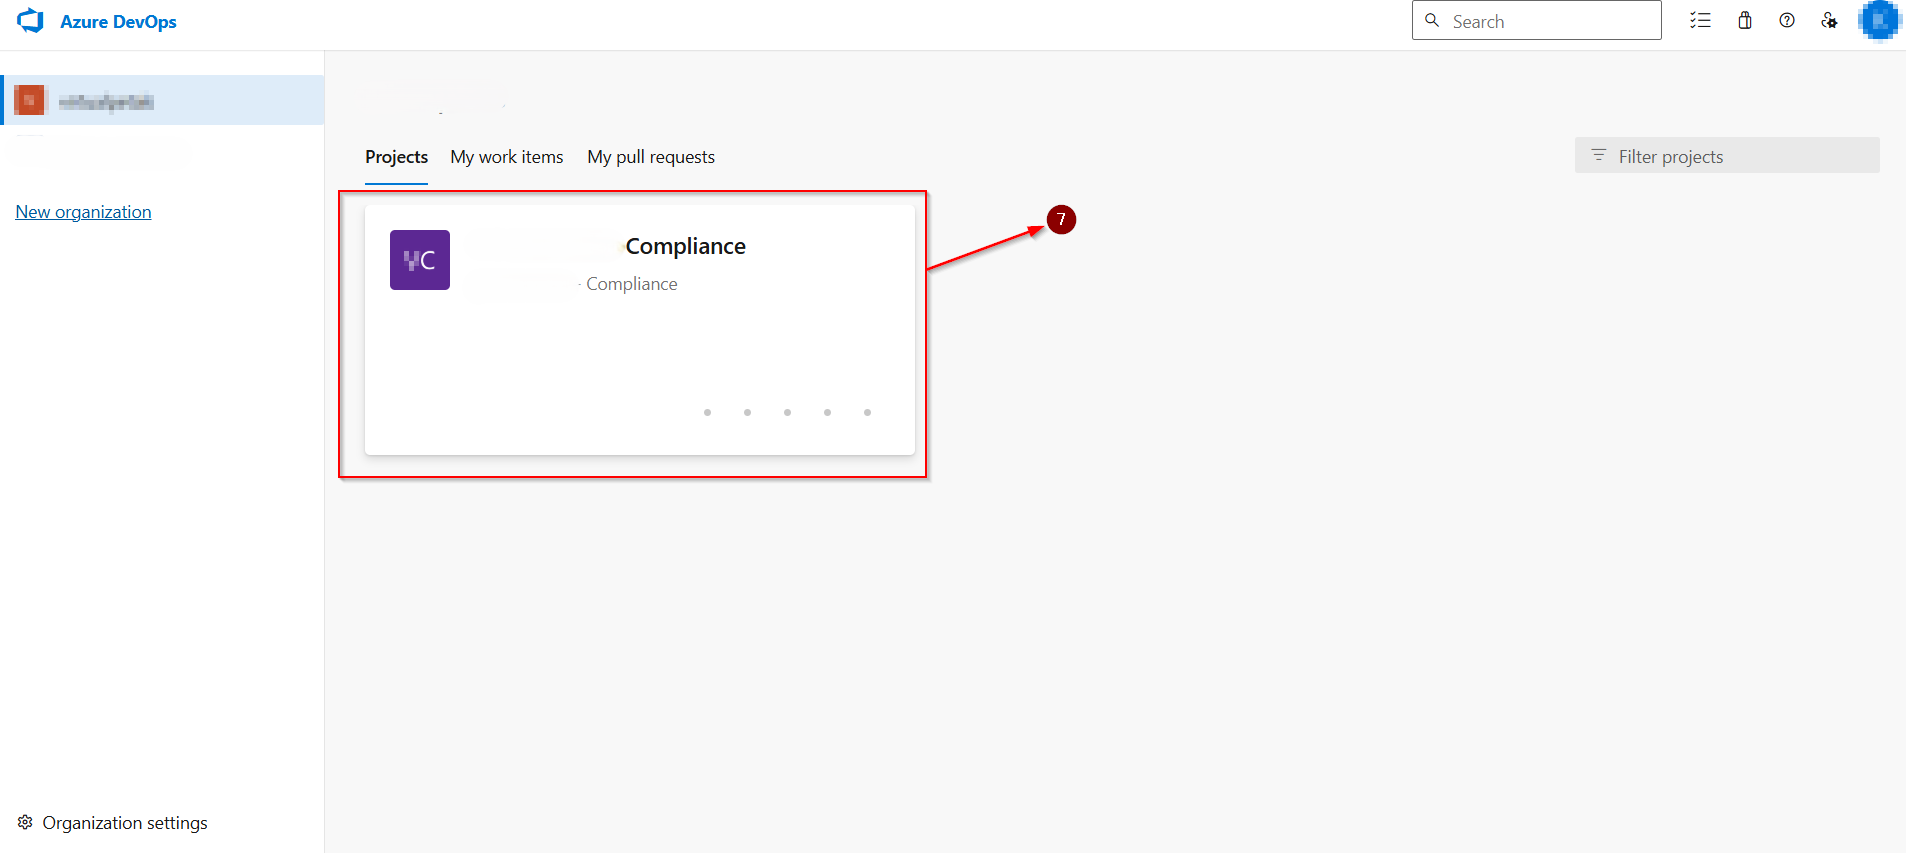
- Sign in to your organization at any time, https://dev.azure.com/{yourorganization}.
In azure portal, Search Azure DevOps organization.
Sign in to Azure DevOps.
Select New organization.
Enter the name for your organization, select its hosting geography, and then select Continue.
Create organization successfully.
Sign in to your organization at any time, https://dev.azure.com/{yourorganization}.
STEP-3: CREATE A PROJECT ON AZURE DEVOPS
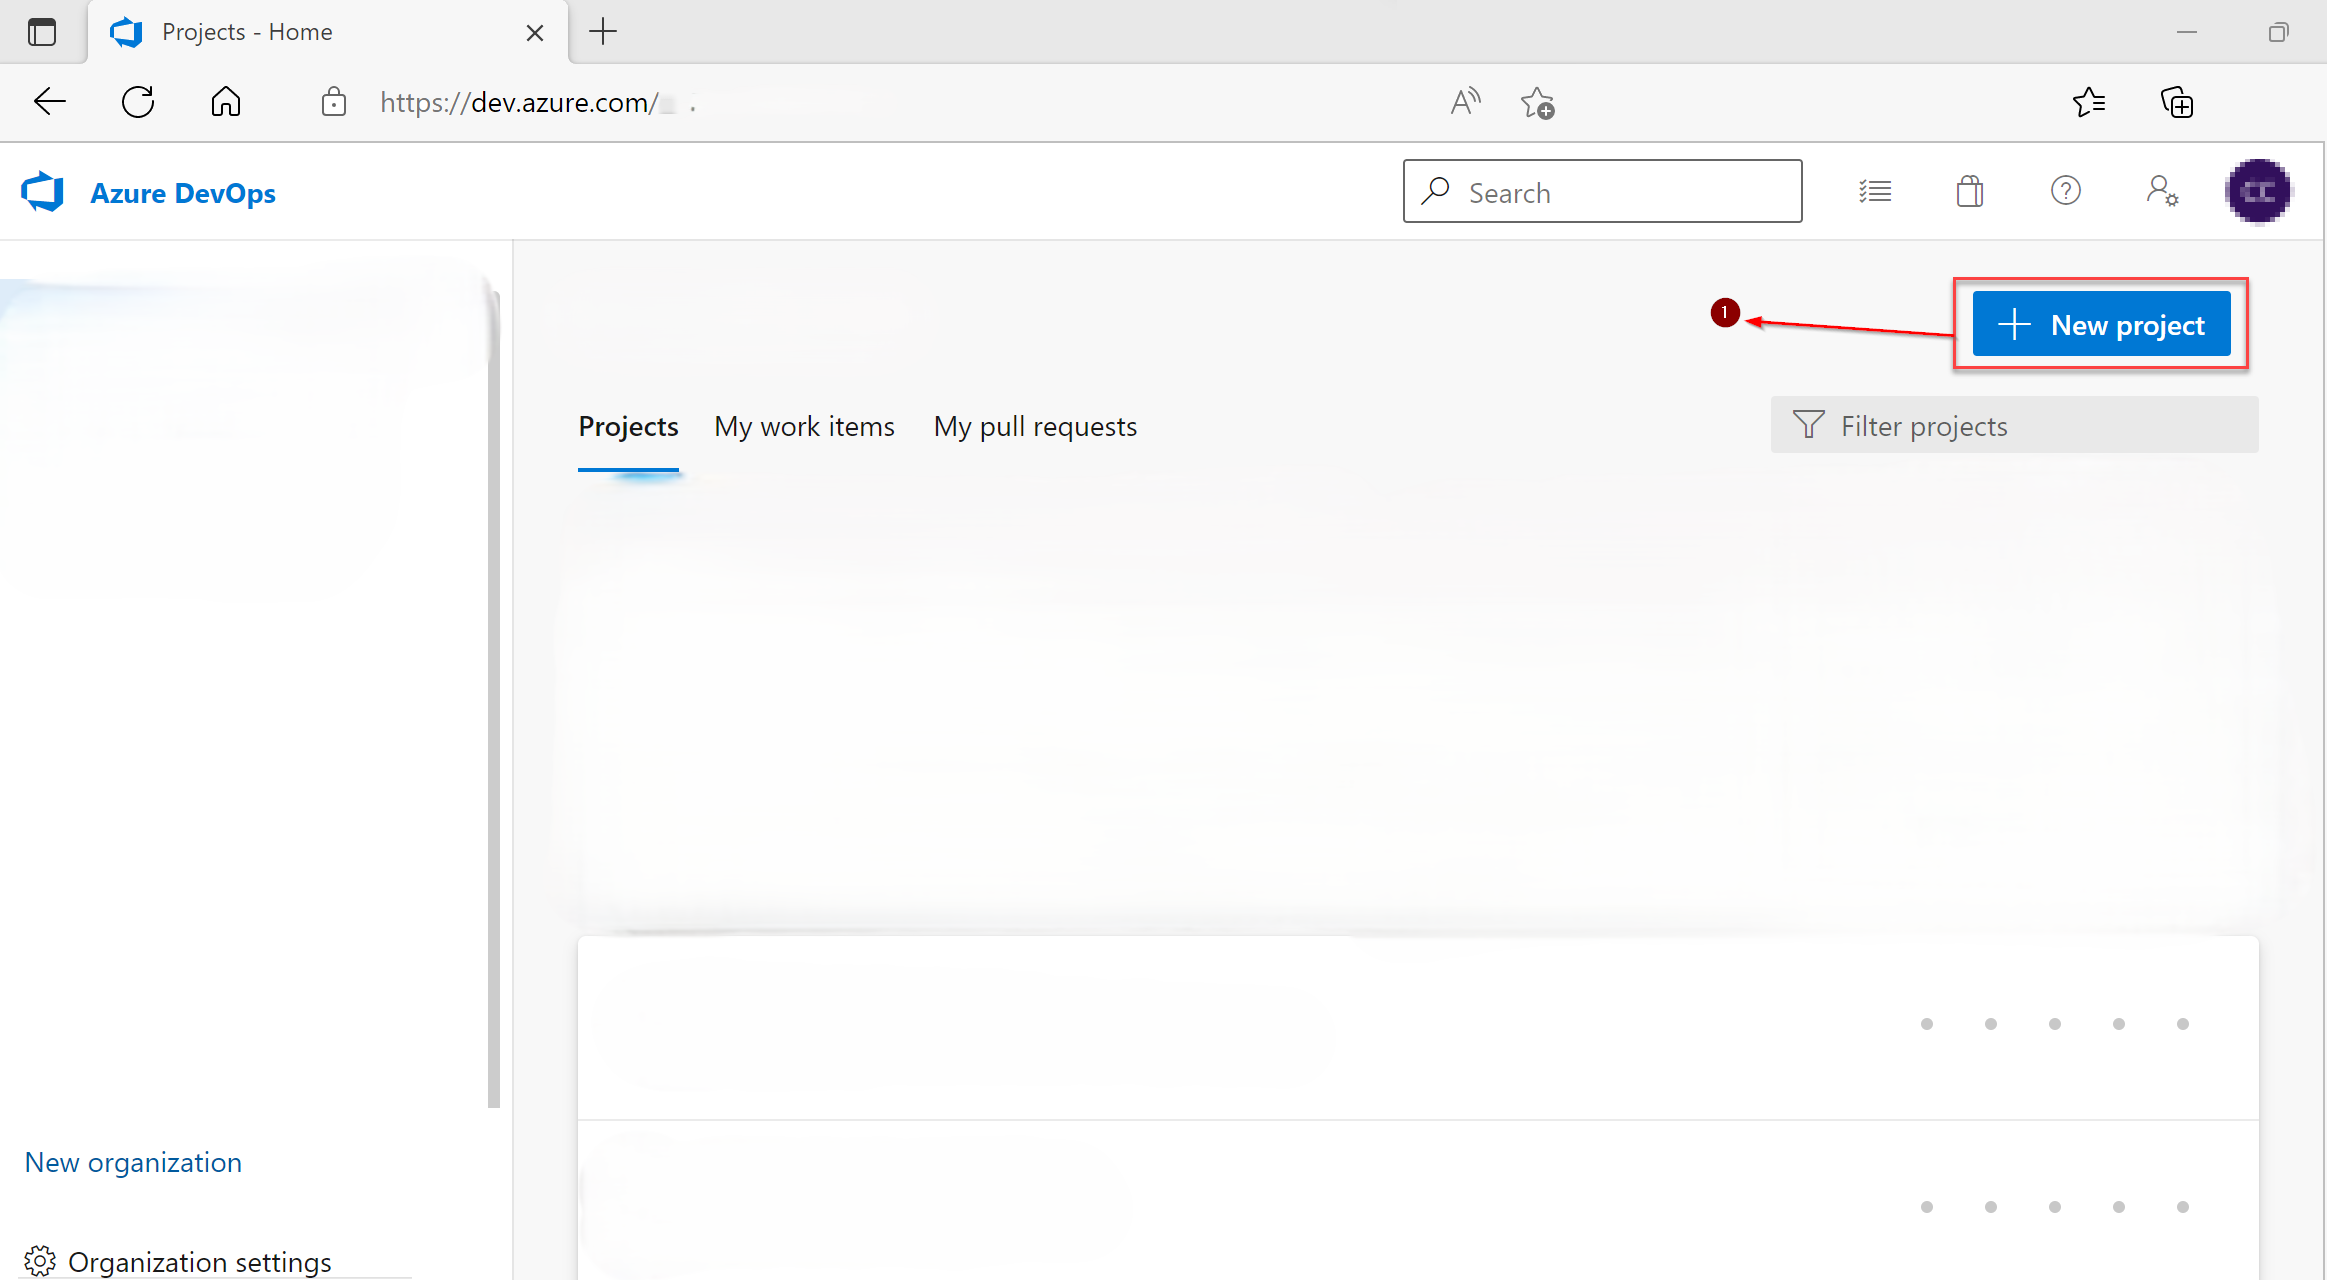
- Sign in to your organization (https://dev.azure.com/{Your_Organization})
- Select New project.
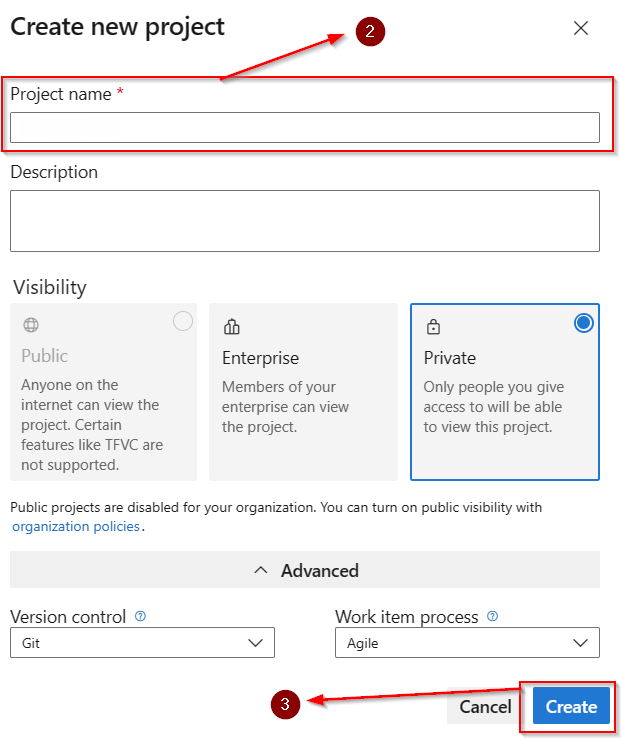
- Enter information into the form provided & Select create.
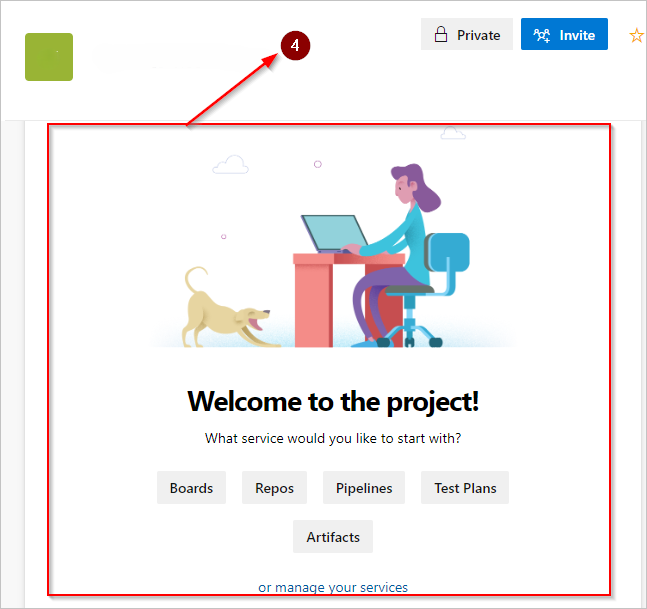
- Azure DevOps displays the project welcome page.
Sign in to your organization (https://dev.azure.com/{Your_Organization})
Select New project. Enter information into the form provided & Select create.
Azure DevOps displays the project welcome page.
STEP-4: IMPORT THE MAESTER TESTS REPOSITORY
- Click The Created Project
- Select Repos from the left-hand menu.
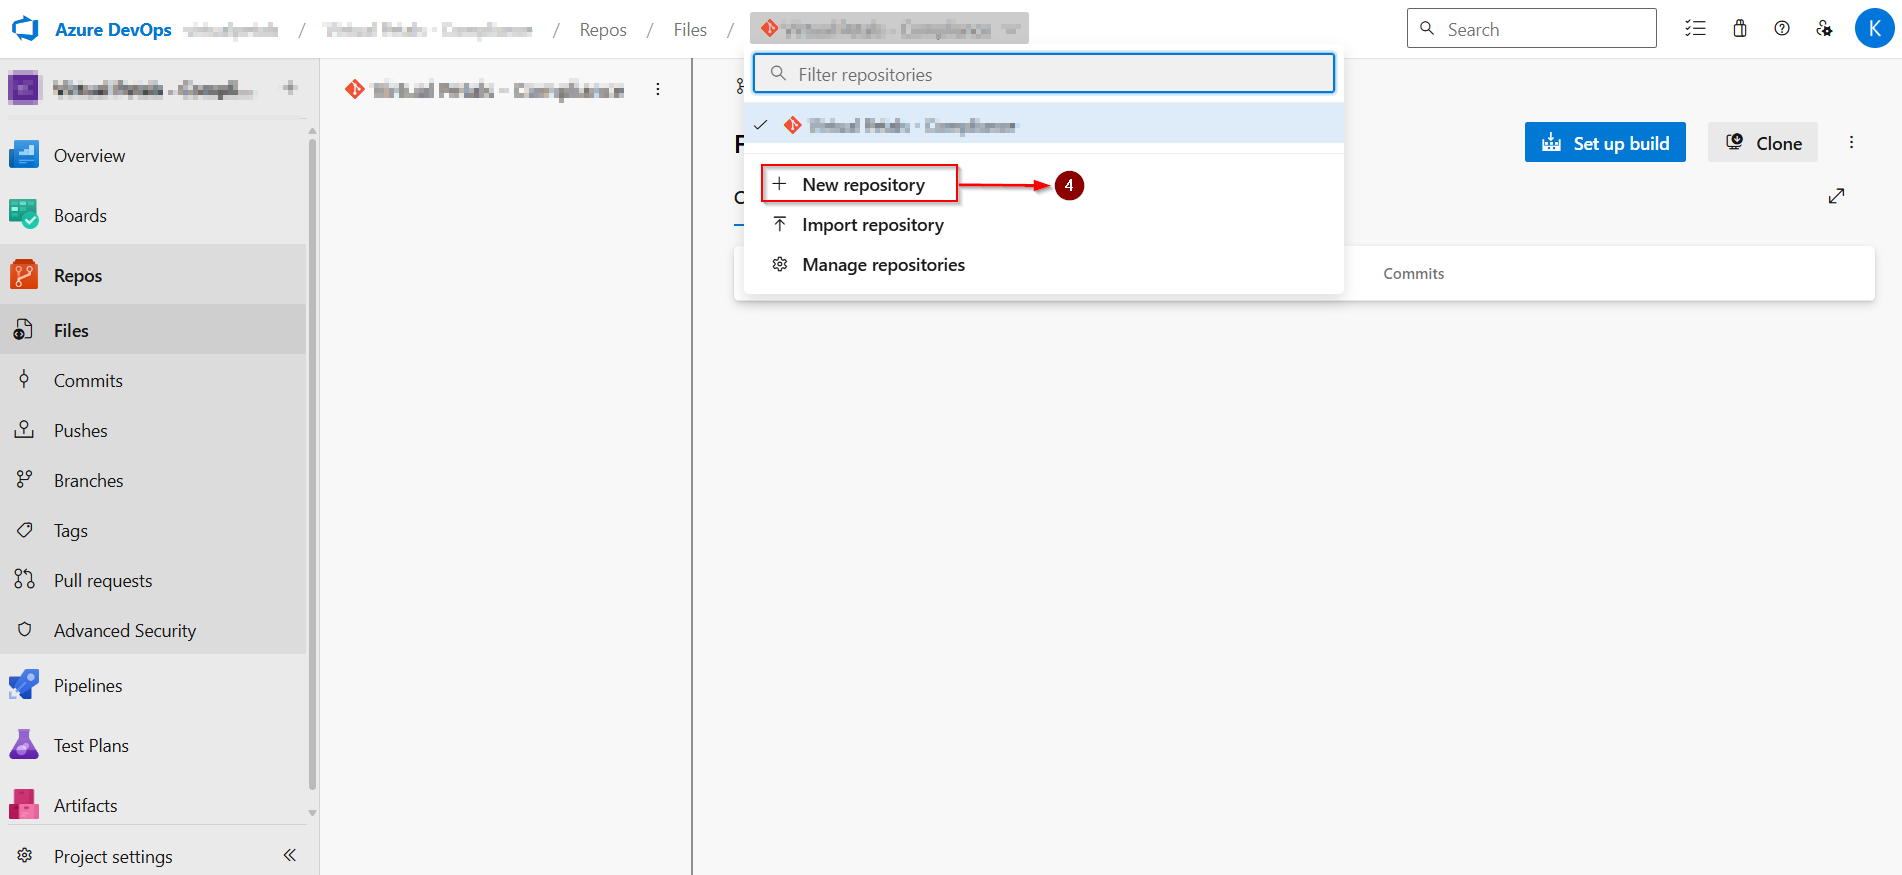
- Select the Import button in the Import a repository section.
- Enter the URL of the Maester repository.
- Select Import to import the repository into your Azure DevOps project.
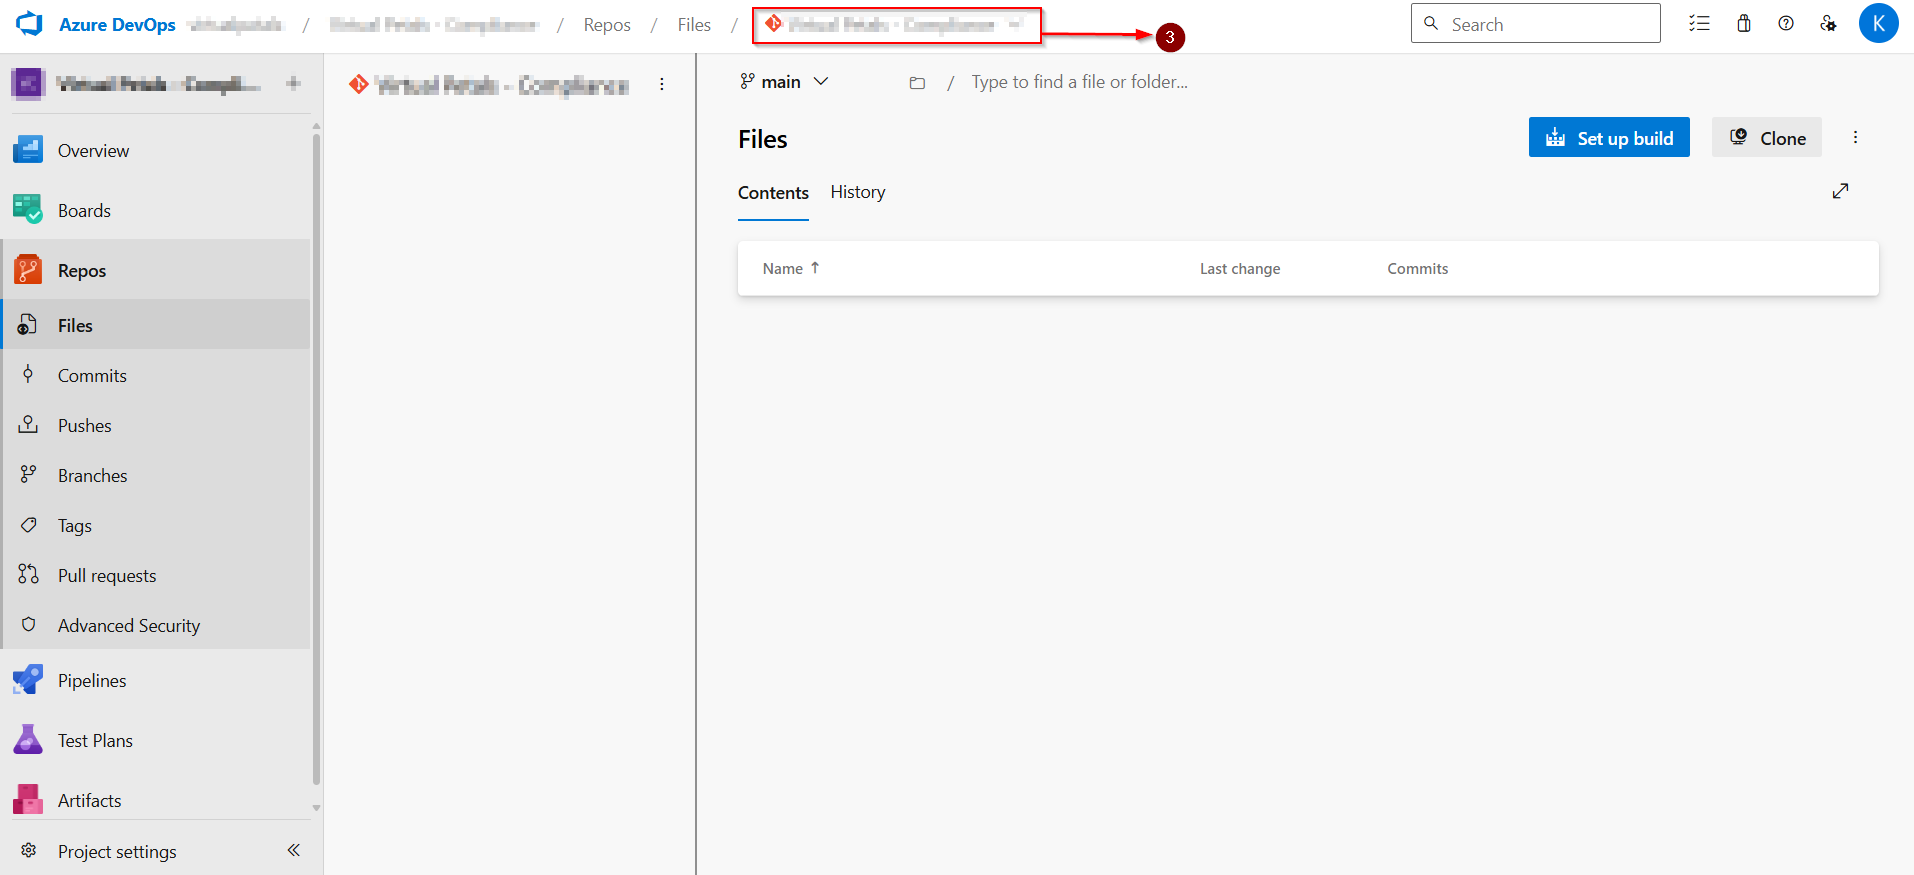
Click The Created Project

Select Repos from the left-hand menu.

Select The Project Name.
Select the Import button in the Import a repository section
Enter the URL of the Maester repository https://github.com/maester365/maester-tests
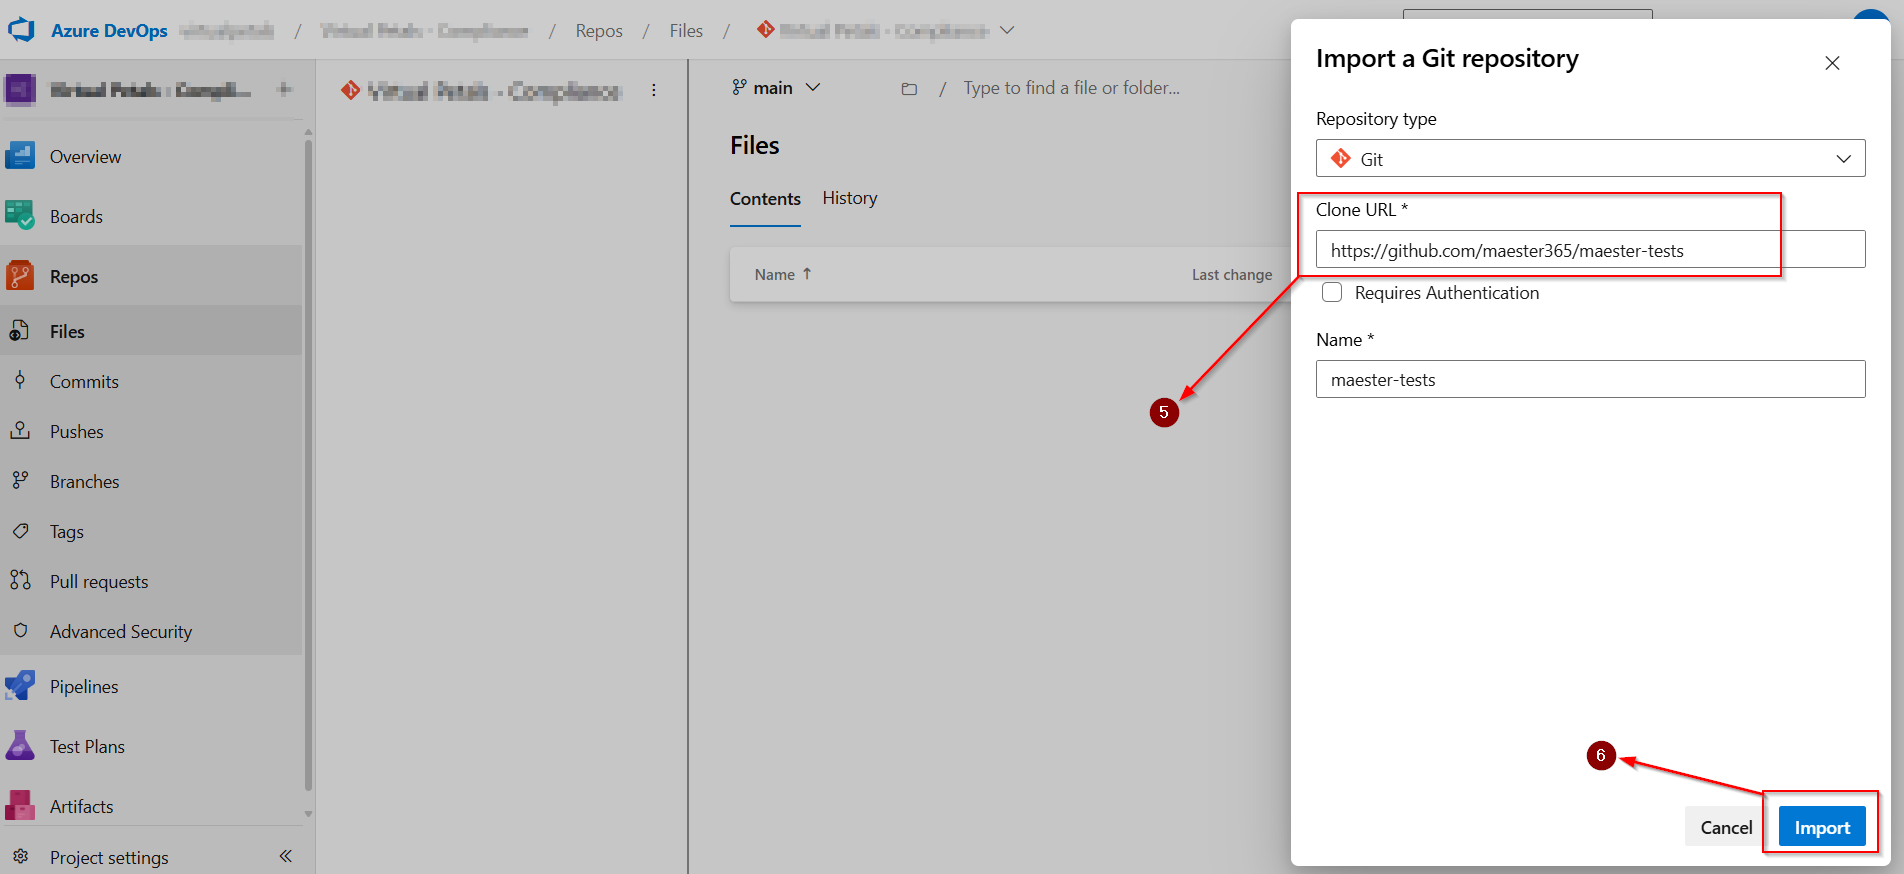
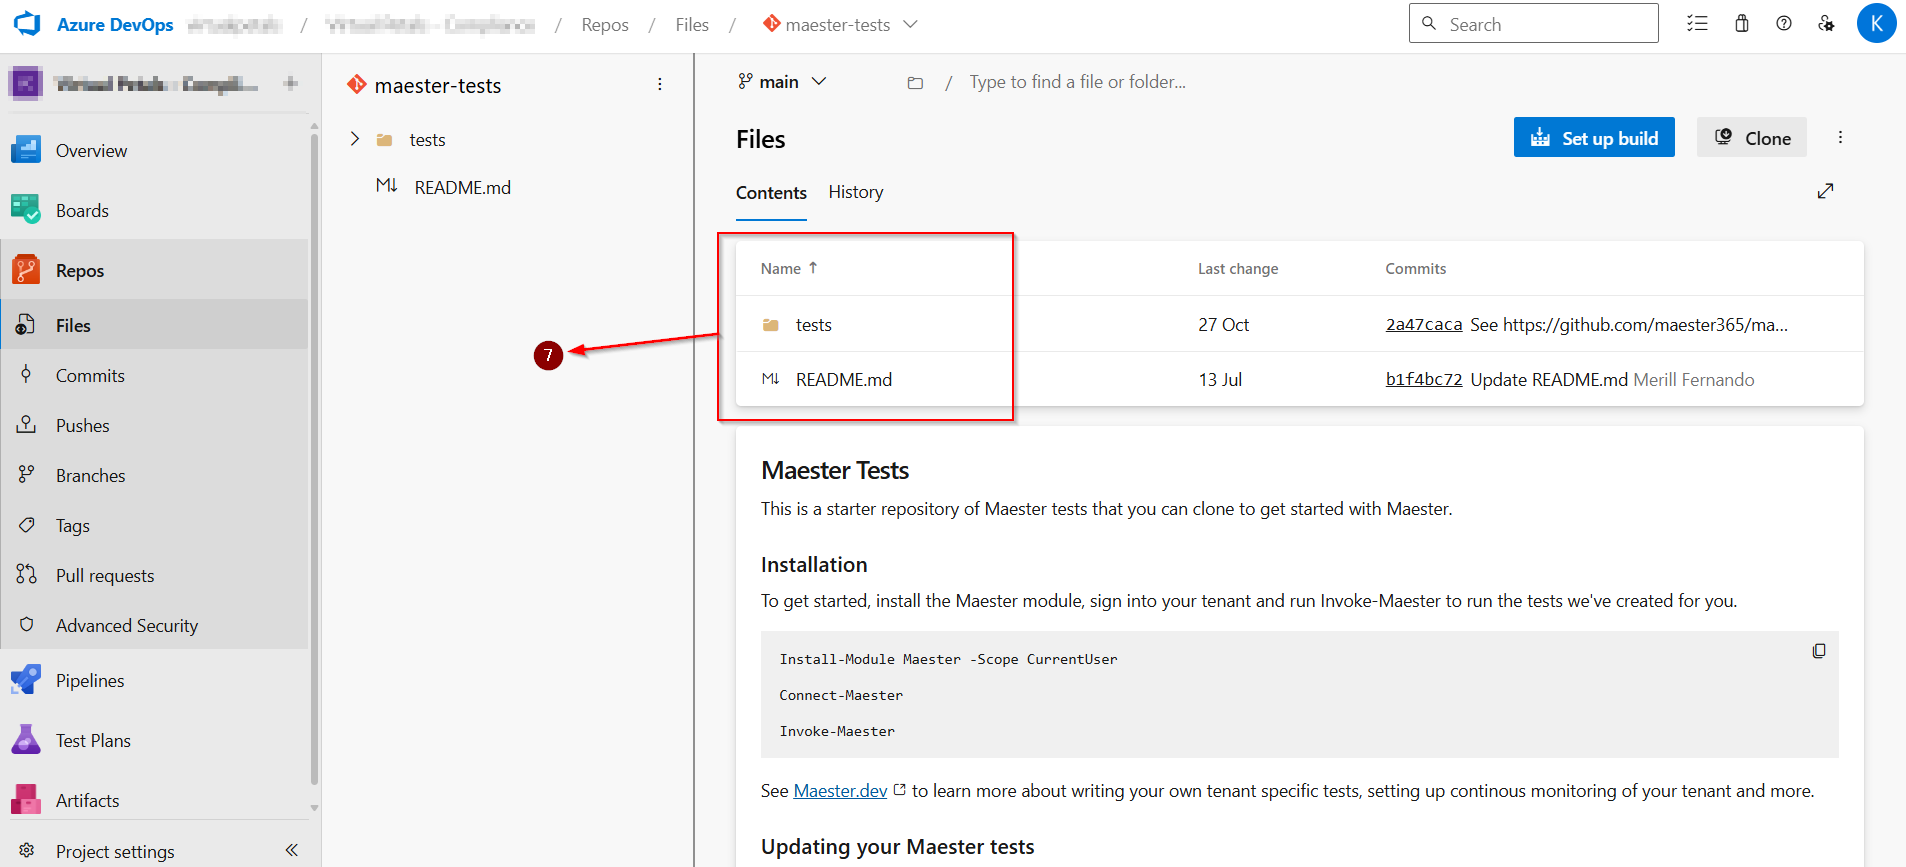
Select Import to import the repository into your Azure DevOps project.
Set up the Azure Pipeline
STEP-5: CREATE AN ENTRA APPLICATION
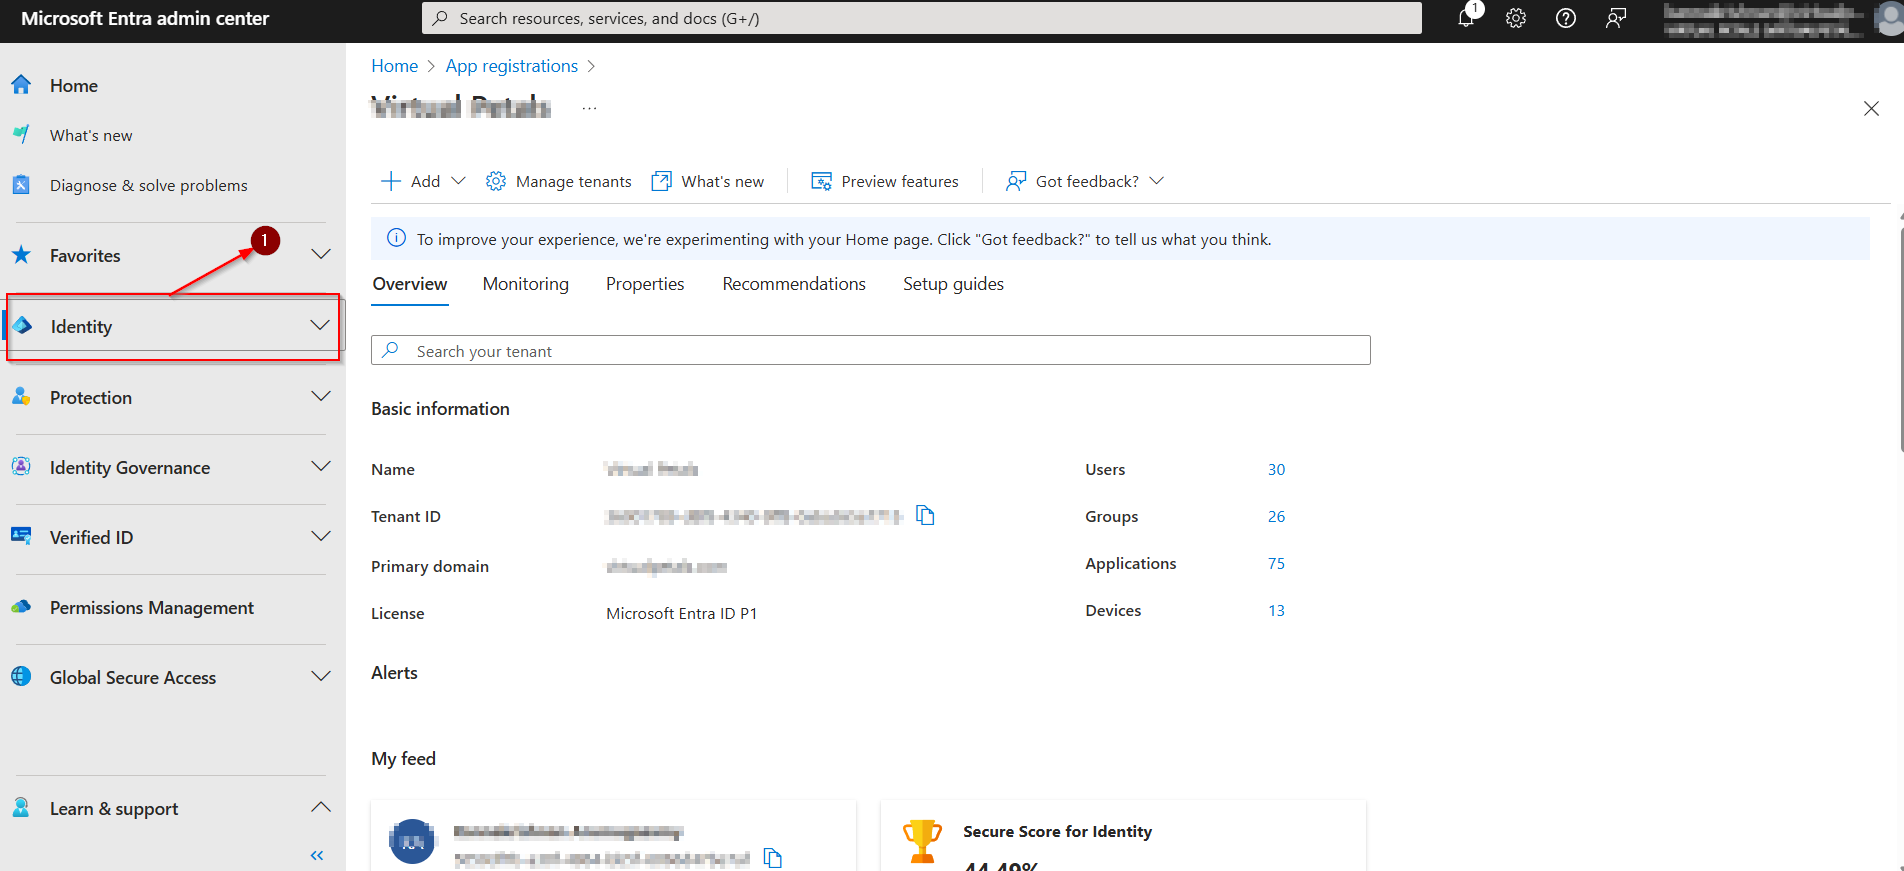
- Open Microsoft entra admin center.
- Select Identity from the left-hand menu.
- In Identity section, Select Applications > App registration.
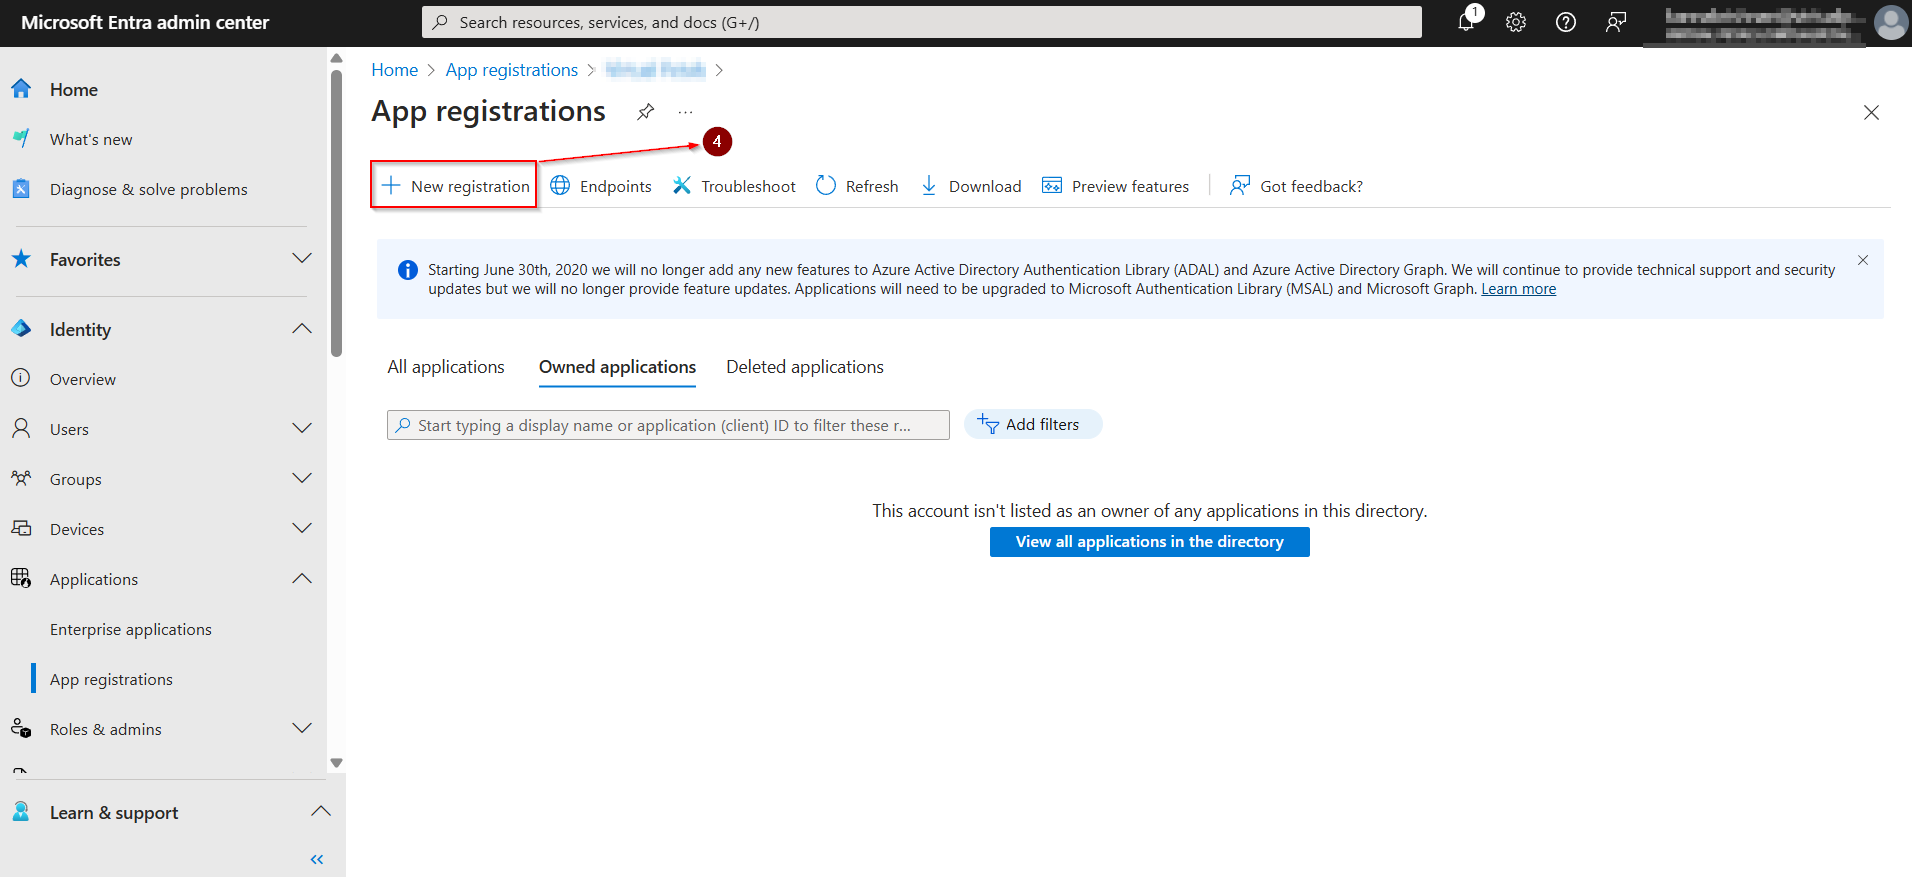
- Select New registration.
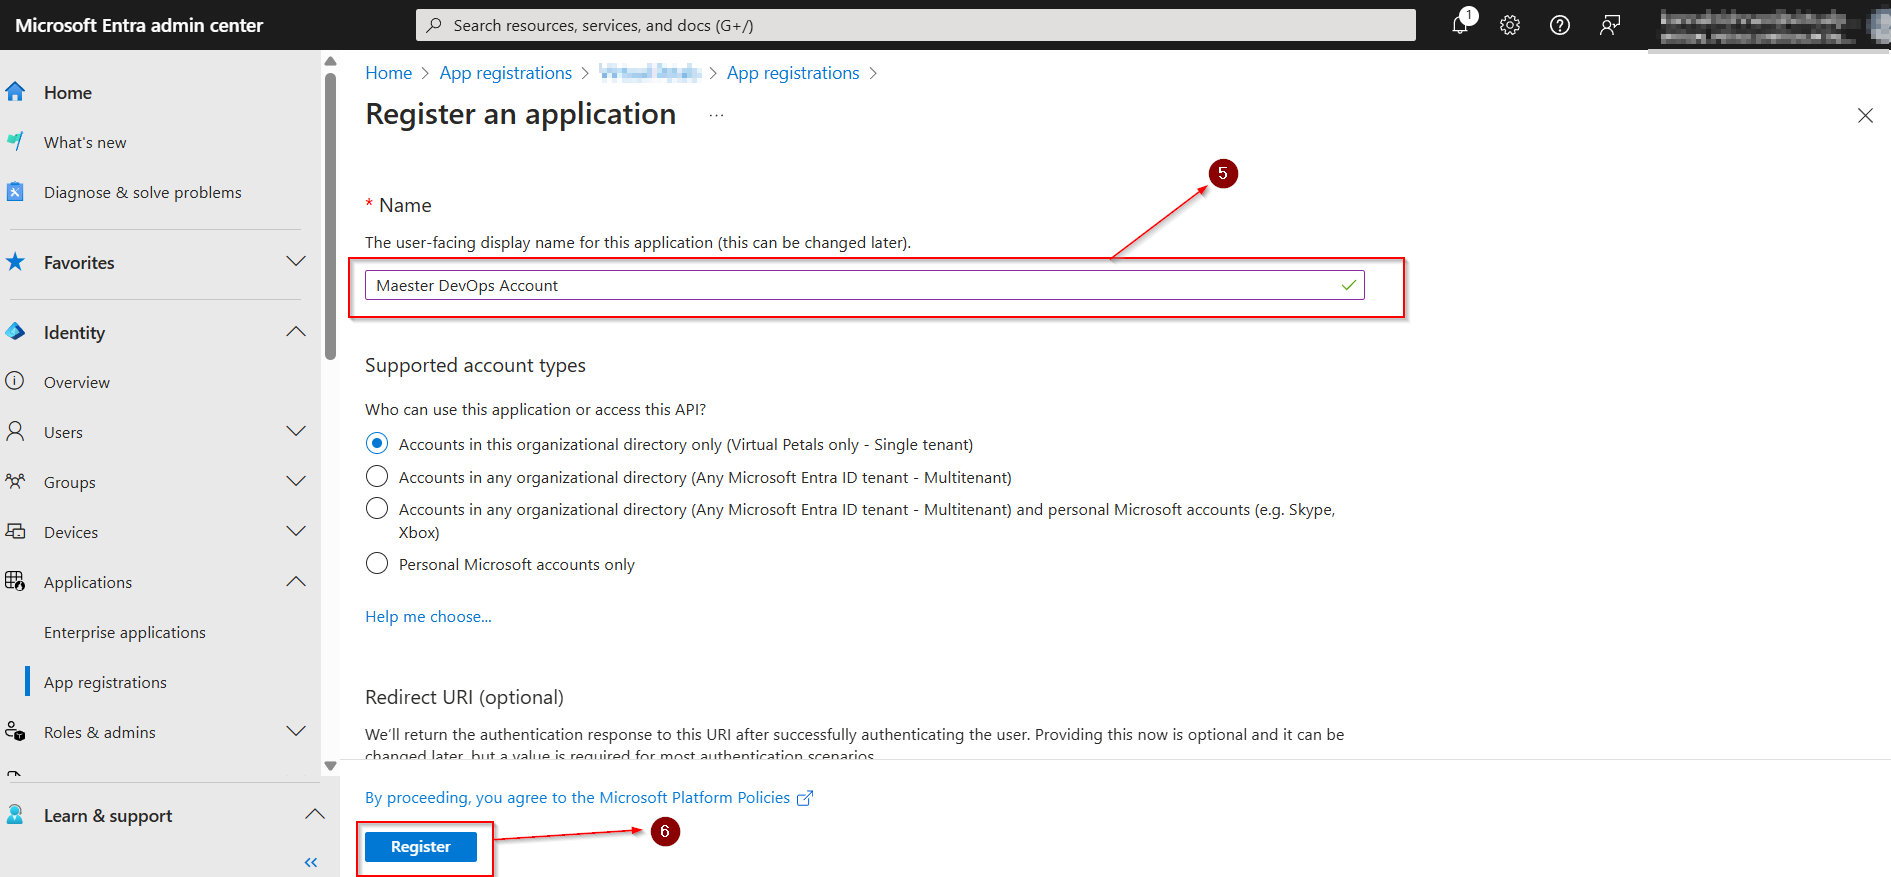
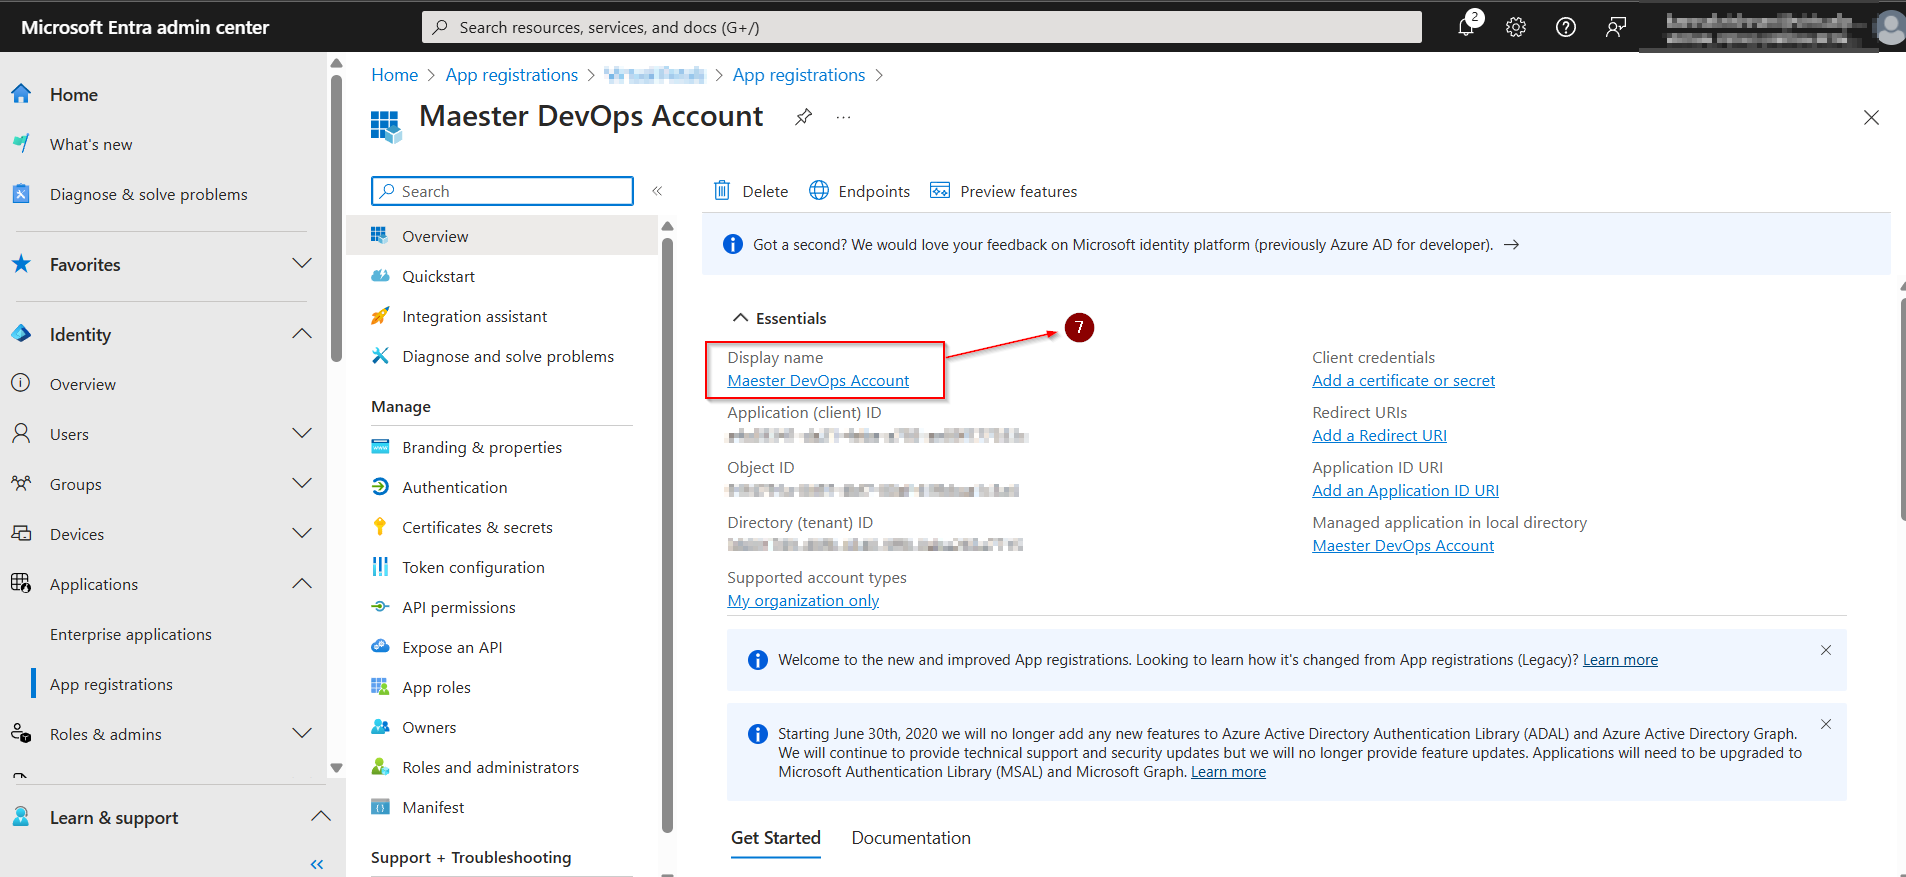
- Enter a name for the application (e.g. Maester DevOps Account).
- Select Register.
- App Registration dashboard.
Open Microsoft entra admin center. Select Identity from the left-hand menu.
In Identity section, Select Applications.
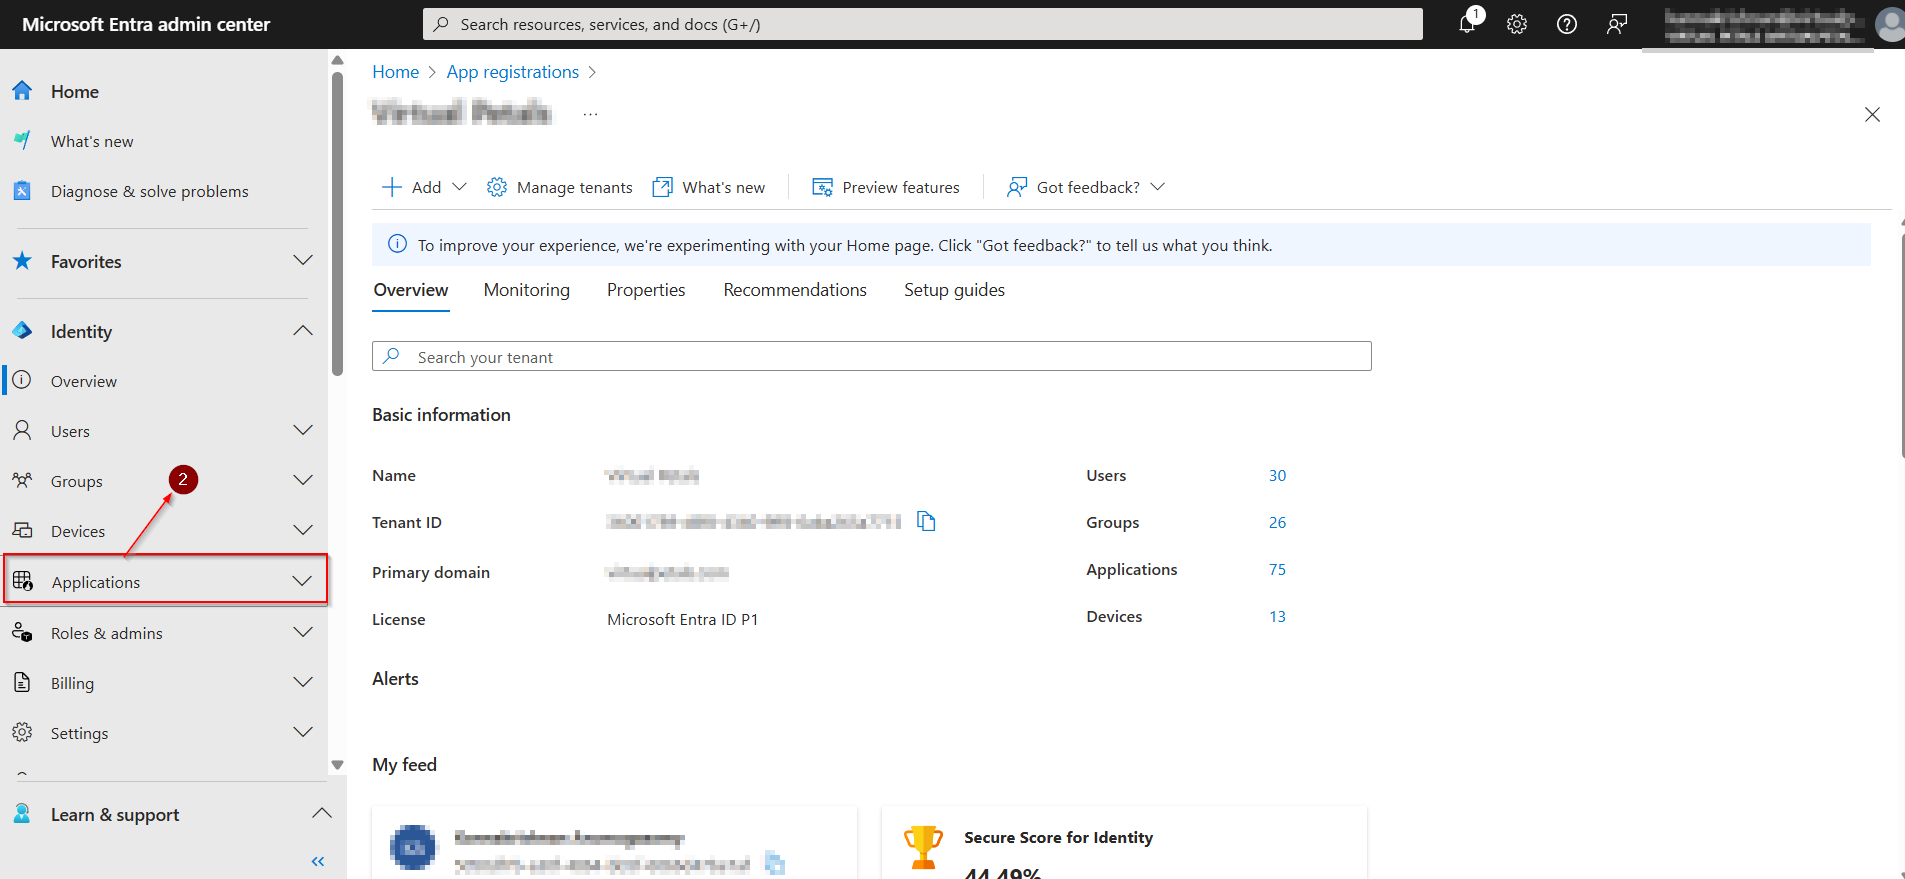
Click App registration.

Select New registration.
Enter a name for the application (e.g. Maester DevOps Account). Select Register.
App Registration dashboard.
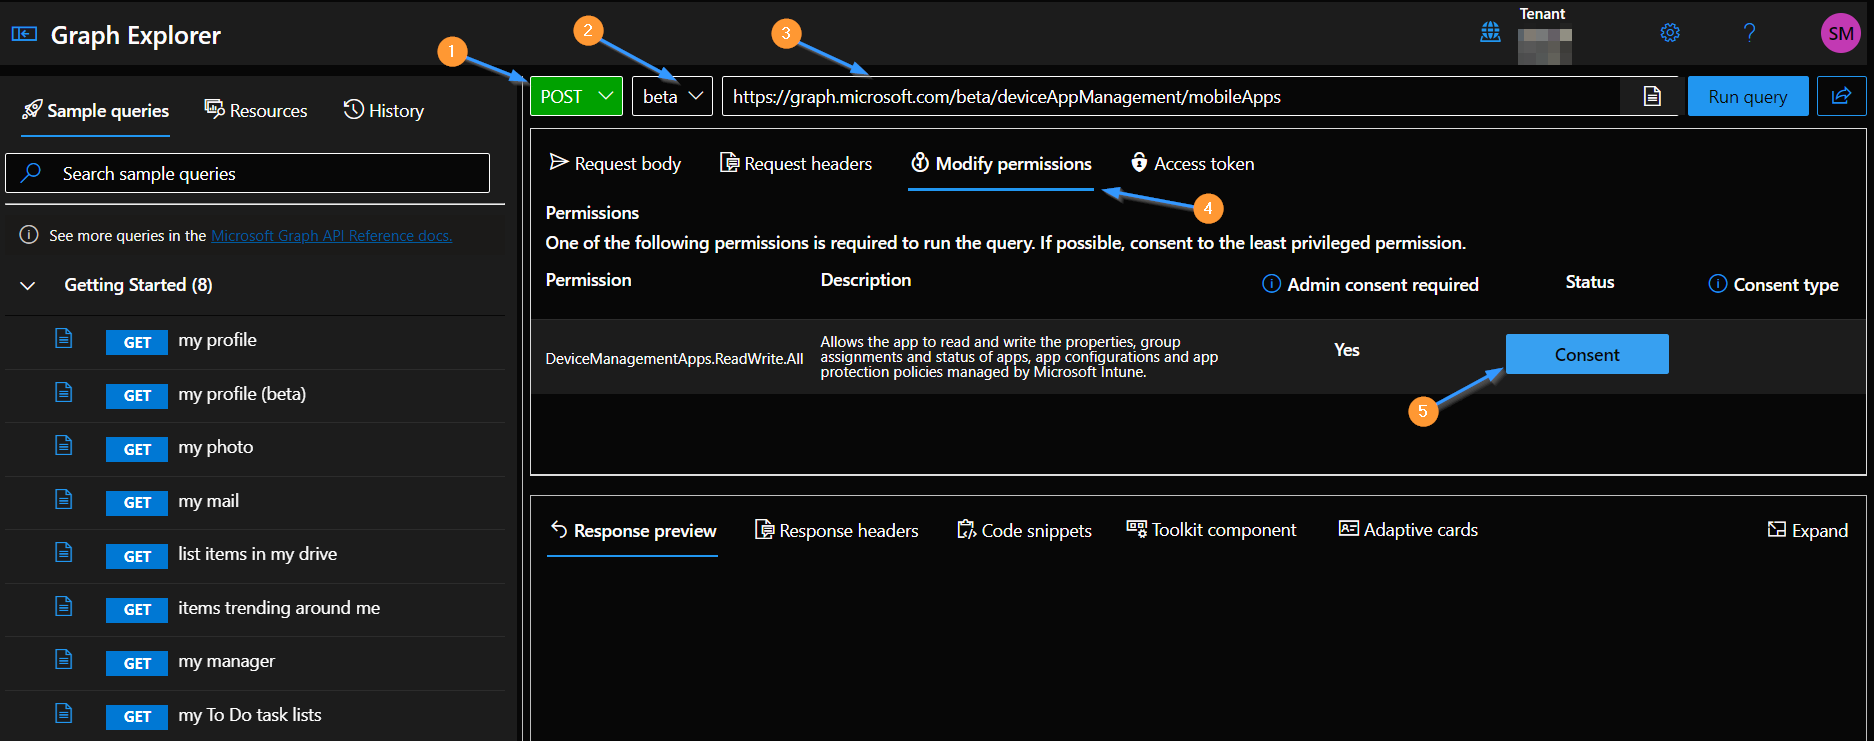
STEP-6: GRANT PERMISSIONS TO MICROSOFT GRAPH
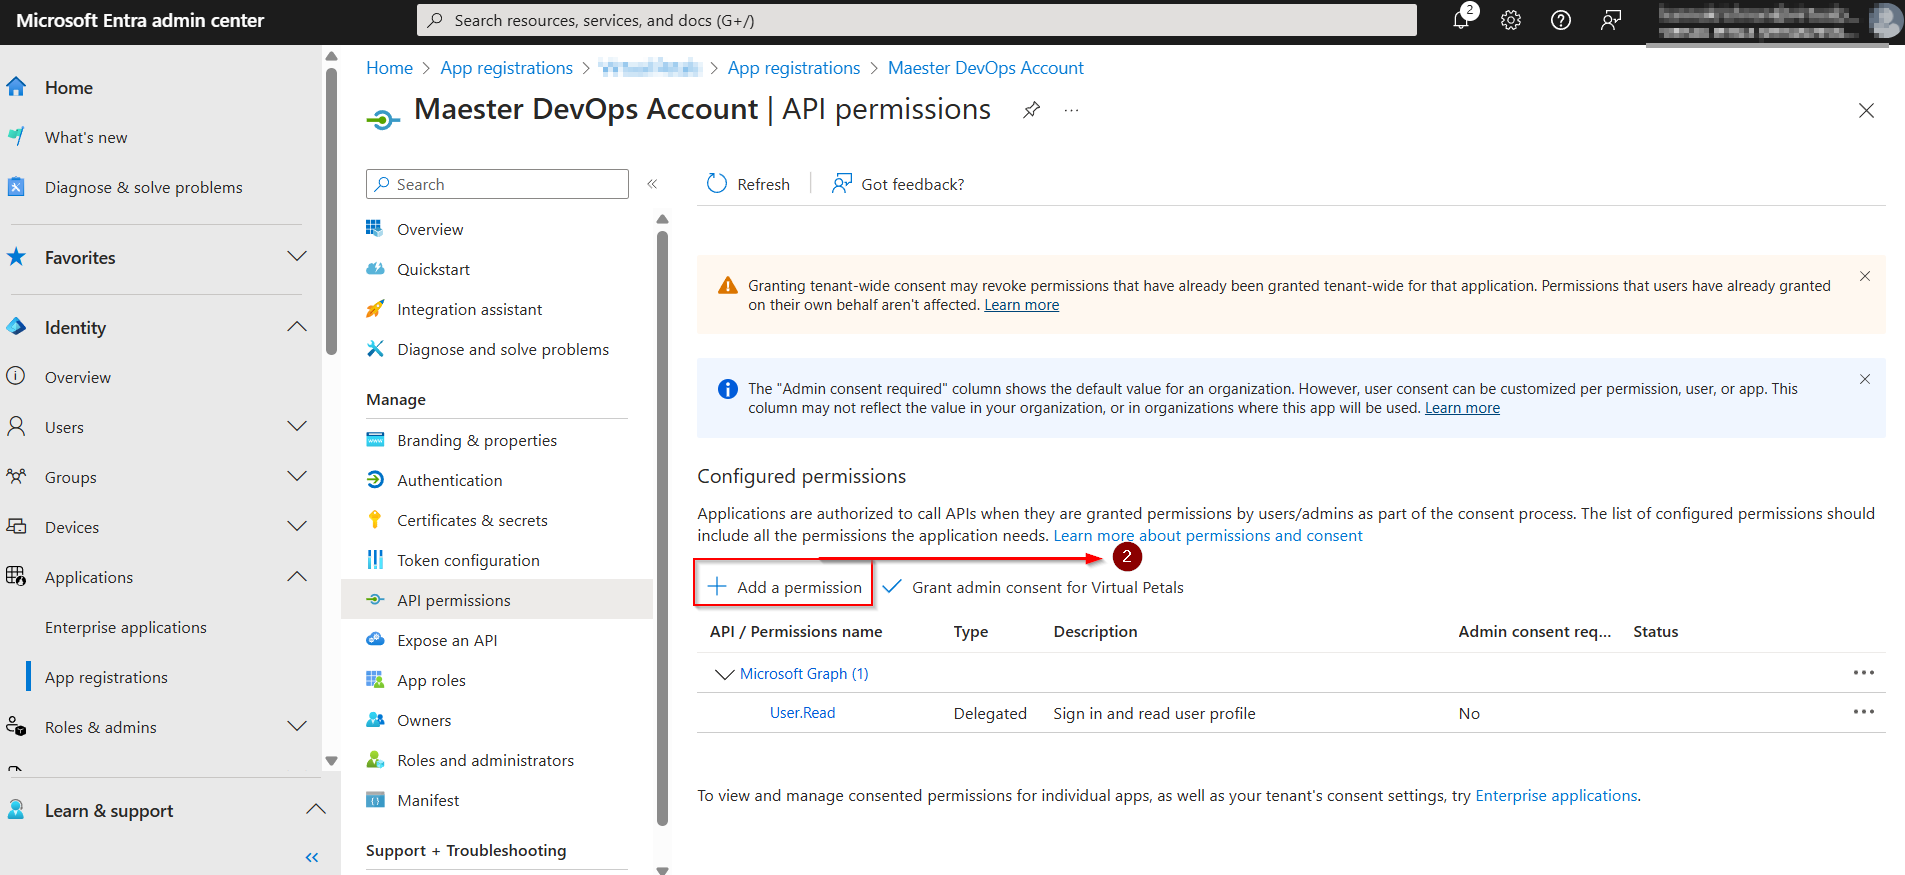
- Open the application you created in the previous step.
- Select API permissions > Add a permission.
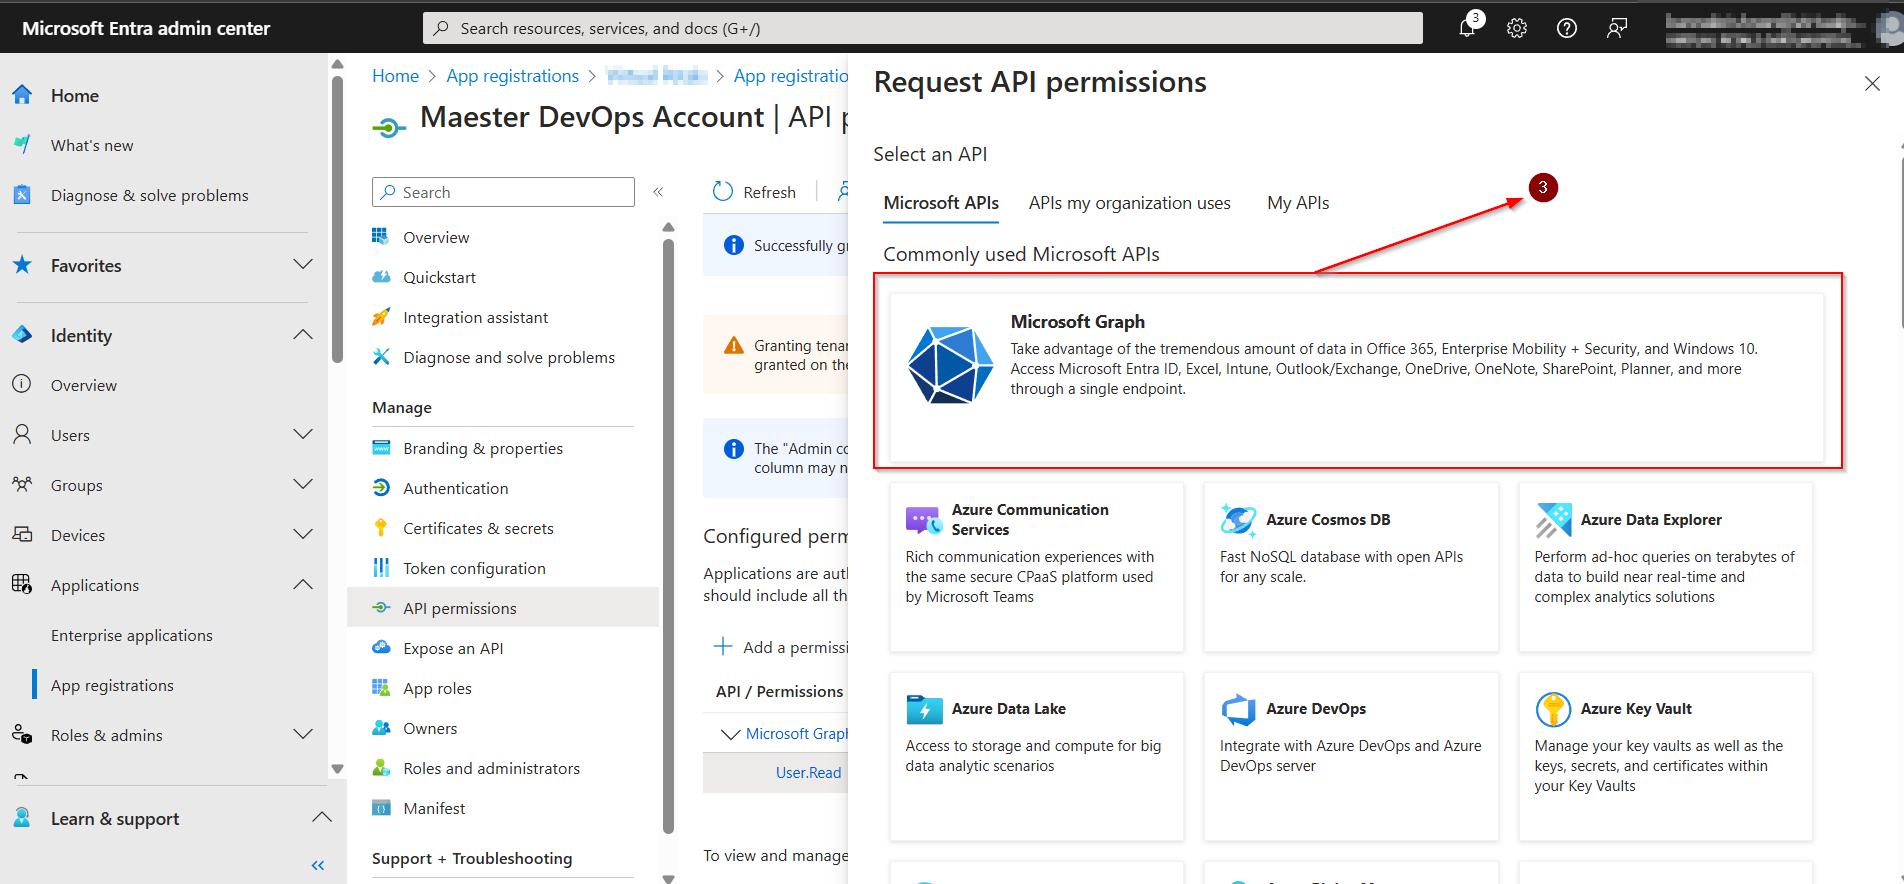
- Select Microsoft Graph.
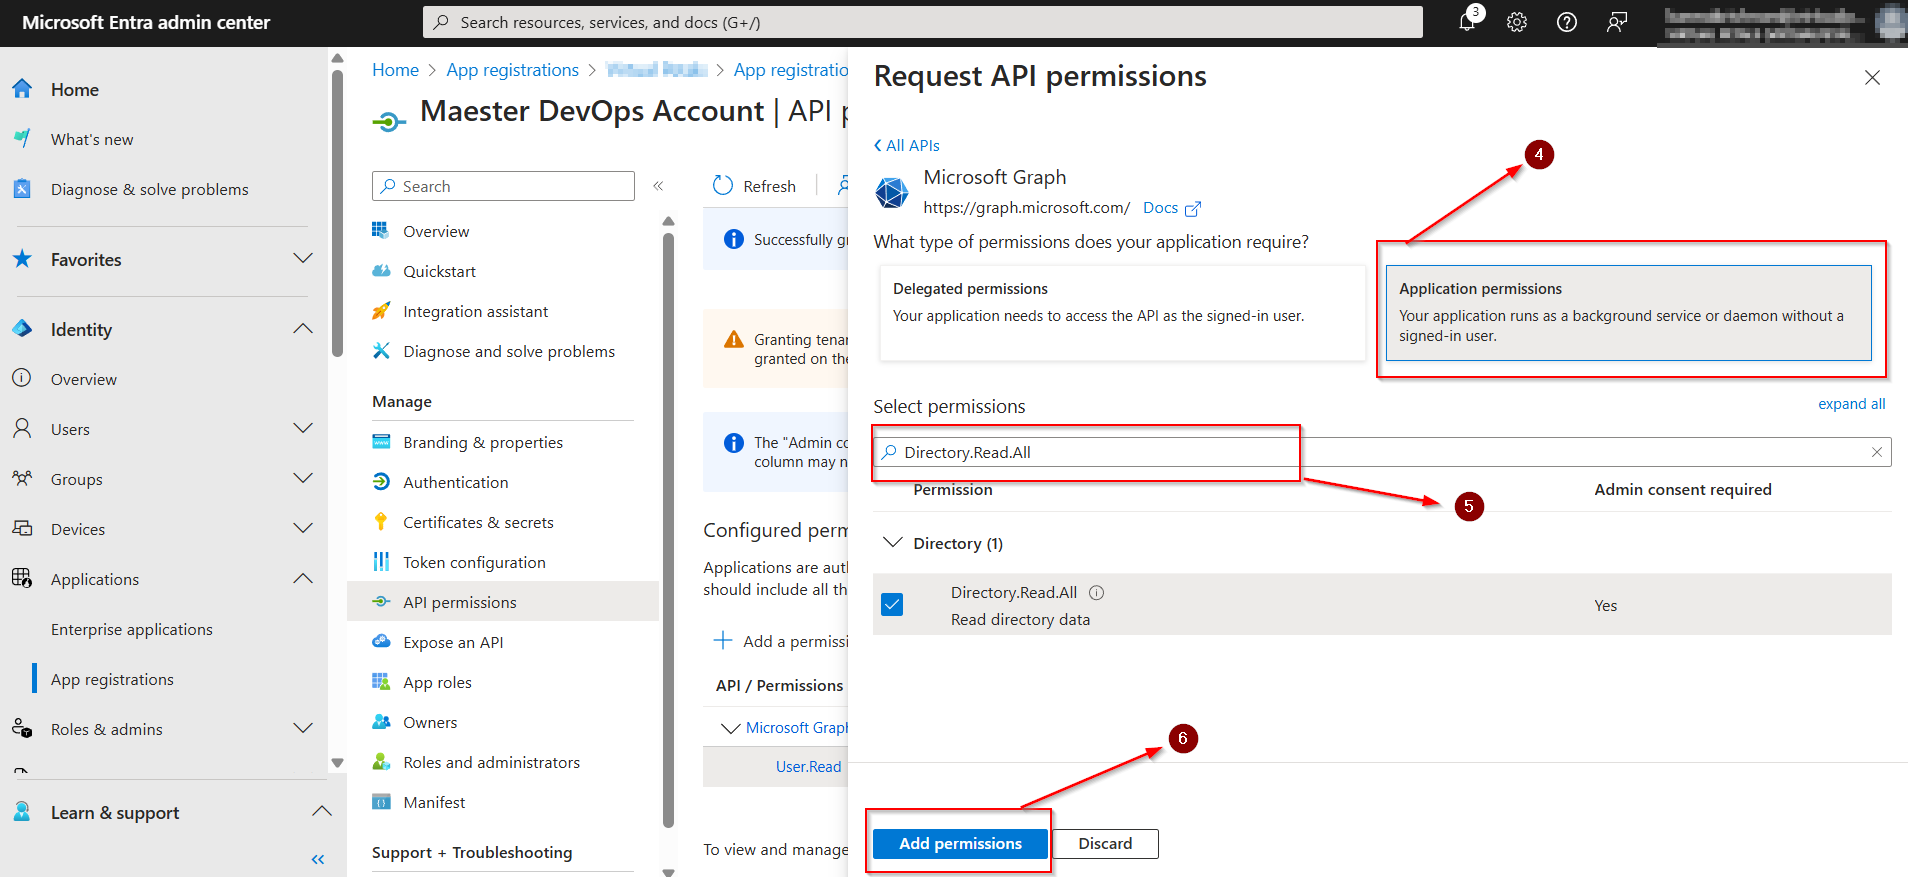
- Click Application permissions.
- Search for each of the permissions and check the box next to each permission.
- Select Add permissions.
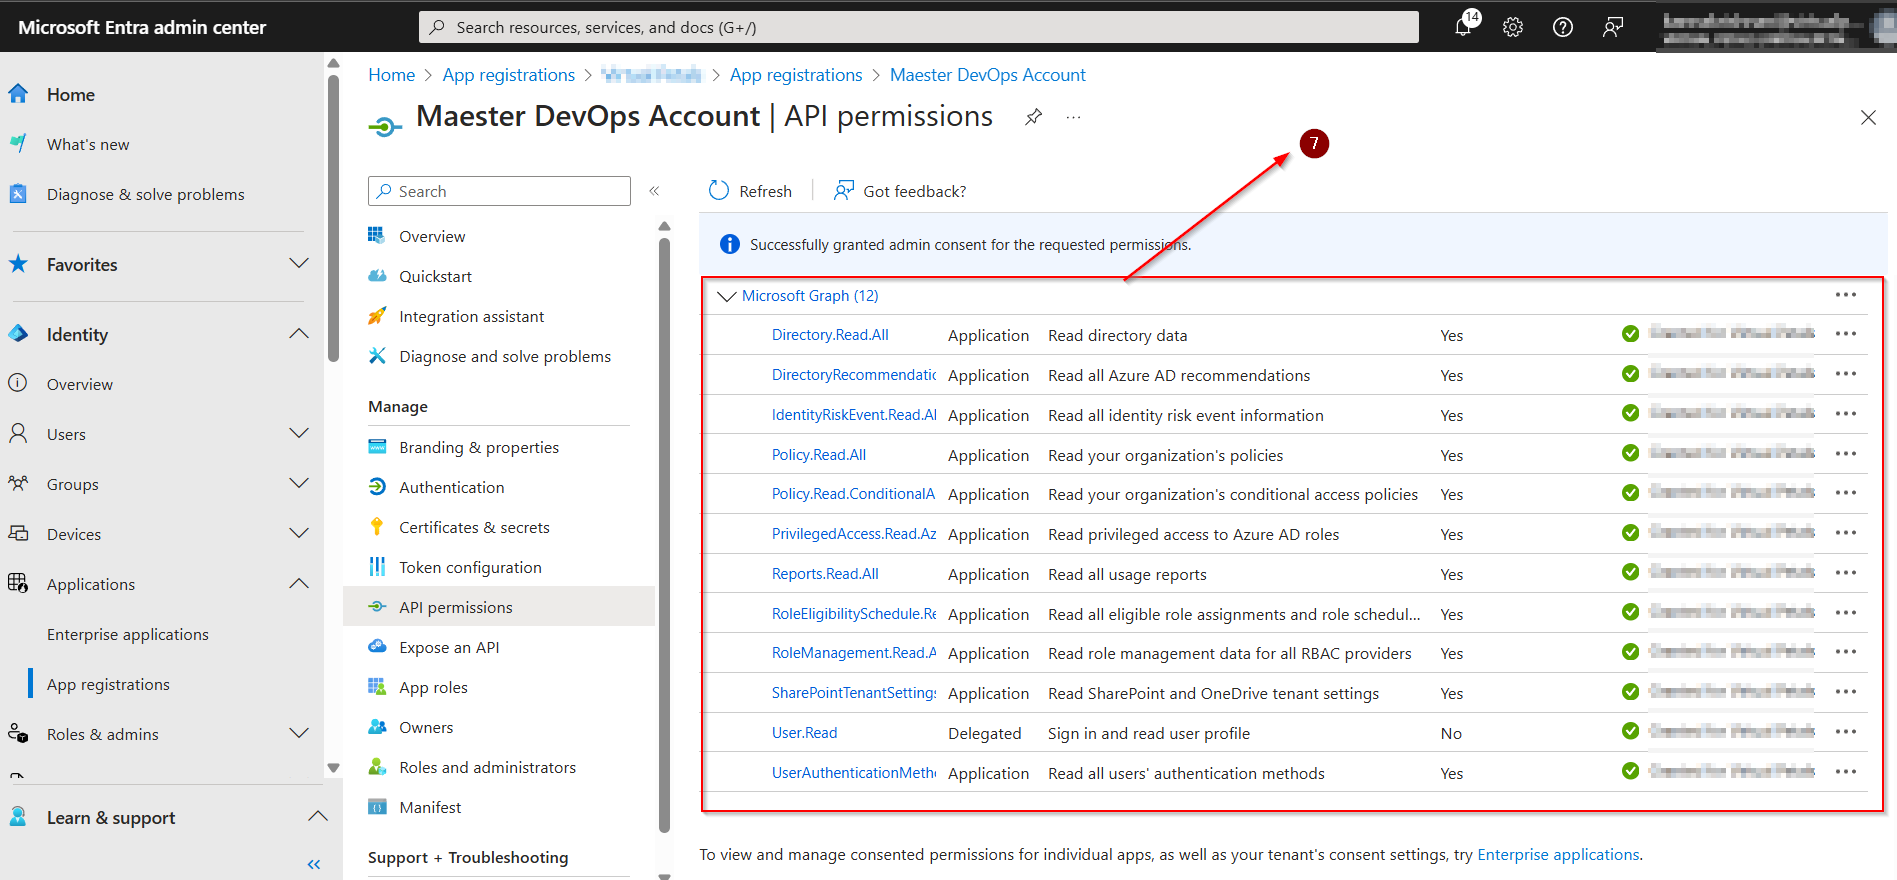
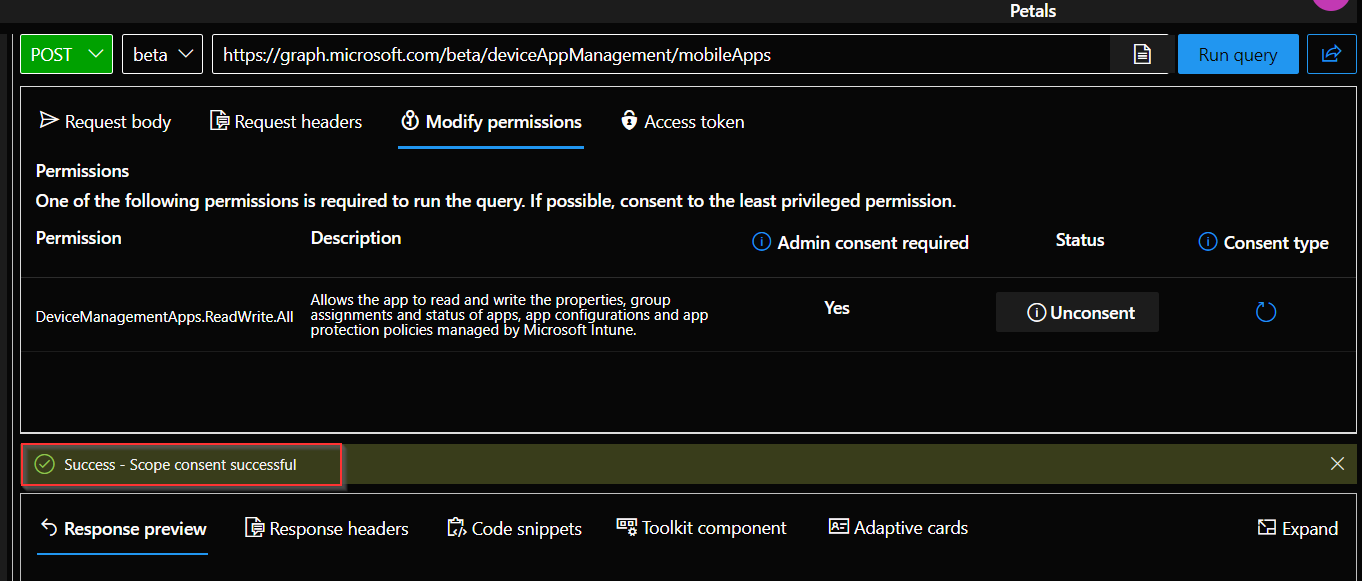
- Select Grant admin consent for [your organization].
- Select Yes to confirm.
Open the application you created in the previous step. Select API permissions > Add a permission.

Select Add permissions.
Select Microsoft Graph.
Click Application permissions. Search for each of the permissions and check the box next to each permission. Select Add permissions.
- Directory.Read.All
- DirectoryRecommendations.Read.All
- IdentityRiskEvent.Read.All
- Policy.Read.All
- Policy.Read.ConditionalAccess
- PrivilegedAccess.Read.AzureAD
- Reports.Read.All
- RoleEligibilitySchedule.Read.Directory
- RoleManagement.Read.All
- SharePointTenantSettings.Read.All
- UserAuthenticationMethod.Read.All
Select Grant admin consent for [your organization]. Select Yes to confirm. This Is the Dashboard Of API Permission
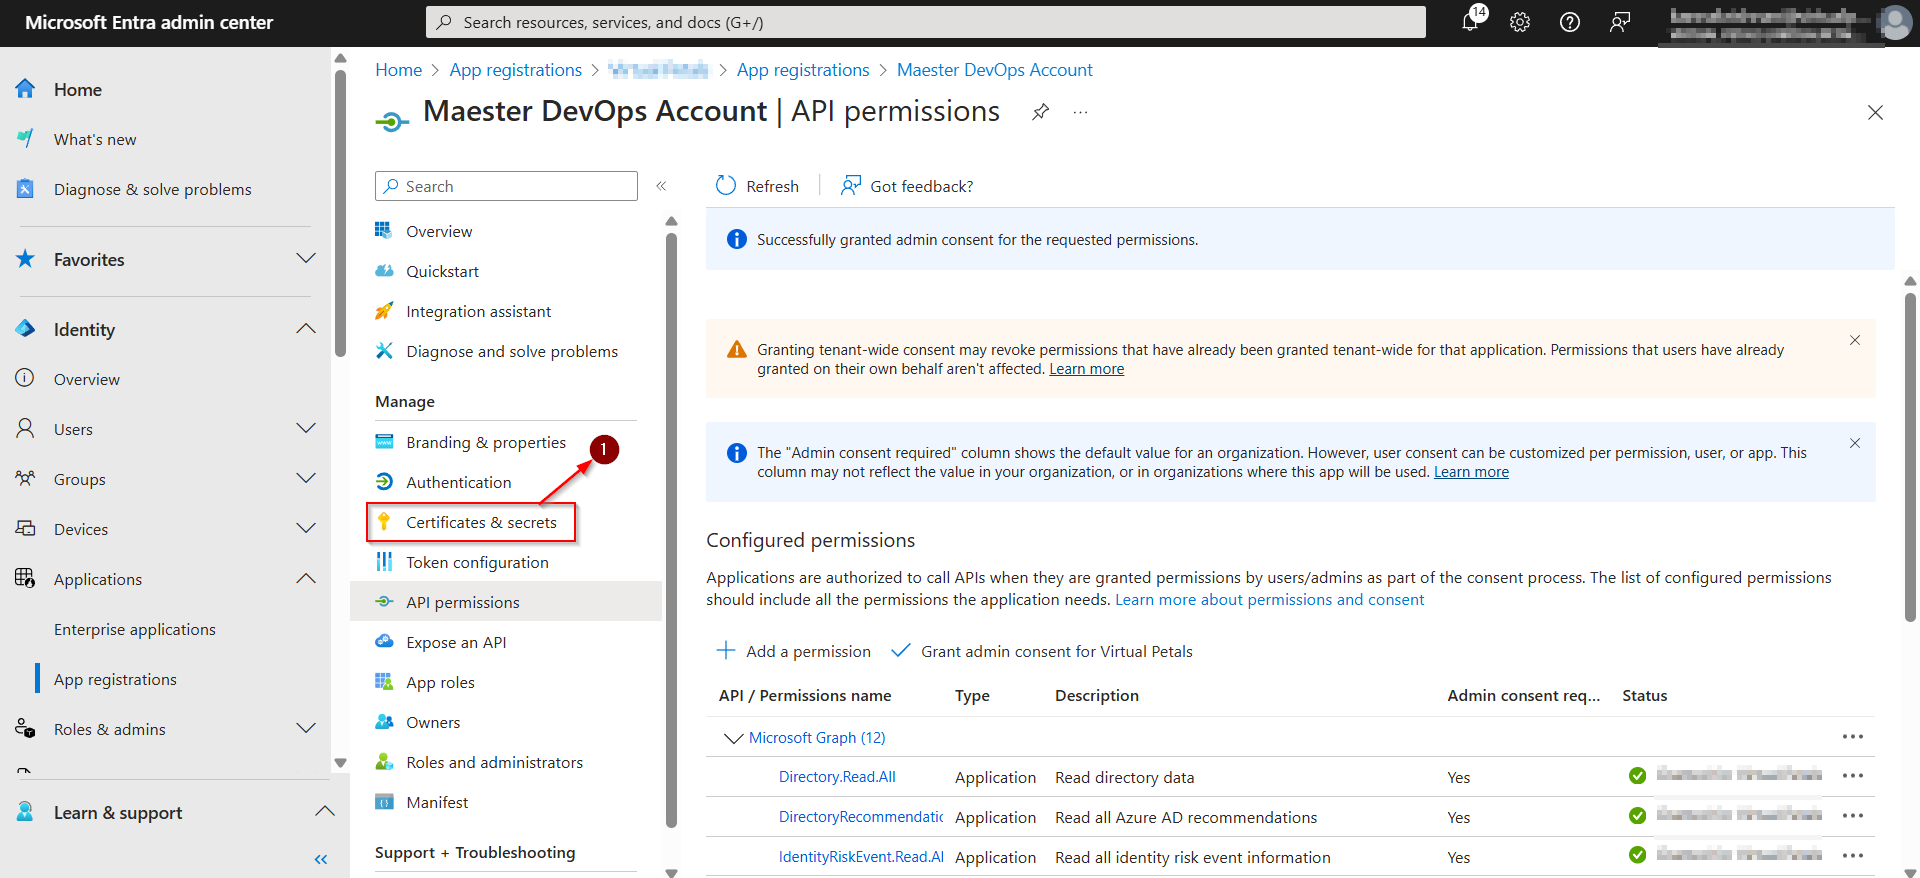
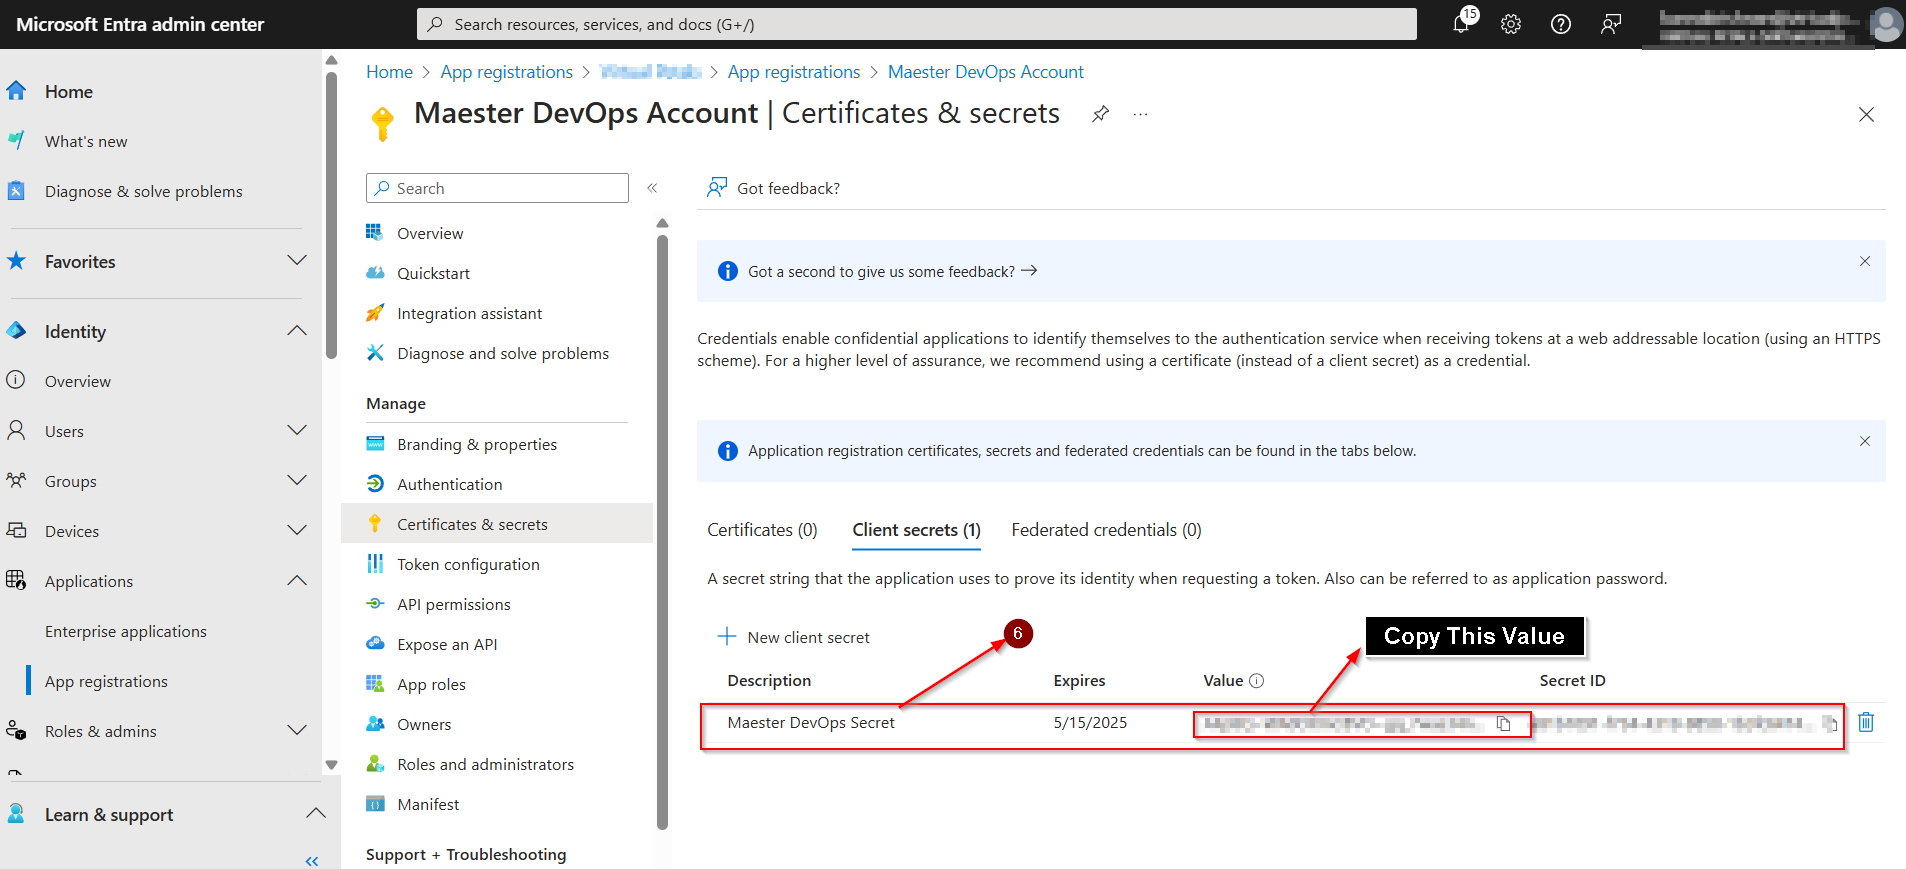
STEP-7: CREATE A CLIENT SECRET
- Select Certificates & secrets.
- Select Client secrets & Click New client secret.
- Enter a description for the secret (e.g. Maester DevOps Secret) & Select Add.
- Copy the value of the secret, we will use this value in the Azure Pipeline.
Select Certificates & secrets.
Select Client secrets.
Click New client secret.
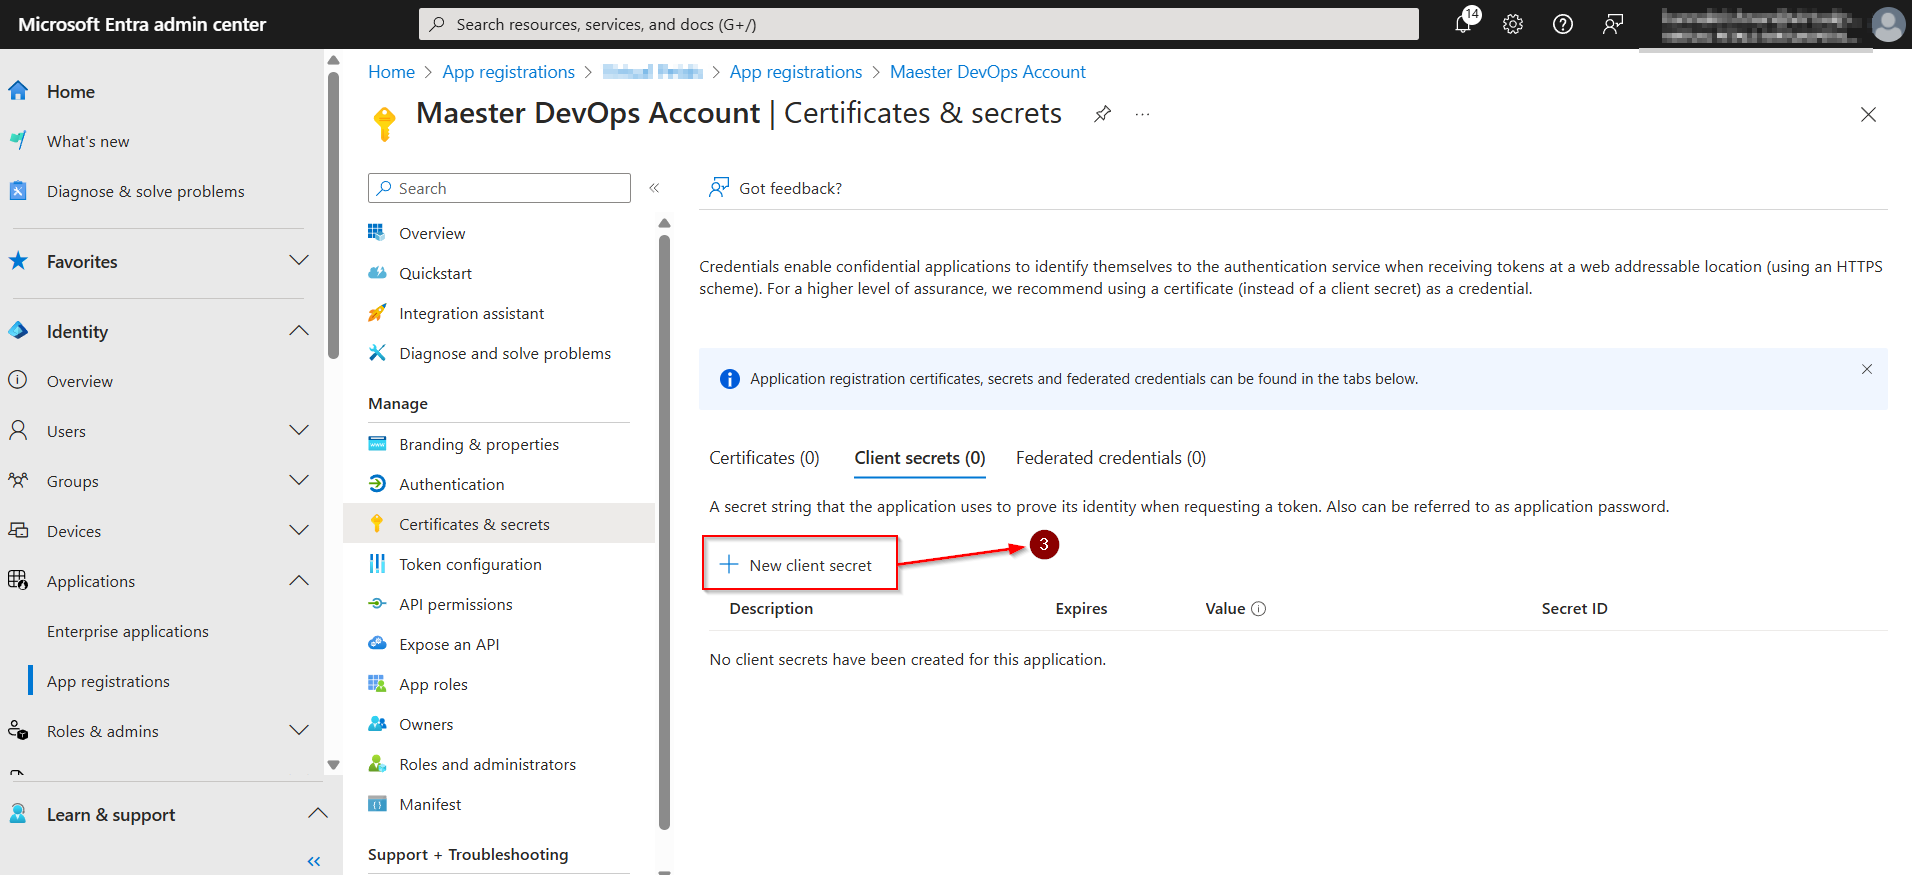
Enter a description for the secret (e.g. Maester DevOps Secret) & Select Add.
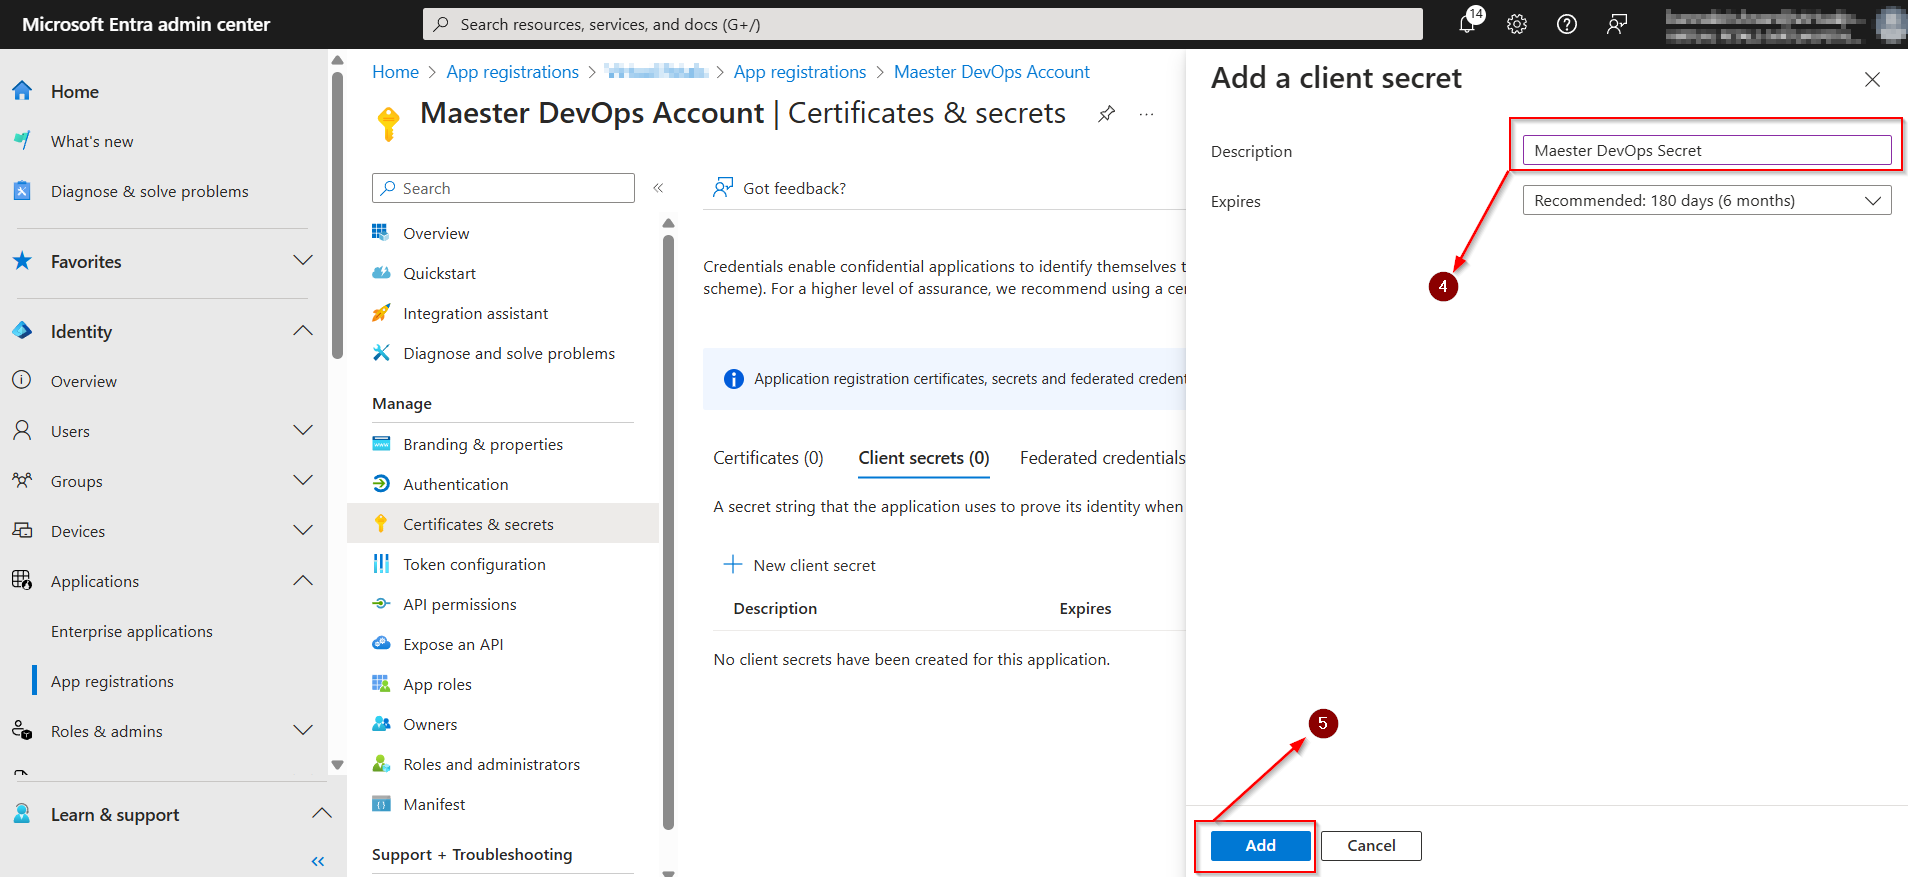
Copy the value of the secret, we will use this value in the Azure Pipeline.
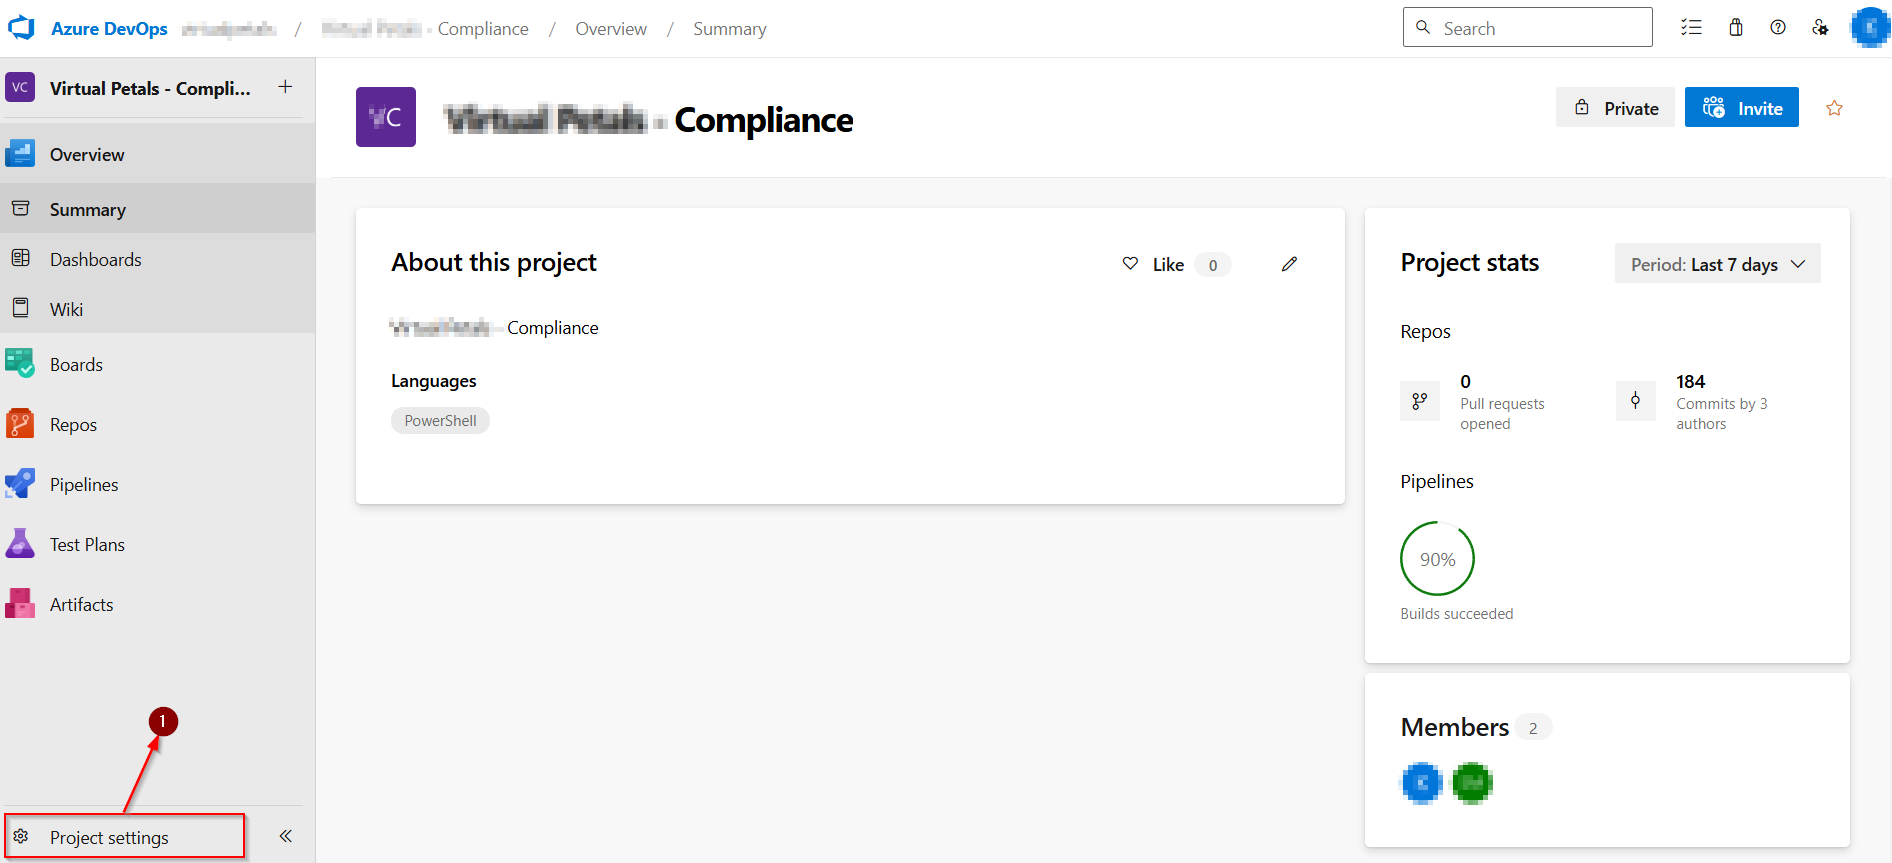
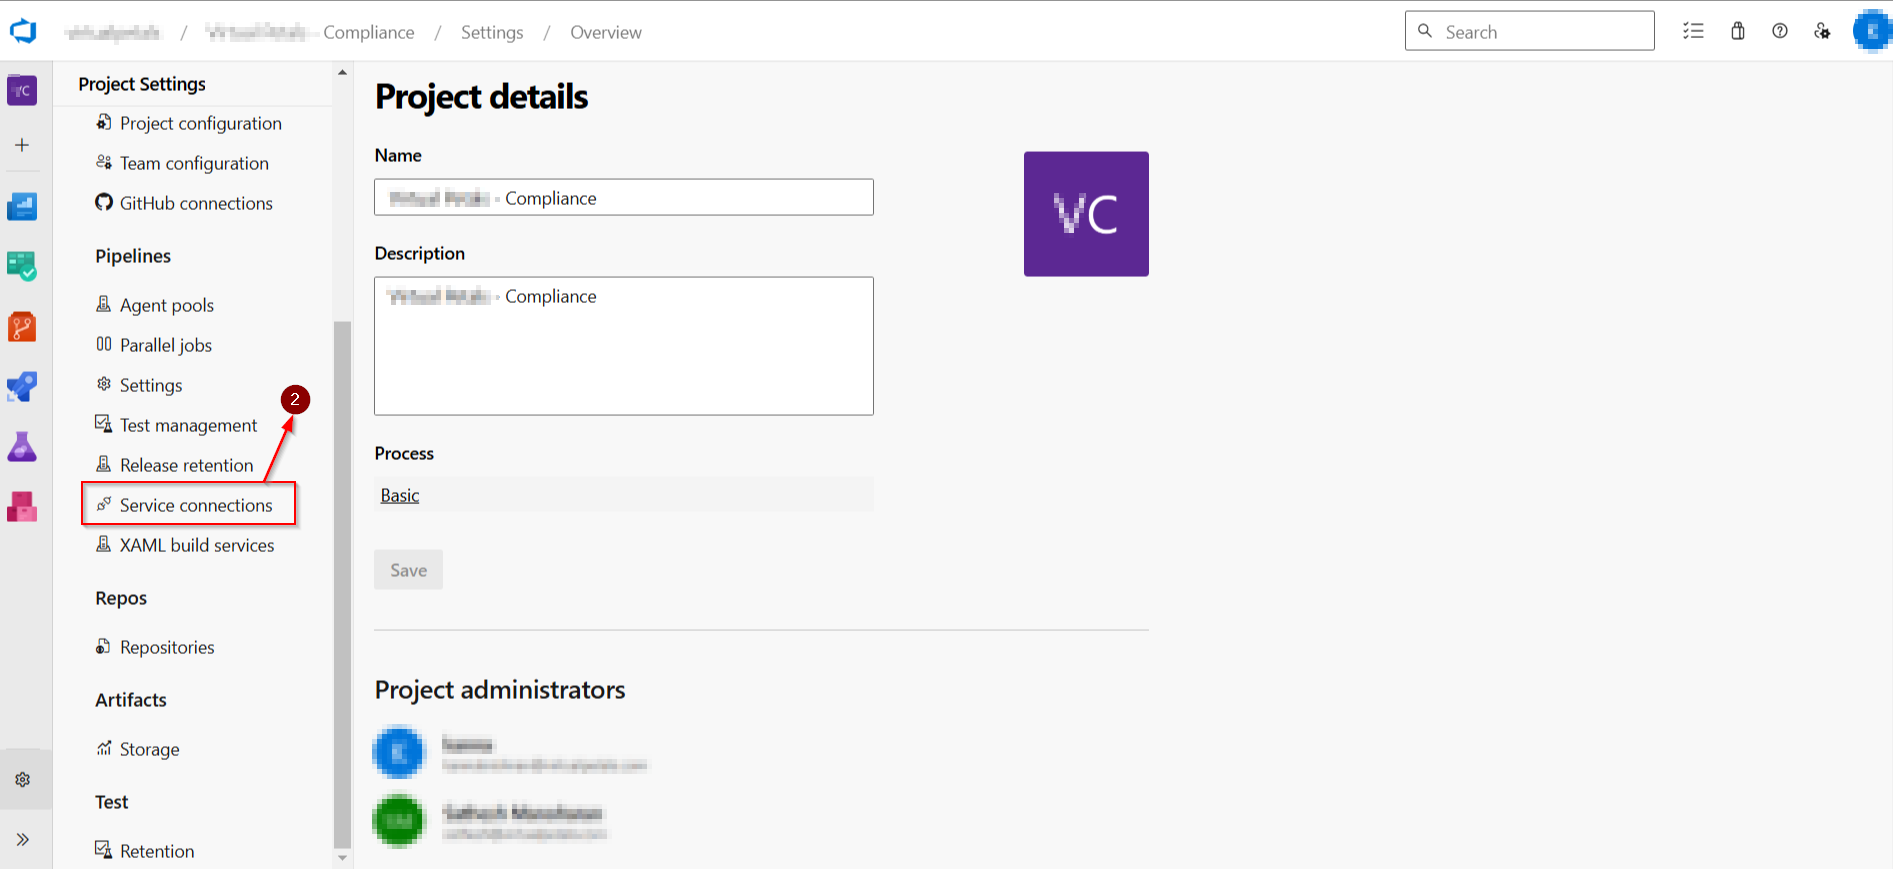
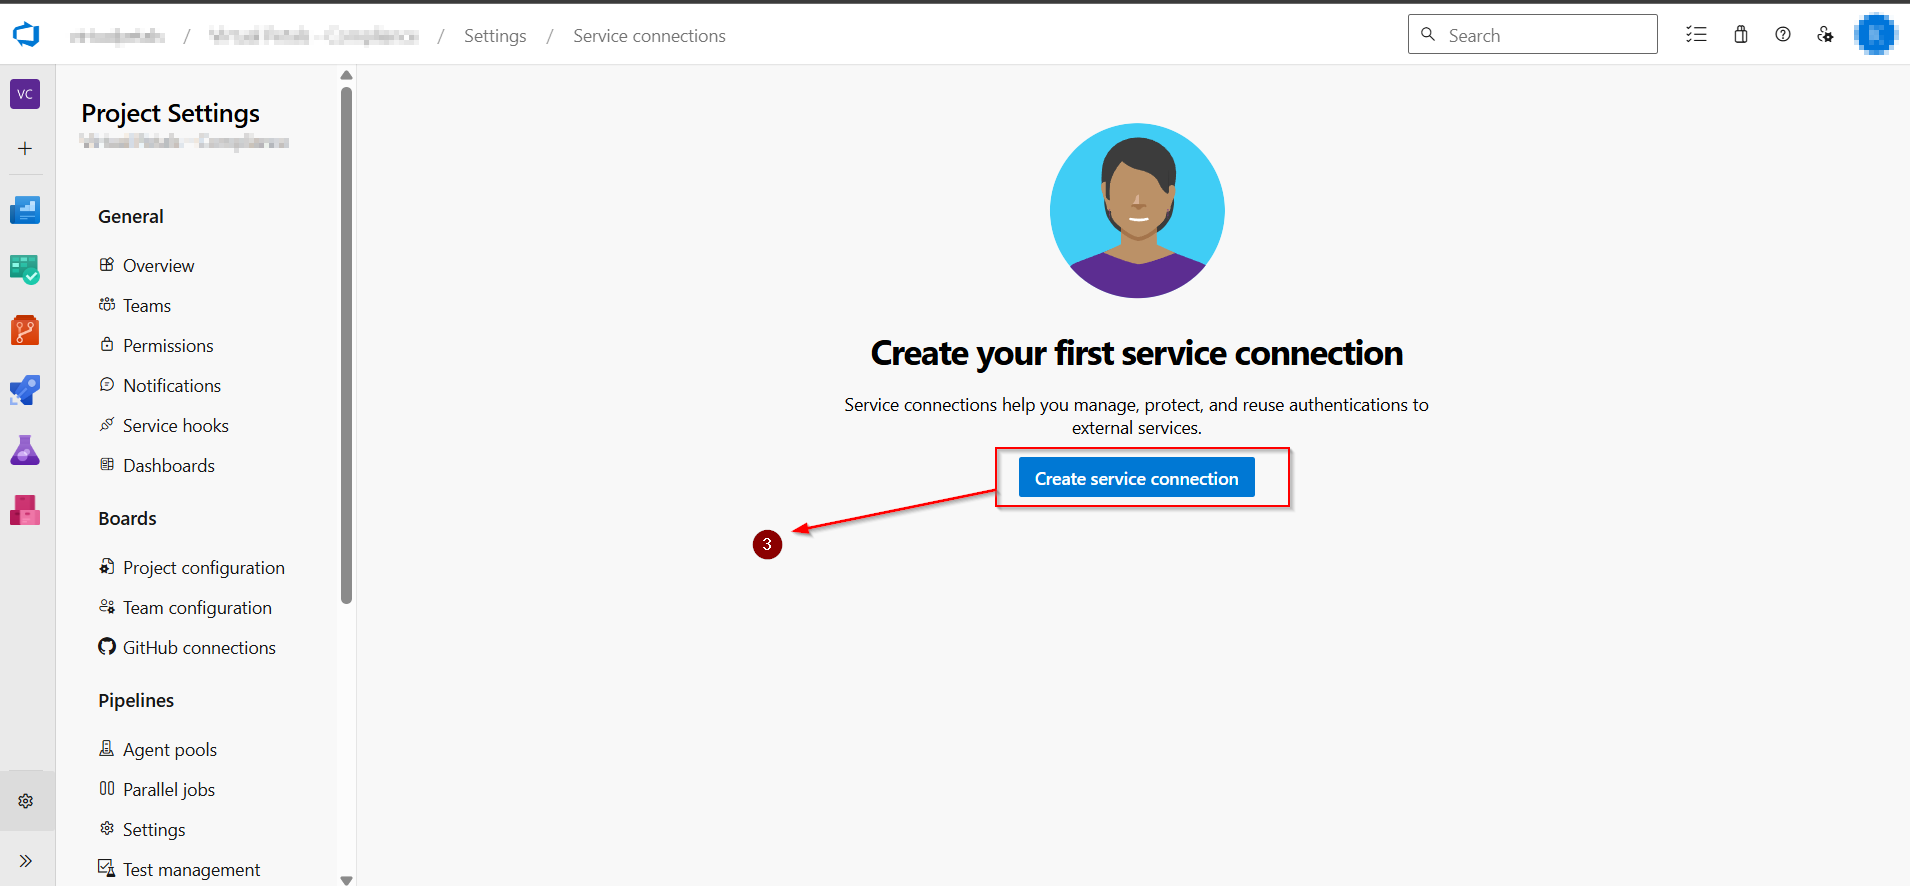
STEP-8: CREATE SERVICE CONNECTIION ON AZURE DEVOPS
- In Azure DevOps, Select Project Settings from the left-hand menu.
- Project Settings > Select Service Connections from the left-hand menu.
- Service Connections > Click New Connection.
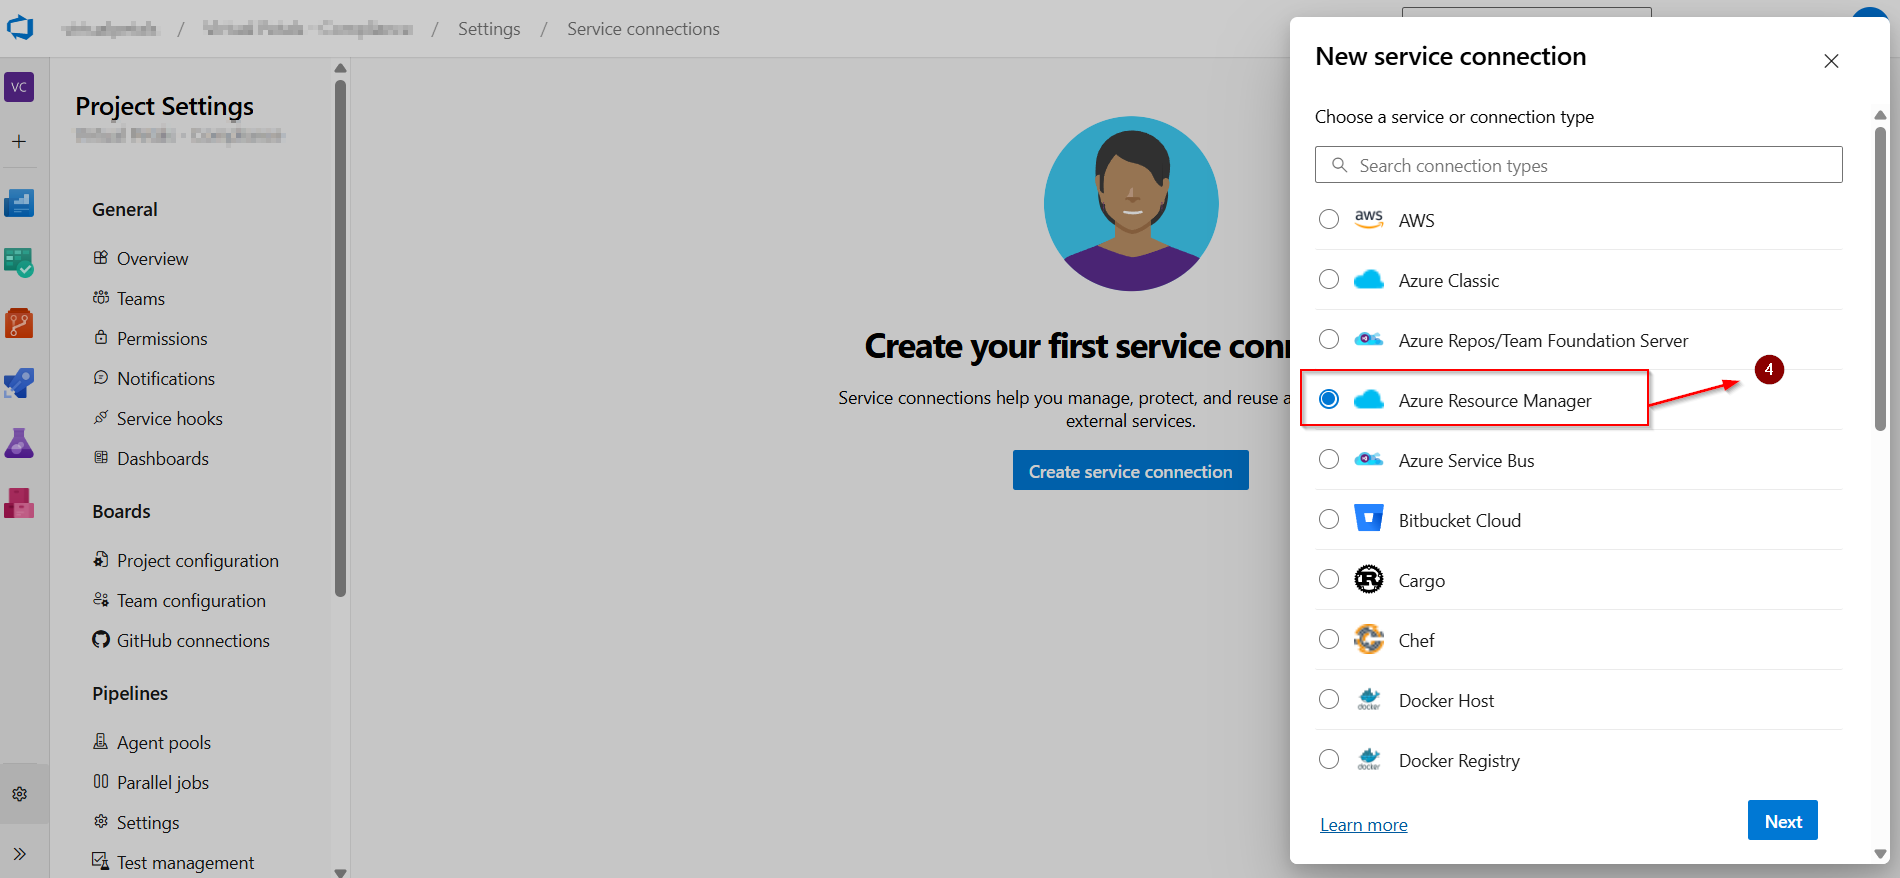
- Select Azure Resource Manager > Click Next.
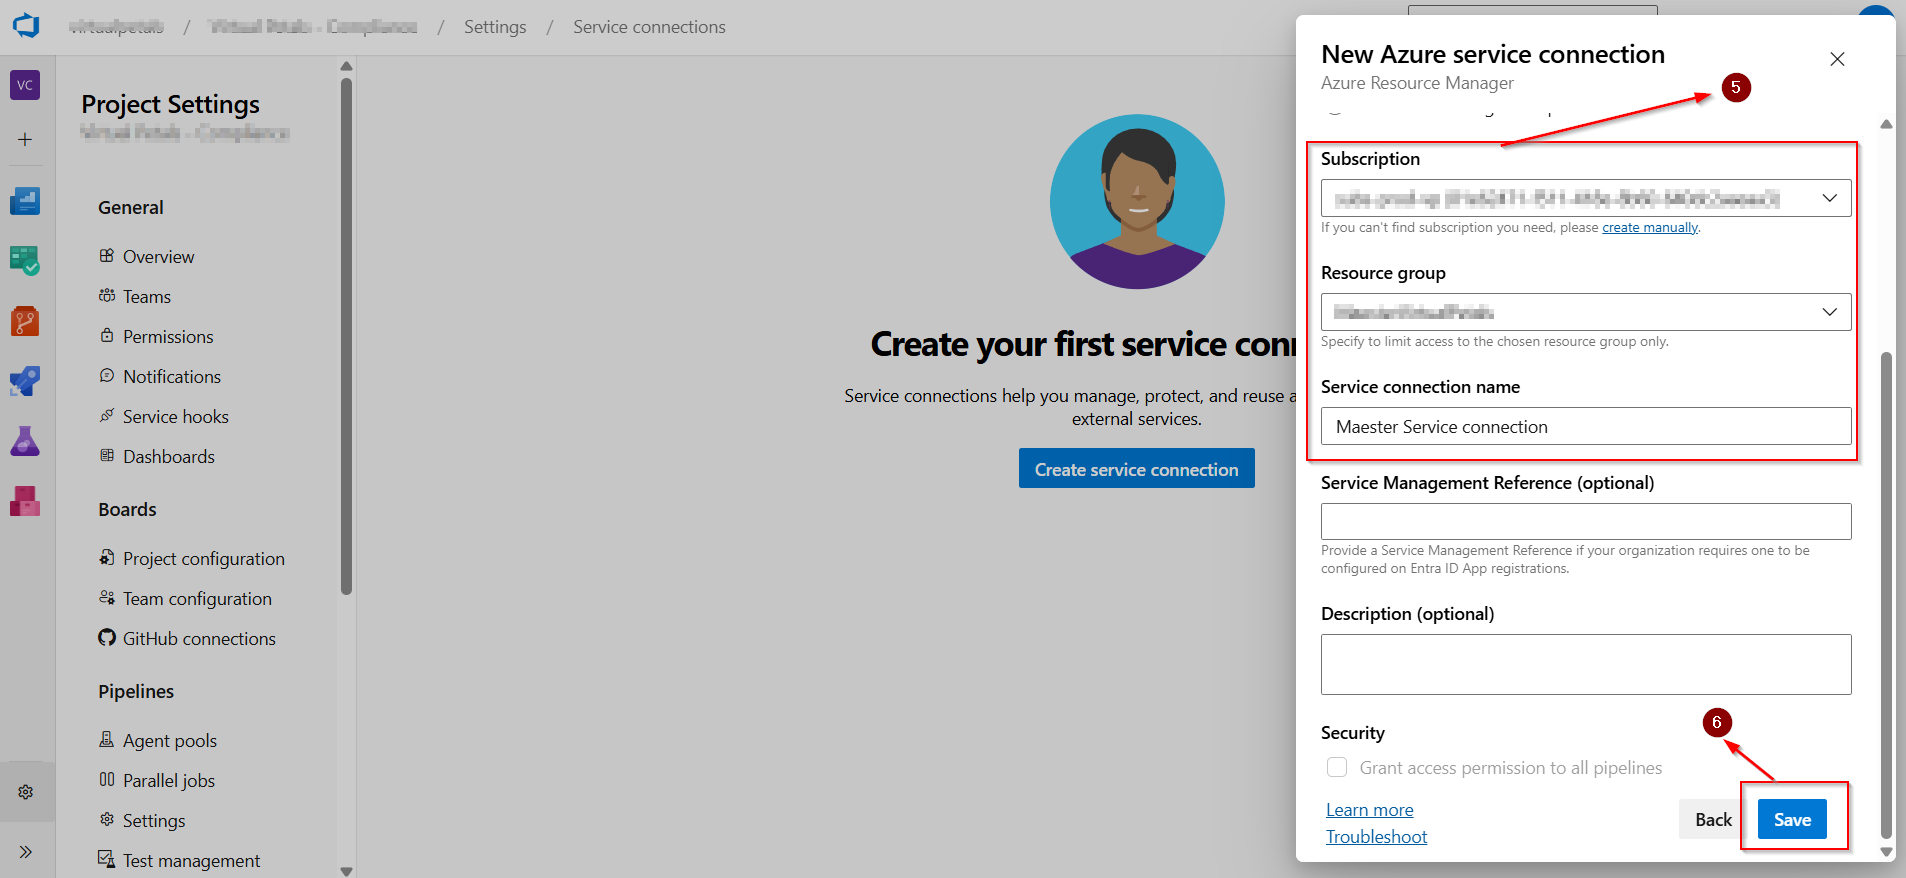
- Select Workload Identity Federation (Automatic) > Click Next.
- Select The Subscription & Resource Group > Click Save.
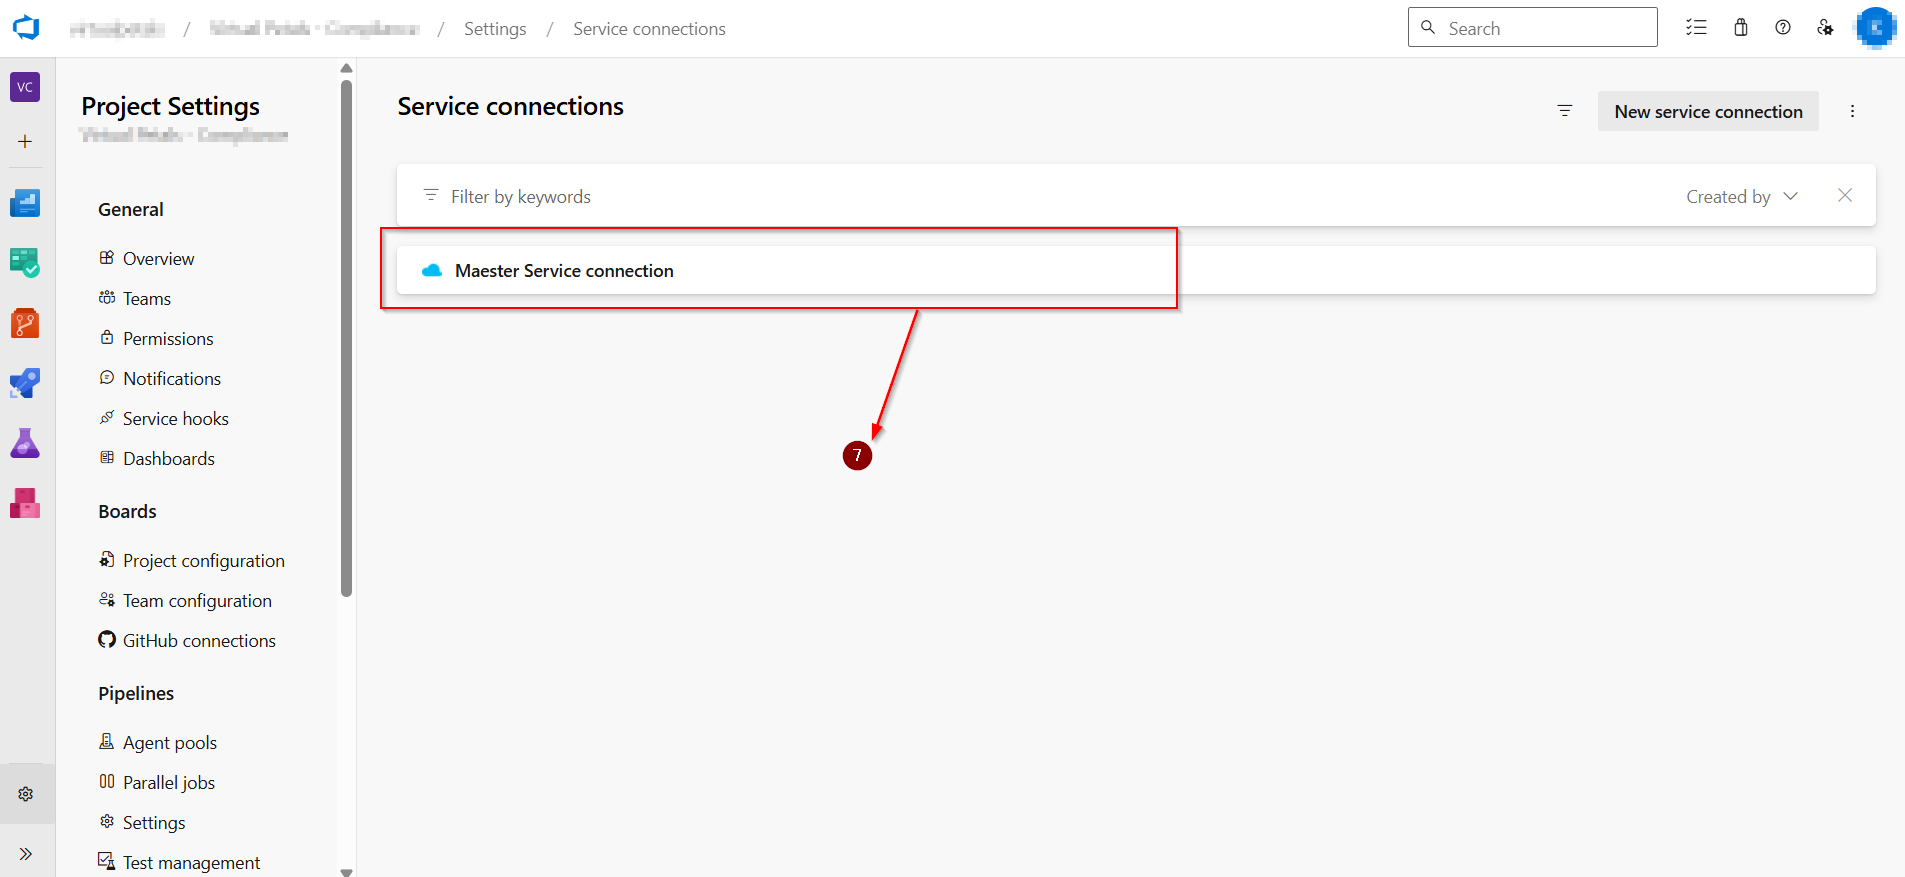
- Create The Service Connection Successfully.
In Azure DevOps, Select Project Settings from the left-hand menu.
Project Settings > Select Service Connections from the left-hand menu.
Service Connections > Click New Connection.
Select Azure Resource Manager > Click Next.
Select The Subscription & Resource Group > Click Save.
Create The Service Connection Successfully.
STEP-9: CREATE AZURE PIPELINE
- Open your Azure DevOps project.
- Select Pipelines > New pipeline.
- Select Azure Repos Git as the location of your code.
- Select the repository where you imported the Maester tests.
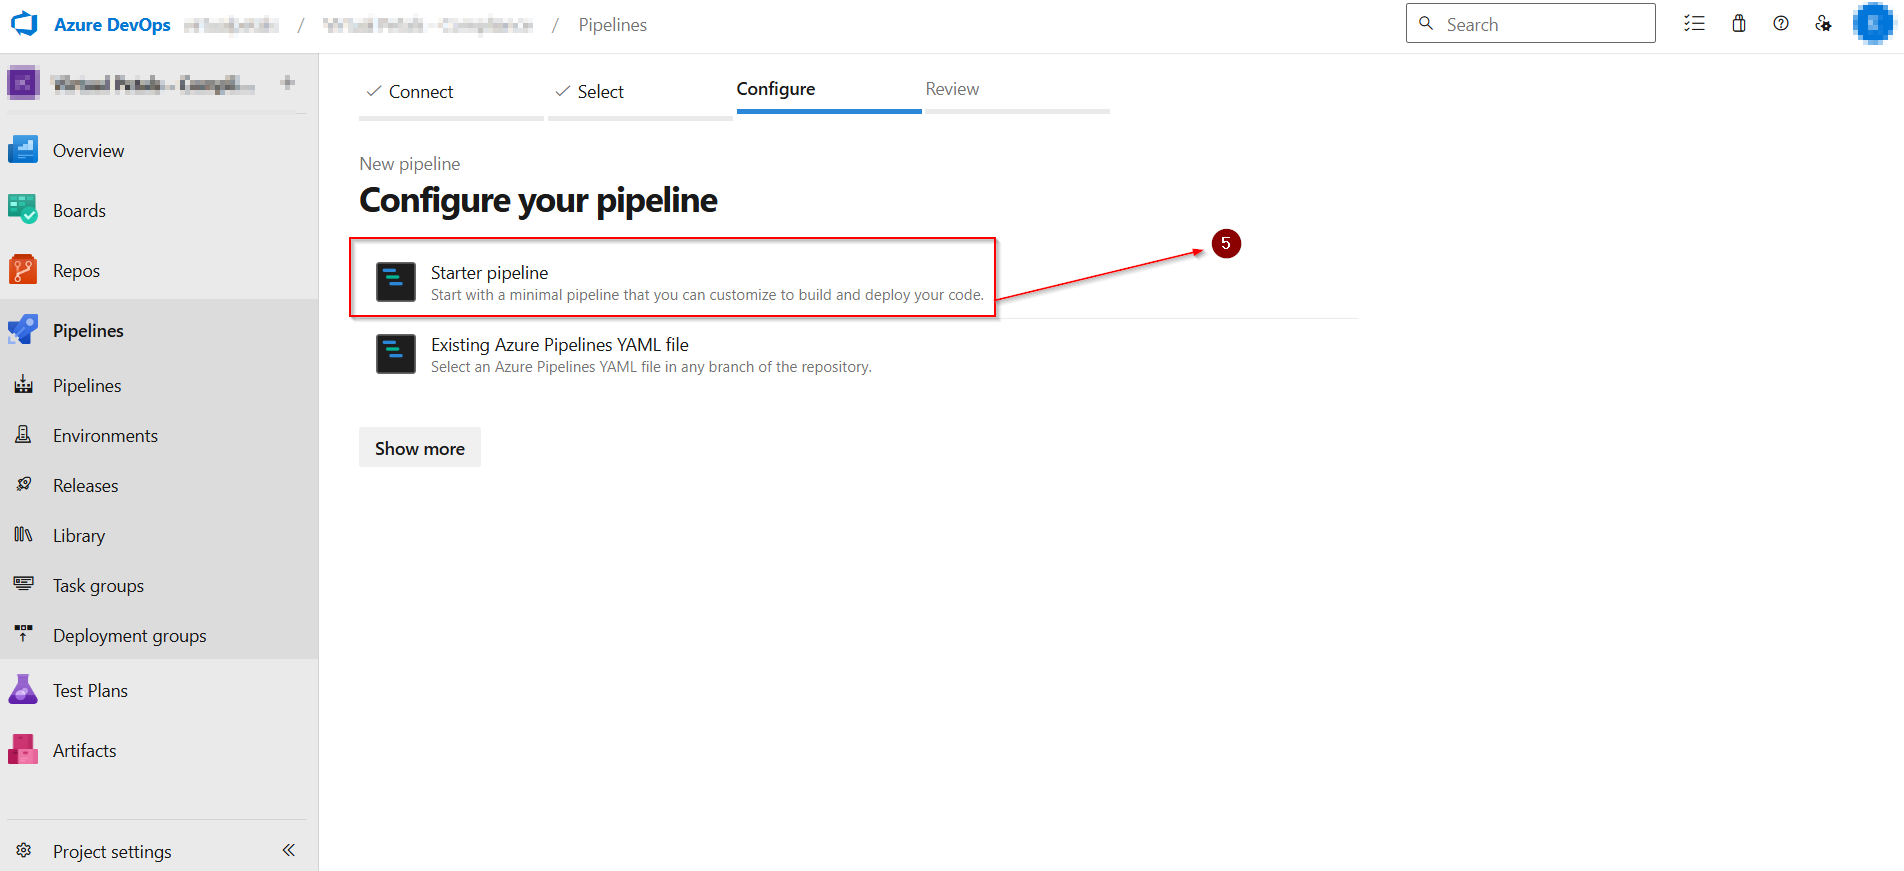
- Select Starter pipeline.
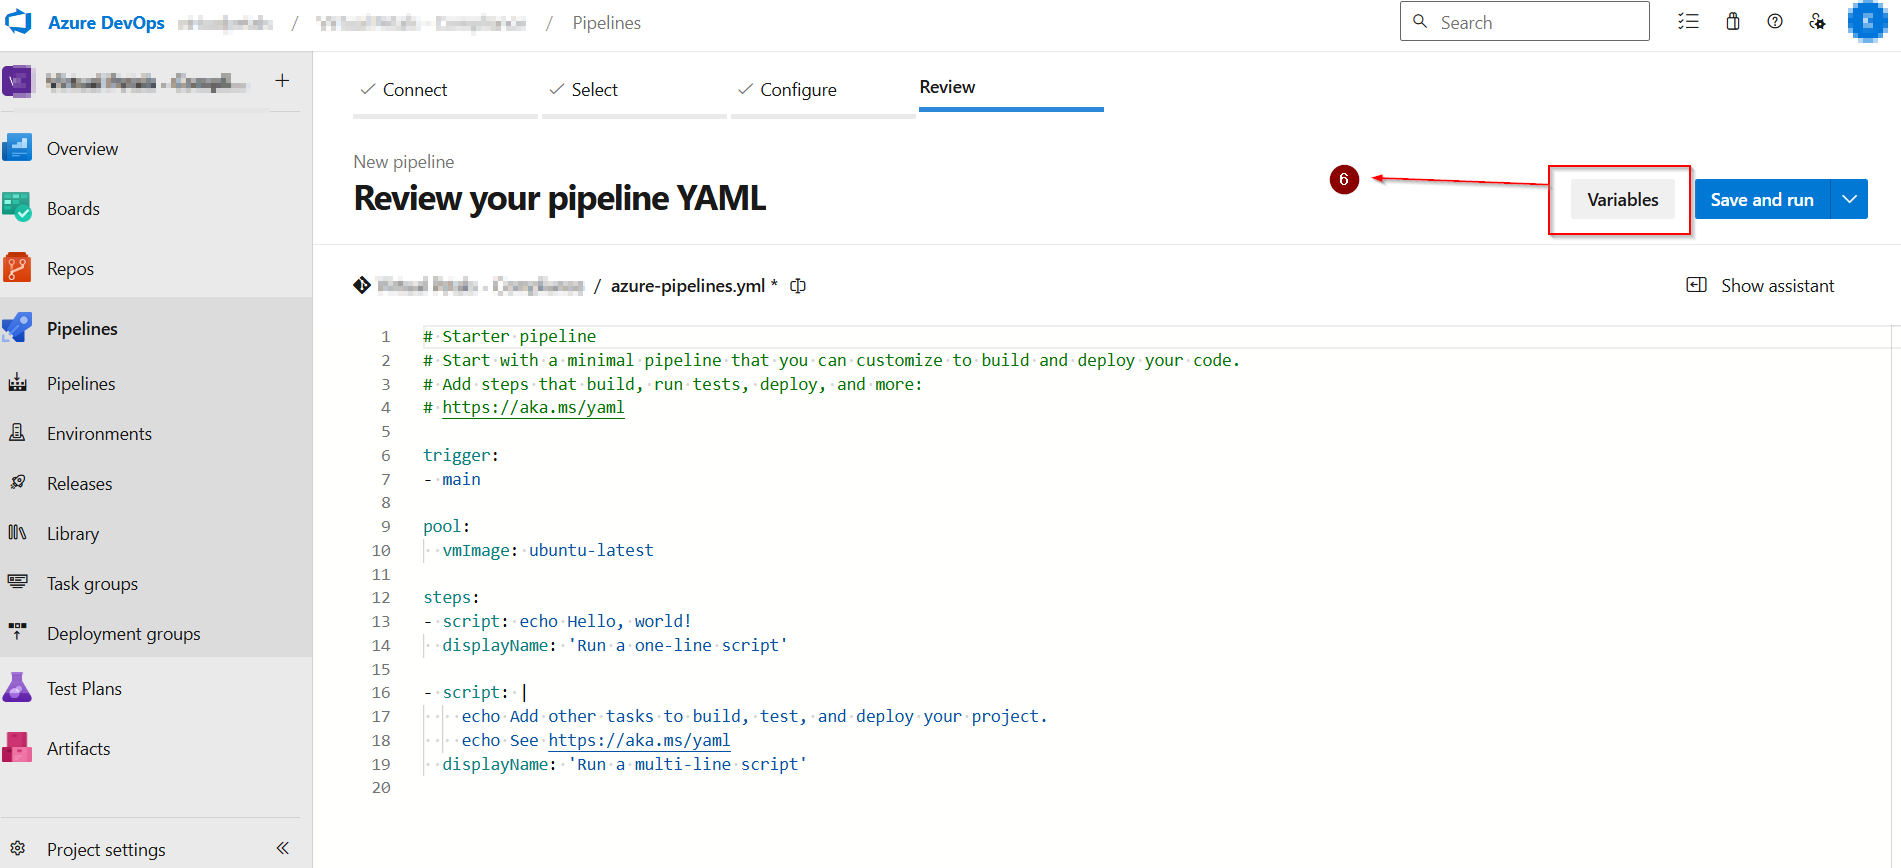
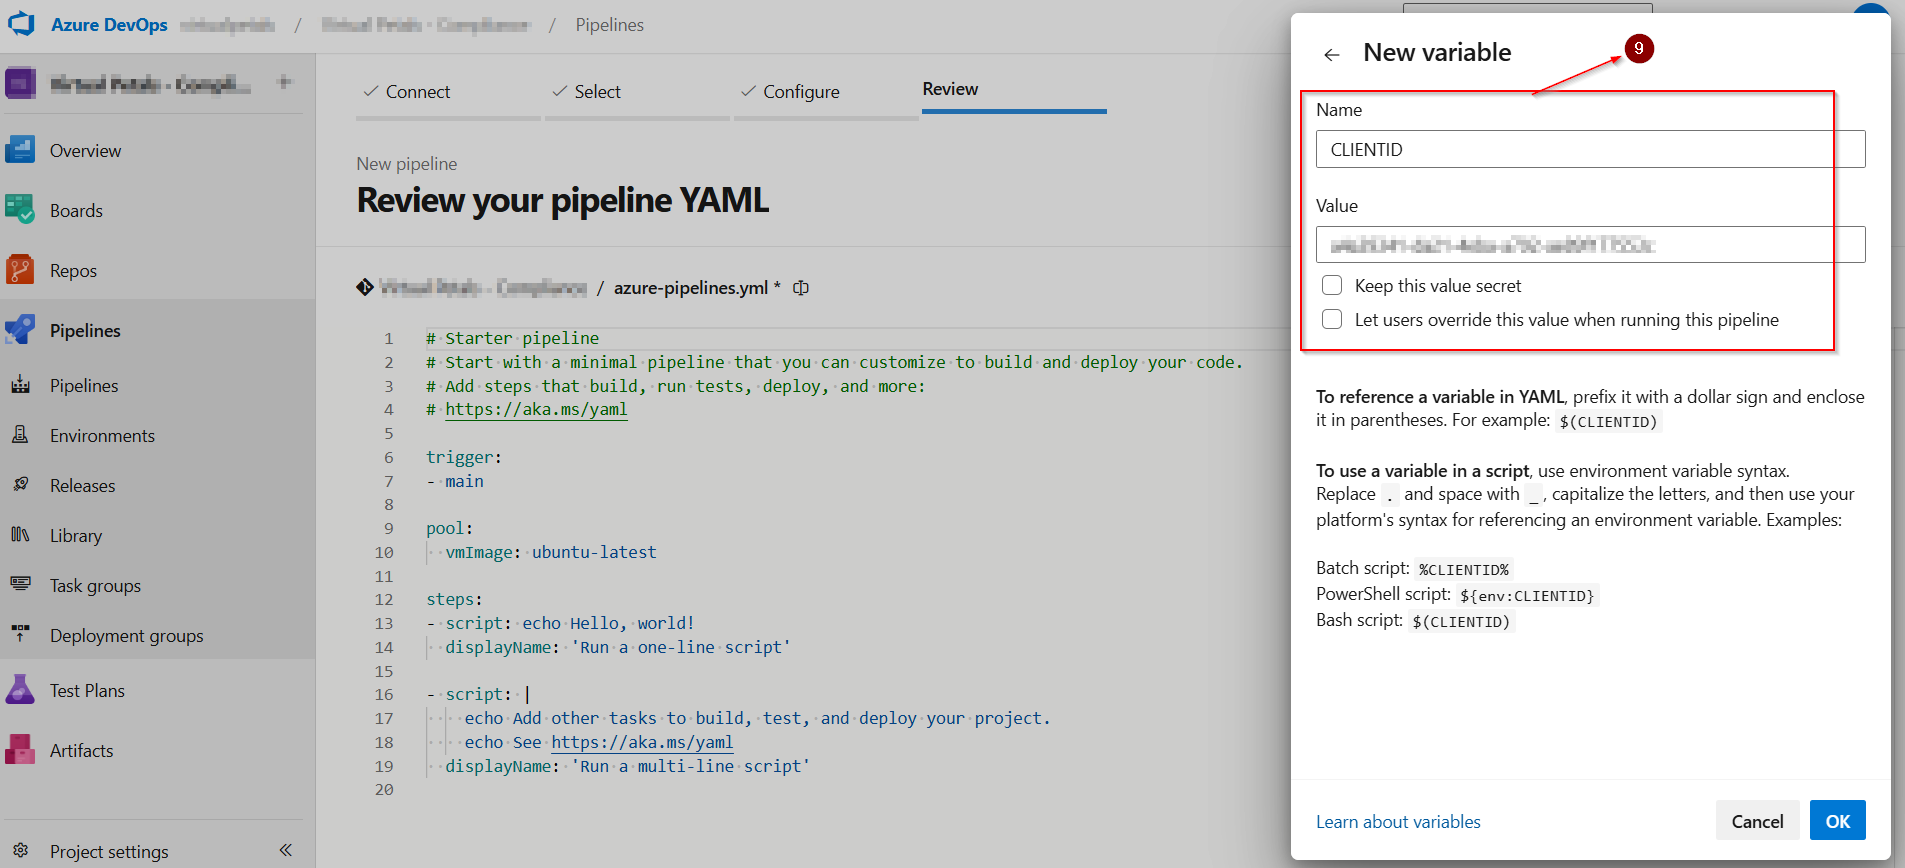
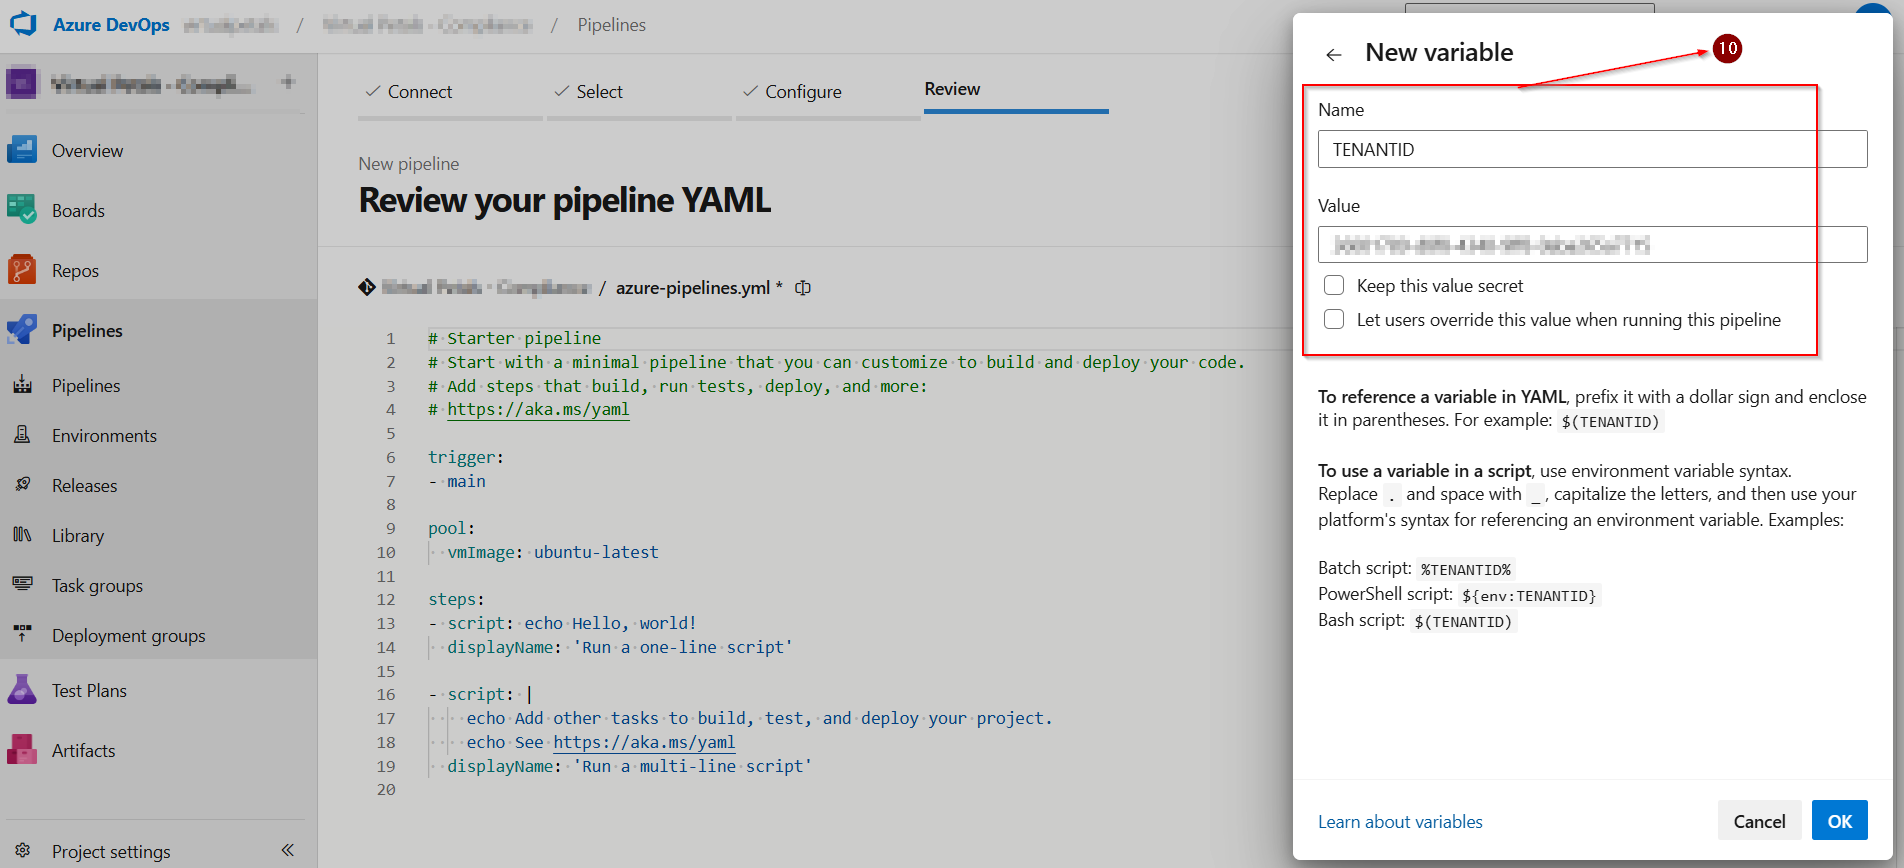
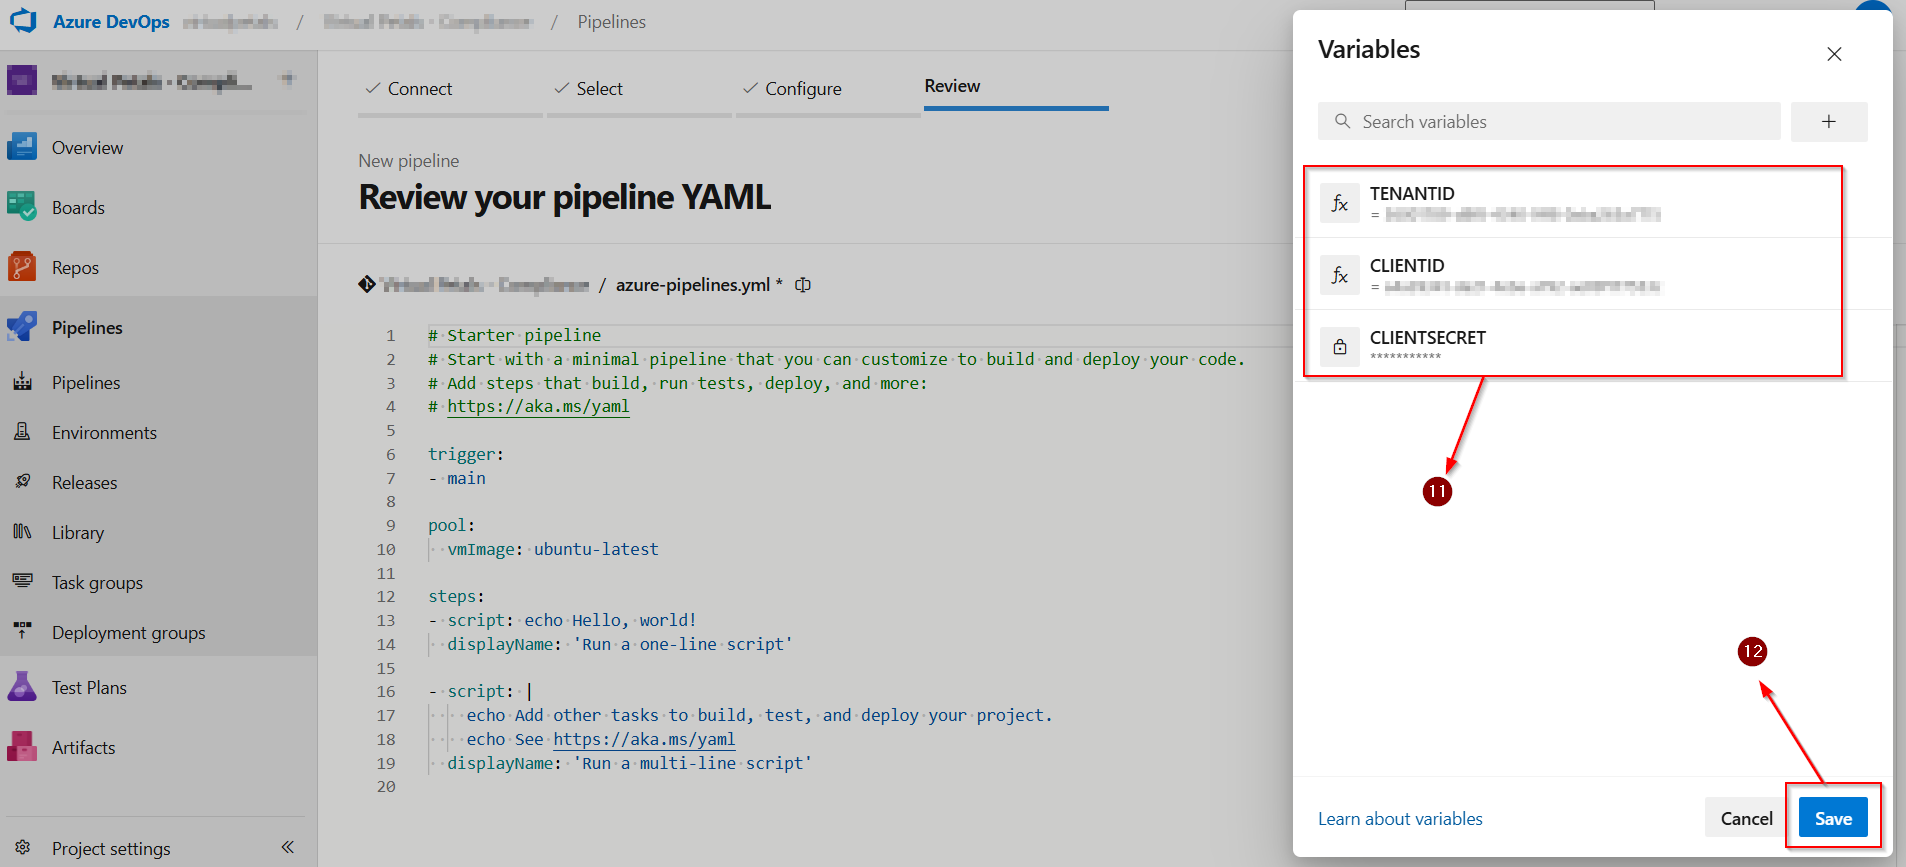
- Select Variable to open the variables editor and add the following variables.
- In the Entra portal, open the application you created earlier and copy the following values from the Overview page:
- ?Name: TENANTID, Value: The Directory (tenant) ID of the Entra tenant.
- ?Name: CLIENTID, Value: The Application (client) ID of the Entra application you created.
- ?Name: CLIENTSECRET, Value: The client secret you copied in the previous step.
- Replace the content of the azure-pipelines.yml file with the code below.
- Select Validate and save > Save.
- Select Run to run the pipeline.
- Select Job to view the test results.
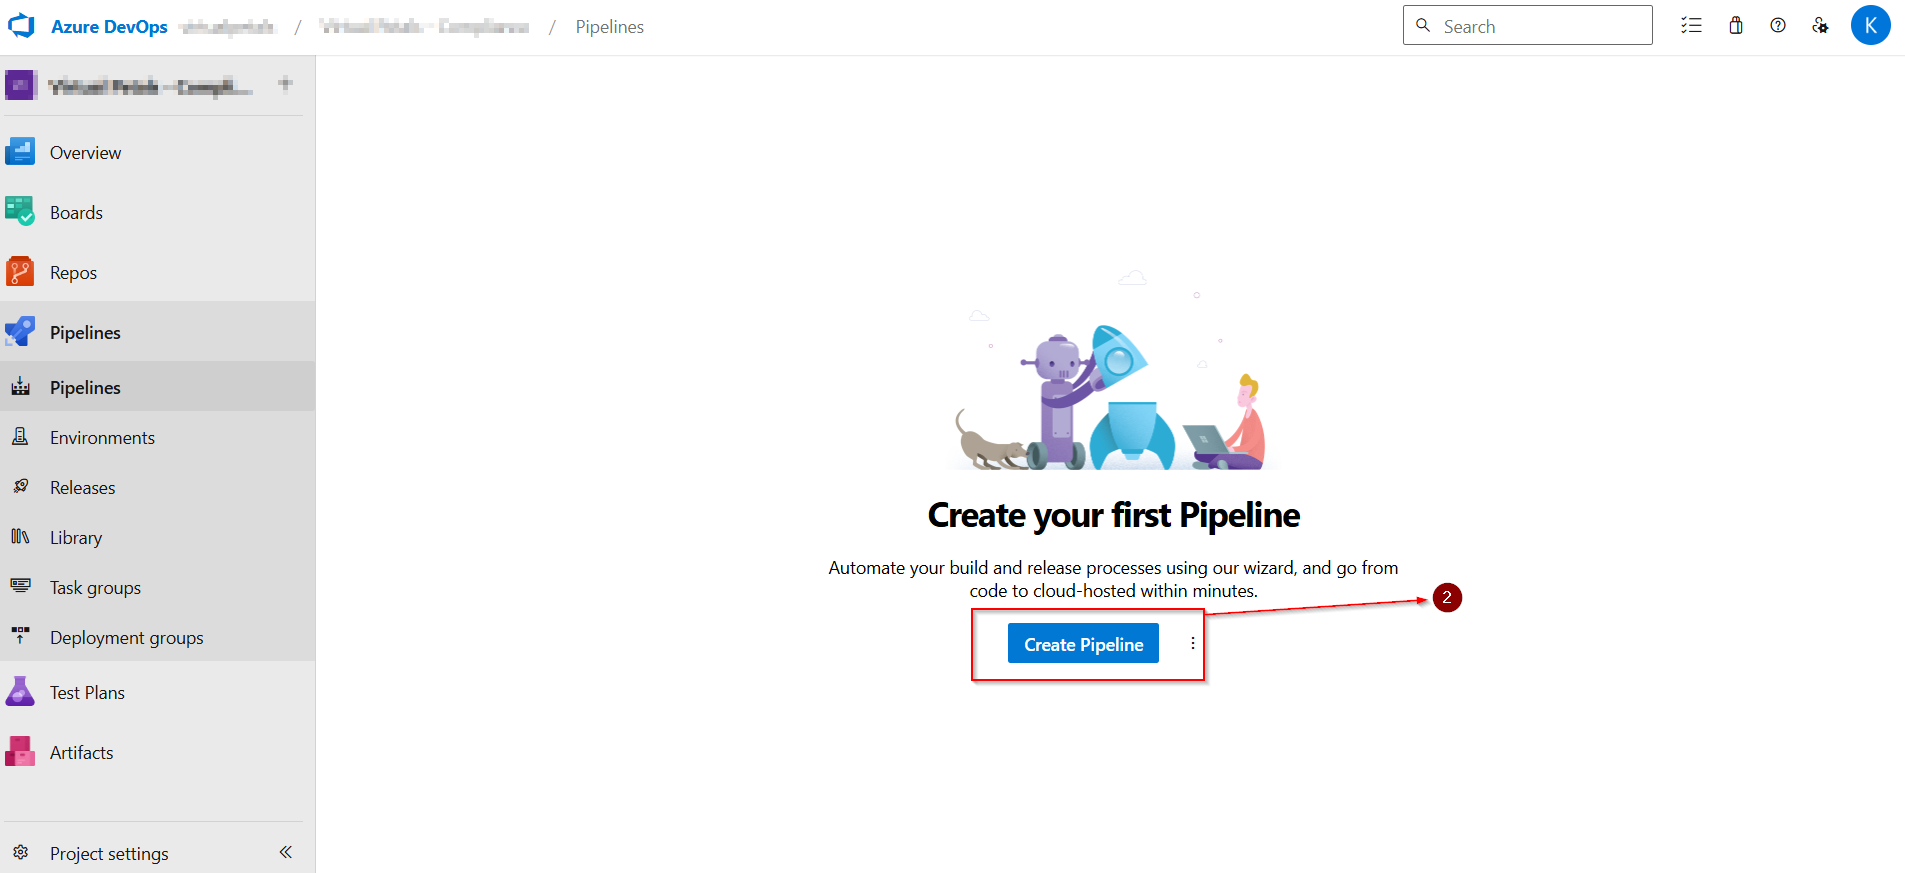
Open your Azure DevOps project > Select Pipelines.
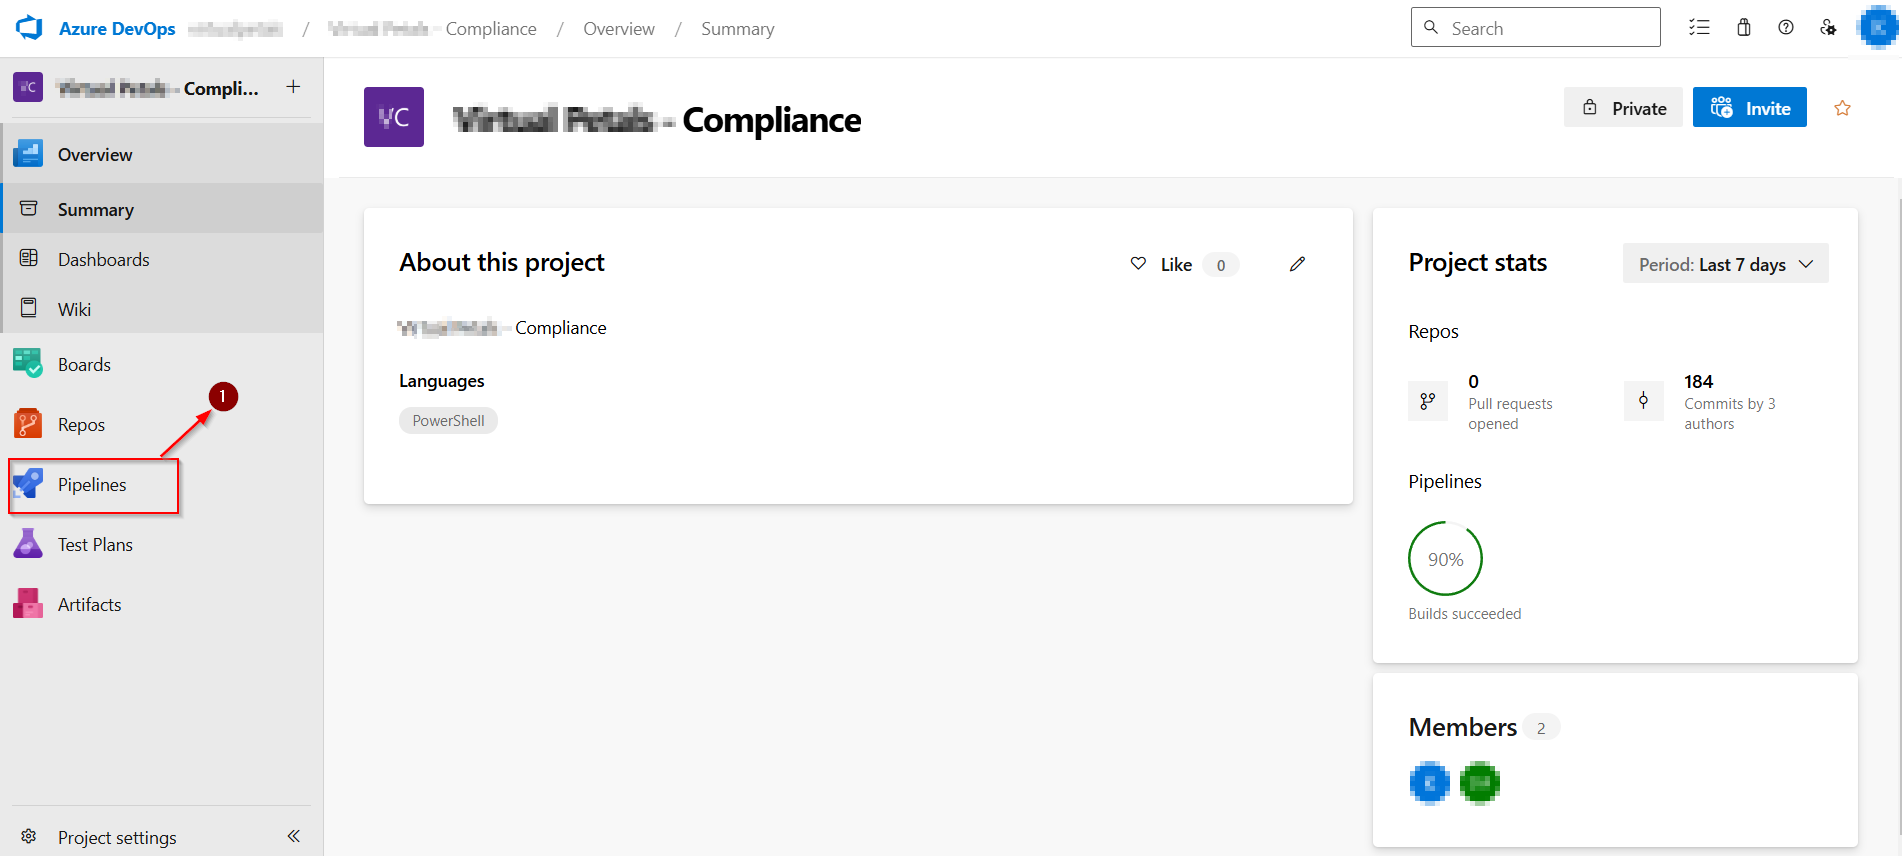
Click New pipeline.
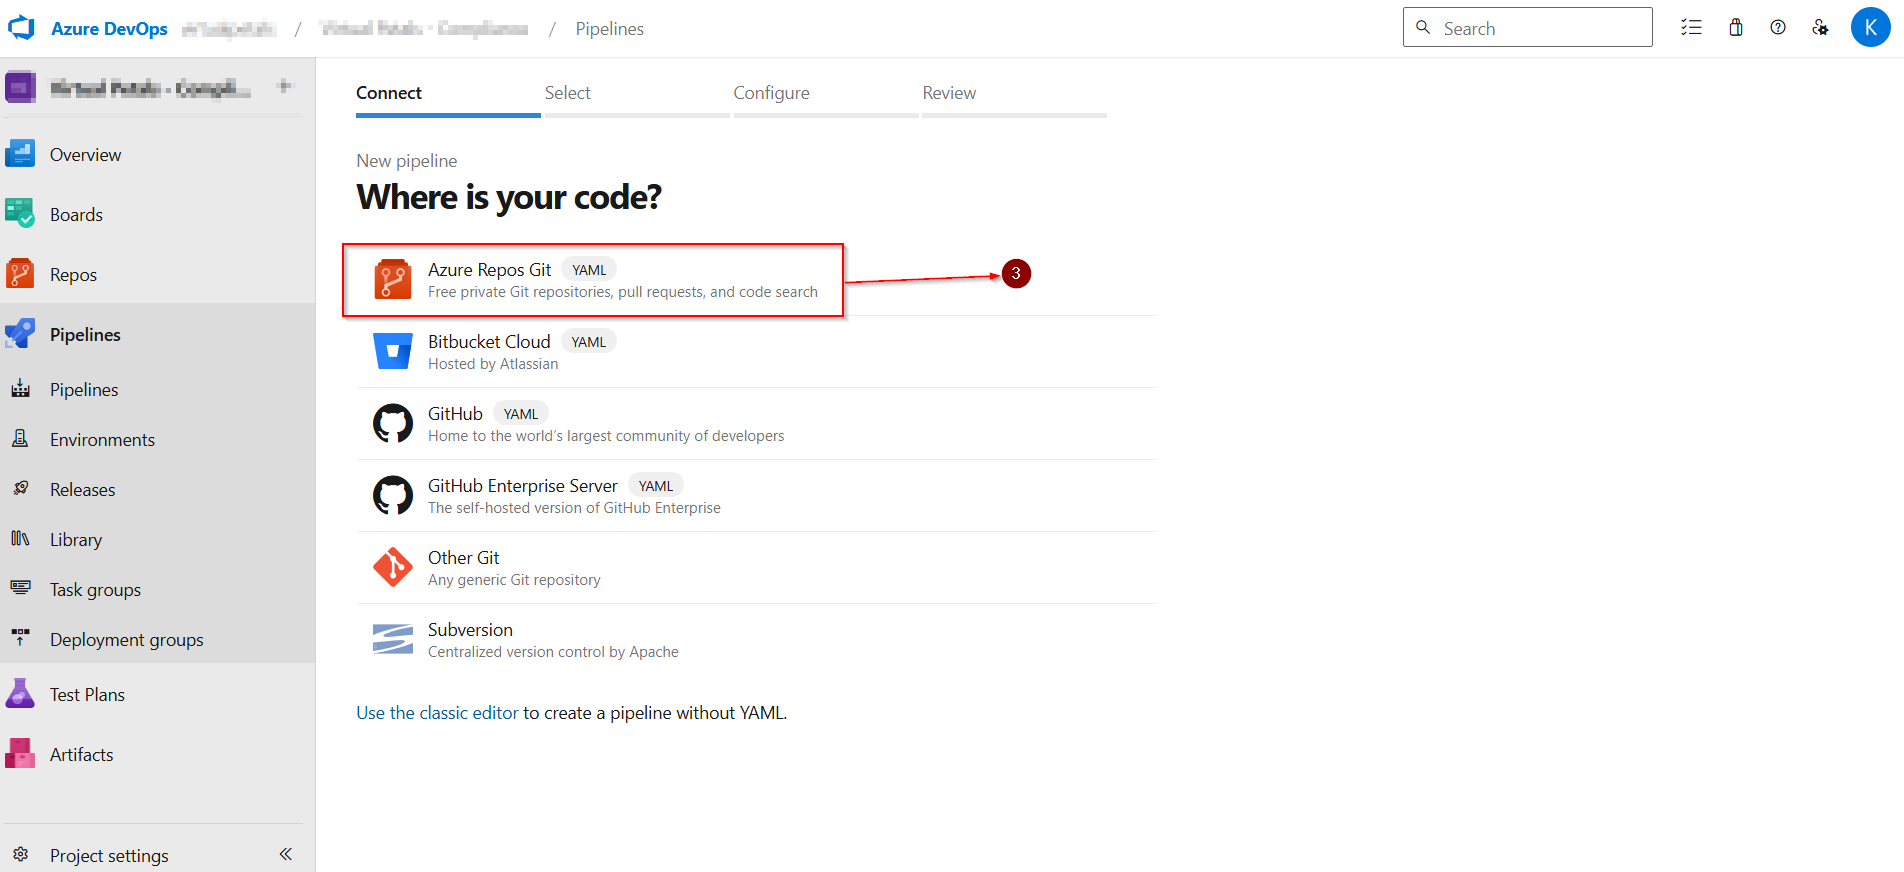
Select Azure Repos Git as the location of your code.
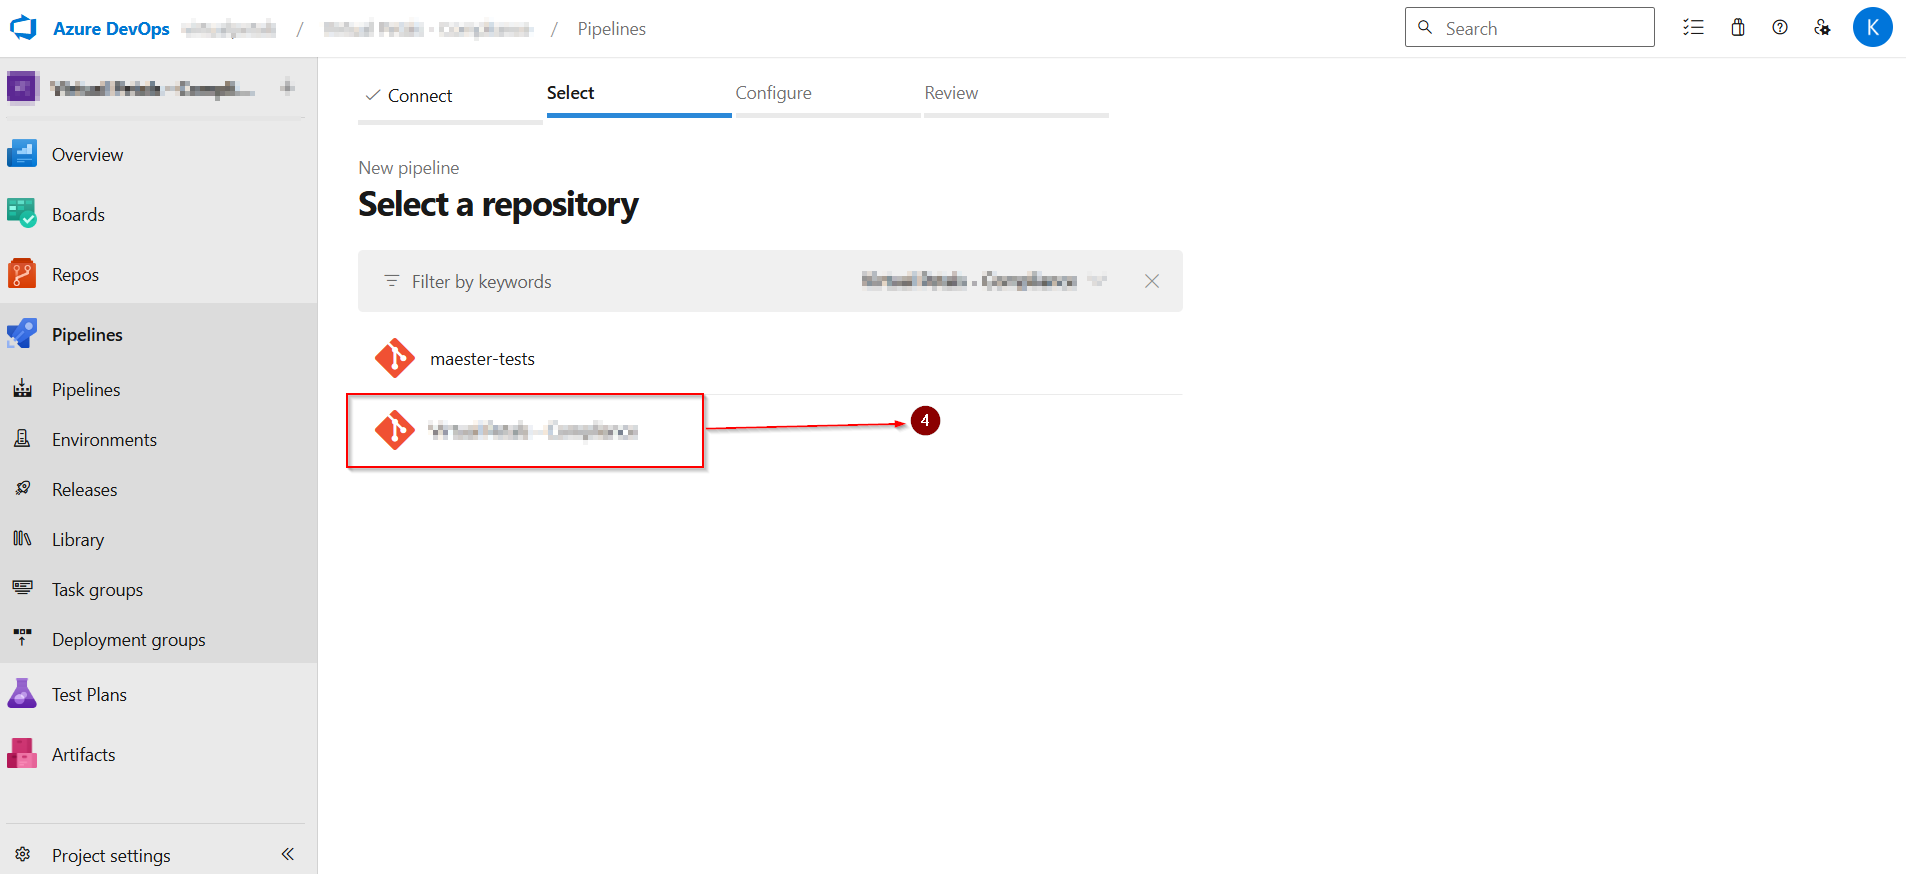
Select the repository where you imported the Maester tests.
Select Starter pipeline.
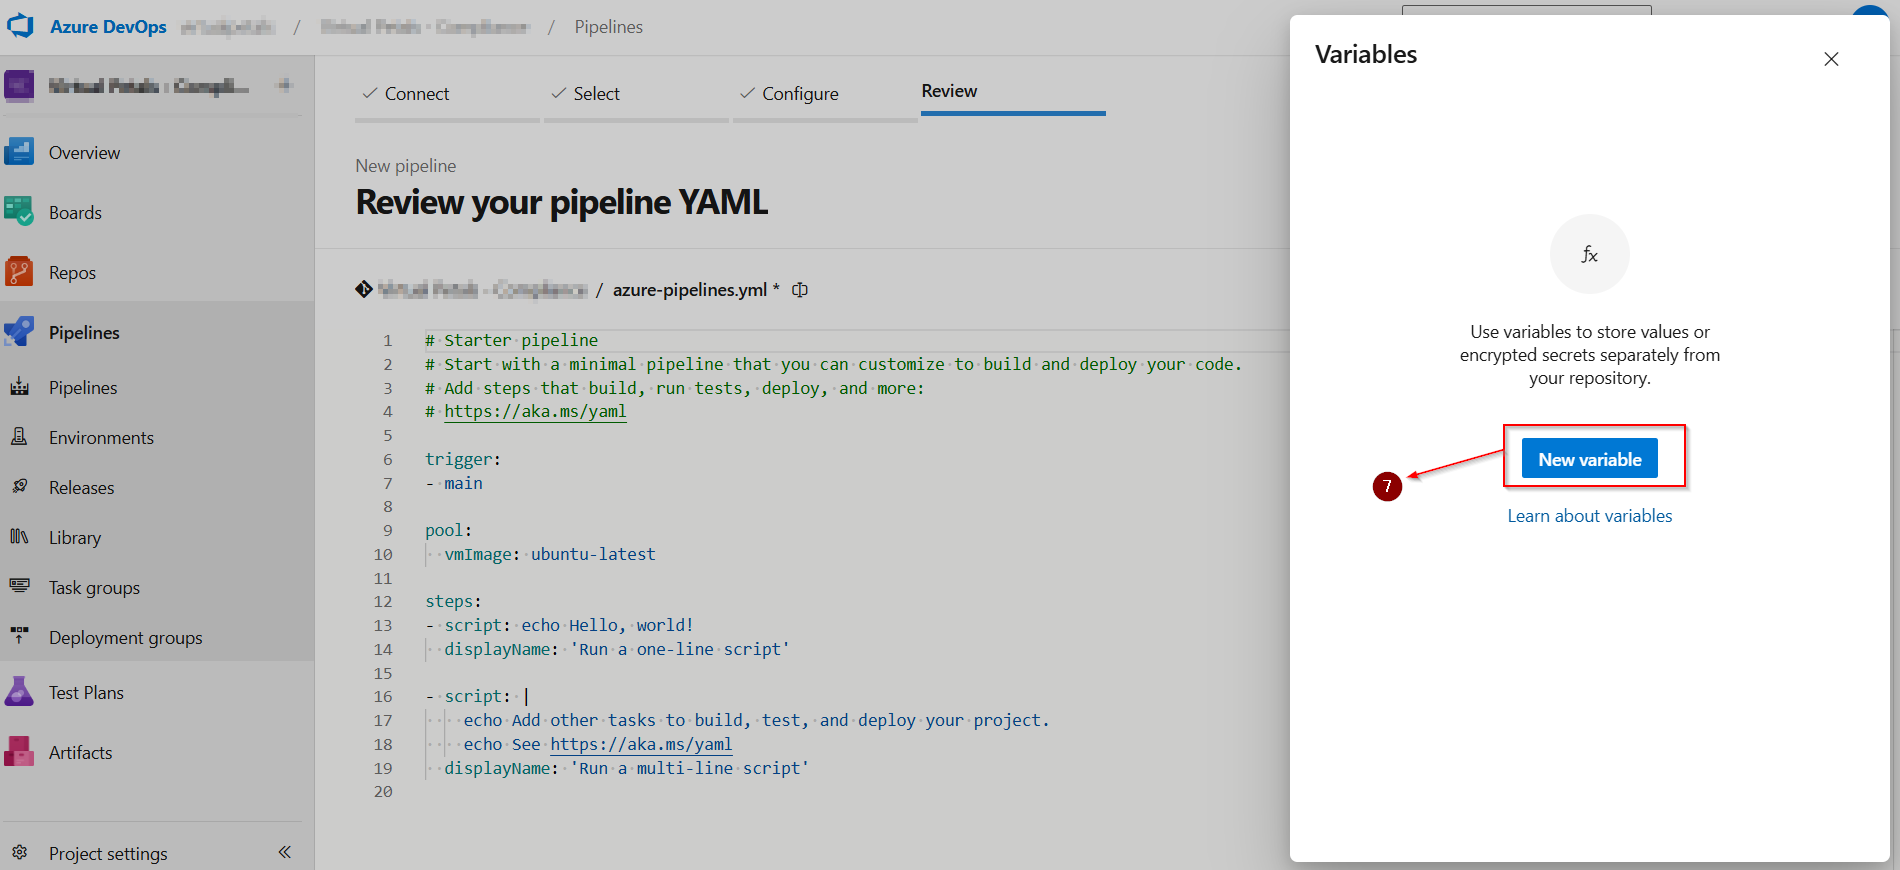
Select Variable to open the variables editor and add the following variables.
Click New Variable.
In the Entra portal, open the application you created earlier and copy the following values from the Overview page:
Name: CLIENTSECRET, Value: The client secret you copied in the previous step.
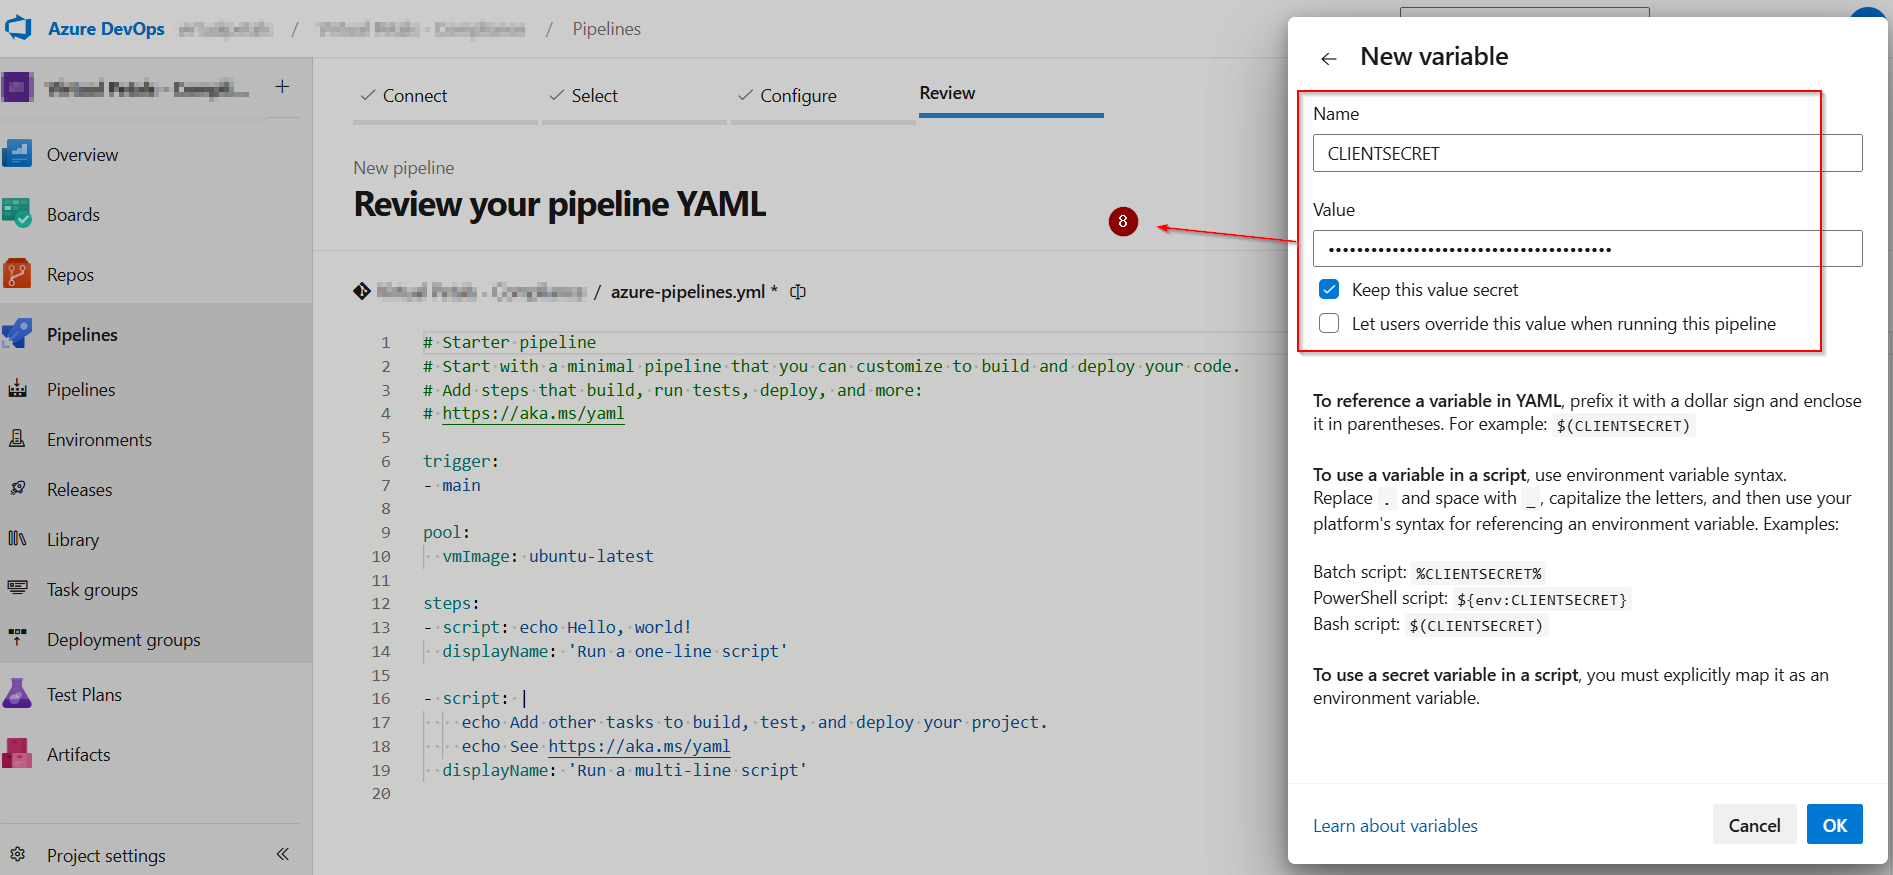
Name: CLIENTID, Value: The Application (client) ID of the Entra application you created.
Name: TENANTID, Value: The Directory (tenant) ID of the Entra tenant.
After Add The Variables > Select The Save
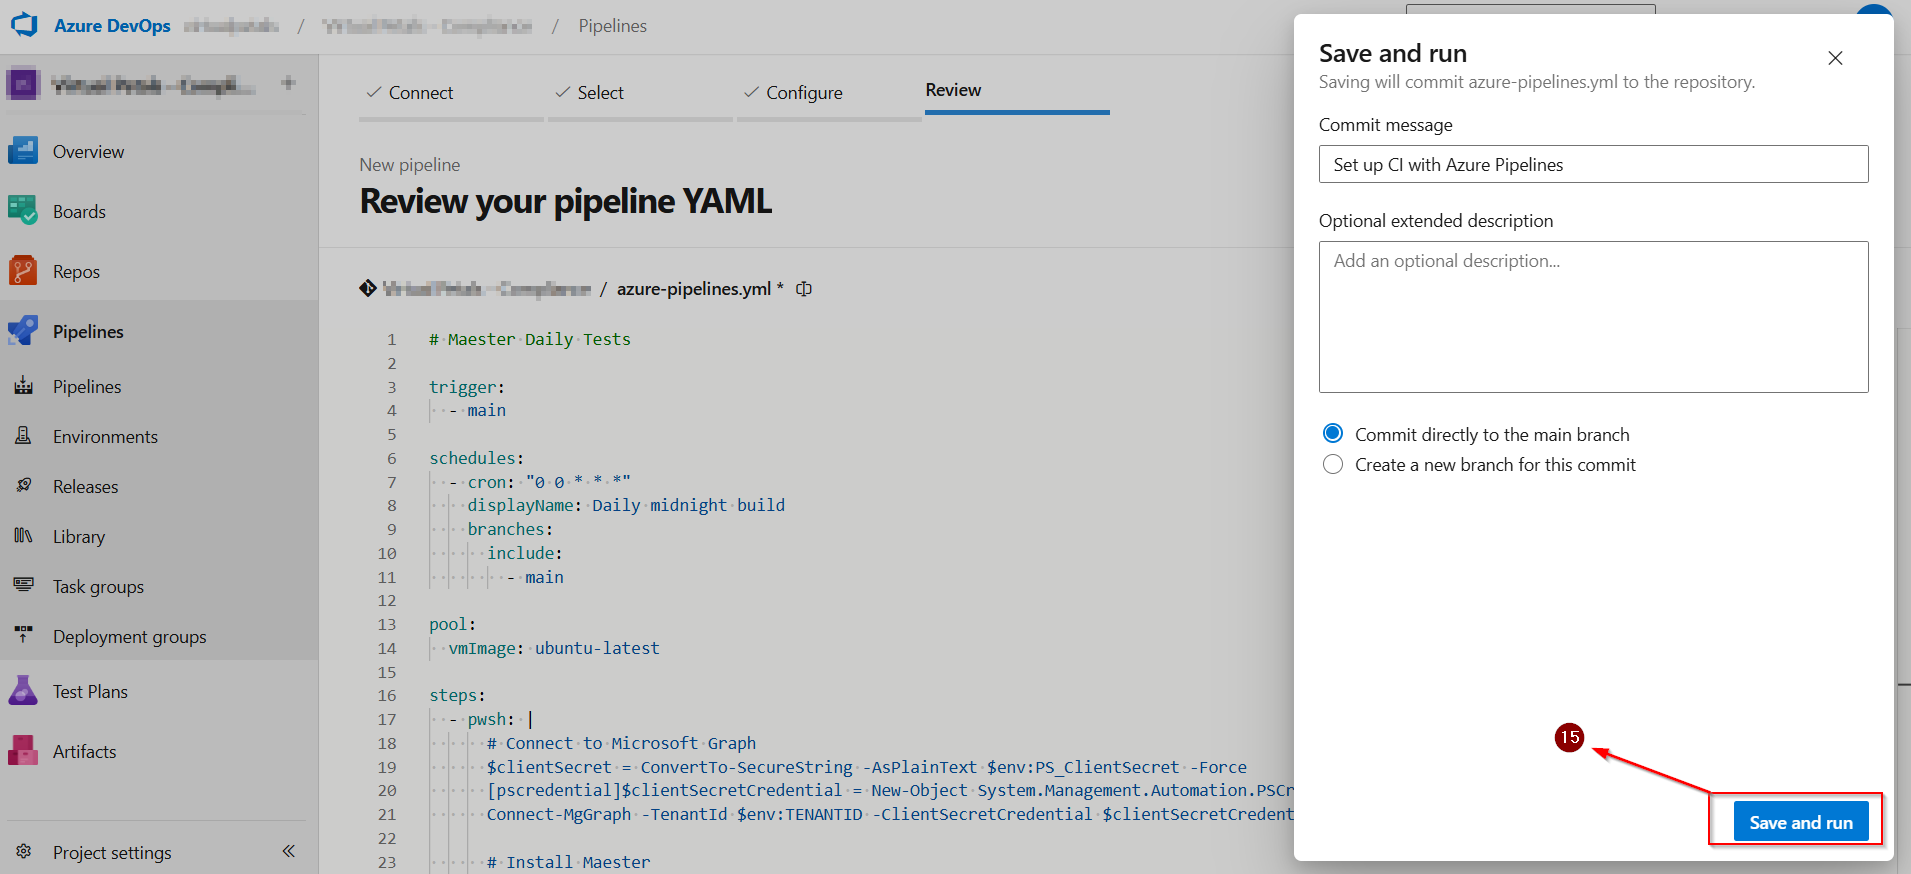
Replace the content of the azure-pipelines.yml file with the code below. Select Validate and save > Save.
Yaml Code
# Maester Daily Tests
trigger:
- main
schedules:
- cron: "0 0 * * *"
displayName: Daily midnight build
branches:
include:
- main
pool:
vmImage: ubuntu-latest
steps:
- task: AzurePowerShell@5
displayName: "Run Maester"
inputs:
azureSubscription: "Maester Service Connection"
pwsh: true
azurePowerShellVersion: LatestVersion
ScriptType: InlineScript
Inline: |
# Connect to Microsoft Graph
$accessToken = (Get-AzAccessToken -ResourceTypeName MSGraph).Token | ConvertTo-SecureString -AsPlainText -Force
Connect-MgGraph $accessToken
# Install Maester
Install-Module Maester -Force
# Configure test results
$PesterConfiguration = New-PesterConfiguration
$PesterConfiguration.TestResult.Enabled = $true
$PesterConfiguration.TestResult.OutputPath = '$(System.DefaultWorkingDirectory)/test-results/test-results.xml'
# Run Maester tests
Invoke-Maester -Path $(System.DefaultWorkingDirectory)/tests/Maester/ -PesterConfiguration $PesterConfiguration -OutputFolder '$(System.DefaultWorkingDirectory)/test-results'
- publish: $(System.DefaultWorkingDirectory)/test-results
displayName: Publish Maester Html Report
artifact: TestResults
- task: PublishTestResults@2
displayName: Publish Pester Test Results
inputs:
testResultsFormat: "NUnit"
testResultsFiles: "**/test-results.xml"
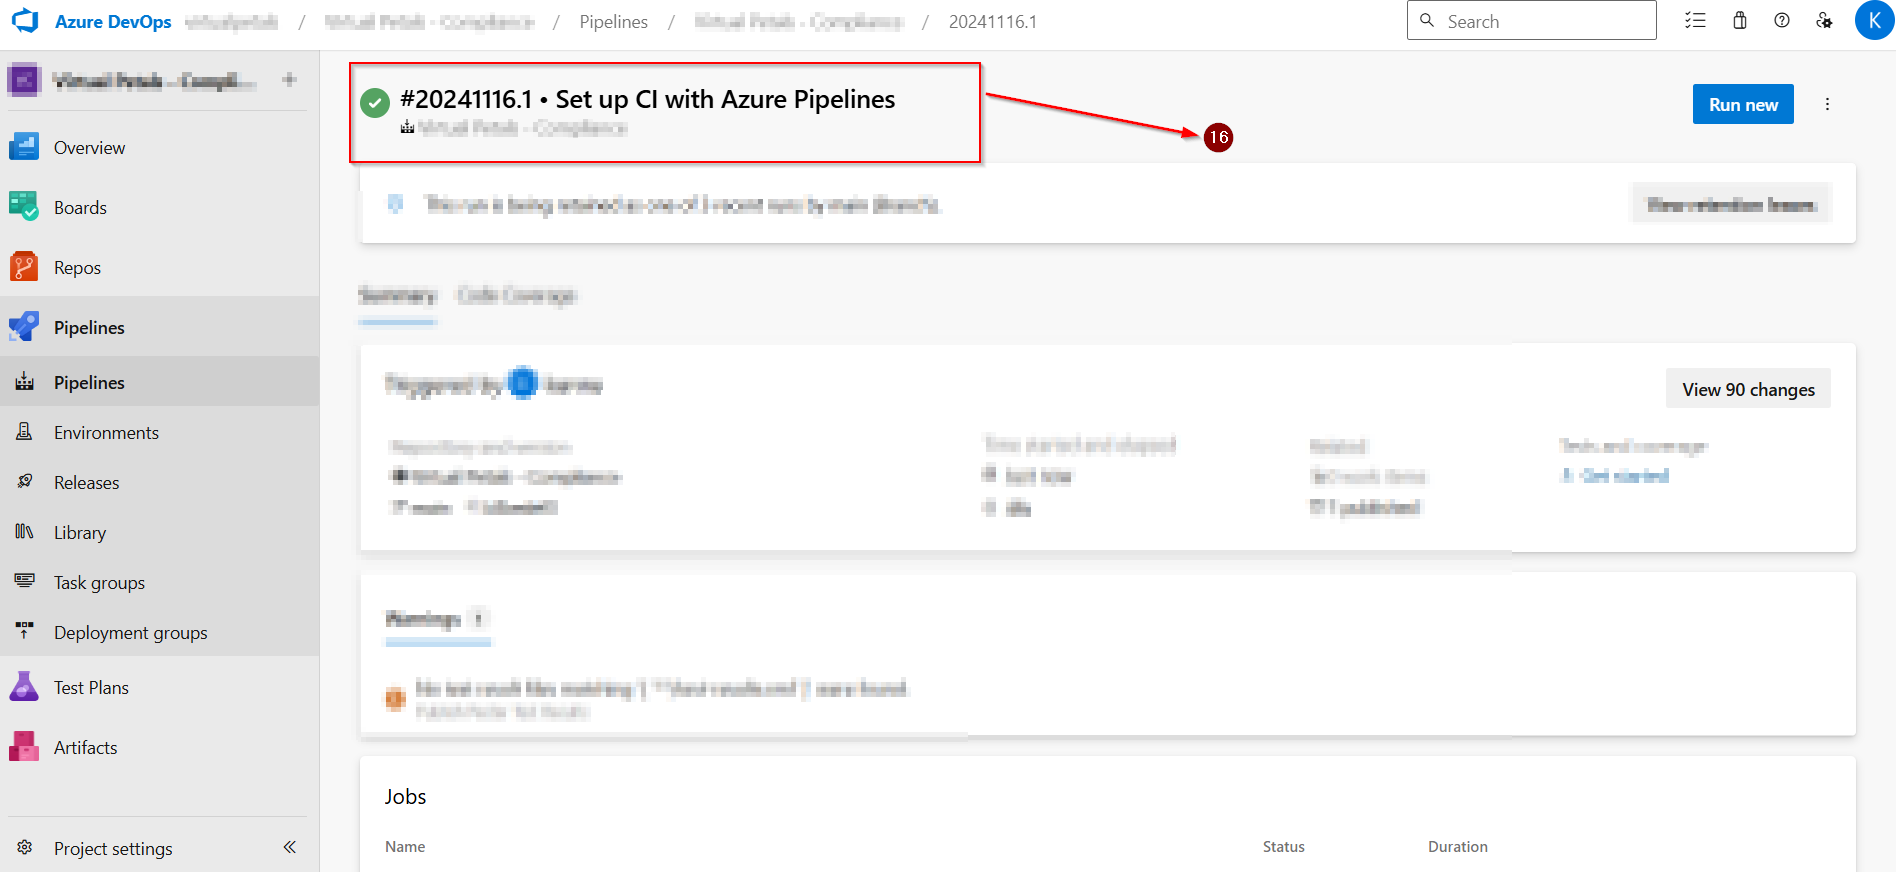
failTaskOnFailedTests: trueSelect Run to run the pipeline.
Pipeline Run Sucessfully.
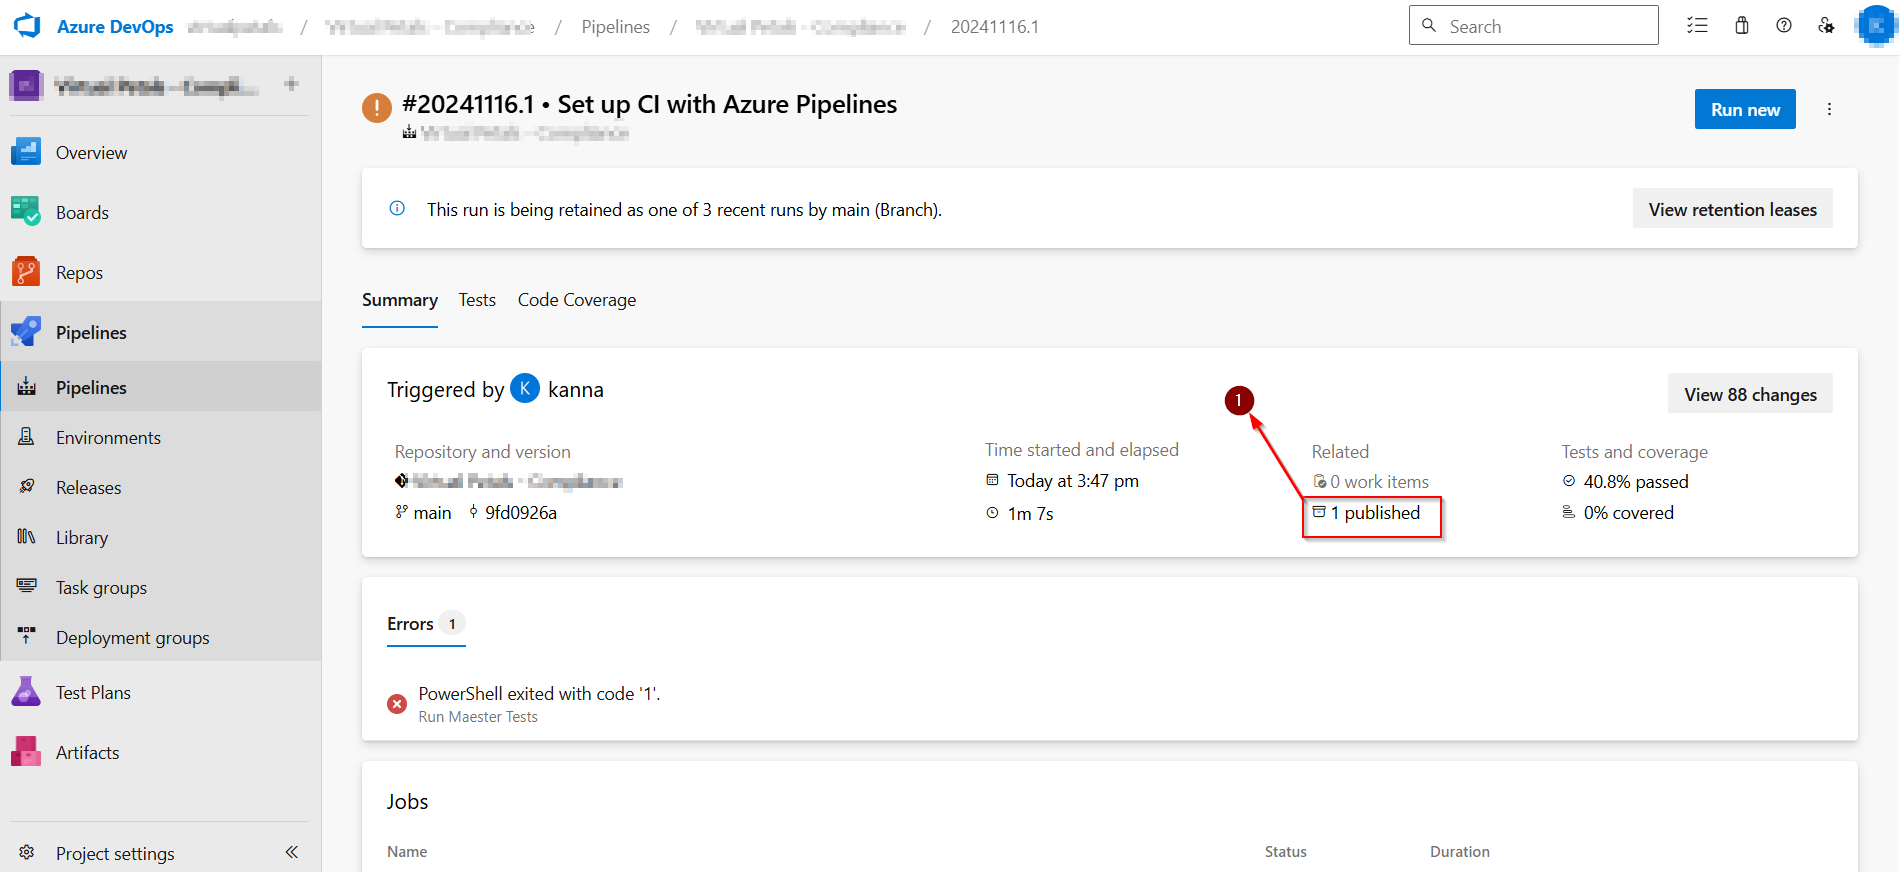
STEP-10: VIEWING THE TEST RESULTS
- Select Pipelines > Runs to view the status of the pipeline.
- Select on a run to view the test results.
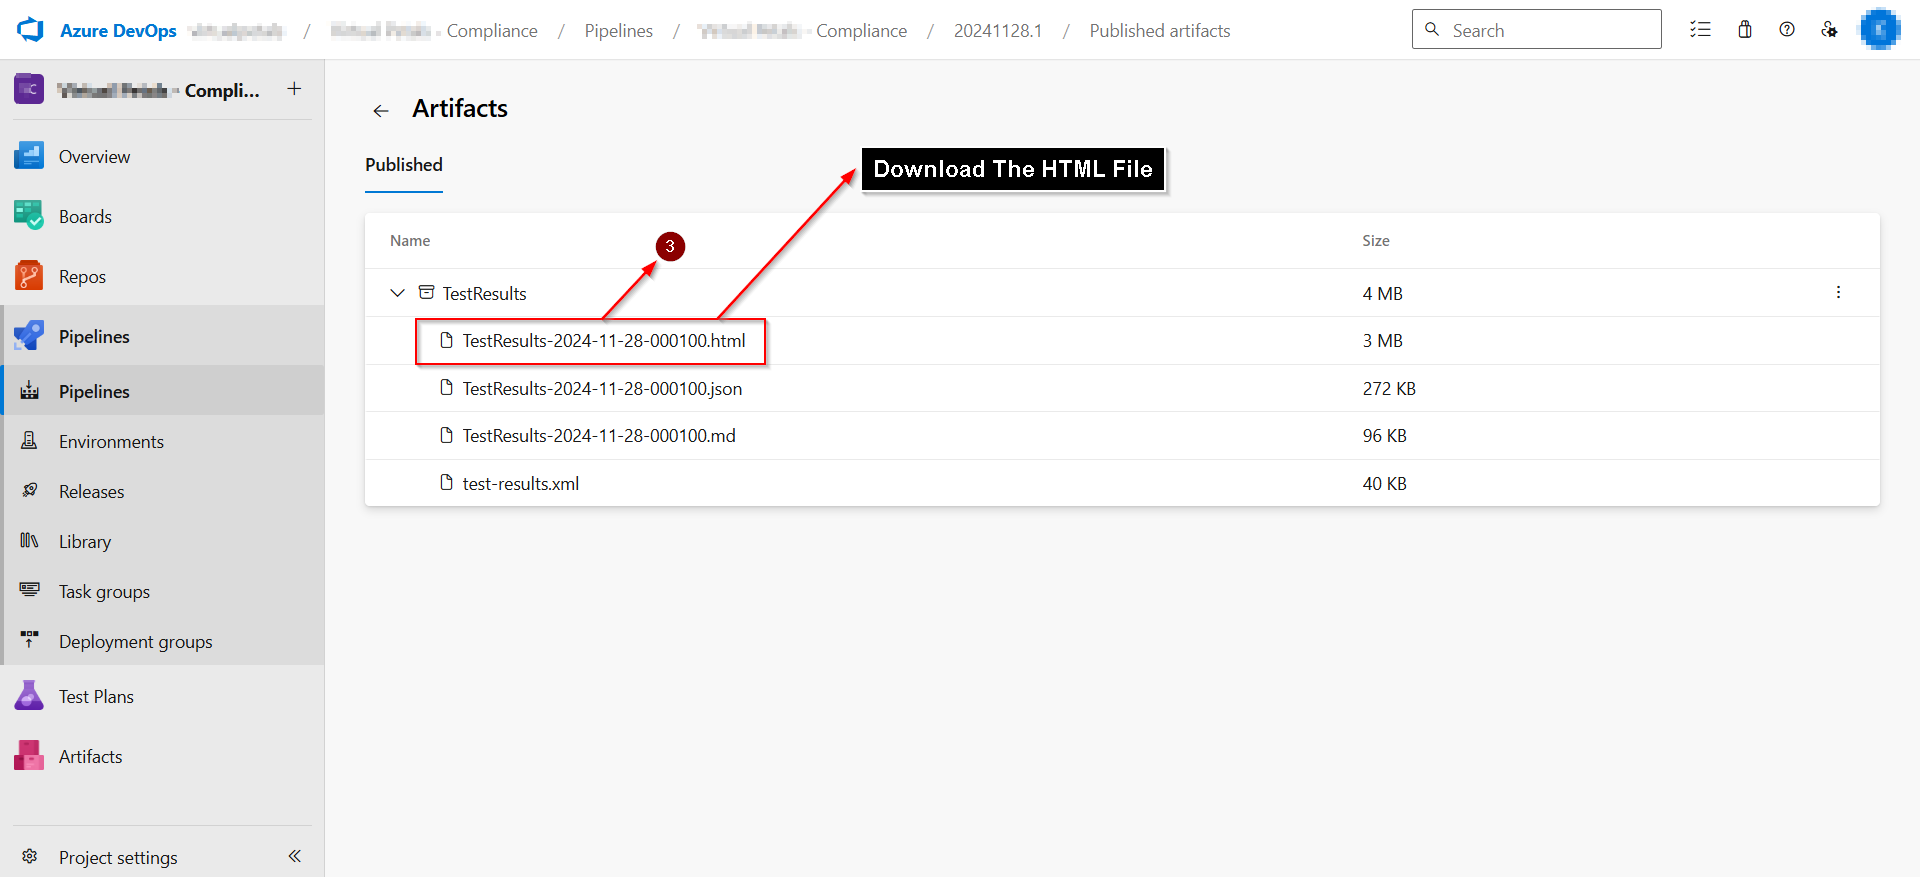
- Click Publisher > Select TestResults.
- Click TestResults > Select First File It’s Download.
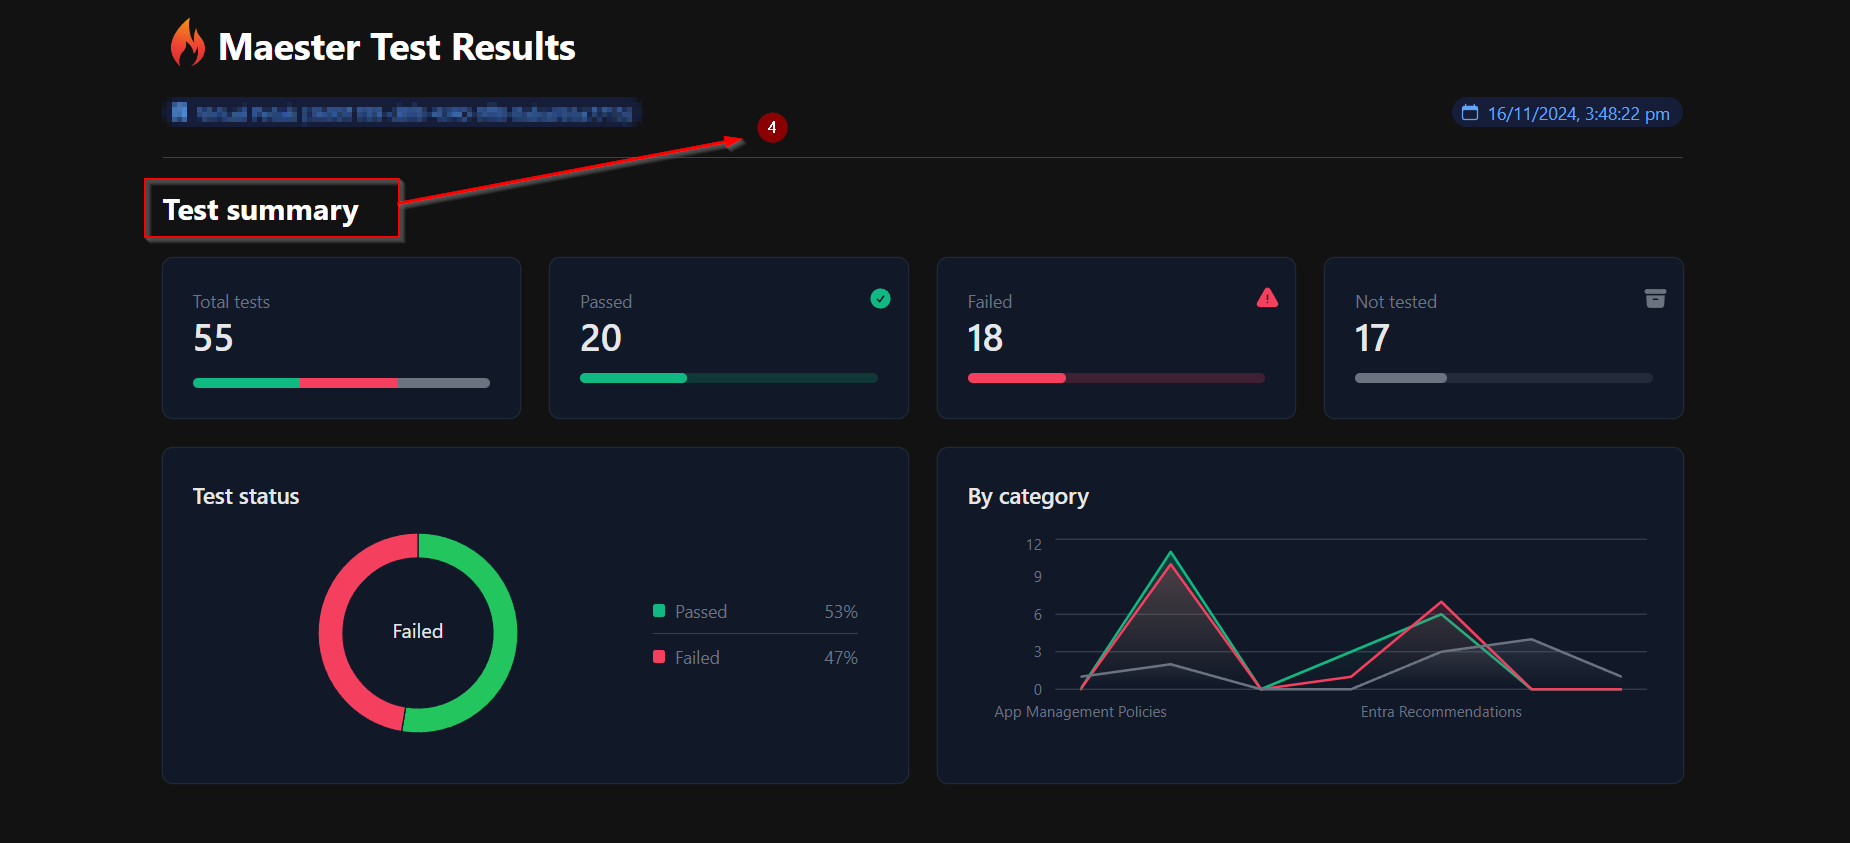
- Open The Downloaded File.
- To View The Maester Test Results.
- To View Test Results in Pipeline Dashboard.
Click Publisher > Select TestResults.
Click TestResults.
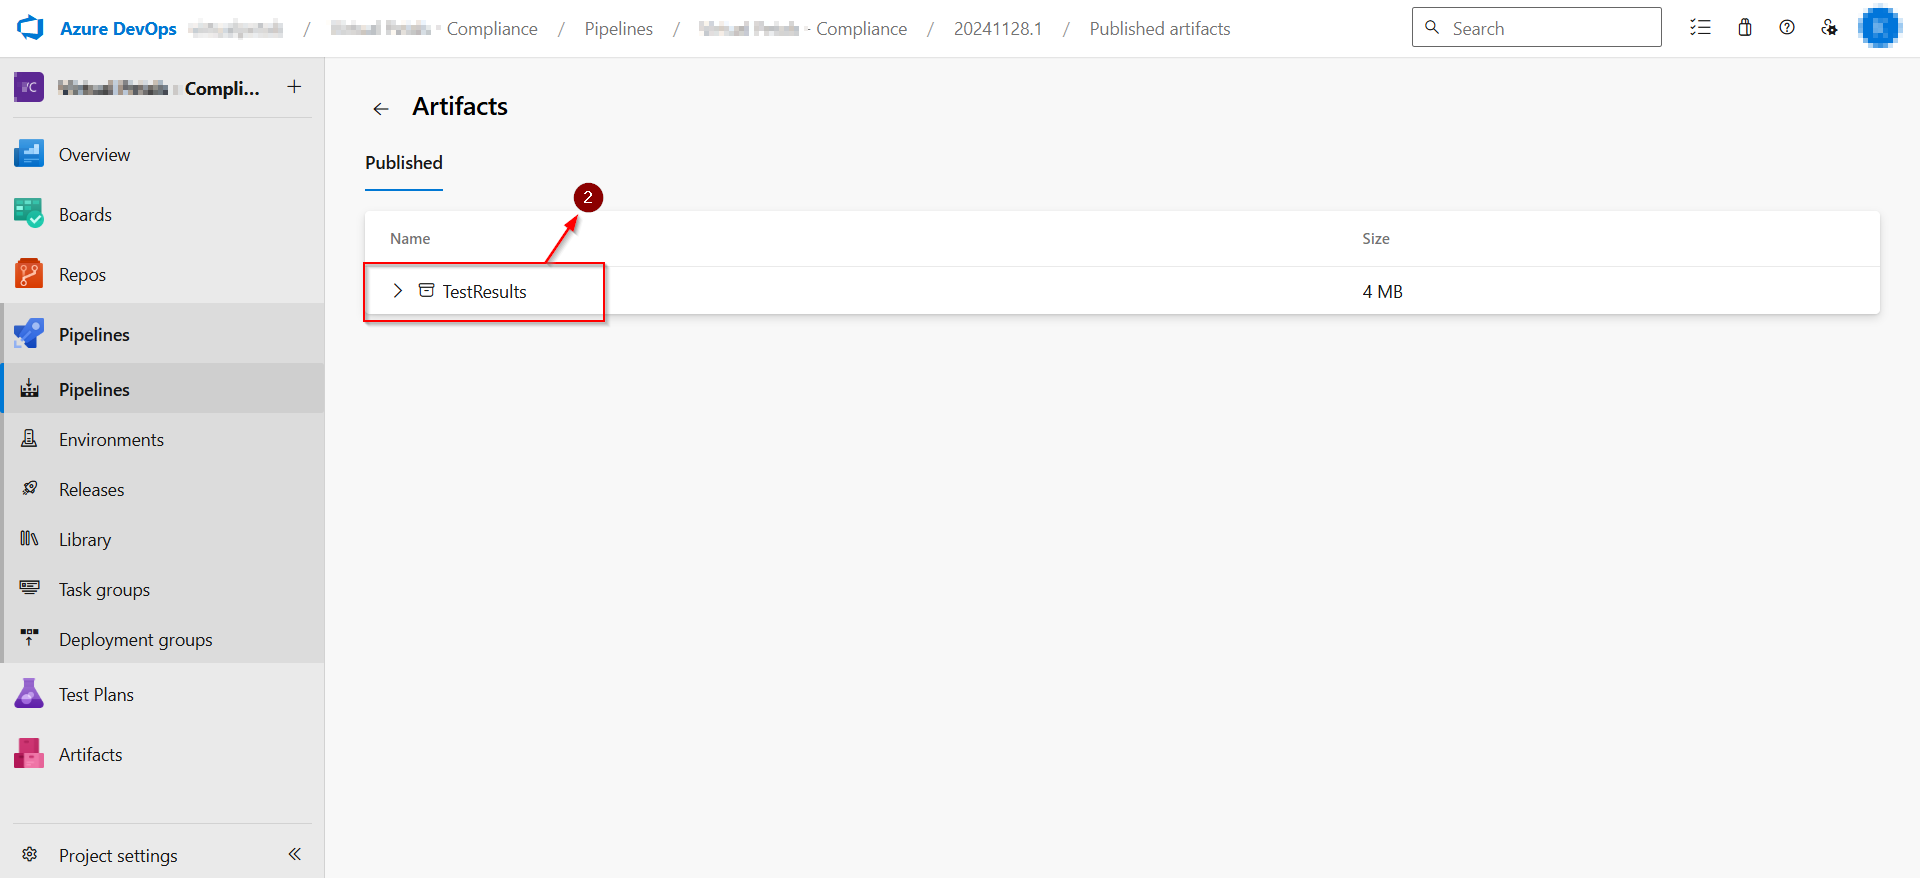
Select First File It’s Download.
Open The Downloaded File. To View The Maester Test Results.
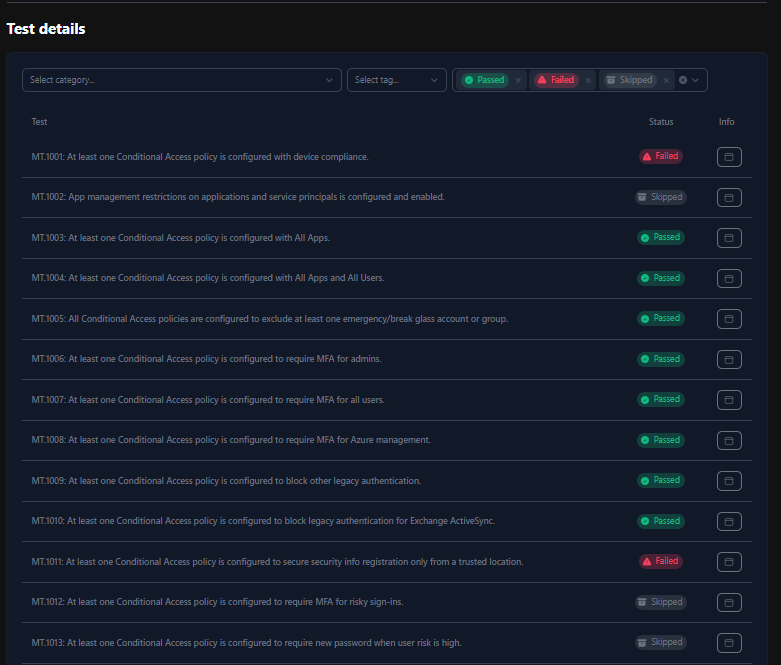
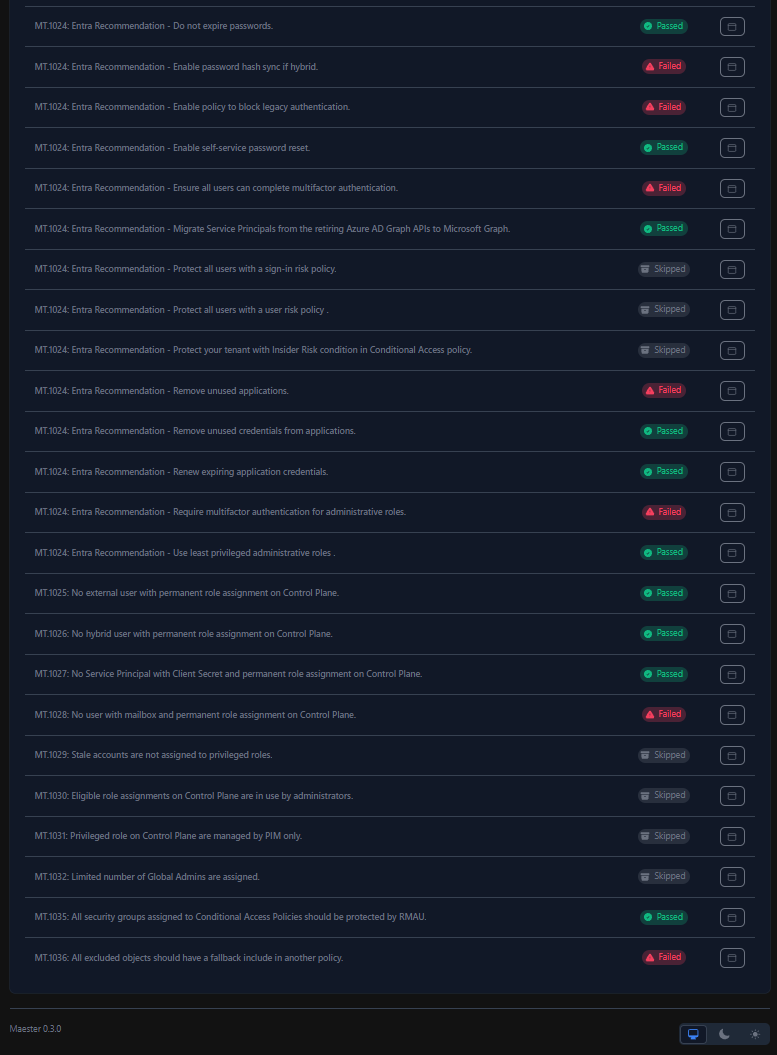
To View The Test Details Passed And Failed In Detailed.

To View Test Results in Pipeline Dashboard.


")