40 C
Dubai
Tuesday, April 29, 2025
Home Blog Page 3

Device Preparation Policy – (Autopilot V2)

While the official name is “Windows Autopilot Device Preparation,” it’s a bit of a mouthful and doesn’t quite capture its essence. Essentially, it’s useful to think of it in terms of “v1” versus “v2”:

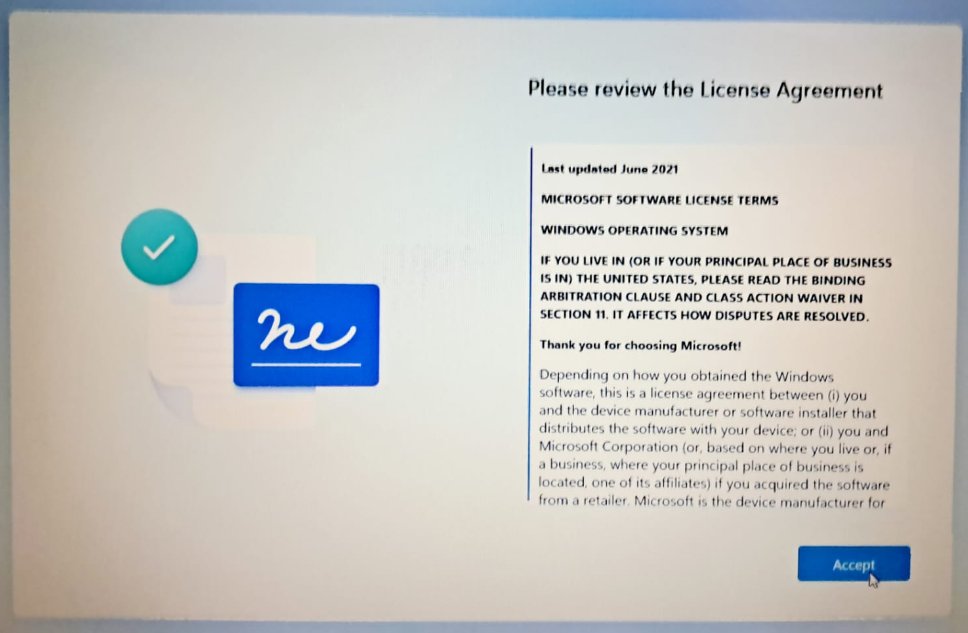
With Autopilot v1, devices were registered with the Autopilot service by you or your OEMs/resellers, creating a “big database of devices in the cloud.” Profiles were assigned to groups of these devices, often using dynamic groups, although static groups could also be used if you were registering the devices yourself. During deployment, devices retrieved their Autopilot profile details from the service to complete OOBE, AAD or AD join, MDM enrollment, and the remaining provisioning steps. Autopilot v2, however, does away with this “big database of devices in the cloud” (to some extent — more on this later). When a Windows device starts up, it follows the usual OOBE screens, such as accepting the EULA and choosing between personal or work/school accounts, until you enter your Entra ID (AAD) credentials. This triggers the Entra ID Join (AAD Join) and MDM enrollment processes, with the Autopilot device preparation details (formerly known as the Autopilot profile and ESP profile) being sent to the device as part of the enrollment payload. Initially, it might have seemed, from my “reading the tea leaves” post, that there was a “new ESP page” and a “new profile type” (Autopilot Device Preparation) that would apply to all Autopilot scenarios, v1 and v2. However, it’s now clear that these changes are exclusive to v2; v1 won’t receive these updates.

Lets start creating a Device Preparation Policy

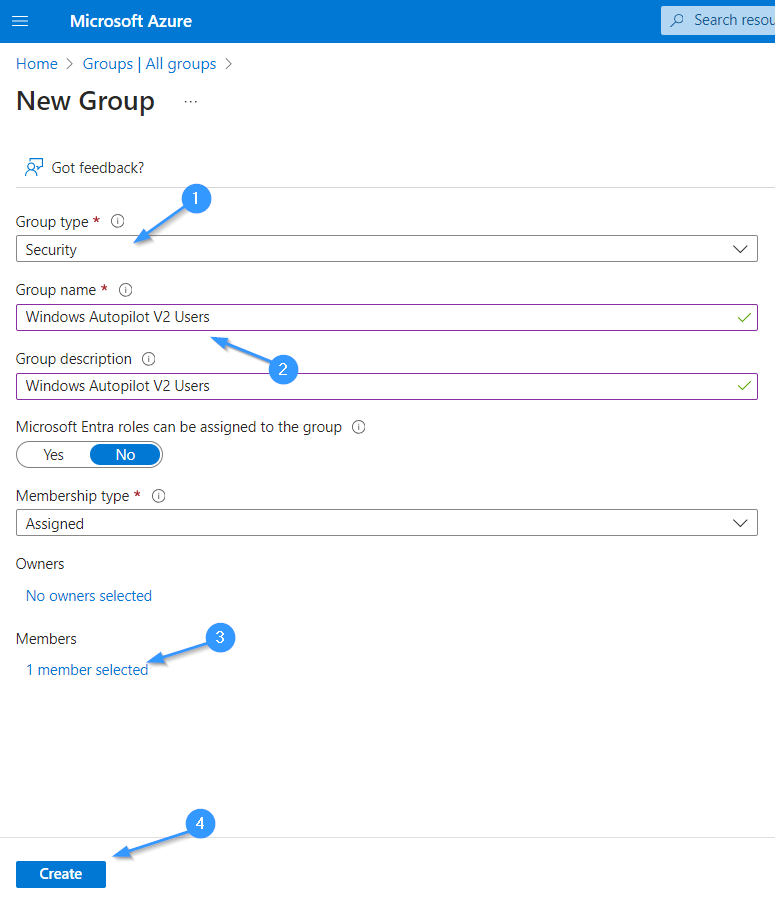
Step 1: Create a security group and add users who will add their device to Autopilot V2 enrollment

Begin by logging into the Microsoft Endpoint Manager admin center and navigating to the “Groups” section. Create a new security group, ensuring to assign a meaningful name that reflects its purpose. Once the group is created, add the users who will be responsible for adding their devices to the Autopilot V2 enrollment. This setup ensures that only authorized users can enroll devices, enhancing security and manageability.

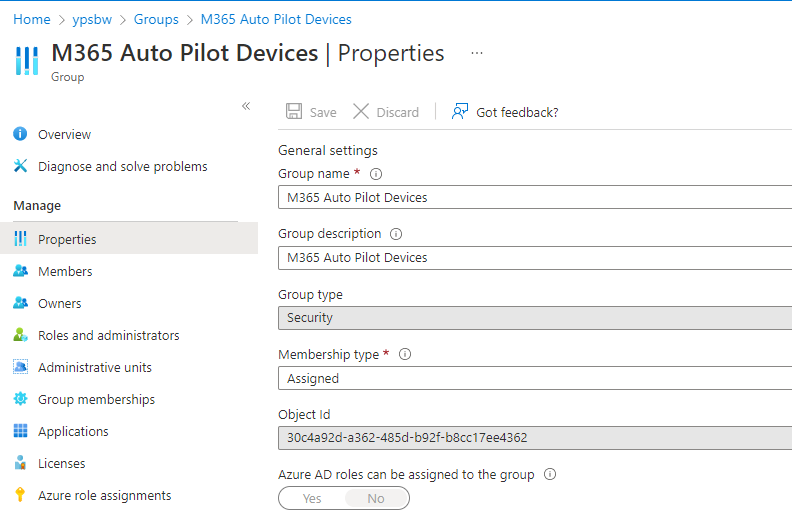
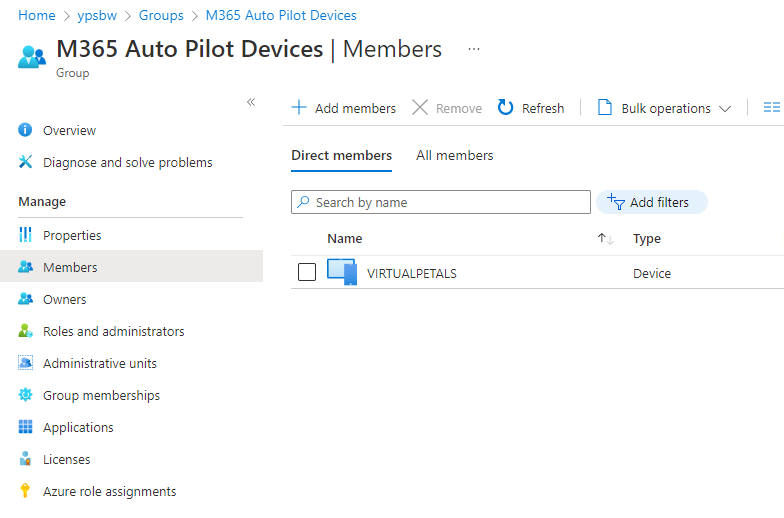
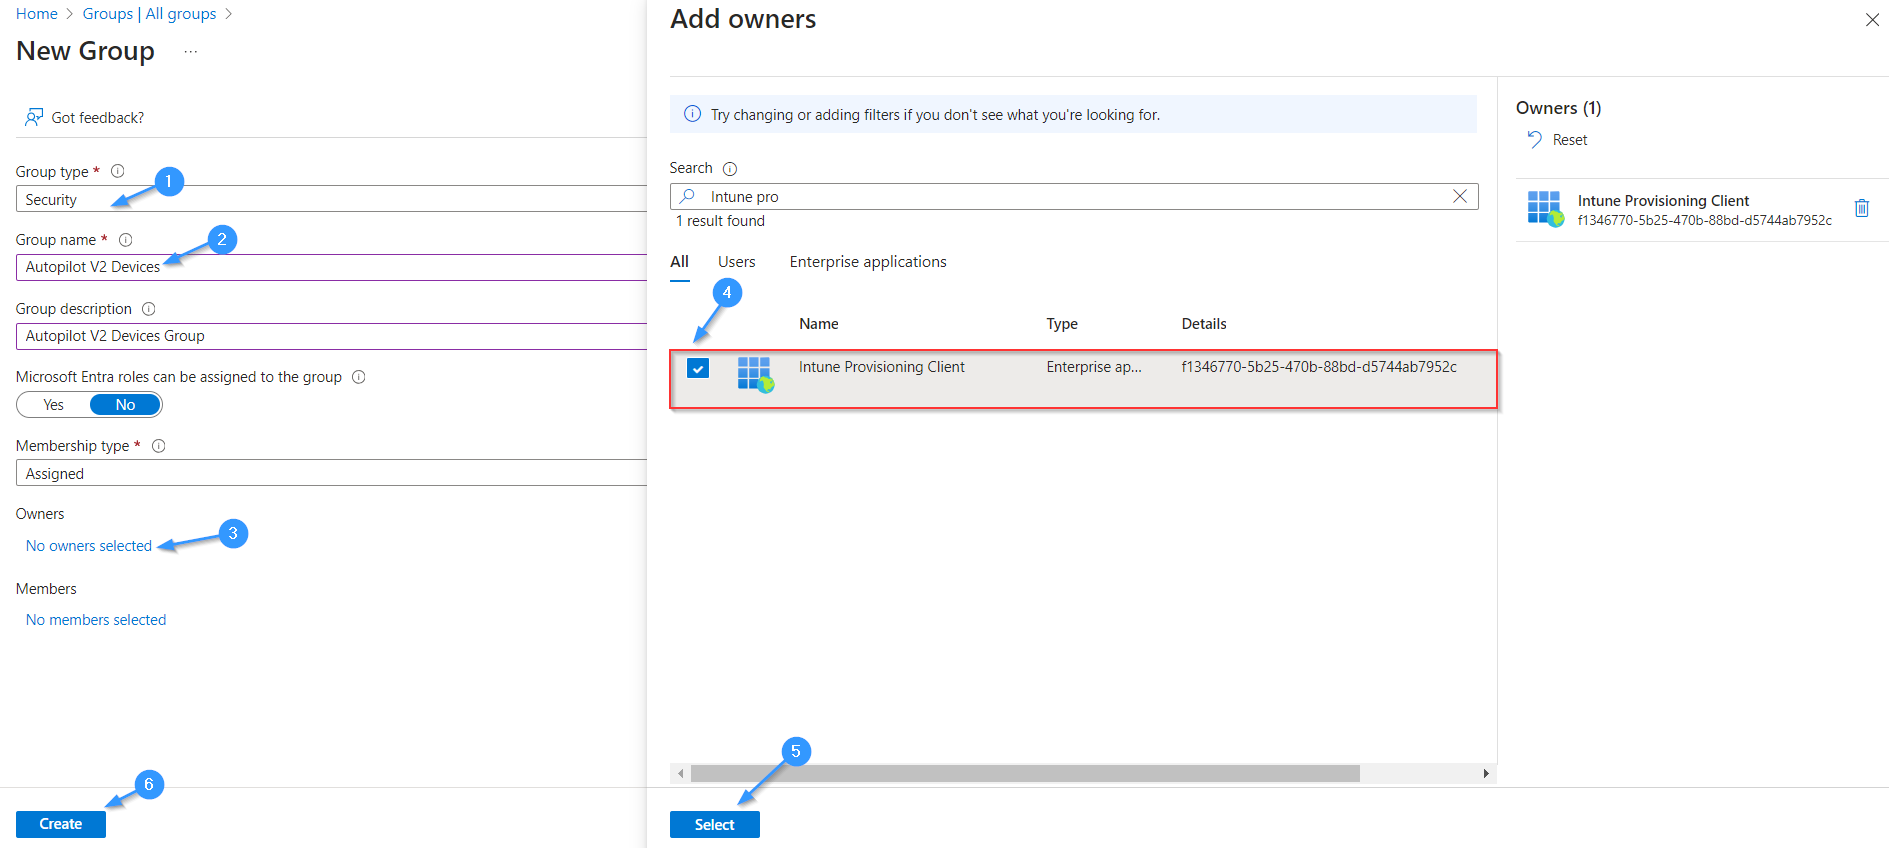
Step 2: Create a security group for devices and add Intune Provisioning Client as owner

Create a group for Devices, this group will be used to manage devices enrolled through Autopilot V2. After creating the group, assign the Intune Provisioning Client as the owner. This step ensures that the provisioning client has the necessary permissions to manage device enrollment and configuration, streamlining the Autopilot V2 process.

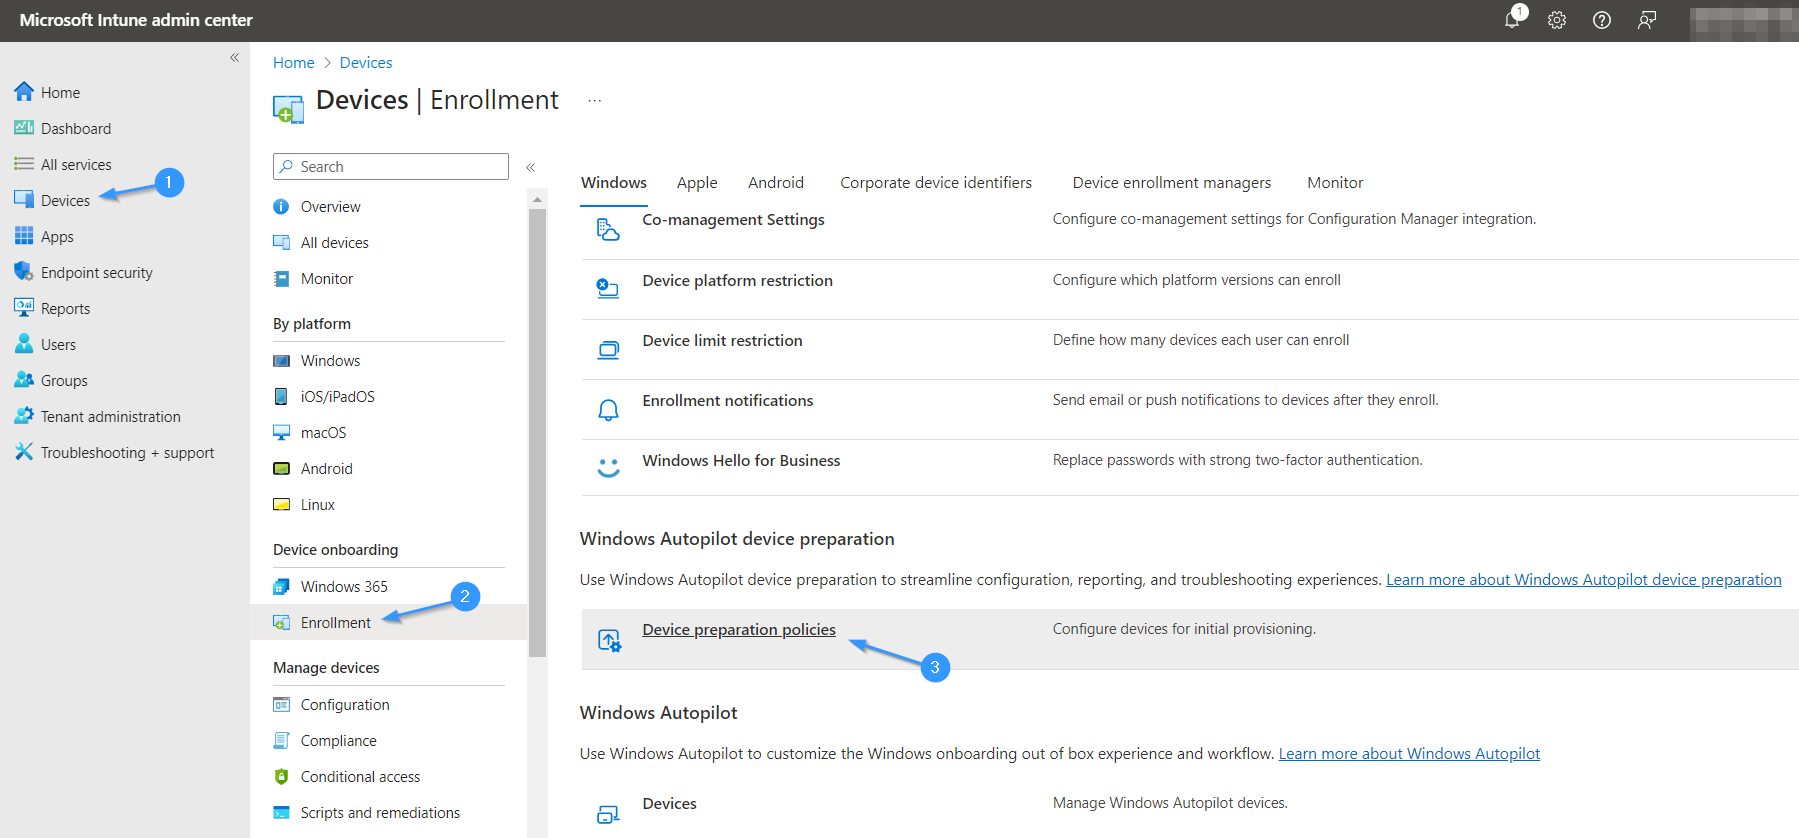
Step 3: Create a Device Preparation Policy for Autopilot V2 in the Microsoft Intune Portal

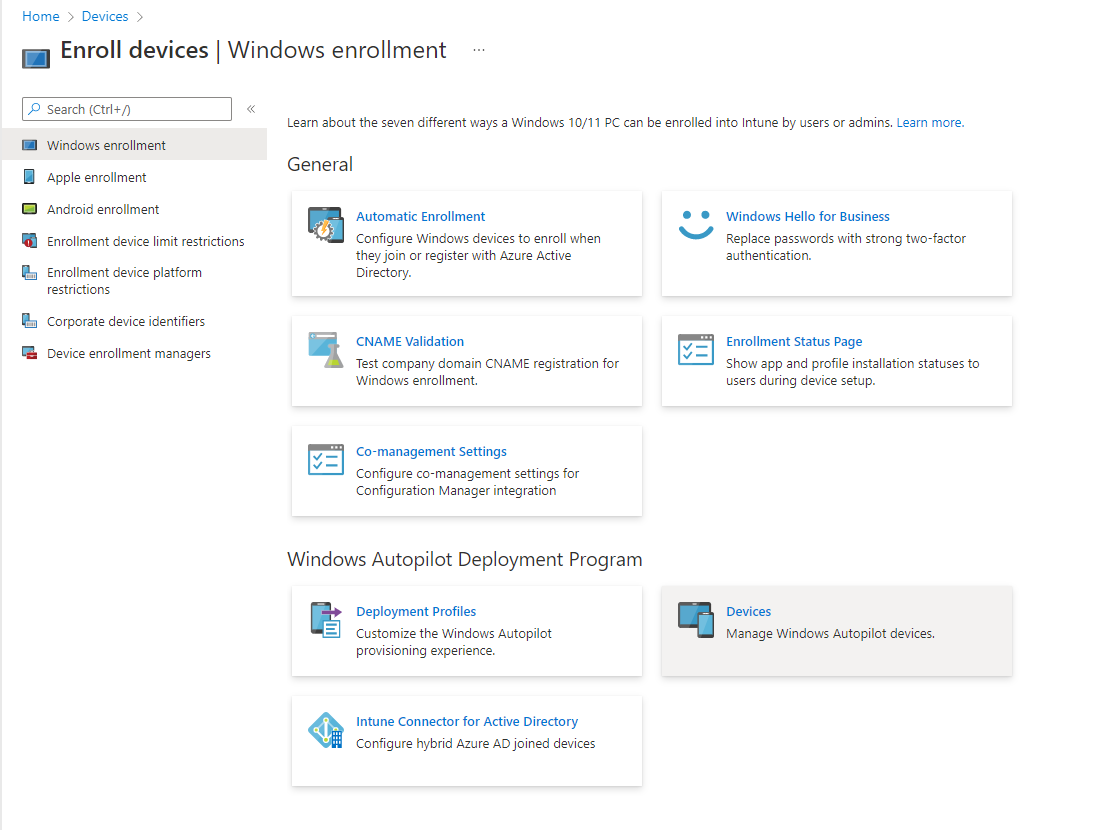
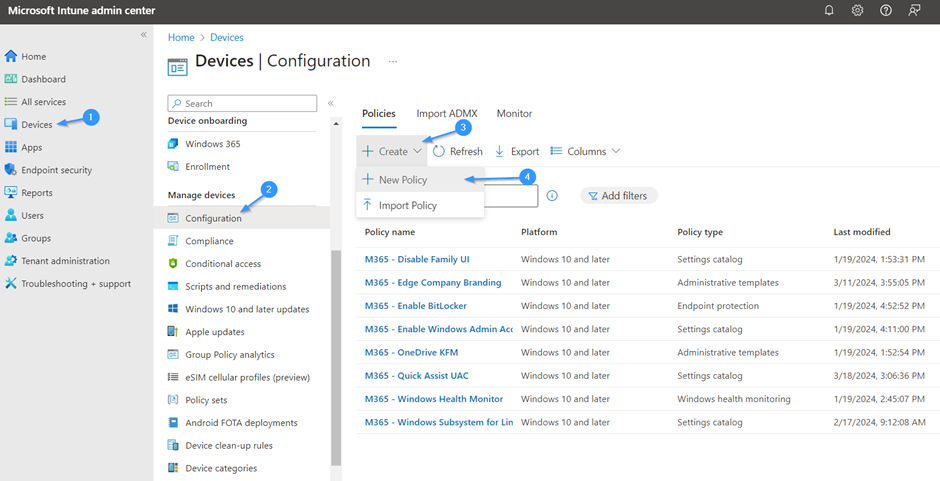
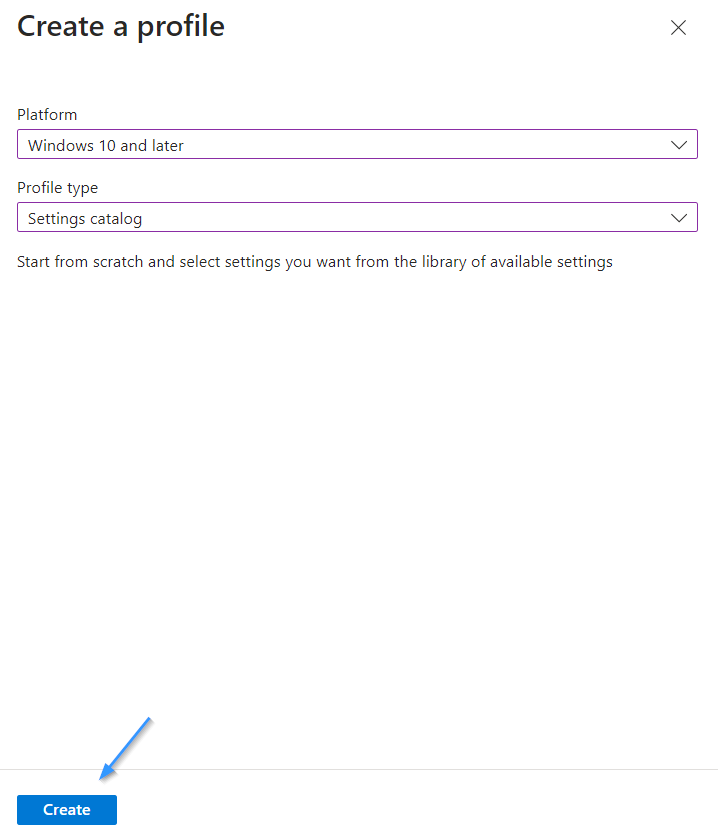
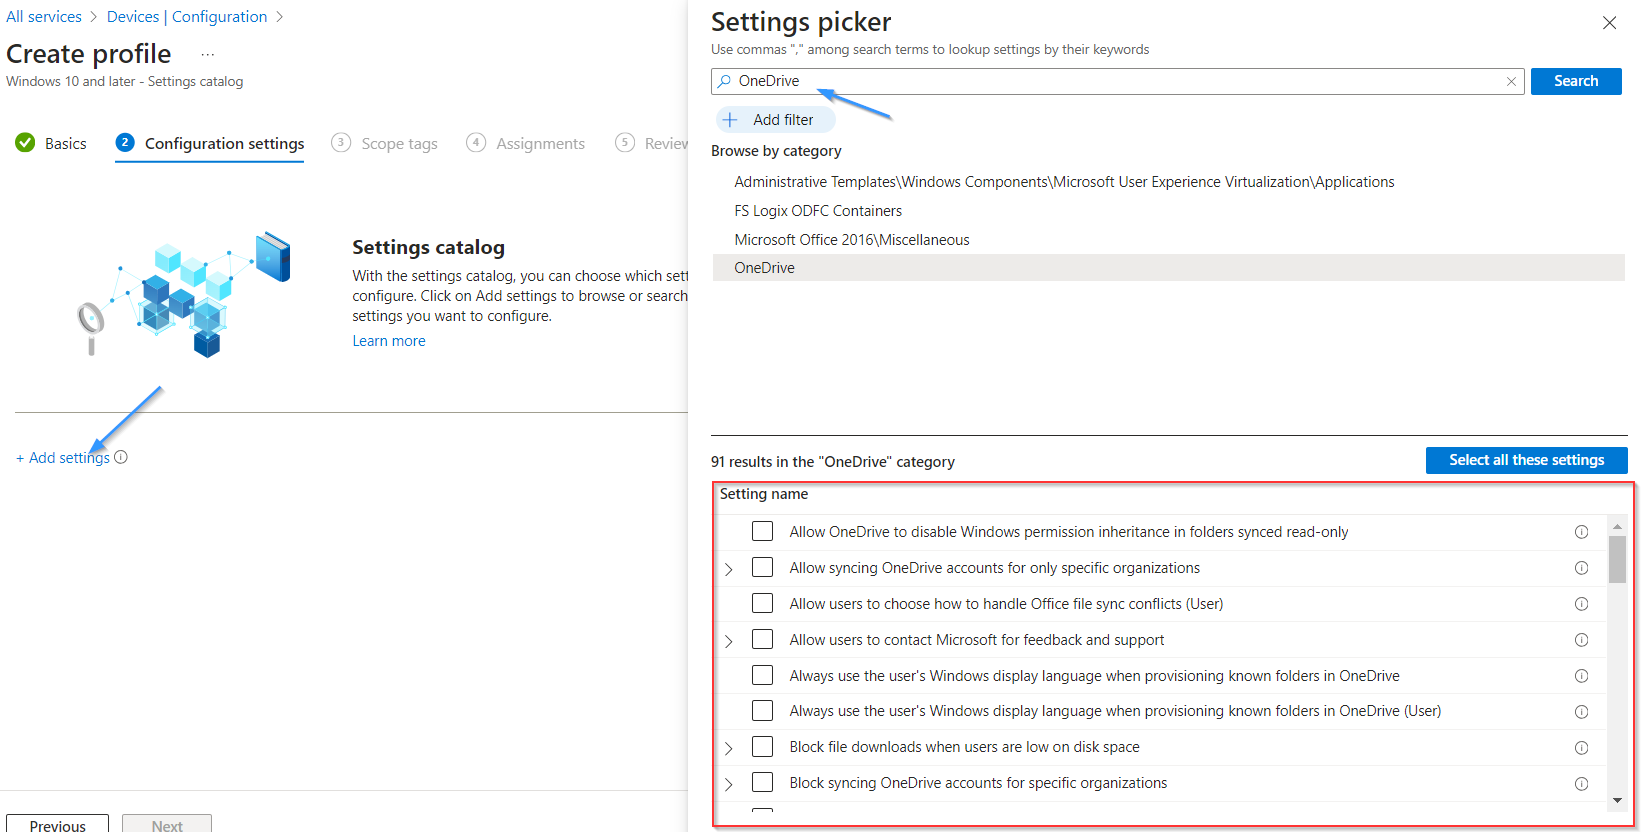
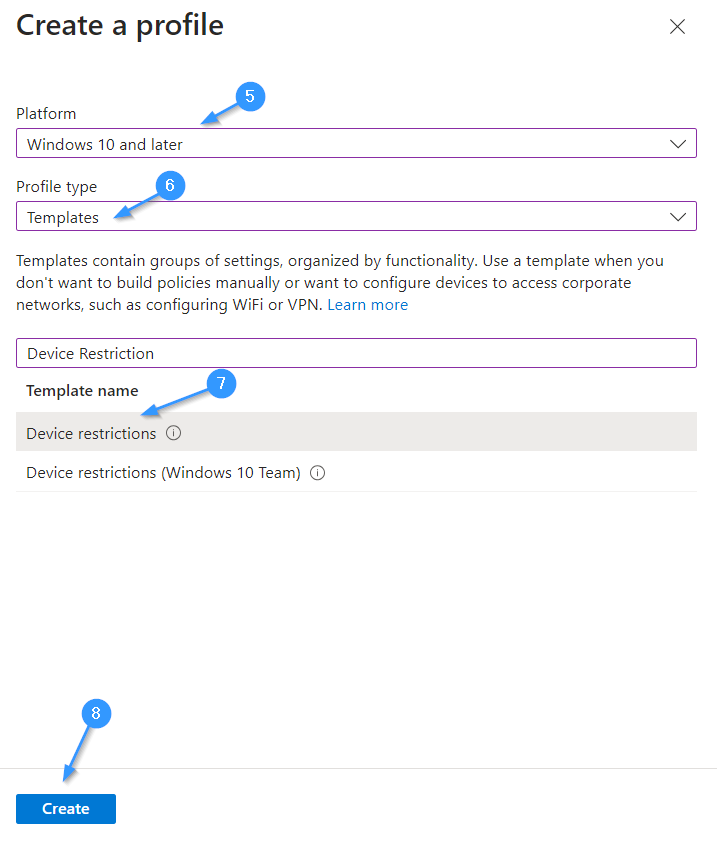
Access the Microsoft Intune Portal and navigate to the “Devices” section. From there, select “Windows” and then “Windows enrollment.” Choose the “Device Preparation Policy” tab and click on “Create profile.” Configure the necessary settings for the Device Preparation Policy.

Starting Creating the policy.

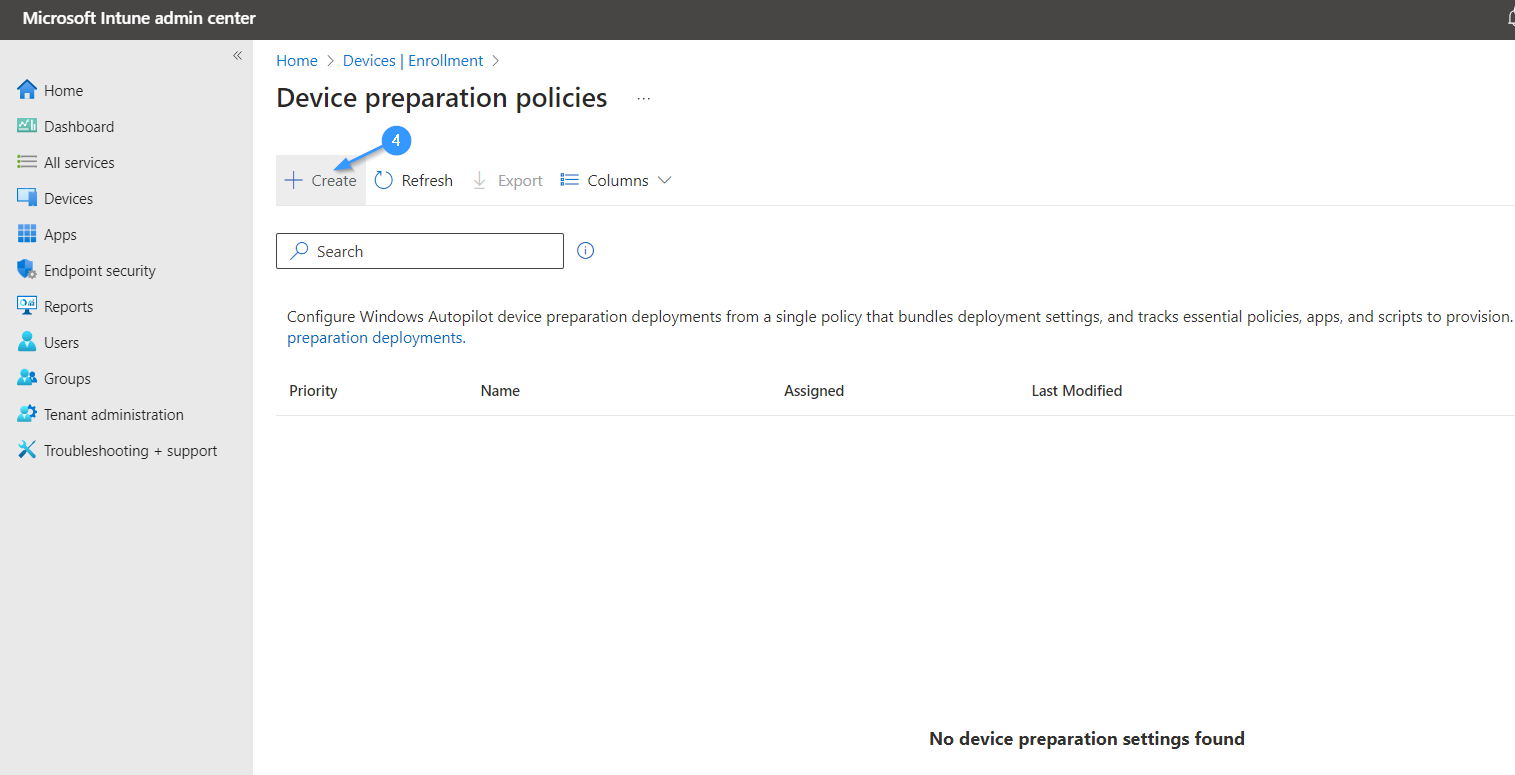
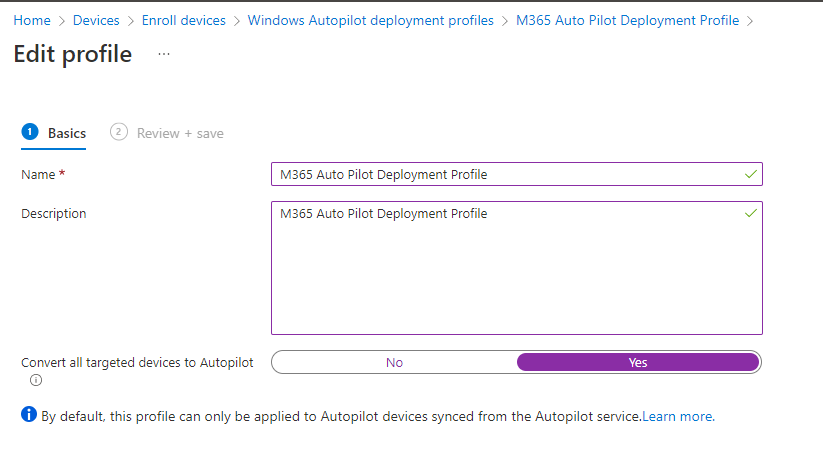
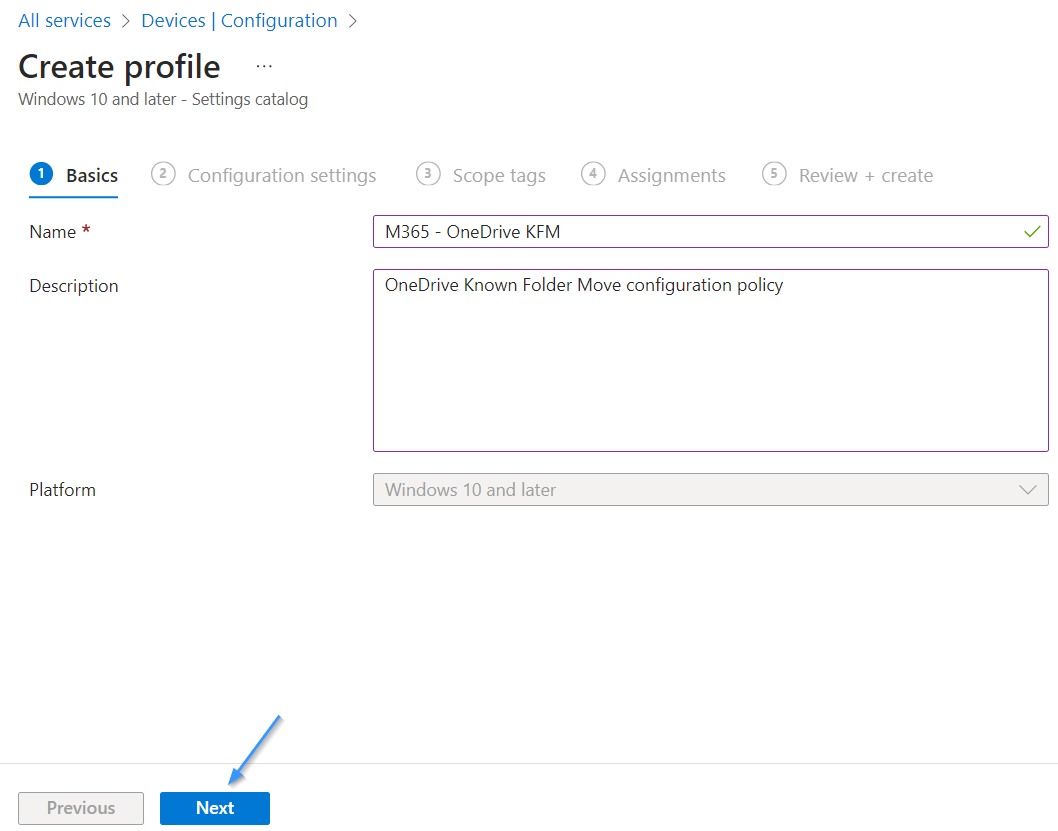
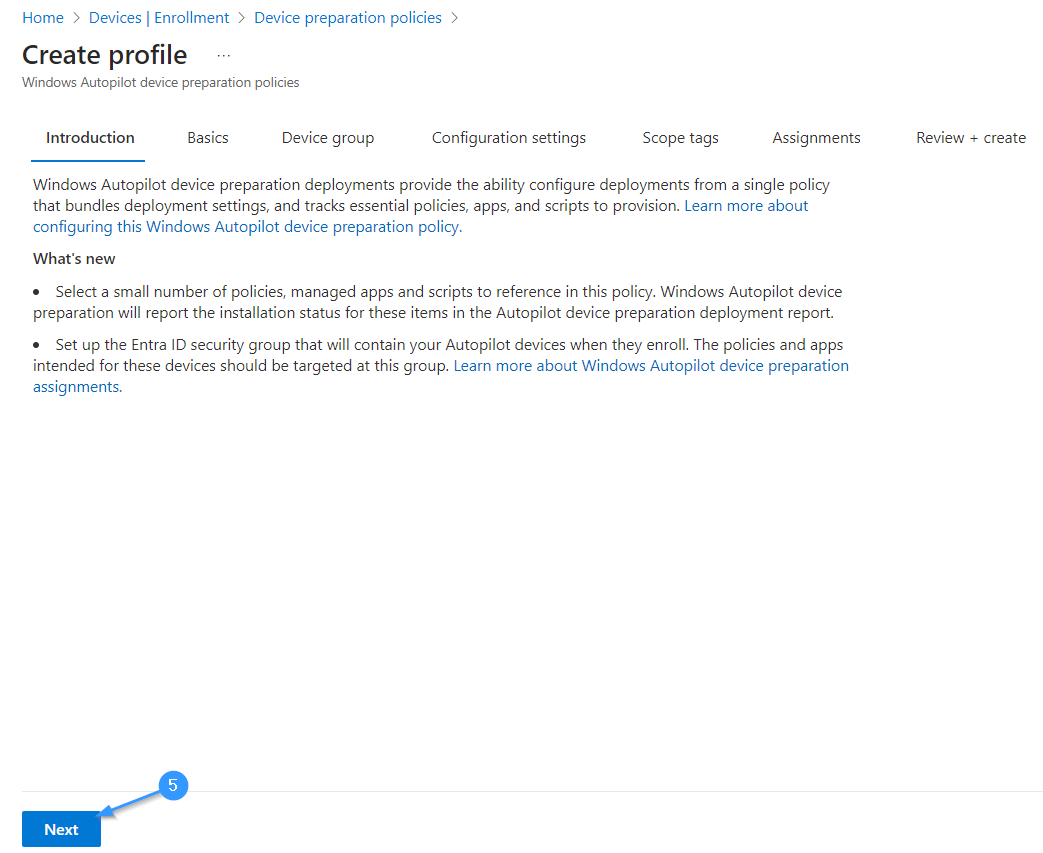
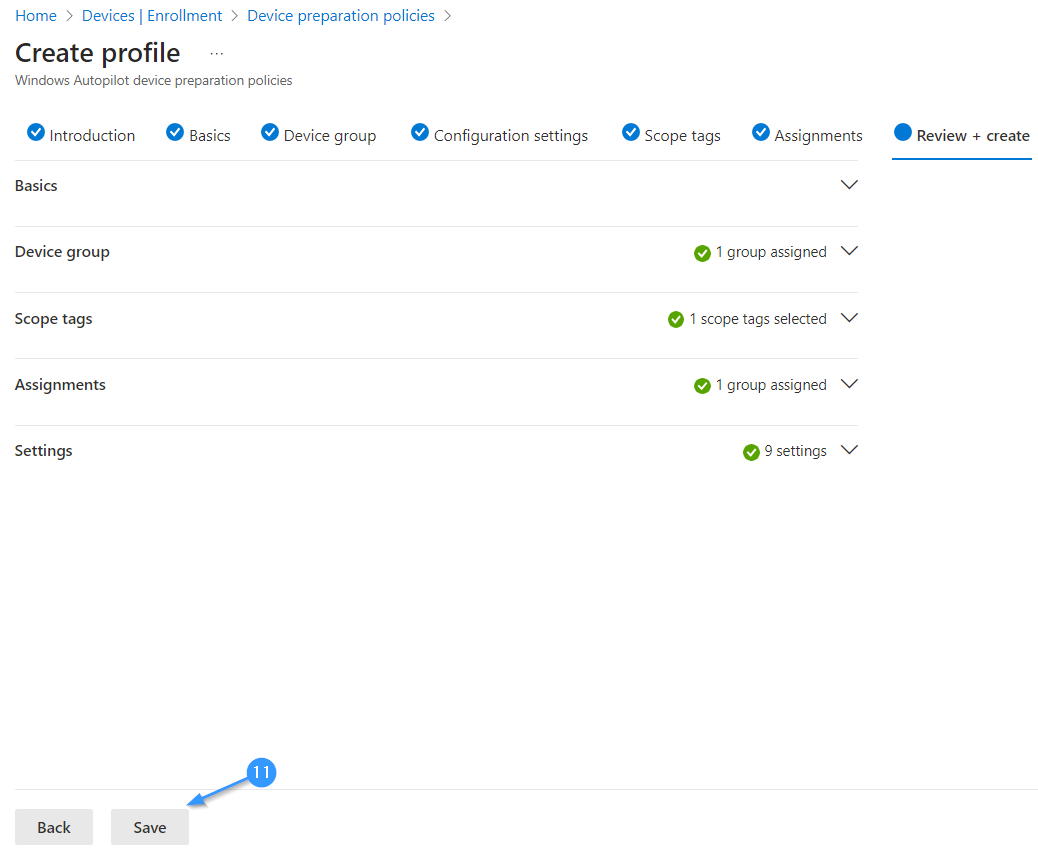
Step 4: Follow the steps to create the Device Preparation Policy.

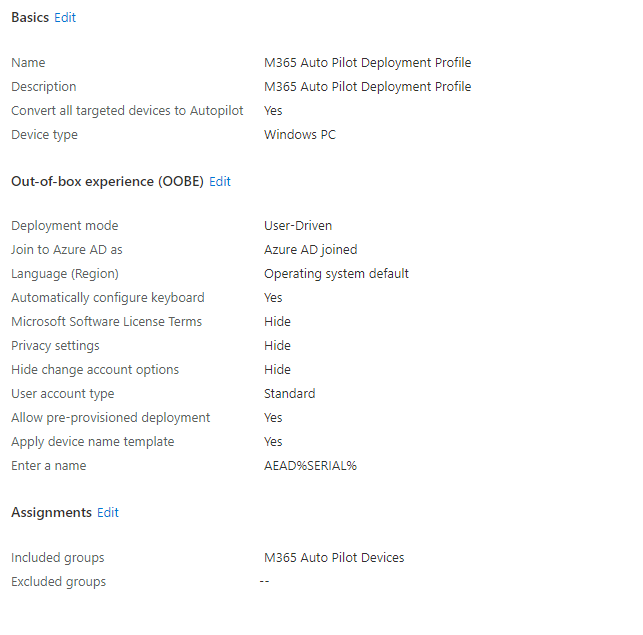
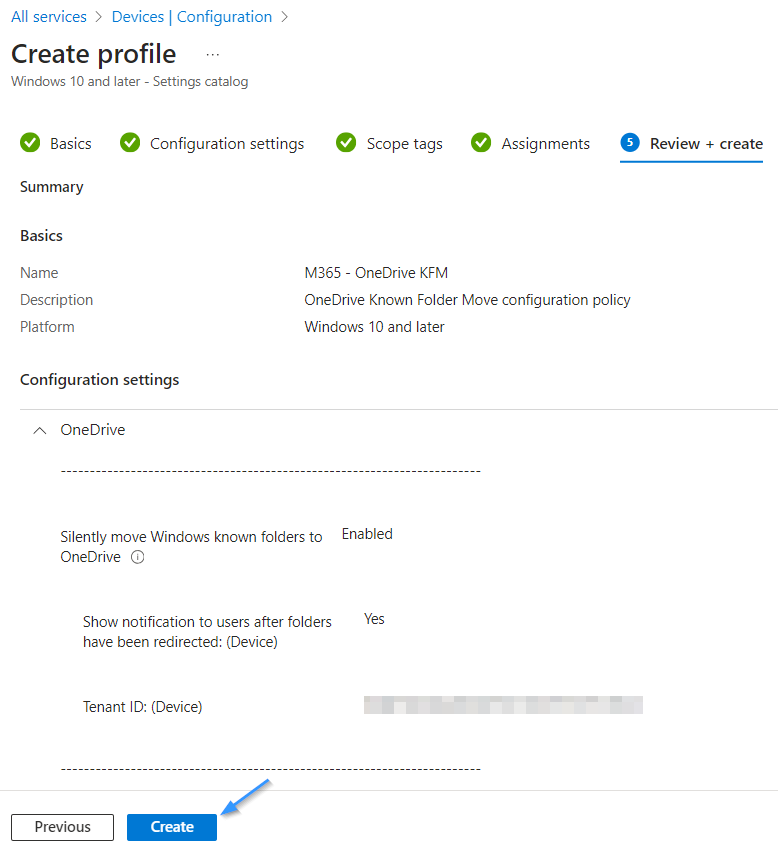
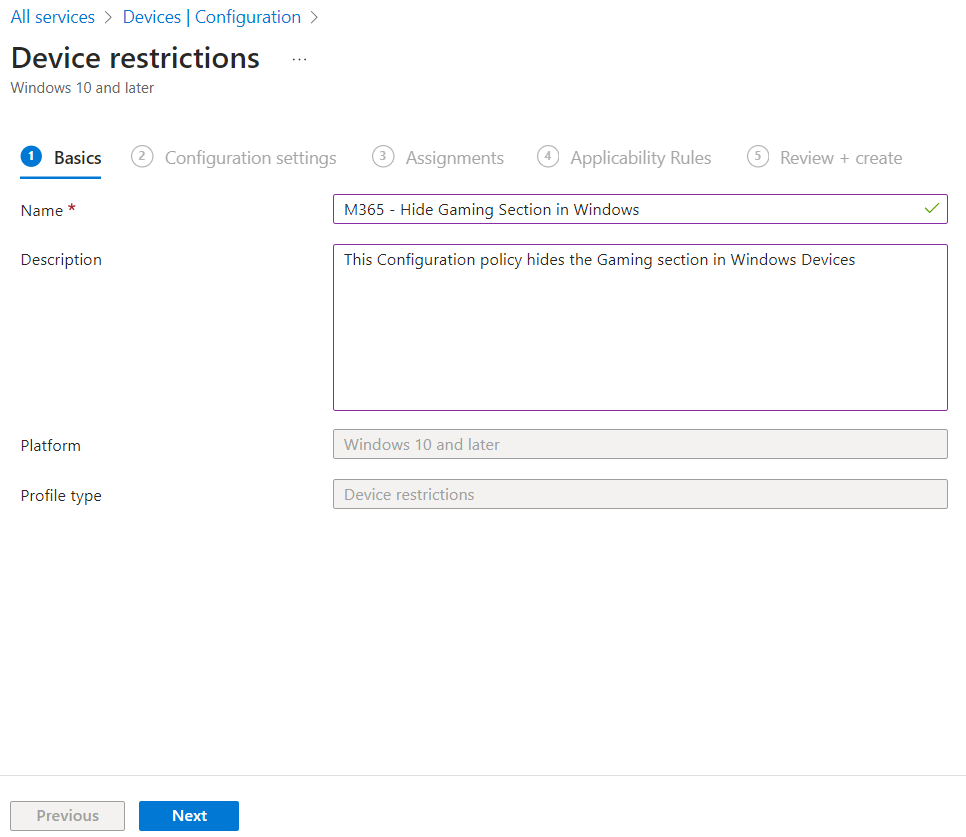
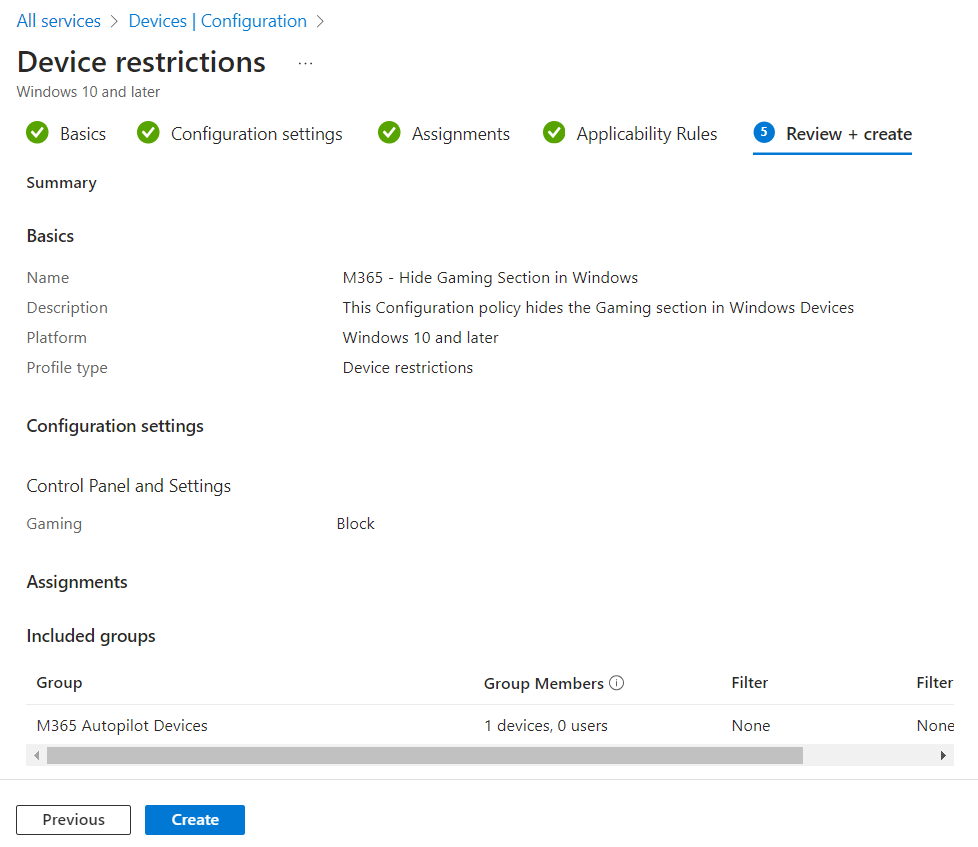
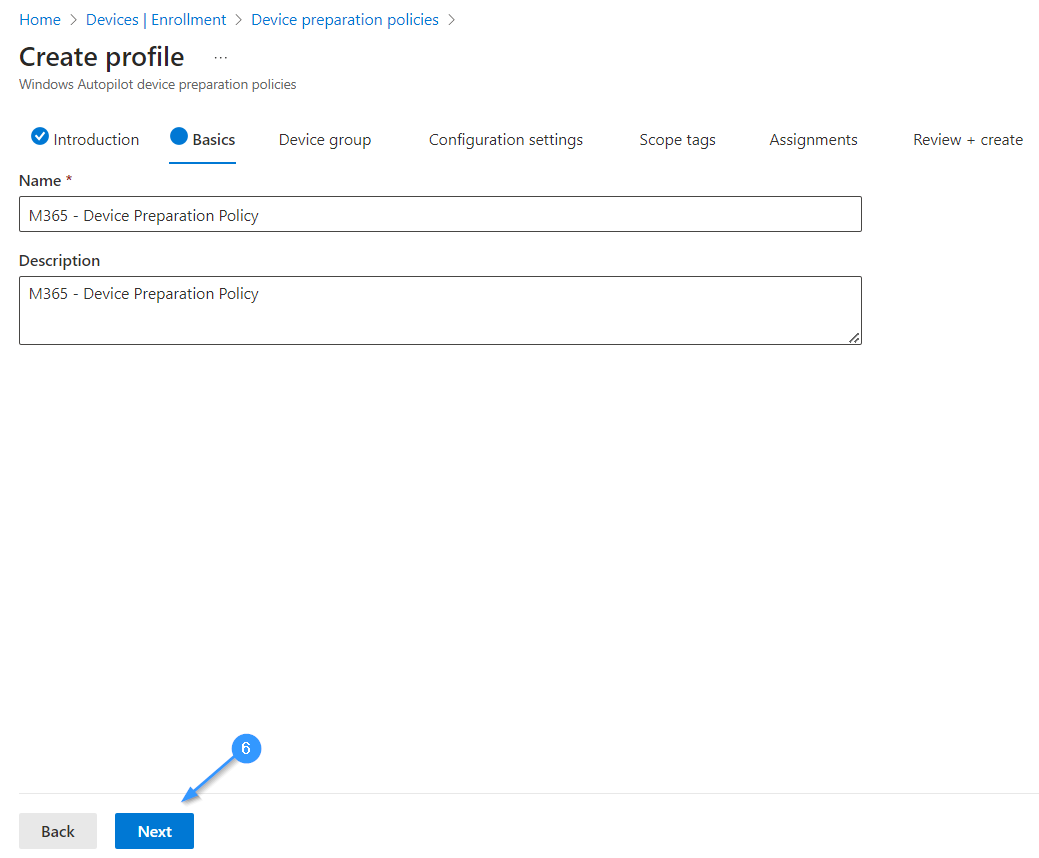
Provide a valid Name and Description.

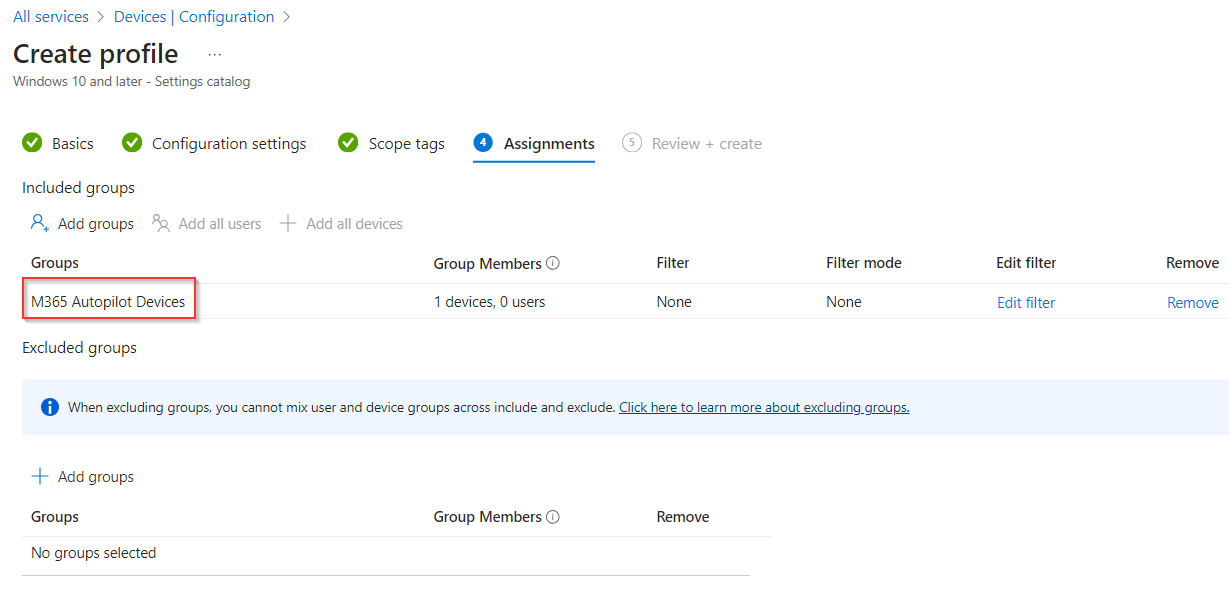
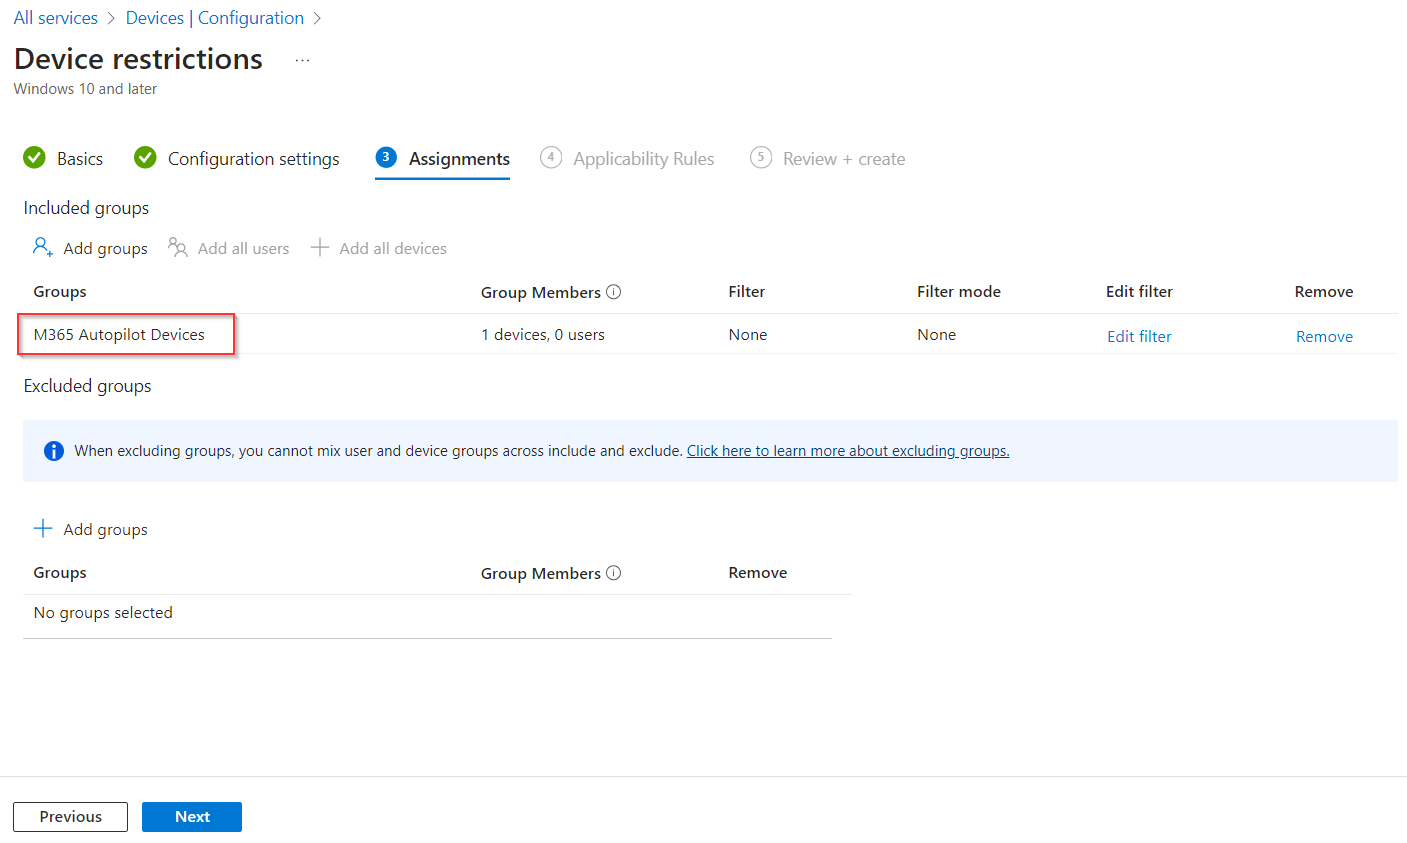
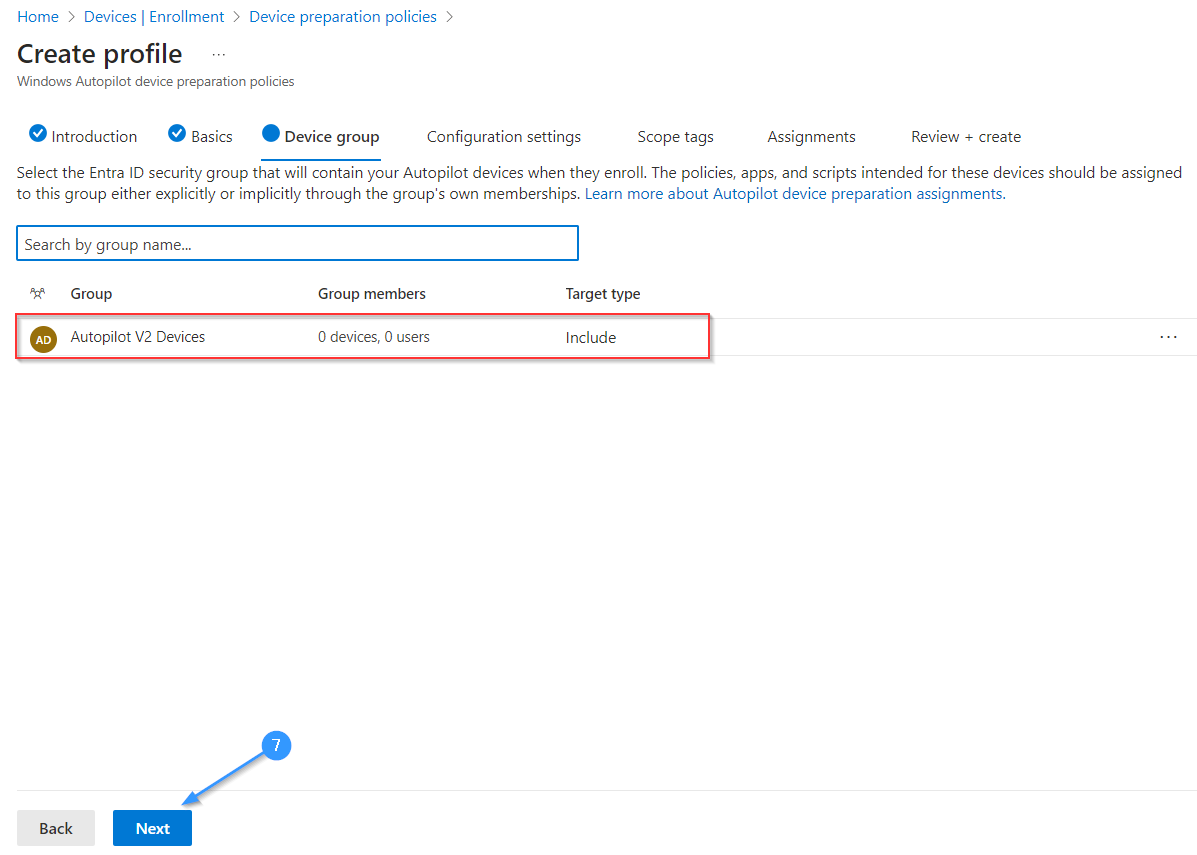
Add the Device Group that we created earlier.

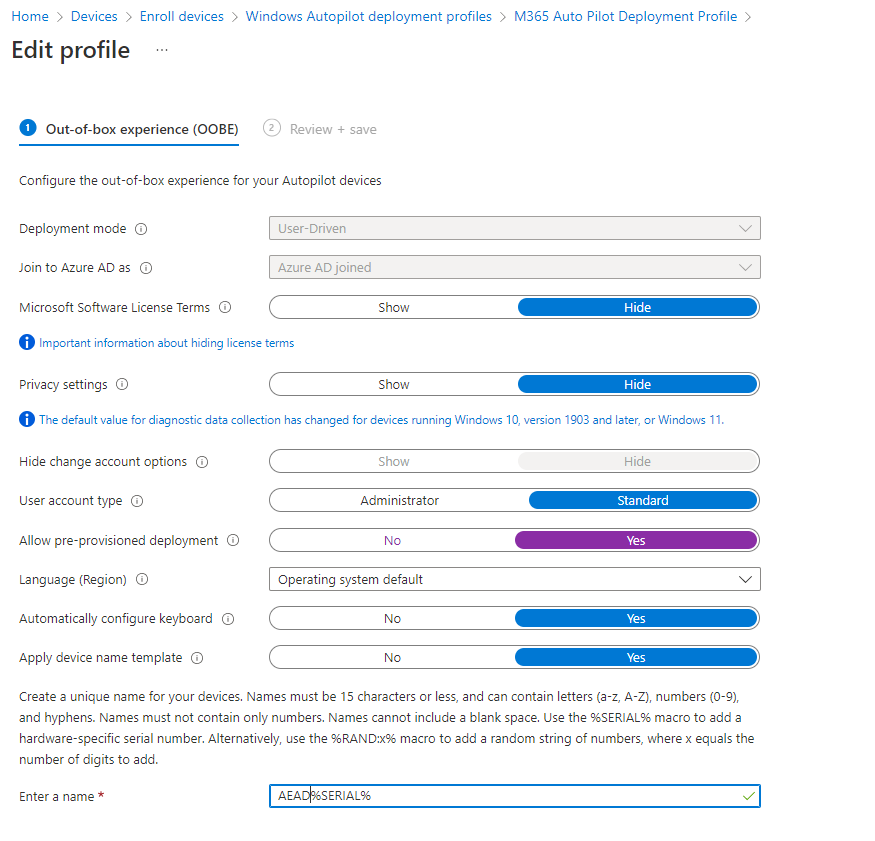
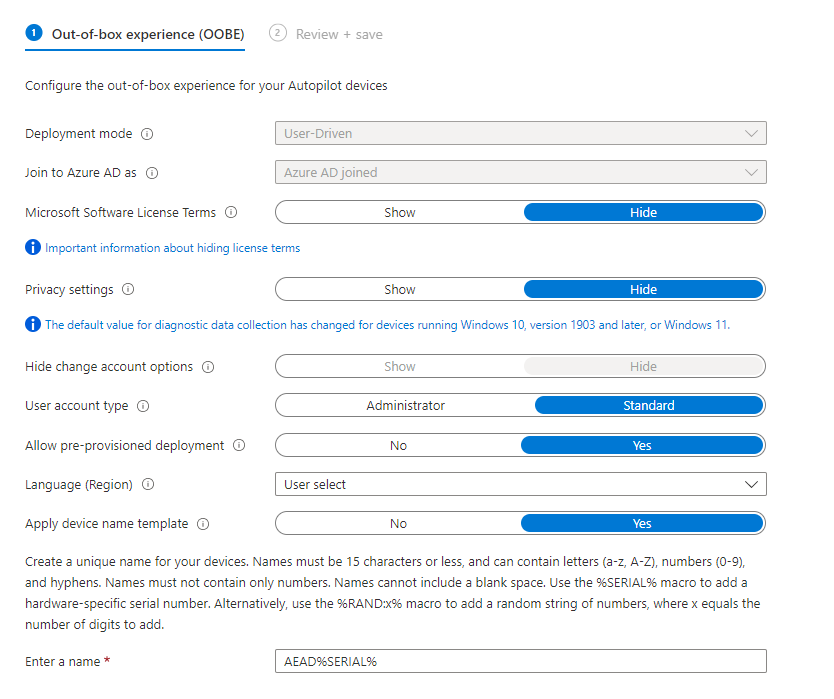
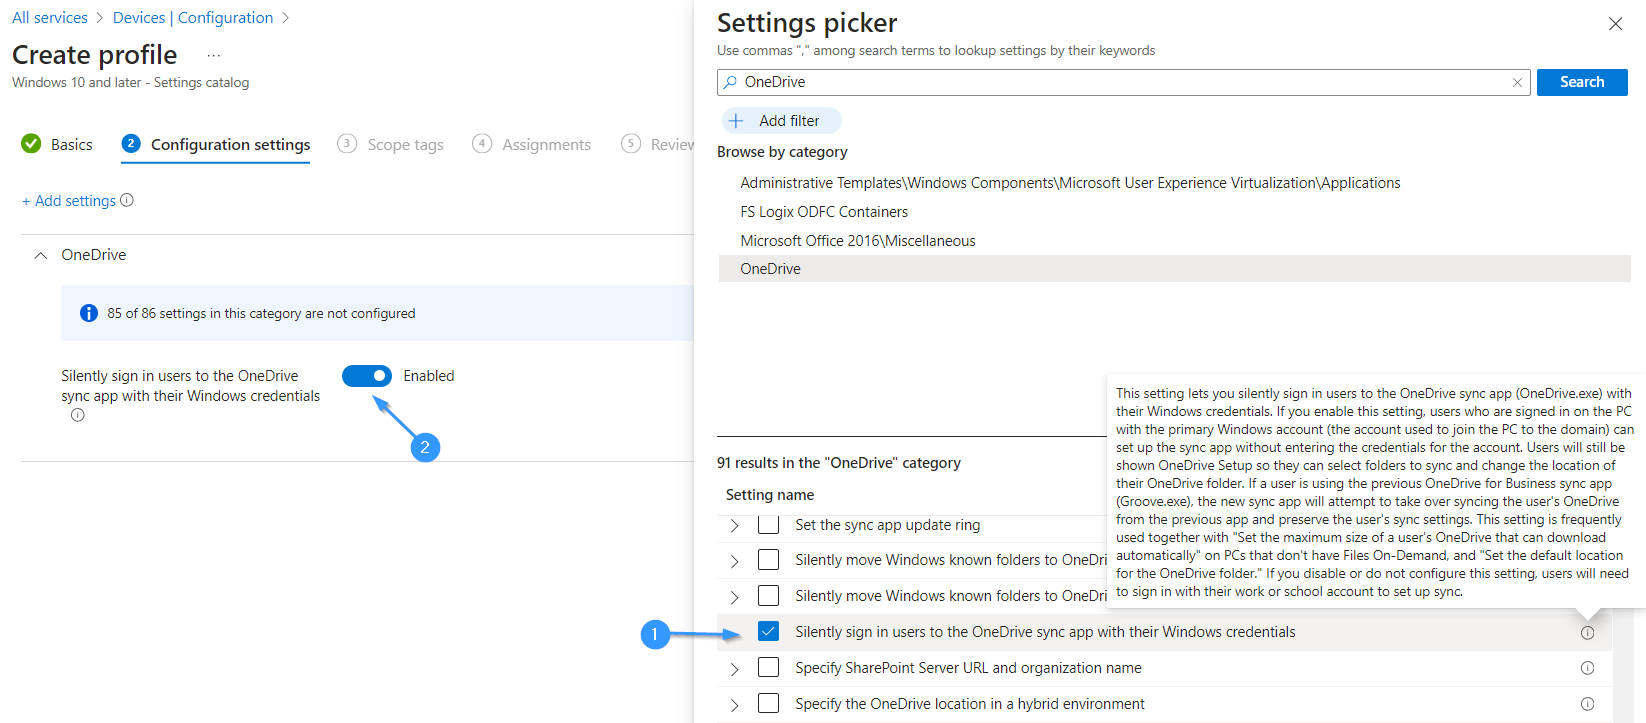
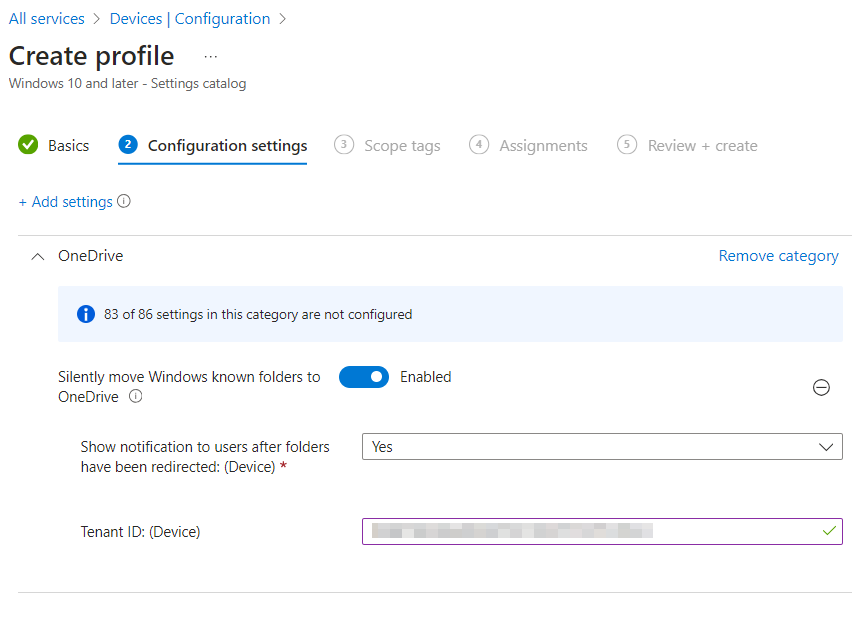
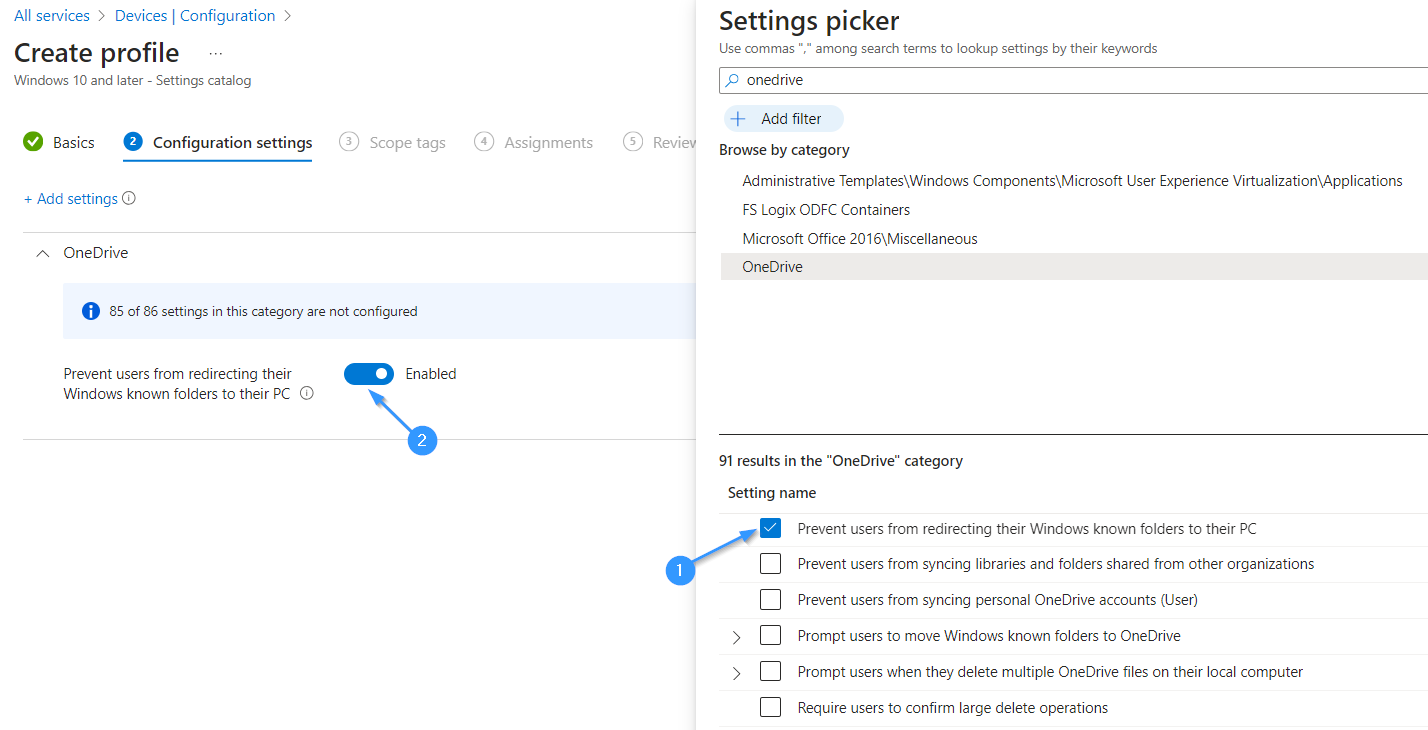
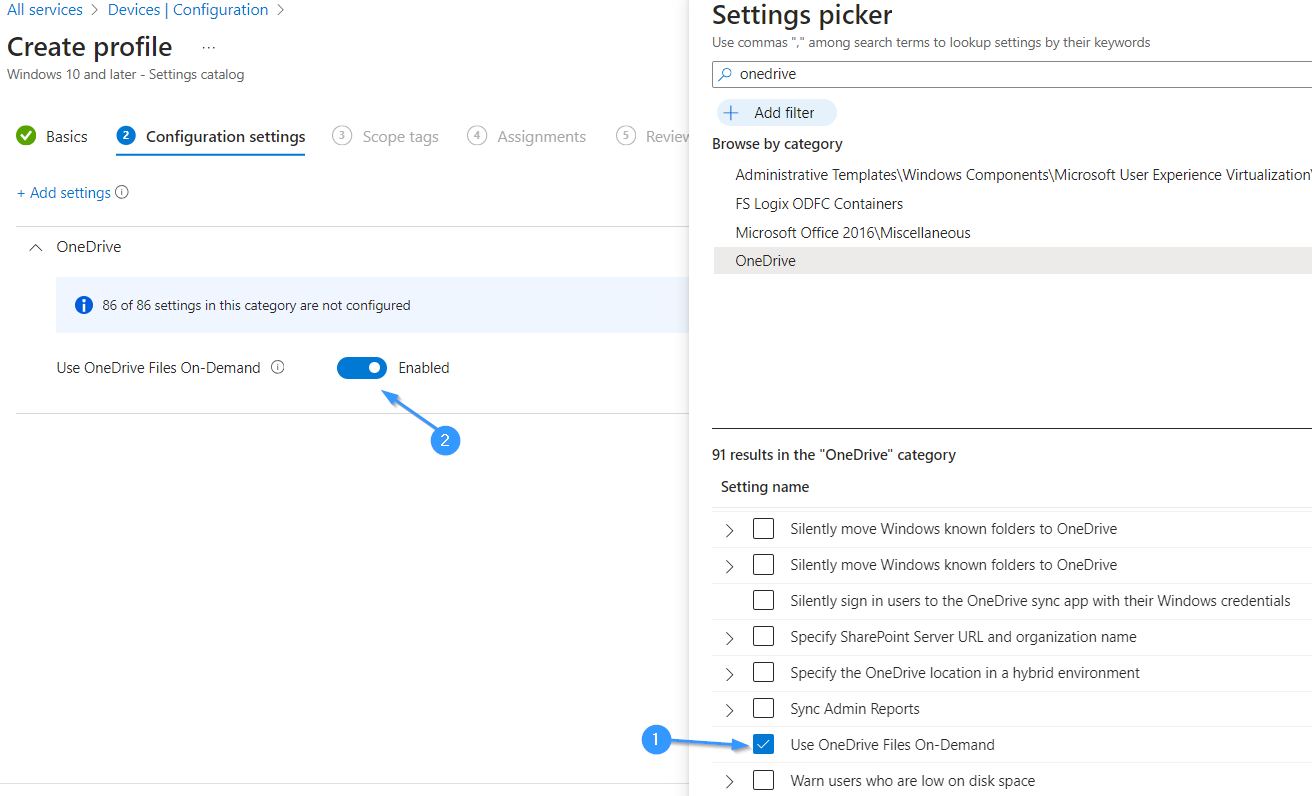
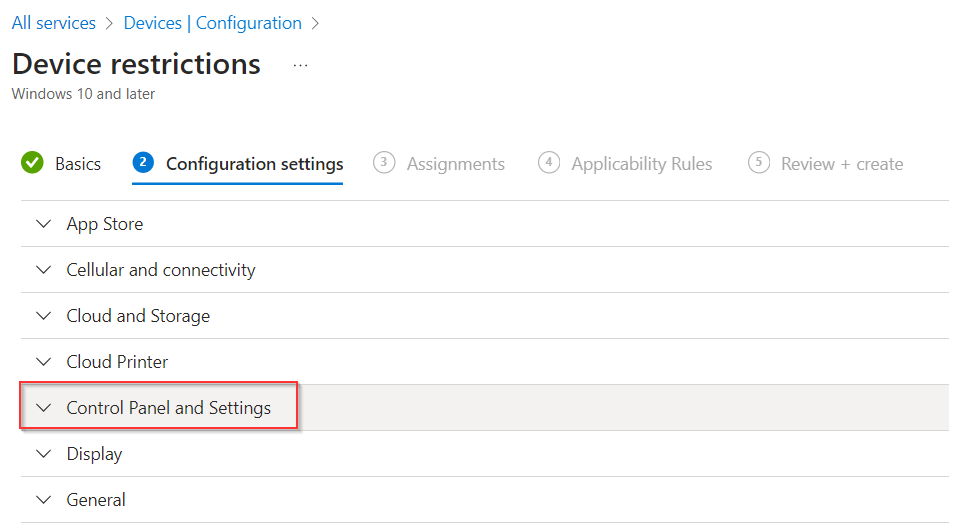
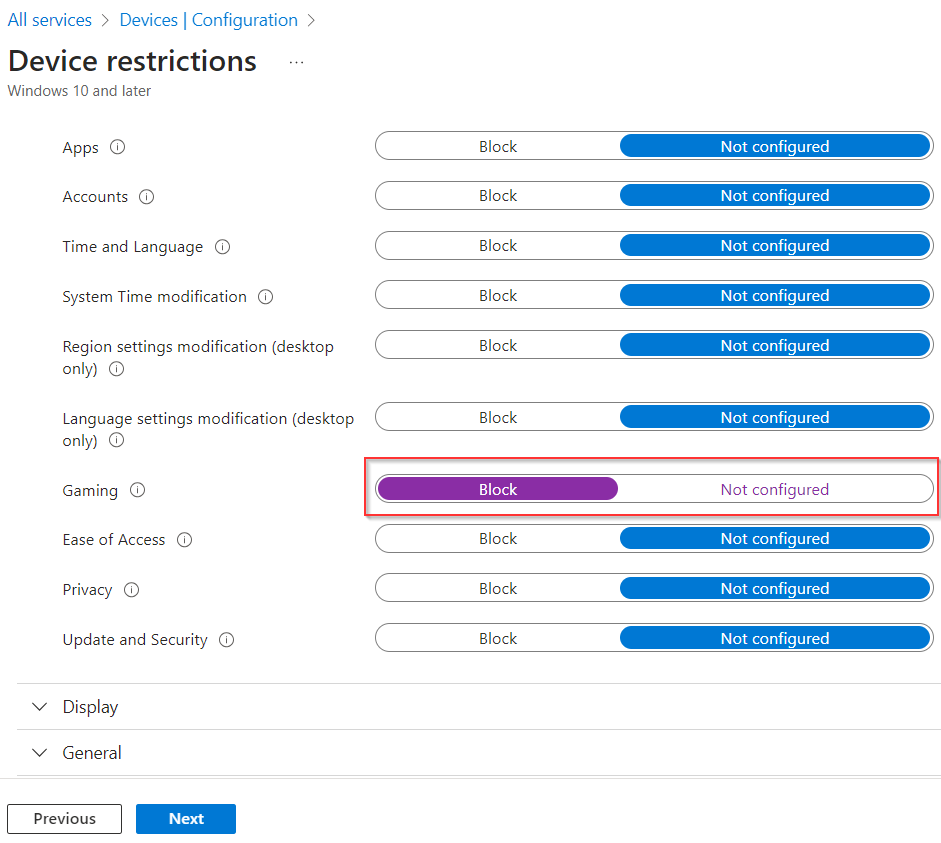
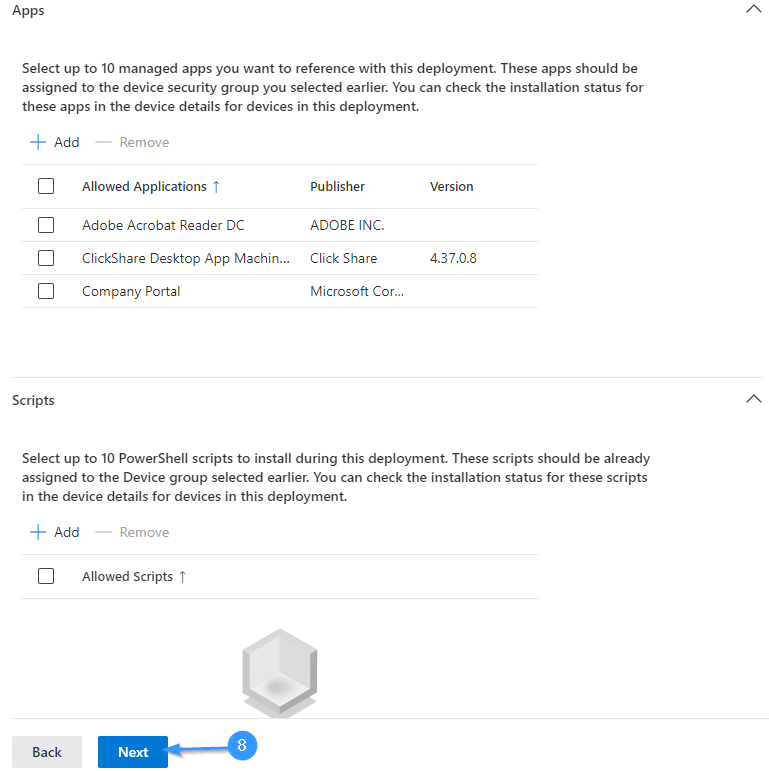
In Configuration Settings, configure the Deployment Settings, OOBE Settings, Apps and Scripts.

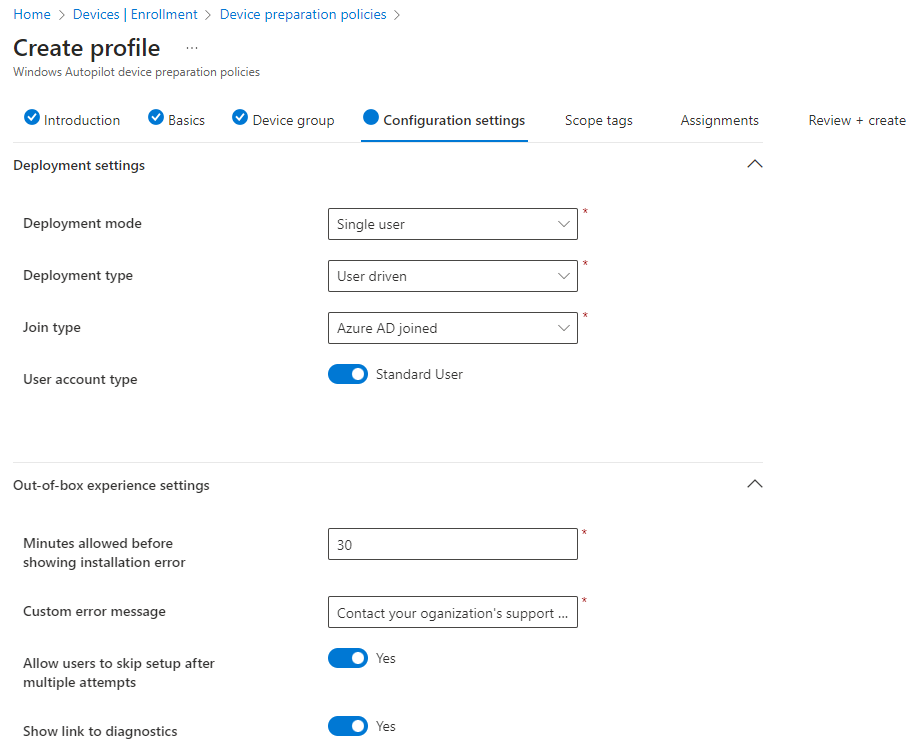
We can add up to 10 apps and scripts for our Autopilot Deployment.
Note : Apps should be Assigned the Autopilot Device Group

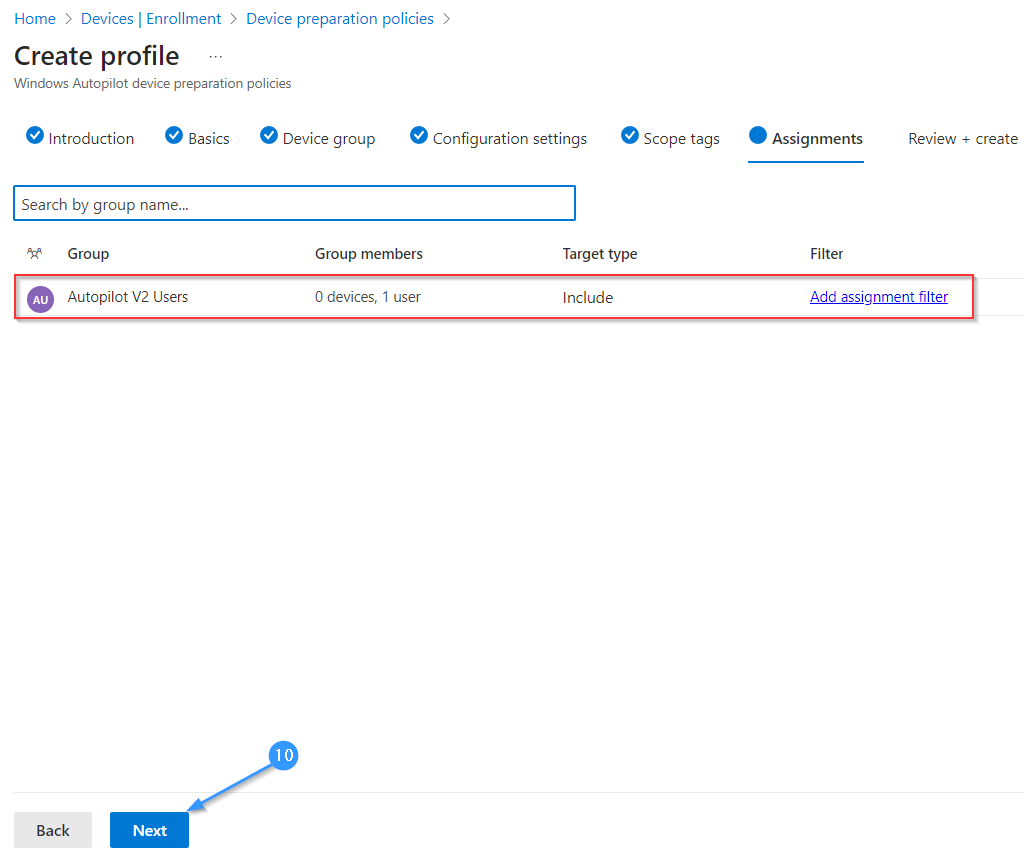
Under Assignment add the Autopilot Users Group.

.

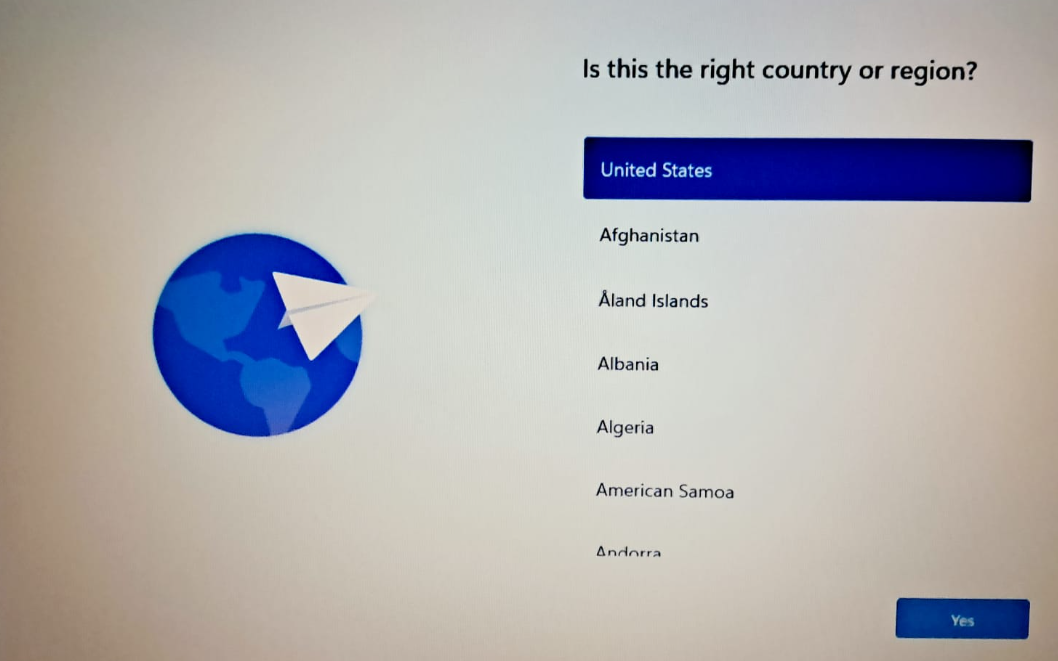
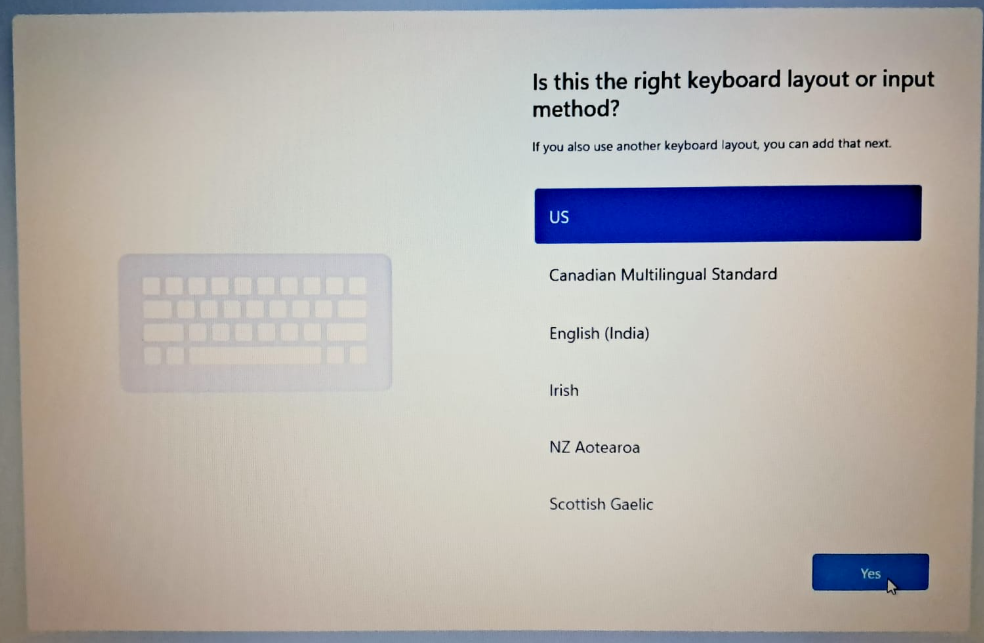
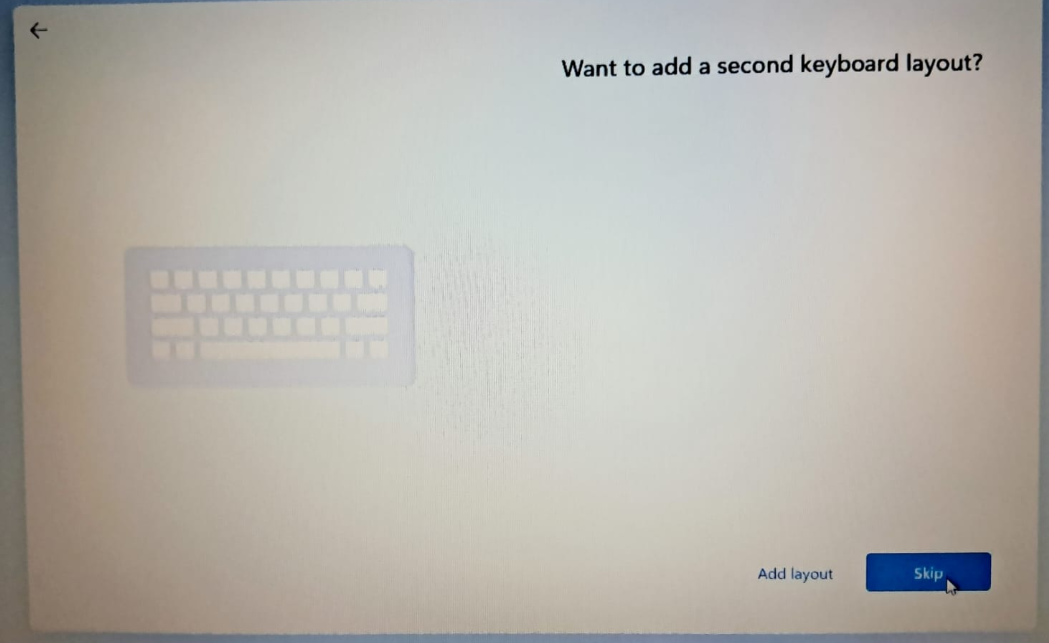
Out-Of-Box-Experience for Windows Autopilot V2

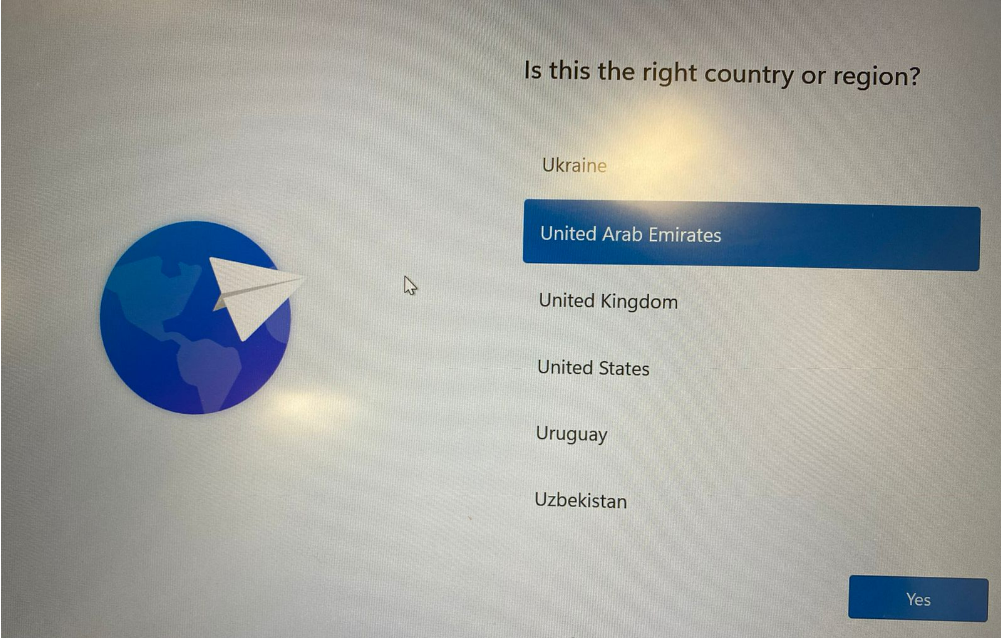
Select Country or Region
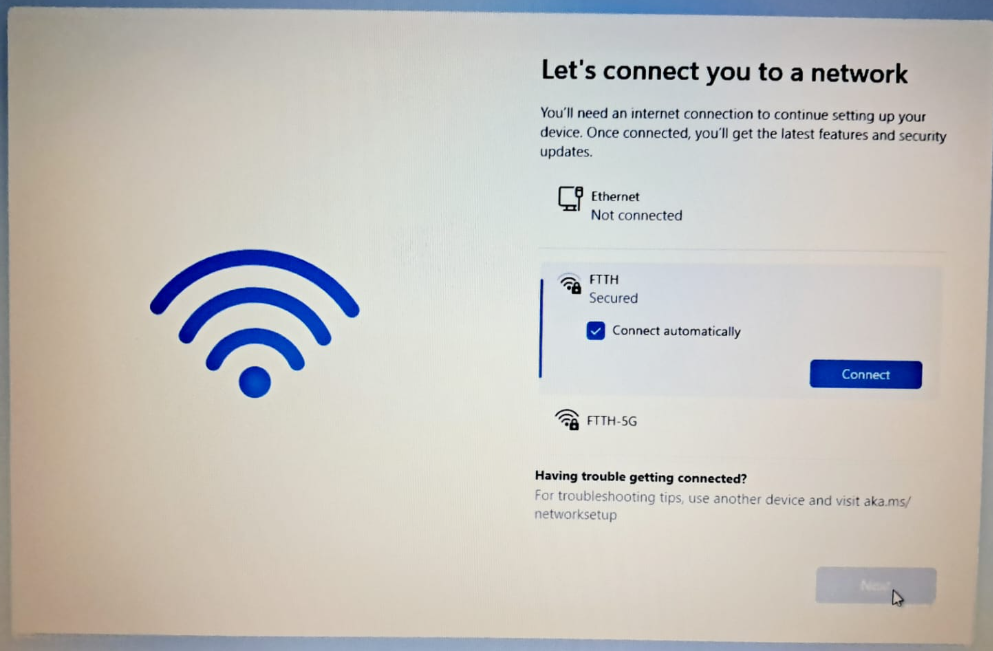
.
.

Connect to Internet

.

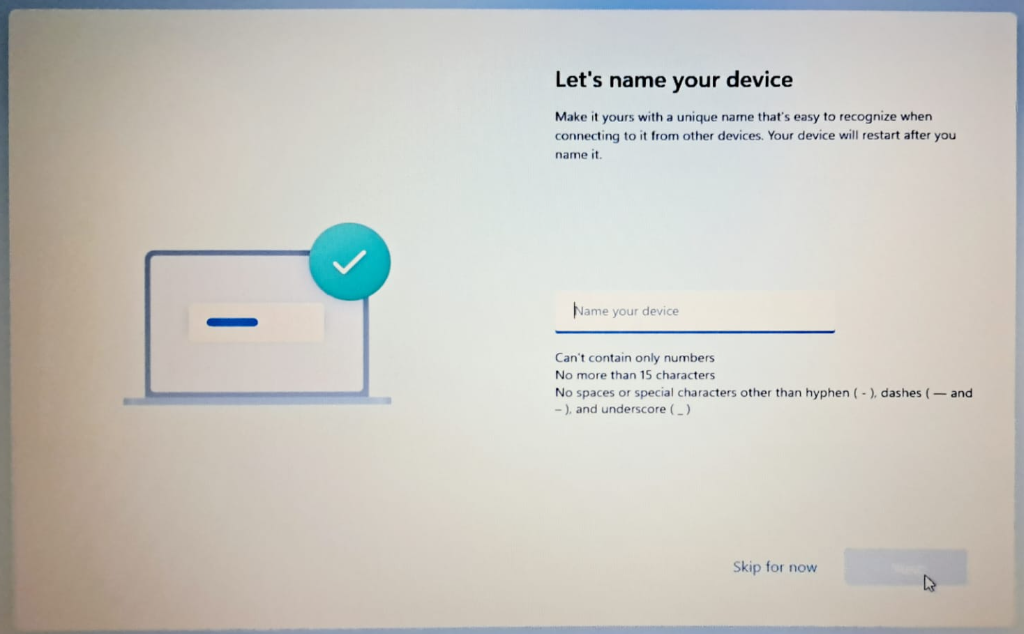
Provide a Device Name or skip the step.

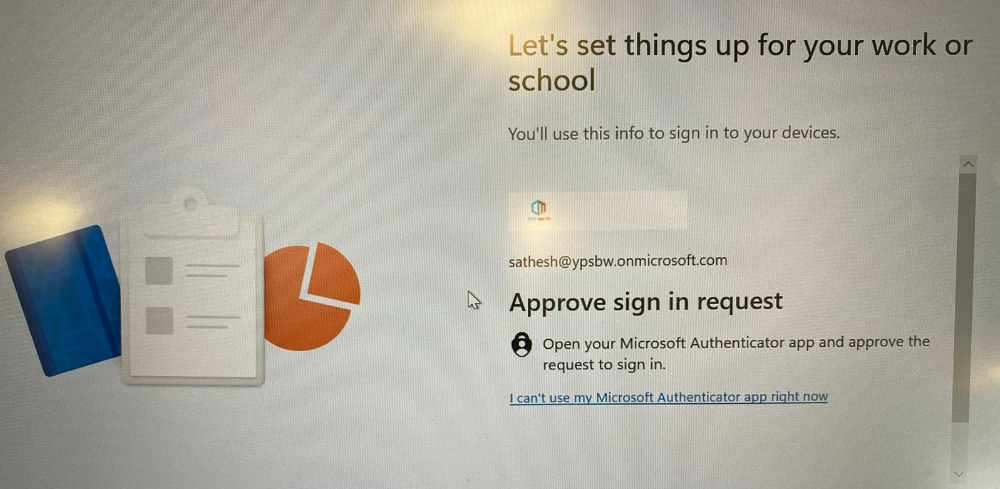
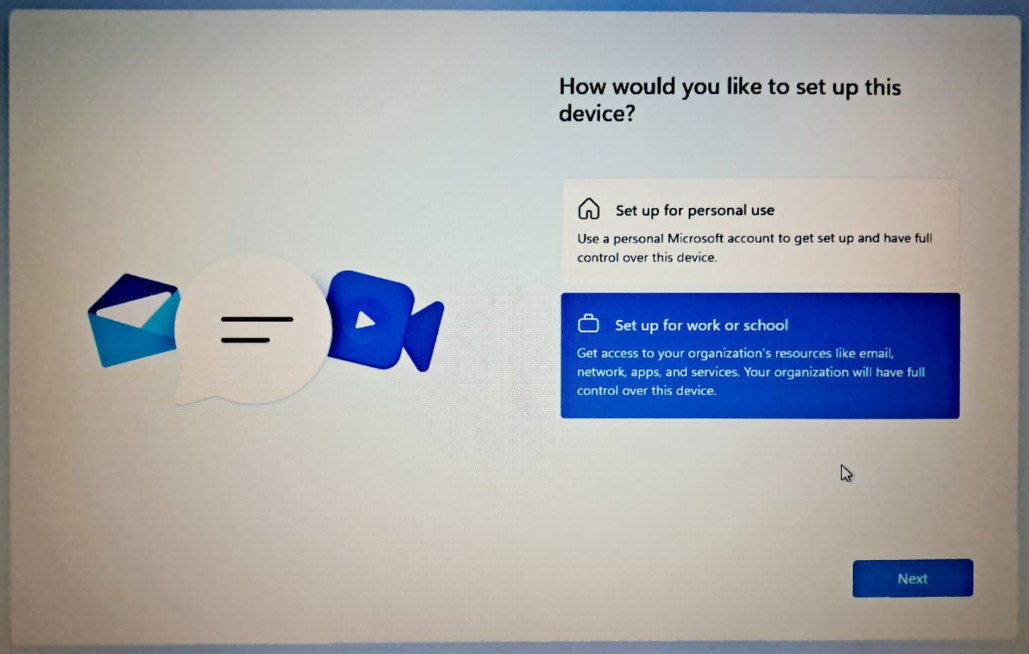
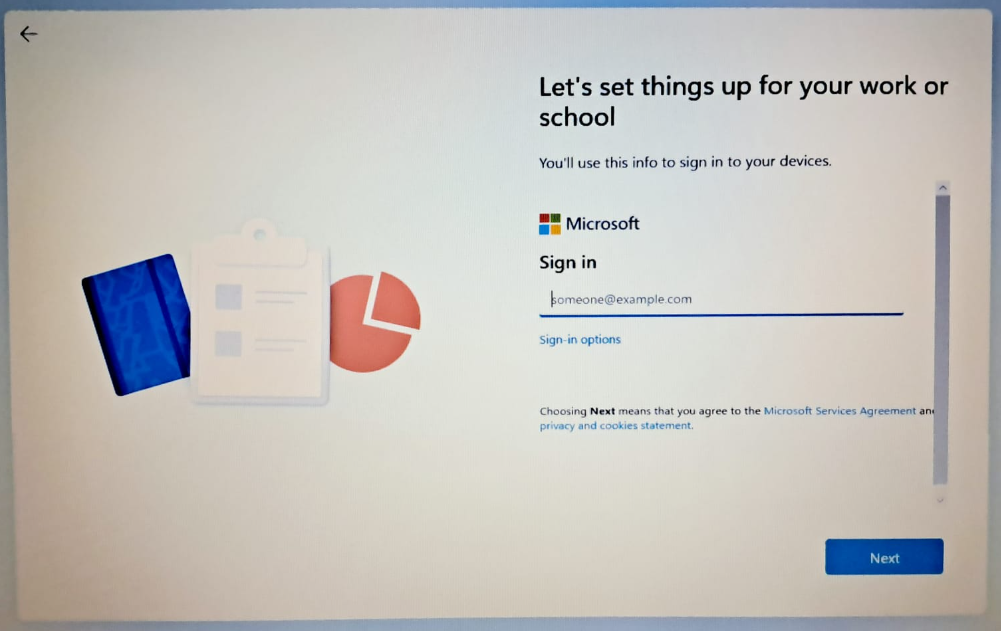
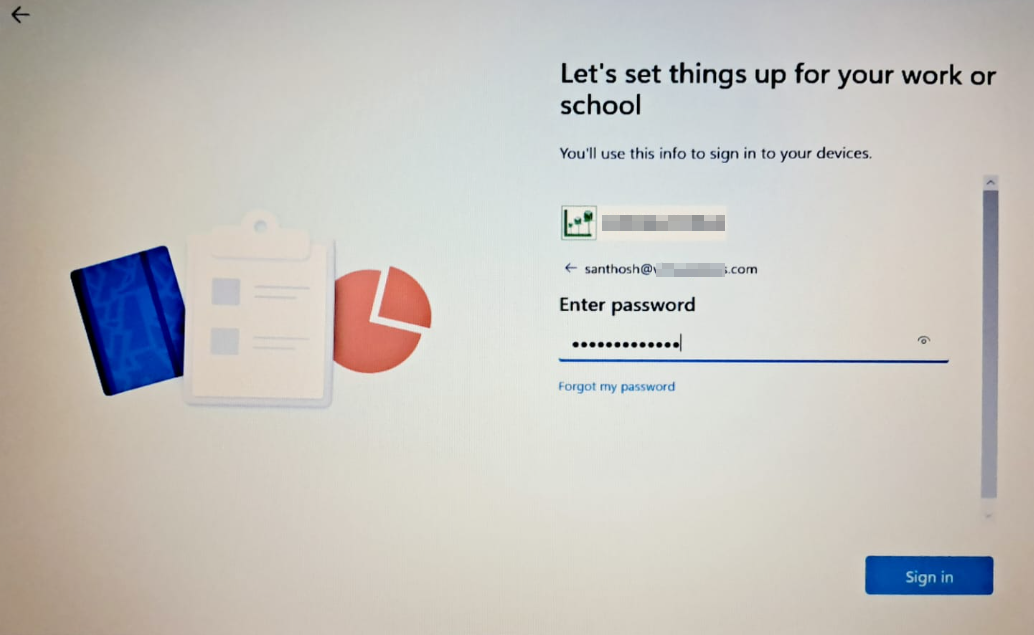
Select work or school account and sign up with your organizational credentials.

Autopilot V2 Device Registration and Configuration

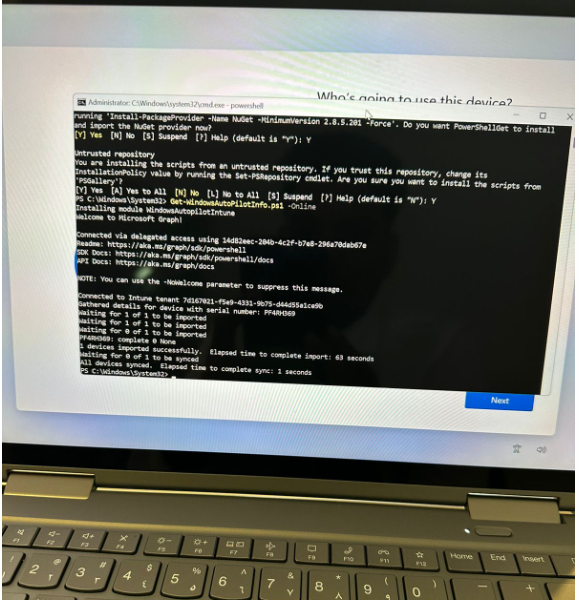
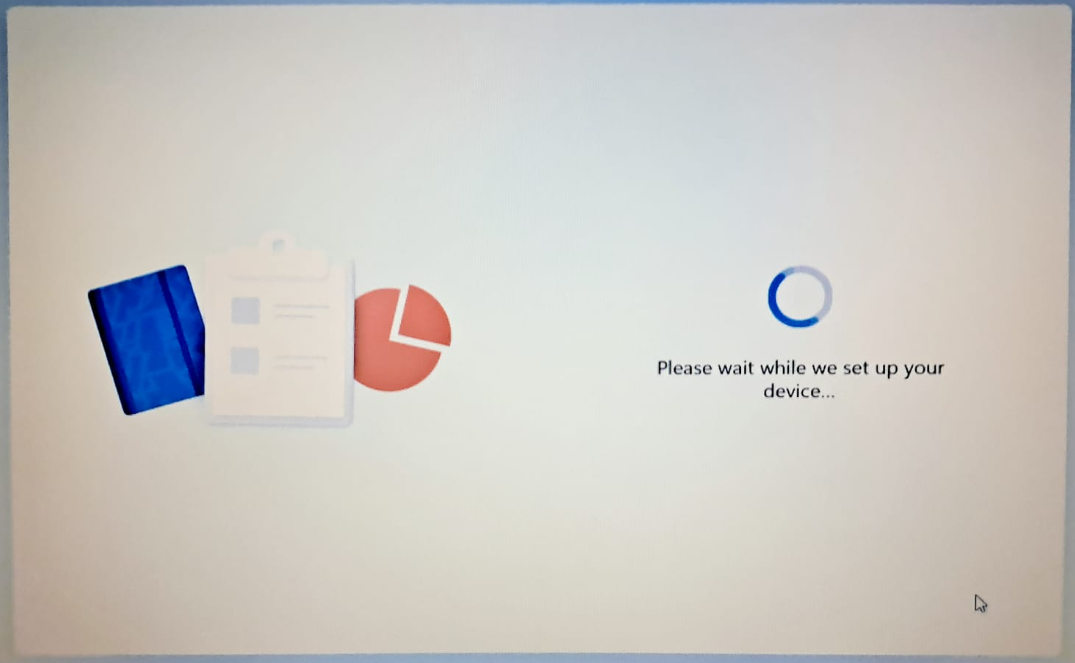
When using Microsoft Autopilot V2, the initial setup process involves registering the device by without its hash values, this makes Intune to recognize and manage the device with Autopilot configurations only after the sign-in process .The actual Autopilot configuration, which includes applying profiles and policies, occurs only after the user signs in for the first time. This means that users might see the standard Windows out-of-box experience (OOBE) screens initially, as Autopilot V2 does not allow customization or control over these pages.

Additionally, it’s important to note that Autopilot V2 currently does not support Hybrid Azure AD joined devices, which are devices that are joined to both Azure Active Directory and on-premises Active Directory.

To ensure that devices are correctly identified as either corporate-owned or personal, administrators need to add device identifiers in the Intune Admin Portal. This differentiation is crucial for applying the appropriate policies and security measures, as corporate devices often require stricter controls compared to personal devices. By accurately categorizing devices, organizations can maintain a secure and efficient IT environment.

Cloud Providers with Data Residency in UAE

Unlocking true value in IT operations means embracing SaaS (Software as a Service) delivery. Without it, there’s no relief from operational burdens. But remember, SaaS must also offer data residency for robust governance and audits.

#SaaS #IToperations #DataGovernance #microsoft #zscaler #aws #microsoft365 #exclaimer #druva #dellemc #circularo #paas #iaas
#Oracle #SAP #MSDynamics #akamai #CloudFlare #CloudTelephony

Cloud and Saas Providers with Data Residency in UAE by Sathesh Manoharan

Windows Auto Pilot Configuration

Lets configure Windows Auto Pilot using Microsoft Endpoint Manager with a deployment profile and manually importing the device into Microsoft Endpoint Manager.

Create a Group to hold Windows Auto Pilot Devices

Devices – Enroll Devices – Windows Enrollment – Deployment Profiles

Create a Deployment Profile

Configure as below –

In Windows 10, version 2004 and later, if the Autopilot deployment profile Language/Region setting is not set to User Select, then OOBE will progress past the language/region/keyboard selection screens. This causes the pre-provisioning technician to arrive at the Azure AD login page, which is too late to enter pre-provisioning. This issue is fixed in Windows 11.

Windows Auto Pilot Deployment Profile

Run PowerShell as administrator

Set-ExecutionPolicy -Scope Process -ExecutionPolicy Unrestricted
Install-Script -Name Get-WindowsAutoPilotInfo
Get-WindowsAutoPilotInfo.ps1 -OutputFile HP.csv

FN + Ctrl + F10 in Lenovo – For Auto Pilot – From Setup Screen

Get-WindowsAutoPilotInfo.ps1 -Online

Now get the CSV File to Devices

Import the Device to Windows Auto Pilot

Add the Associated devices to Group

Reset PC to Test Auto Pilot – Remove Everything – Cloud or local install – (Cloud install if you have a good connection speed)

If you wish to use Pre Provisioning – Press Windows Key 5 times to enter into a different page.

If finger print sensor exist – It will detect finger print for Windows Hello for Business

If you wish to use Pre Provisioning – Press Windows Key 5 times to enter into a different page.

  • Install Provisioning Package
  • Pre-Provision with Windows Autopilot
  • Reset Device

MEM – Configure OneDrive KFM via Intune

In this blog post, we’ll delve into the seamless integration of Intune Policy with OneDrive, focusing particularly on the effortless migration of Known Folders. Exploring the myriad options available, we’ll navigate through the Intune Settings Catalog to configure the OneDrive Known Folders move policy.

Whether it’s a physical setup or a virtual environment like AVD or Cloud PC, the OneDrive Known Folders Move (KFM) emerges as a pivotal solution. Among the familiar Windows Folders—Desktop, Documents, and Pictures—this policy ensures a smooth transition, optimizing storage utilization.

To complement the OneDrive KFM, it’s imperative to implement the OneDrive Files On-Demand policy, a strategic move to conserve device space by adopting an on-demand file access approach.

Finally, we’ll unravel the step-by-step configuration process of the OneDrive Known Folder Move (KFM) policy, facilitating automatic user logins and seamless file saving, all orchestrated through the Intune Settings Catalog.

Objective :

  • Setup OneDrive for Business for end-users
  • Enable KFM (Known Folder Move)
  • Block end-users from reverting known folders configuration to their PC
  • Block personal OneDrive accounts
  • Restrict OneDrive client to sync only specific Azure AD tenant
  • Enable Files On-Demand

Step 1: To begin setting up the Known Folder Move and restricting the OneDrive client to a single tenant, start by retrieving the Azure AD tenant ID. Sign in to the Azure AD portal, then navigate to Azure Active Directory > Properties. Here, you’ll find the Tenant ID. Copy this ID for later use.

Step 2: With the Tenant ID in hand, let’s proceed to create the Configuration Profile for configuring OneDrive policy settings. Log in to the MEM Admin Center portal, navigate to Devices, then Configuration Profiles, and click on Create Profile.

Step 3: Choose “New Policy,” then in the Platform section, select “Windows 10 and later.” Under Profile Type, opt for “Setting Catalog.”

Step 4: In the Basic section, enter a Name and Description for the configuration policy.

Step 5: Navigate to the Configuration Settings page and select “All Settings.” In the search bar, enter ‘OneDrive‘ to find all of the OneDrive available settings.

Based on the above objectives, we’ll create the appropriate settings, I will break these down per objective.

Step 6:Setup OneDrive for Business for end-users“, this setting lets you ‘Silently sign in the users to the OneDrive sync client with their Windows Credentials’ and set this to Enabled.

Step 7:Enable KFM (Known Folder Move)“, Enable the “Silently move Windows known folders to OneDrive” setting, input the Tenant ID, and choose whether to display notifications to users.

Step 8:Block end-users from reverting known folders configuration to their PC‘, locate the setting titled ‘Prevent users from redirecting their Windows known folders to their PC‘ and set it to ‘Enabled‘.

Step 9: Locate the setting ‘Prevent users from syncing personal OneDrive accounts‘ and Enable it.

Step 10: Locate the setting ‘Allow syncing OneDrive accounts for only specific organizations’, and Enable it.

Step 11: Find the setting ‘Use OneDrive Files On-Demand‘ and set this to Enabled.

Step 12: Assign the policy to a group, then proceed by clicking on “Next.”

Step 7: Review the policy in the final step and click onCreateto finish the process.

Configuration Policy – How to Hide the Gaming Section on Windows Devices Using Intune

Hello everyone! Today, let’s explore how to hide the Gaming section on Windows devices using Intune. If you’ve used Windows 11, you might have seen the Gaming section in the Settings app. This section includes options for the Xbox Game Bar, Captures, and Game Mode.

Game Mode on Windows is designed to prioritize system resources for gaming, ensuring that games run smoothly and efficiently. When enabled, Game Mode allocates more system resources to games, prevents Windows updates from installing drivers, stops restart notifications, and adjusts the frame rate for optimal gaming performance. This results in a more immersive and seamless gaming experience.

Despite the benefits, some organizations may want to hide the Gaming section in the Settings app for various reasons. Let’s delve into how this can be achieved using Intune.

Reasons to Hide Gaming on Windows

Hiding games on Windows 11 corporate devices may be necessary for several reasons:

  1. Minimizing Workplace Distractions: Gaming can be a major distraction, reducing employee productivity. By hiding games, employees can focus more on their work.
  2. Preserving System Resources: Games often consume significant system resources, which can lead to performance issues and affect critical tasks. Hiding games ensures that resources are available for essential business activities.
  3. Adhering to Corporate Policies: Some games may be banned by company policies or contain inappropriate content for the workplace. Hiding games helps maintain a professional environment and ensures compliance with these policies.

By hiding games on corporate devices, organizations can promote a productive, efficient, and policy-compliant work environment.

AppDescription
Xbox Game BarIt’s a customizable gaming overlay built into Windows 10
that works with most PC games
CapturesIt controls how you capture your game through
screenshots and recording
Game ModeGame Mode is a built-in Windows 11 feature
to optimize your PC for digital play

Initial Setup in Windows 11: Gaming Options

During the initial setup of Windows 11, users are presented with various options related to Gaming. This setup includes configurations for the Xbox Game Bar, Captures, and Game Mode.

Hide Gaming on Windows Devices using IntuneConfiguration Policy

Step 1: Sign in to the Microsoft Intune Admin portal and navigate to Devices > Configuration profiles > Create profile >New Policy.

Step 2: After clicking on “Create Profile,” a new window will appear. In this window, set the “Platform” to “Windows 10 and later.” For the “Profile Type,” choose “Templates.” Search and select “Device Restriction“, and then click on the “Create” button to proceed.

Step 3: In the Basic section, enter a Name and Description for the configuration policy.

Step 4: In the Basic section, enter a Name and Description for the configuration policy.

Step 5: In the Configuration Settings, select the drop-down menu for “Control Panel and Setting,” then navigate to the “Gaming” section and choose “Block.”

Select “Block” and click on Next.

Step 6: Assign the policy to a group, then proceed by clicking on “Next.”

Step 7: Review the policy in the final step and click on “Create” to finish the process.

End User Experience
The Gaming Section has been successfully removed from the targeted Windows Device.

Step-by-Step Azure SQL Backup & Restore Guide

In the digital age, where data is the lifeblood of businesses, safeguarding databases against loss or corruption is paramount. Azure SQL Server, Microsoft’s cloud-based relational database service, offers a suite of powerful tools to ensure the integrity and availability of critical data. At the heart of this arsenal lies Azure SQL Backup, a feature-rich solution designed to protect databases from unforeseen disasters, system failures, or human errors. In this guide, we delve into the world of Azure SQL Backup, exploring its capabilities, benefits, and best practices. From data protection and disaster recovery to cost-efficiency and ease of management, Azure SQL Backup empowers organizations to fortify their data infrastructure and navigate the complexities of modern data management with confidence.

Advantages of Backup Configuration in Azure SQL Server:

  1. Data Protection and Integrity: Backup configuration in Azure SQL Server enables organizations to create regular backups of their databases, ensuring that critical data is safeguarded against accidental deletion, corruption, or other data loss events. By establishing automated backup schedules, businesses can maintain data integrity and meet regulatory compliance requirements.
  2. Business Continuity and Disaster Recovery: With backup configuration, organizations can effectively prepare for and mitigate the impact of unexpected disasters or system failures. By regularly backing up databases to Azure Blob Storage, businesses can quickly restore data to a point-in-time state, minimizing downtime and ensuring seamless continuity of operations.
  3. Flexibility and Scalability: Azure SQL Server offers flexible backup options, allowing organizations to tailor backup configurations to their specific requirements. Whether it’s full backups, differential backups, or transaction log backups, businesses can choose the appropriate backup strategy based on their data volume, retention policies, and recovery objectives. Additionally, Azure’s scalable infrastructure ensures that backup operations can effortlessly accommodate growing data workloads.

Step 1: Initiate your journey into Azure SQL Backup by creating an Azure SQL database and server. This foundational step lays the groundwork for testing various backup configurations and strategies within the Azure ecosystem.

Check the created configurations and click on create.

Step 2: Within your Azure SQL Server, navigate to the Data Management section and locate the Backup option. Here, you’ll be prompted to select the specific database you wish to back up. Once selected, proceed to configure the backup policy by clicking on “Configure policy.” This step allows you to define the backup frequency, retention period, and other settings tailored to your data protection needs.

Point-in-time-restore

Point-in-time restore is a feature in Azure SQL Database that allows you to recover your database to a specific moment in time, typically just before an issue occurred. This feature is invaluable in scenarios where you need to roll back your database to a previous state due to data corruption, accidental deletions, or erroneous updates.

With point-in-time restore, you can select a precise timestamp within the backup retention period to restore your database. Azure SQL Database automatically identifies the available restore points based on your backup configuration, enabling you to choose the most appropriate point for recovery.

Once initiated, the point-in-time restore process creates a new database copy based on the selected restore point, preserving data integrity up to the chosen timestamp. This allows you to effectively revert your database to a consistent state, mitigating the impact of data loss or corruption events.

Point-in-time restore empowers you to recover from unexpected incidents with minimal downtime and data loss, providing a crucial layer of resilience and flexibility in your database management strategy.

Long Term Retention
Long-term retention (LTR) in Azure SQL enables you to store database backups beyond the standard 1-35 day period, meeting regulatory or business requirements. LTR utilizes full database backups automatically created by Azure SQL, storing them in redundant Azure Blob storage with retention up to 10 years.

You can define LTR policies based on weekly, monthly, or yearly retention, specifying which backups are copied to long-term storage. For example, you might keep one backup per week for 10 years or the first backup of each month for three months.

Changes to LTR policies only affect future backups; existing backups retain their original retention settings. If you wish to delete old LTR backups prematurely, manual deletion is required.

Examples of the LTR policy:

  • W=0, M=0, Y=5, WeekOfYear=3The third full backup of each year is kept for five years.
  • W=0, M=3, Y=0The first full backup of each month is kept for three months.
  • W=12, M=0, Y=0Each weekly full backup is kept for 12 weeks.
  • W=6, M=12, Y=10, WeekOfYear=20Each weekly full backup is kept for six weeks. Except the first full backup of each month, which is kept for 12 months. Except the full backup taken on the 20th week of the year, which is kept for 10 years.

The following table illustrates the cadence and expiration of the long-term backups for the following policy:

W=12 weeks (84 days), M=12 months (365 days), Y=10 years (3650 days), WeekOfYear=20 (the week after May 13)

The following dates are in ISO 8601 (YYYY-MM-DD).

Step 3: Navigate to the Azure SQL Database configuration settings and locate the options for Point-in-Time Restore and Long-Term Retention. Configure the Point-in-Time Restore settings to define the maximum retention period for backups, allowing you to restore your database to a specific moment in time within this window. Additionally, set up Long-Term Retention settings to specify the duration and frequency of backups stored in Azure Blob storage for extended retention periods, ensuring compliance with regulatory requirements and providing additional data protection against long-term data loss events.

Step 4: Access the “Available backups” section within the Azure SQL Database Backups menu. Here, you’ll find a list of available backups corresponding to your configured backup policies, including both regular and long-term retention backups. Select the backup you wish to restore from, and then choose the destination database to which you want to restore the data. This step initiates the restoration process, enabling you to recover your database to a specific point in time or from a long-term retention backup with ease.

Step 5: When creating a Restore Database, first, choose the desired restore type—either Point-in-Time or Long-Term Retention—based on your recovery needs. If selecting Point-in-Time, specify the date and time to which you want to restore your database. For Long-Term Retention, ensure you’ve configured the appropriate retention policies beforehand. Once the settings are defined, initiate the restoration process by clicking on “create.” This action triggers the database restoration, effectively rolling back your database to the specified point in time or restoring it from a long-term retention backup.

Step 6: Upon completion of the restoration process, you’ll receive a confirmation message indicating the successful creation of the restored database from the backup section. This acknowledgment verifies that your database has been successfully restored to the specified point in time or from a long-term retention backup, ensuring data integrity and enabling you to resume operations with confidence.

× How can I help you?