31 C
Dubai
Wednesday, April 30, 2025
Home Blog Page 6

Deploy Azure Front Door and Web Application Firewall (WAF) for React JS app

Adding a Web Application Firewall (WAF) to Azure Front Door provides several advantages, enhancing the security and performance of your web applications. Here are five key advantages:

  1. Security against Web Application Attacks:
    • WAF helps protect your web applications from a variety of common web vulnerabilities, such as SQL injection, cross-site scripting (XSS), and cross-site request forgery (CSRF). It acts as a security layer between clients and your applications, blocking malicious traffic and potential attacks.
  2. OWASP Compliance:
    • Azure Front Door WAF is designed to comply with the Open Web Application Security Project (OWASP) guidelines. It helps organizations meet security best practices and standards, ensuring that web applications are protected against the latest threats and vulnerabilities.
  3. Application Layer DDoS Protection:
    • WAF provides protection against distributed denial-of-service (DDoS) attacks at the application layer. It can detect and mitigate attacks that specifically target vulnerabilities in web applications, preventing disruptions and downtime.
  4. Granular Rule Configuration:
    • Azure Front Door WAF allows you to configure custom rules based on your application’s specific security requirements. This includes the ability to create and enforce rules related to HTTP protocol violations, request limits, and other security policies. Fine-grained control over security rules helps tailor protection to the unique characteristics of your application.
  5. Centralized Management and Monitoring:
    • Azure Front Door WAF offers centralized management and monitoring capabilities. You can configure and monitor security policies, view real-time analytics, and gain insights into the security posture of your applications. Centralized management simplifies the task of maintaining and updating security policies across multiple applications.

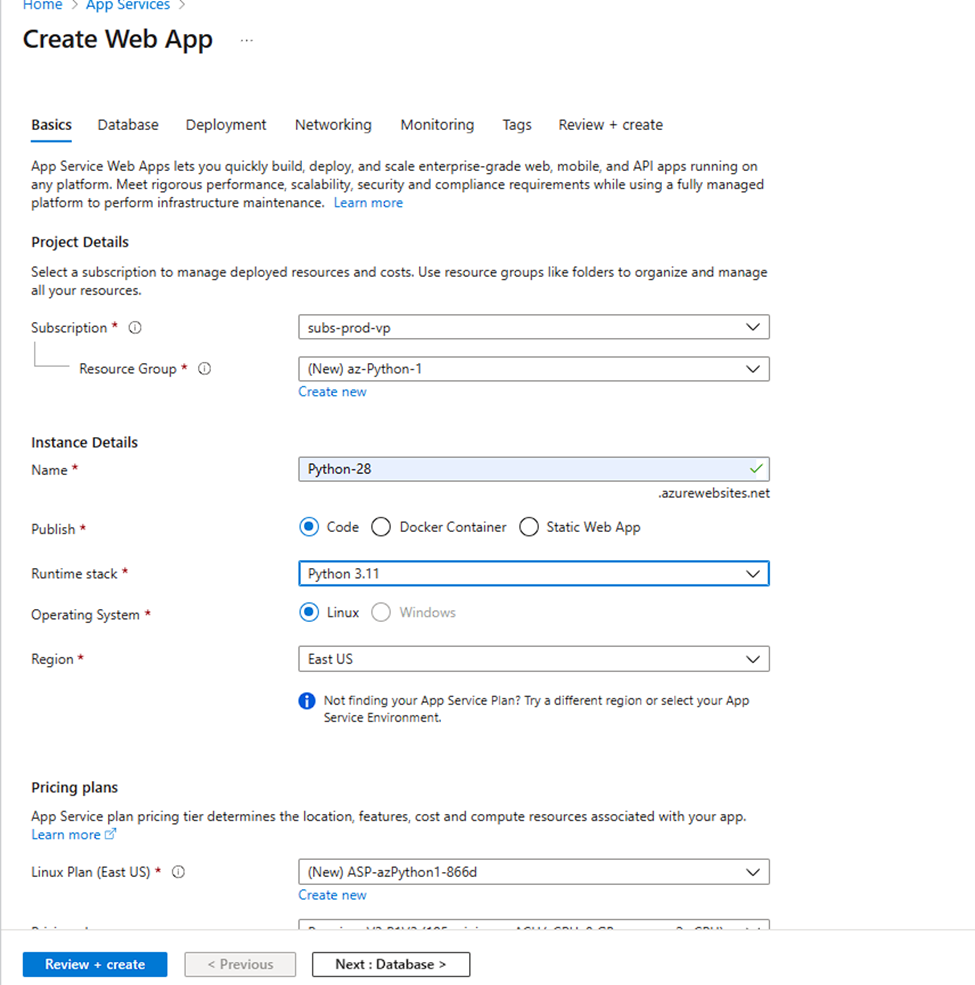
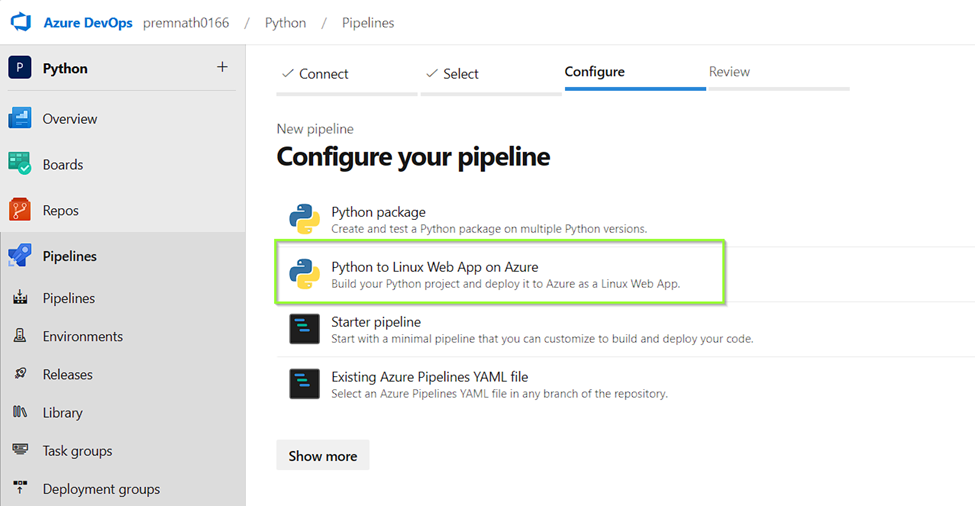
Step 1 : Create a CI/CD pipeline connection for a Sample React JS application which will be pushed to Azure App Service.

.
.

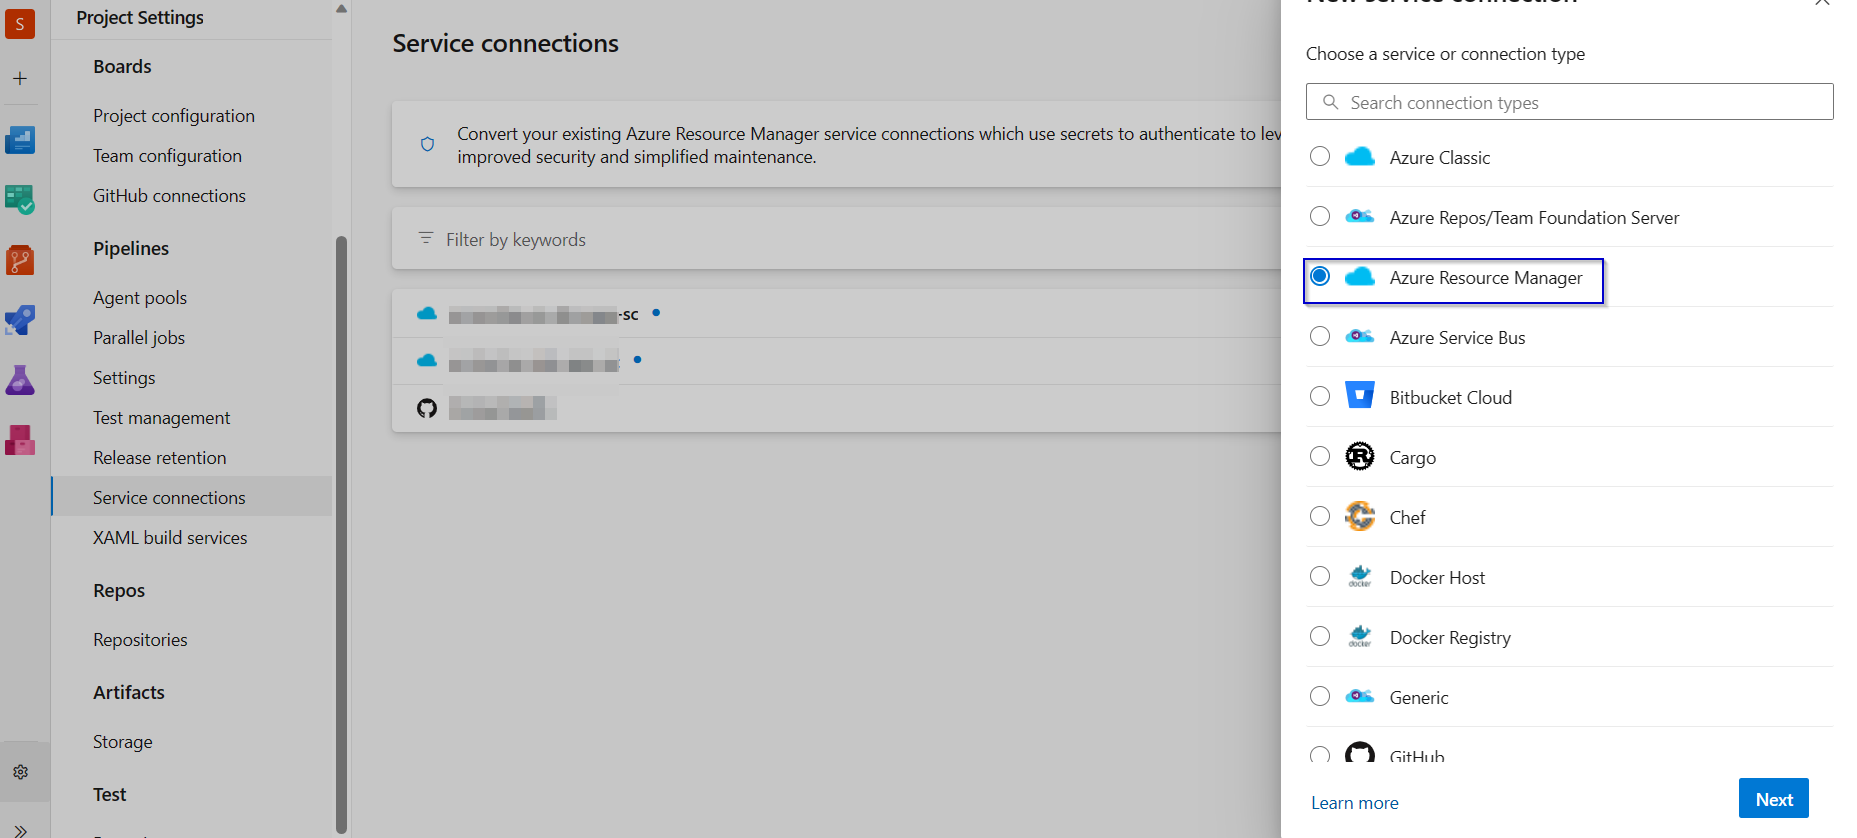
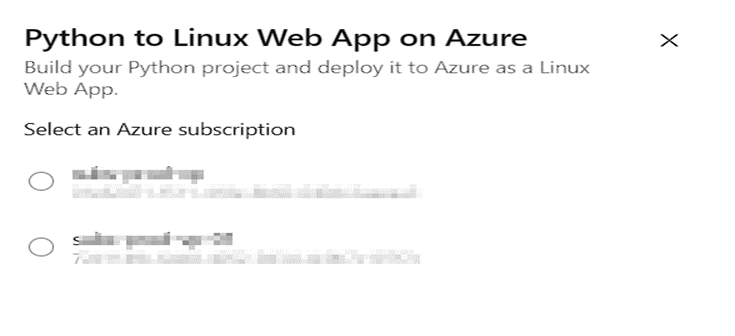
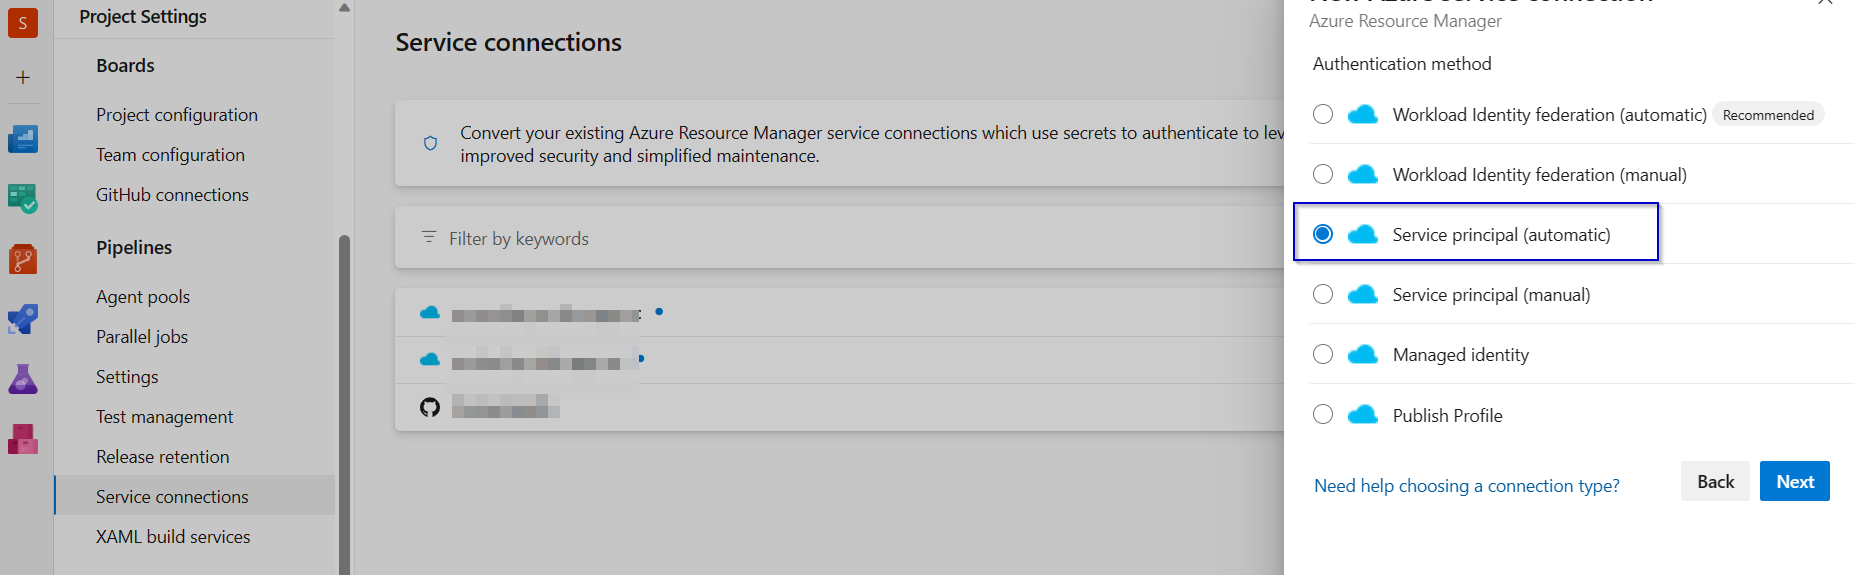
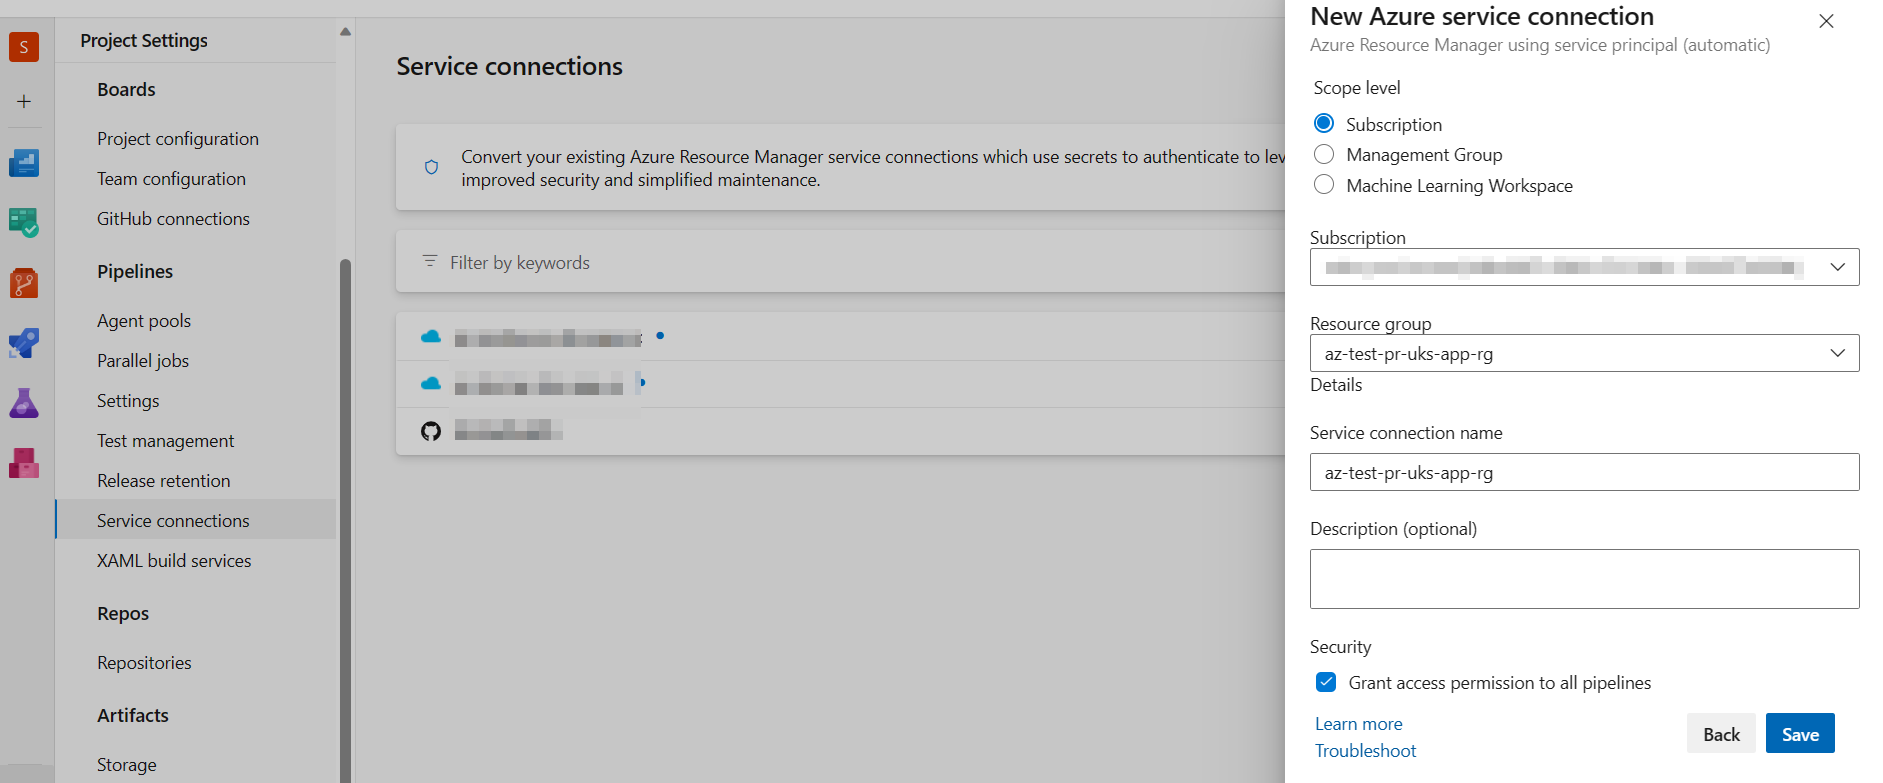
Step 2 : Before creating a CI/CD pipeline lets create a Service Connection to the azure subscription.

.

Select your subscription and Resource group that contains the Azure App Service.

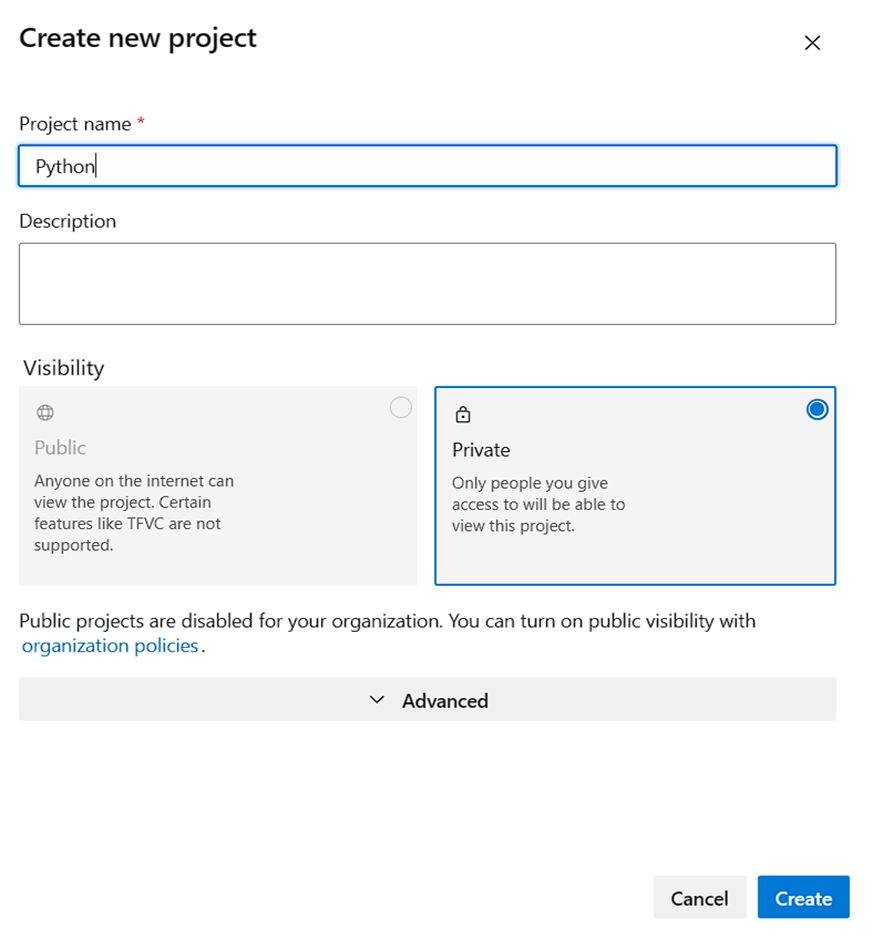
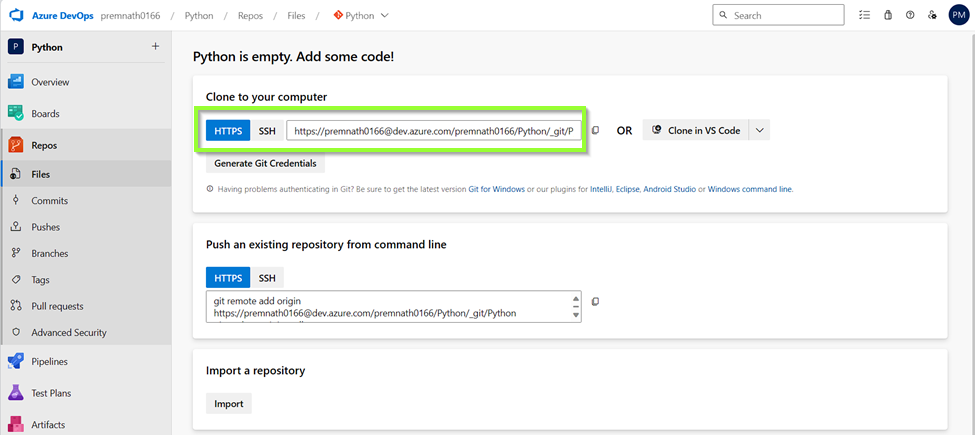
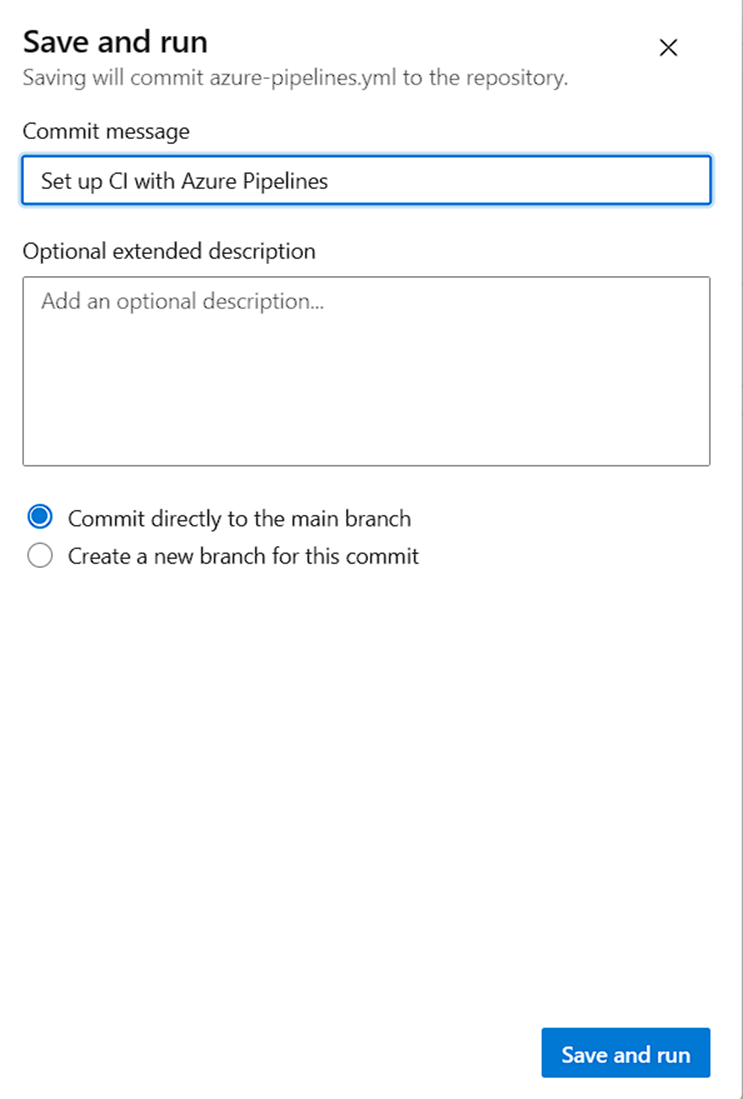
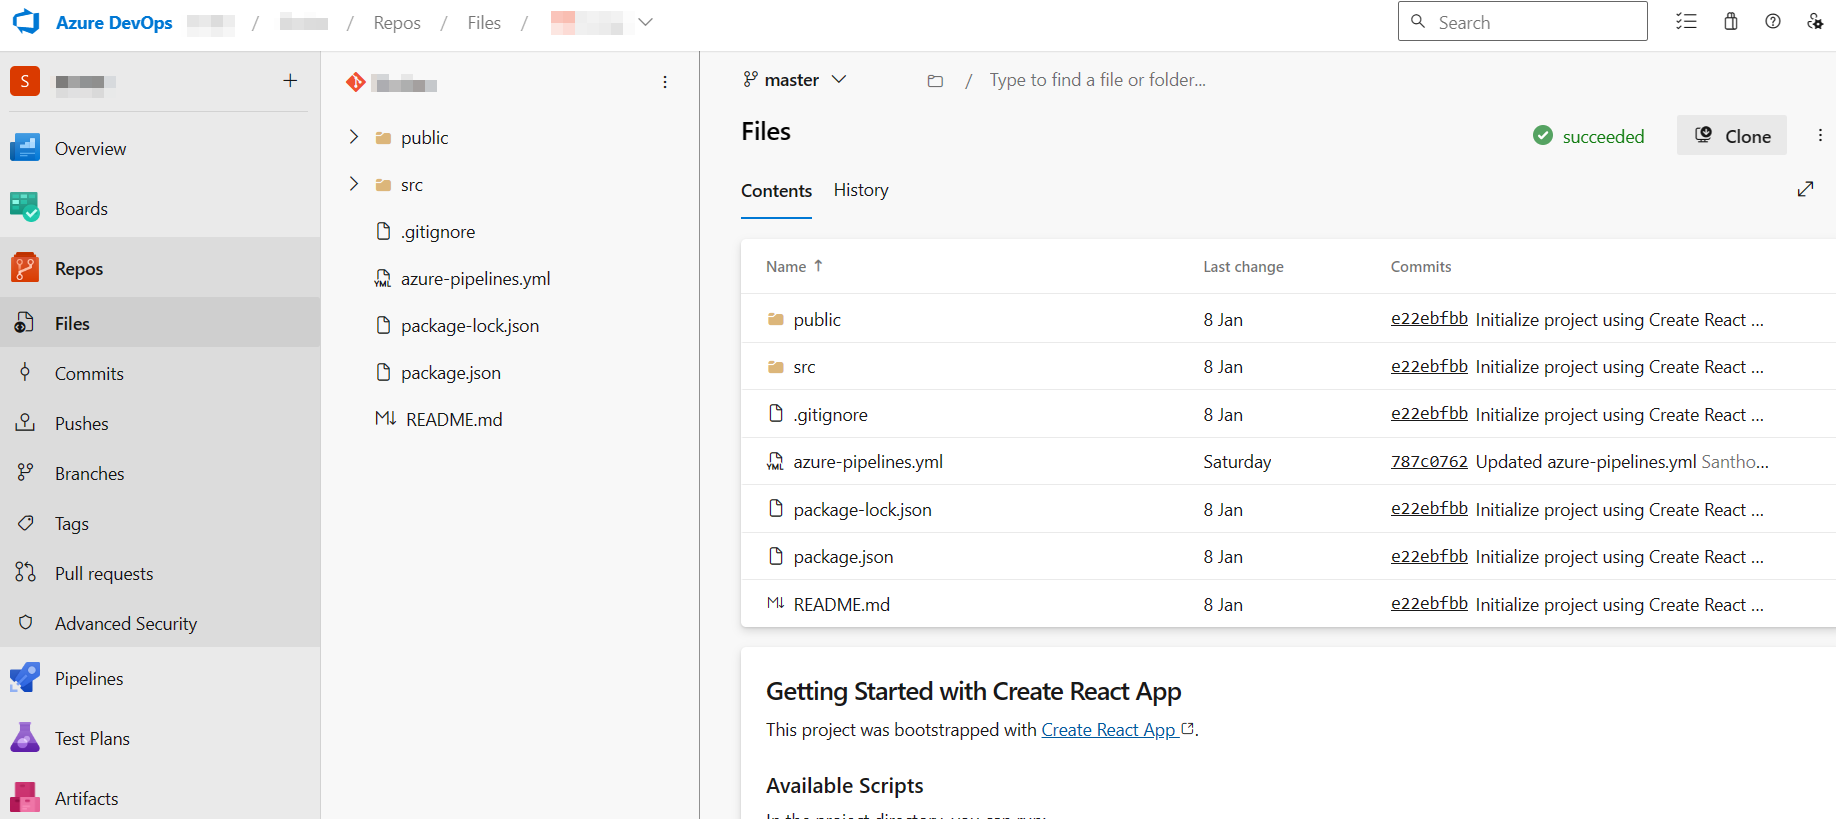
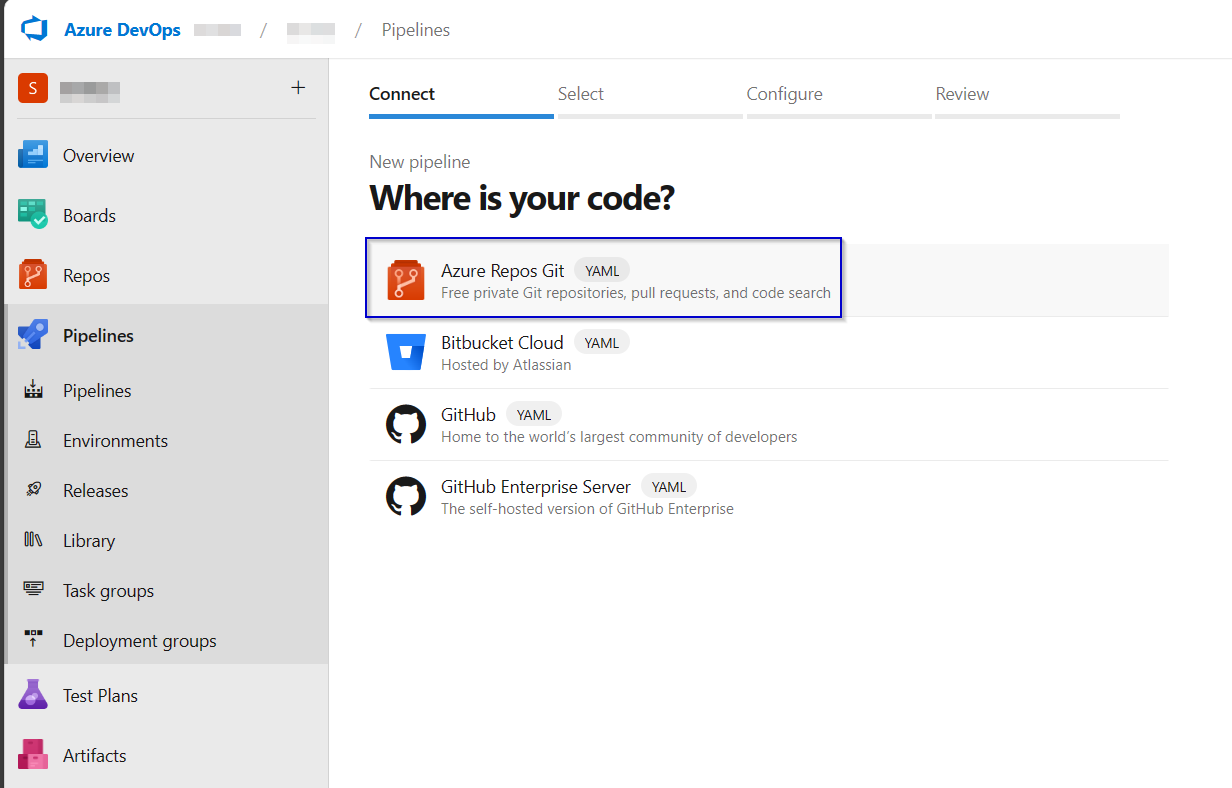
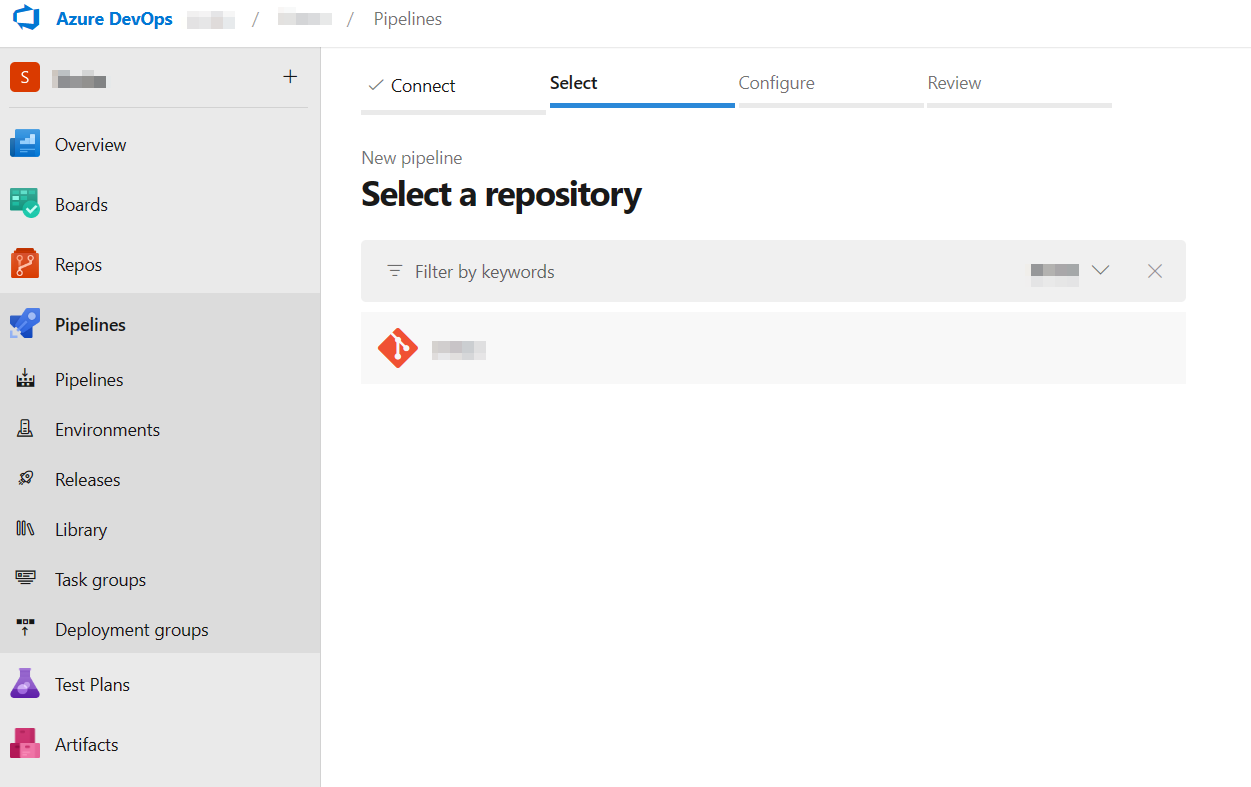
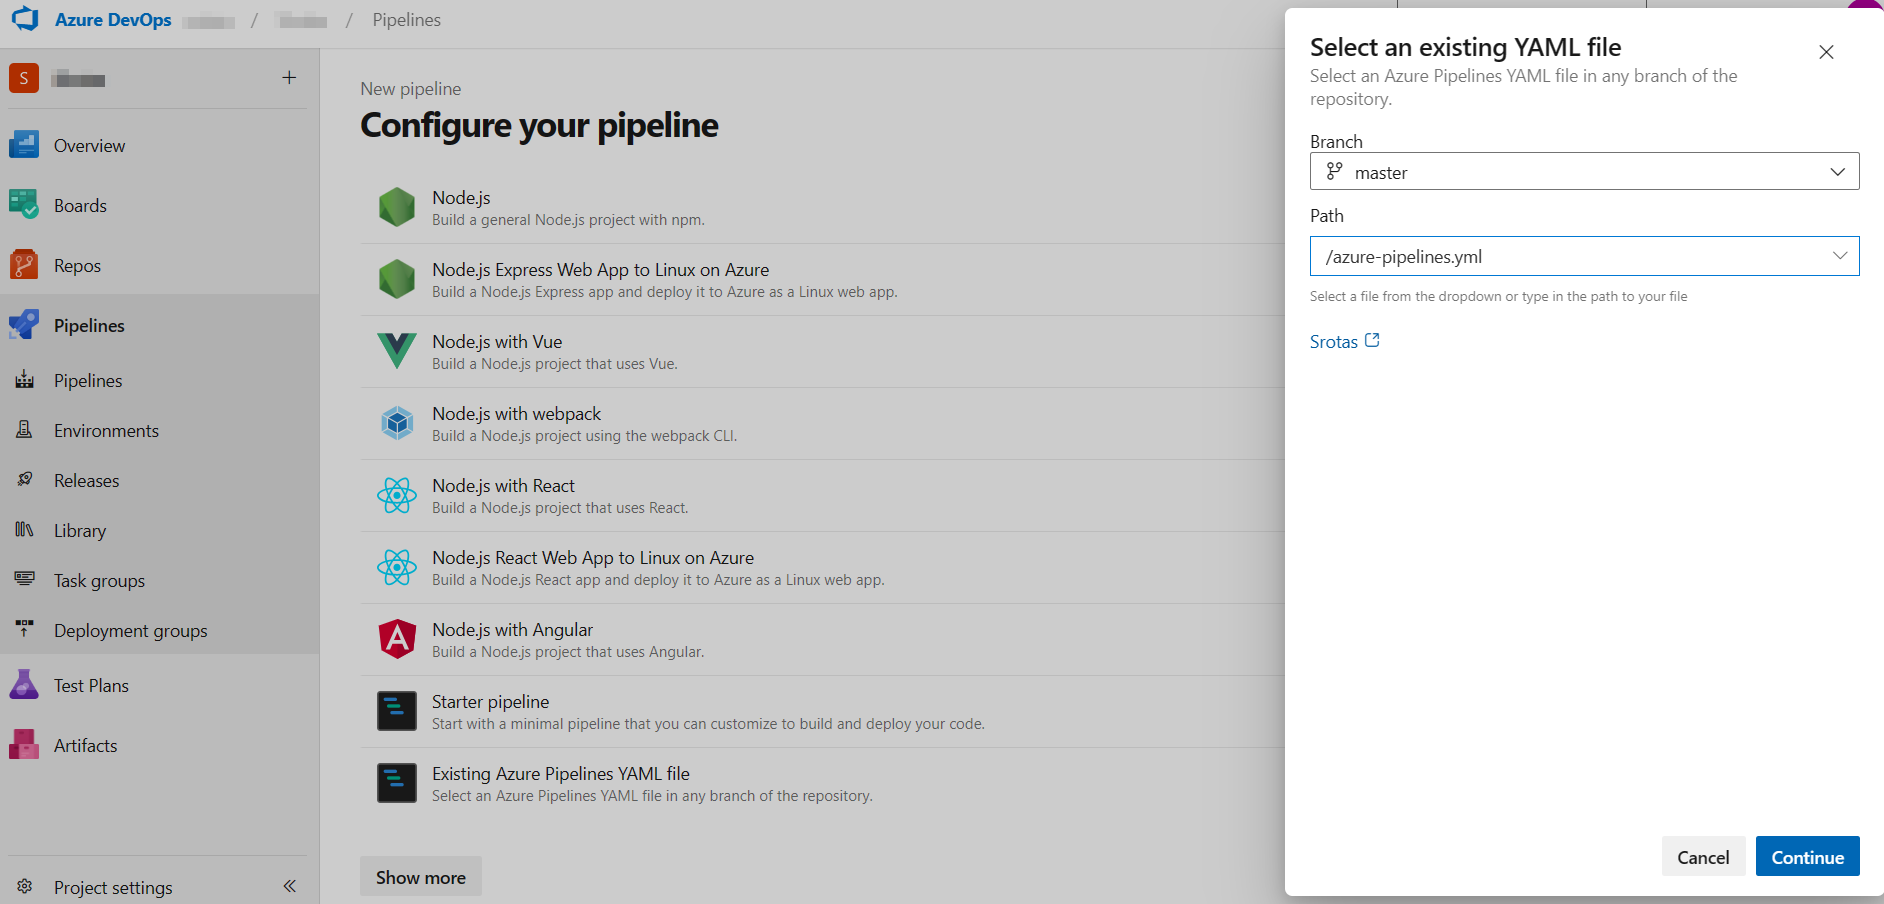
Step 3 : Once we create a service connection, lets start creating a CI/CD pipeline. Select the repository that contains the azure-pipeline.yml file.

.
.

Click on existing Azure pipeline YAML file.

.

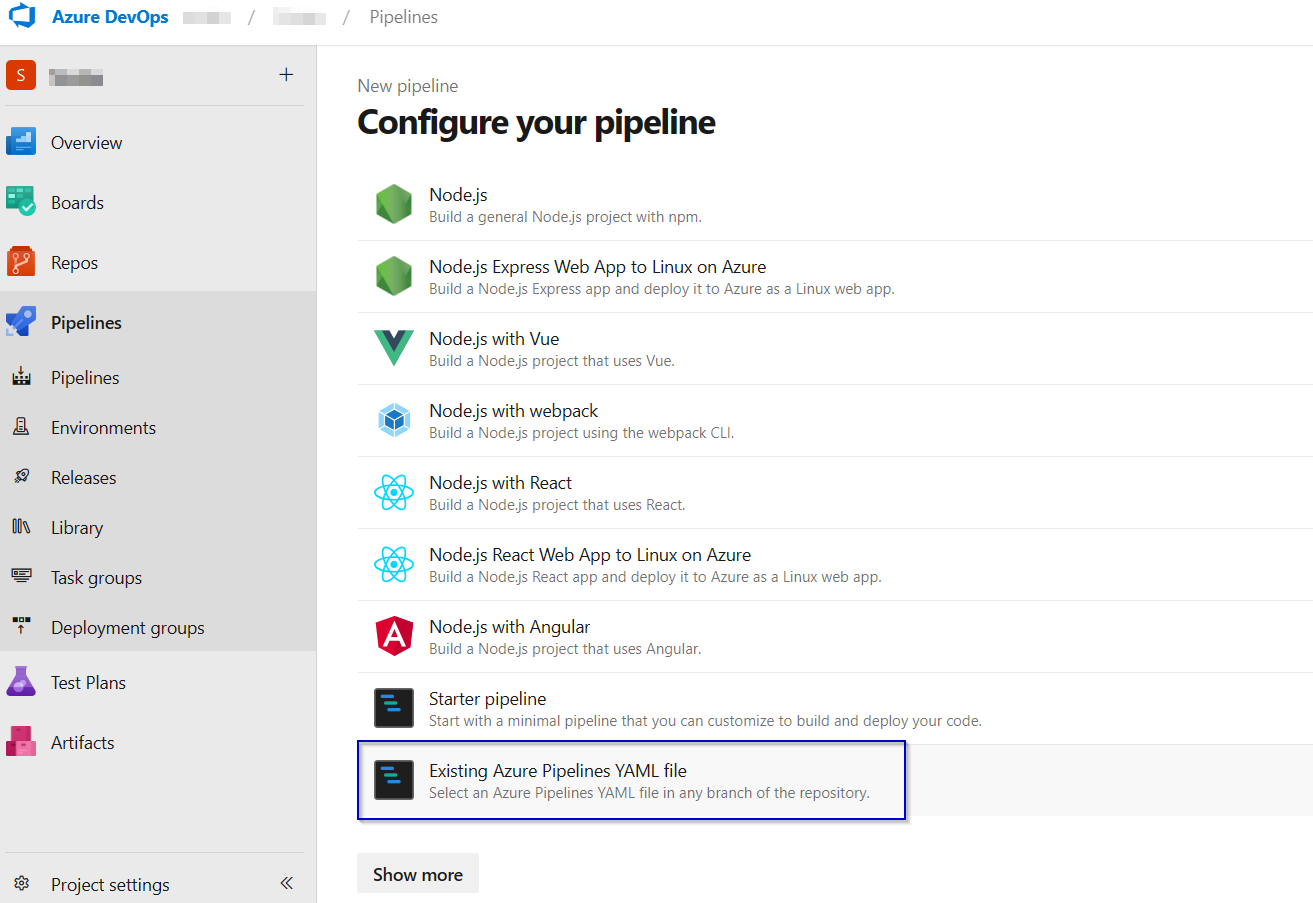
Select the configured YAML file.

Note : If you don’t have a configured Azure YMAL file for pipeline then use the below yml file. Alter the below code according to your preference.

trigger:
- master

variables:

  # Azure Resource Manager connection created during pipeline creation
  azureSubscription: '########################'

  # Web app name
  webAppName: 'az-test-pr-uks-app'

  # Environment name
  environmentName: 'az-test-pr-uks-app'

  # Agent VM image name
  vmImageName: 'ubuntu-latest'

stages:
- stage: Build
  displayName: Build stage
  jobs:
  - job: Build
    displayName: Build
    pool:
      vmImage: $(vmImageName)

    steps:
    - task: NodeTool@0
      inputs:
        versionSource: 'spec'
        versionSpec: '18.x'
      displayName: 'Install Node.js'

    - script: |
        npm install
        npm run build --if-present
      displayName: 'npm install, build and test'

    - task: ArchiveFiles@2
      displayName: 'Archive files'
      inputs:
        rootFolderOrFile: '$(System.DefaultWorkingDirectory)'
        includeRootFolder: false
        archiveType: zip
        archiveFile: $(Build.ArtifactStagingDirectory)/$(Build.BuildId).zip
        replaceExistingArchive: true

    - upload: $(Build.ArtifactStagingDirectory)/$(Build.BuildId).zip
      artifact: drop

- stage: Deploy
  displayName: Deploy stage
  dependsOn: Build
  condition: succeeded()
  jobs:
  - deployment: Deploy
    displayName: Deploy
    environment: $(environmentName)
    pool:
      vmImage: $(vmImageName)
    strategy:
      runOnce:
        deploy:
          steps:
          - task: AzureWebApp@1
            displayName: 'Azure Web App Deploy: az-test-pr-uks-app'
            inputs:
              azureSubscription: 'az-test-pr-uks-app-sc'
              appType: 'webAppLinux'
              appName: 'az-test-pr-uks-app'
              package: '$(Pipeline.Workspace)/drop/$(Build.BuildId).zip'
              runtimeStack: 'NODE|18-lts'
              startUpCommand: 'pm2 serve /home/site/wwwroot/build --no-daemon --spa'

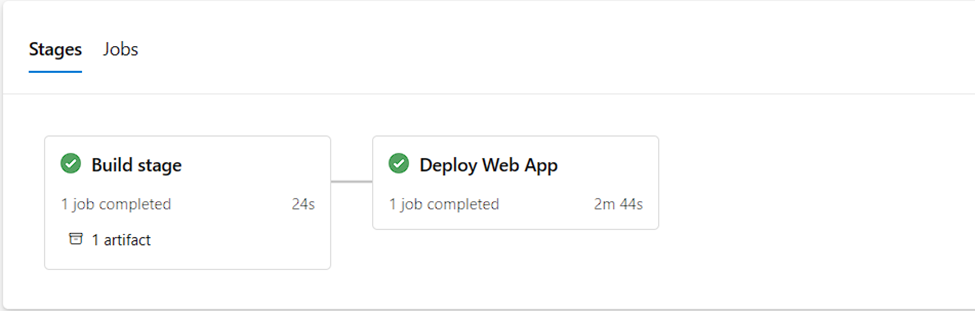
Here I have configured both Build and Deploy stages in a single YAML file.

.

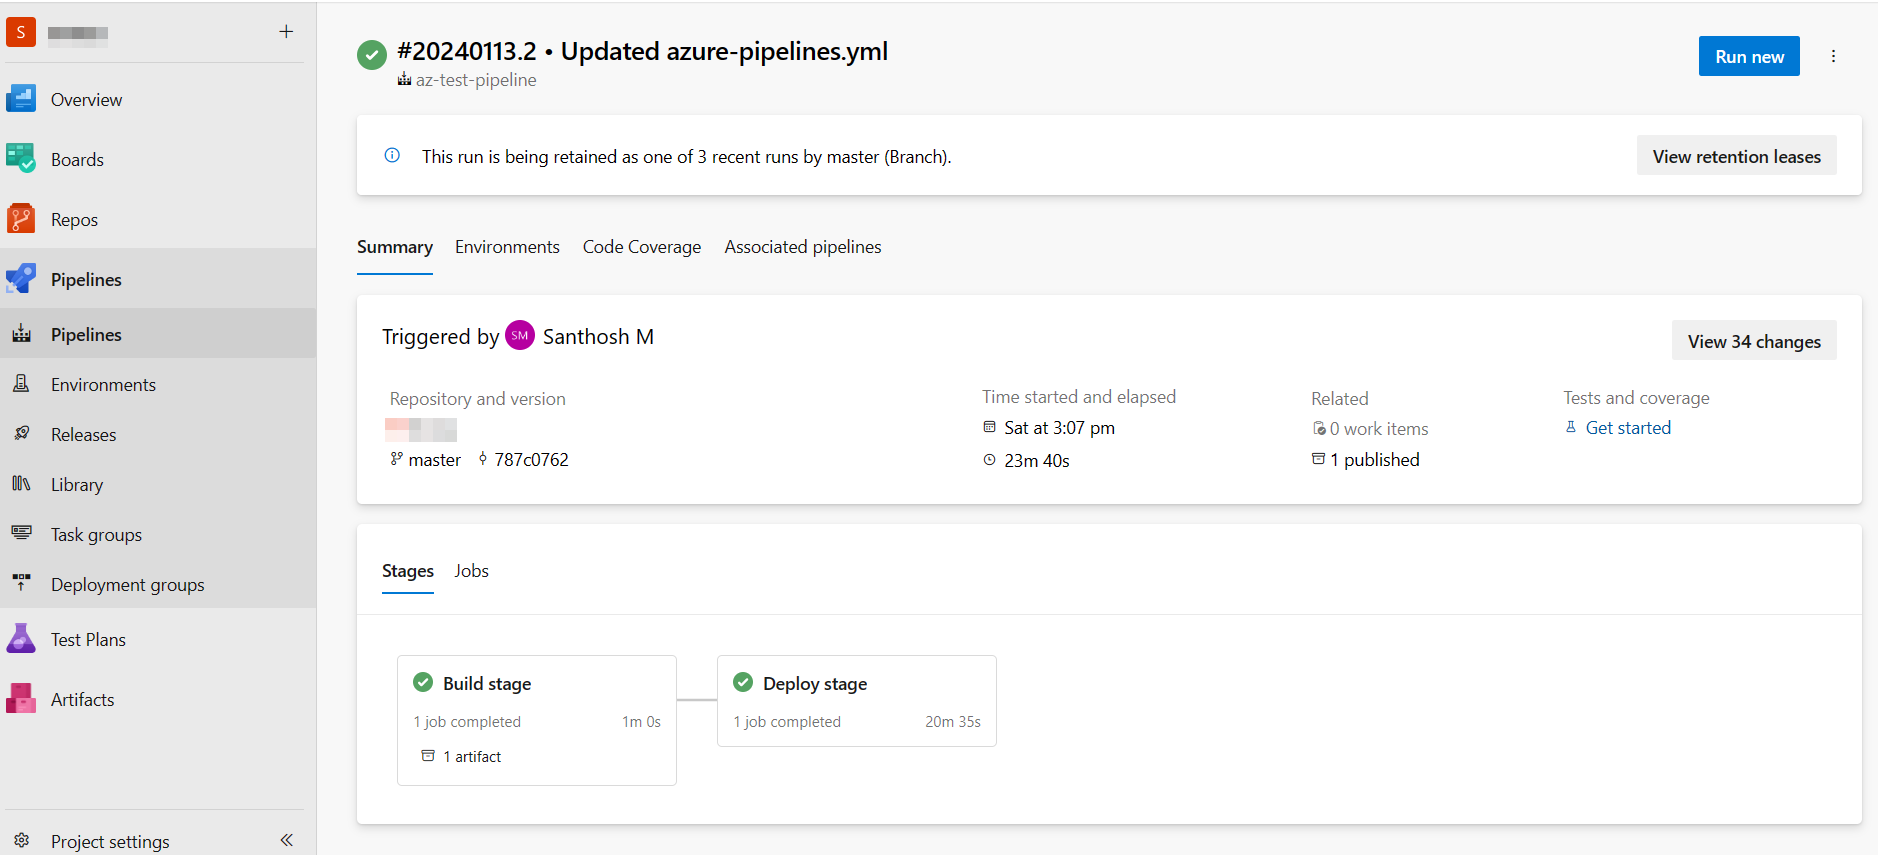
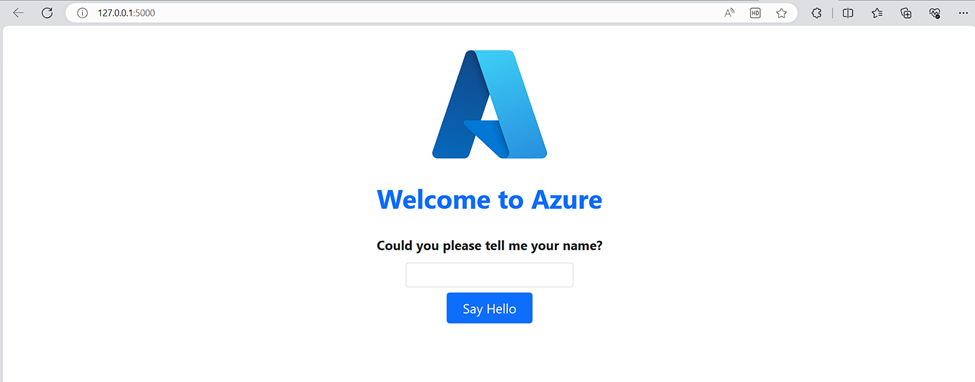
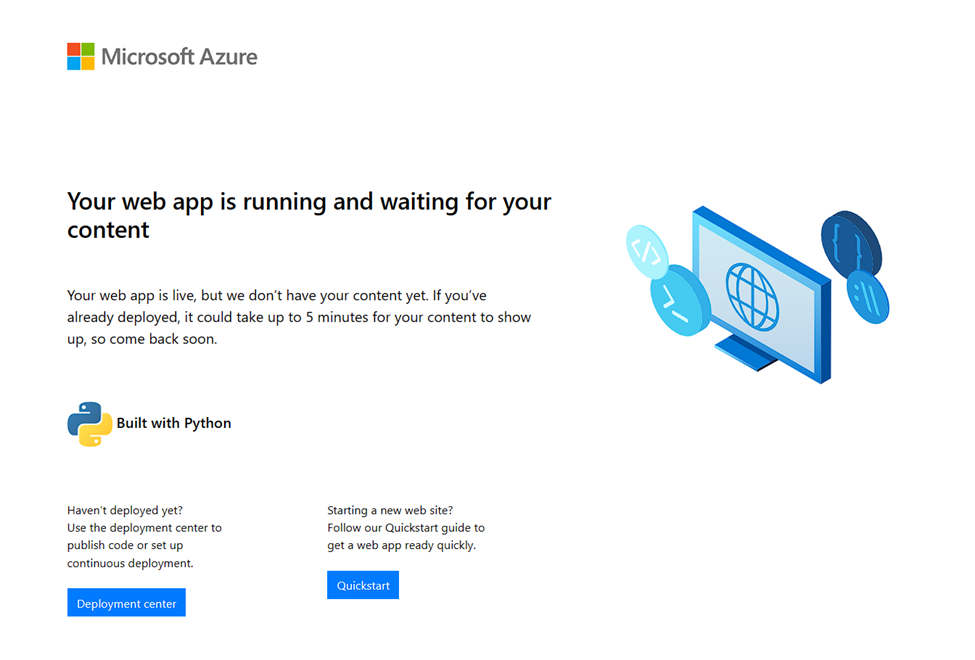
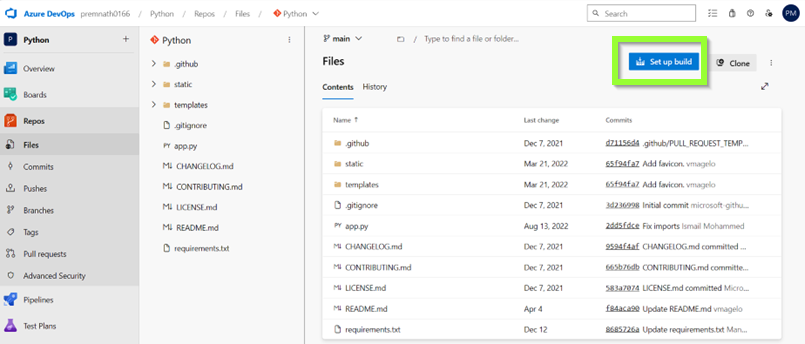
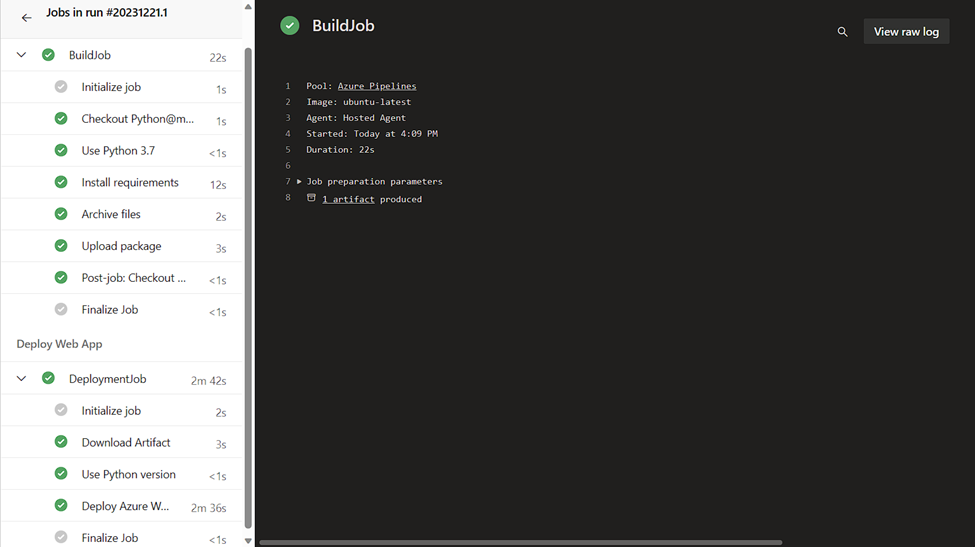
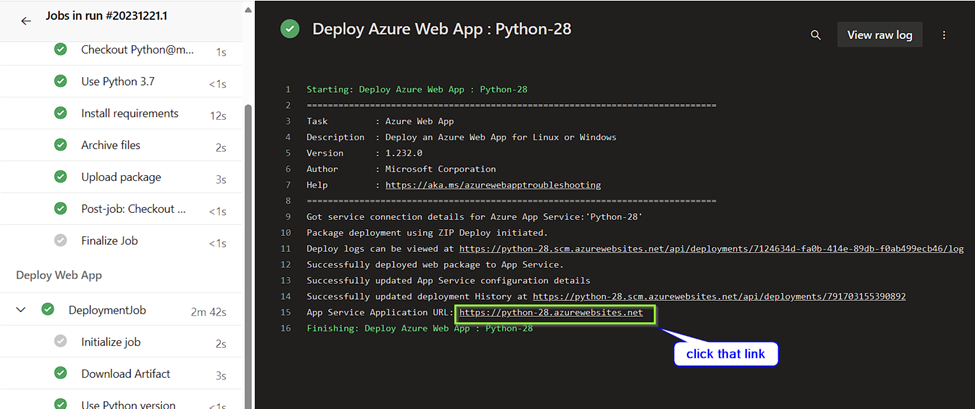
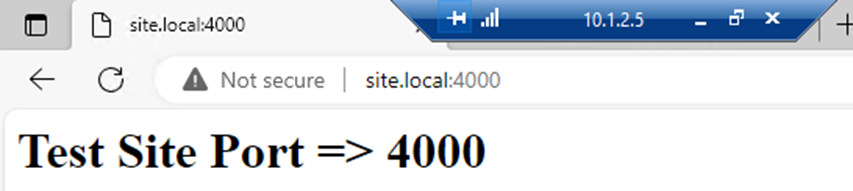
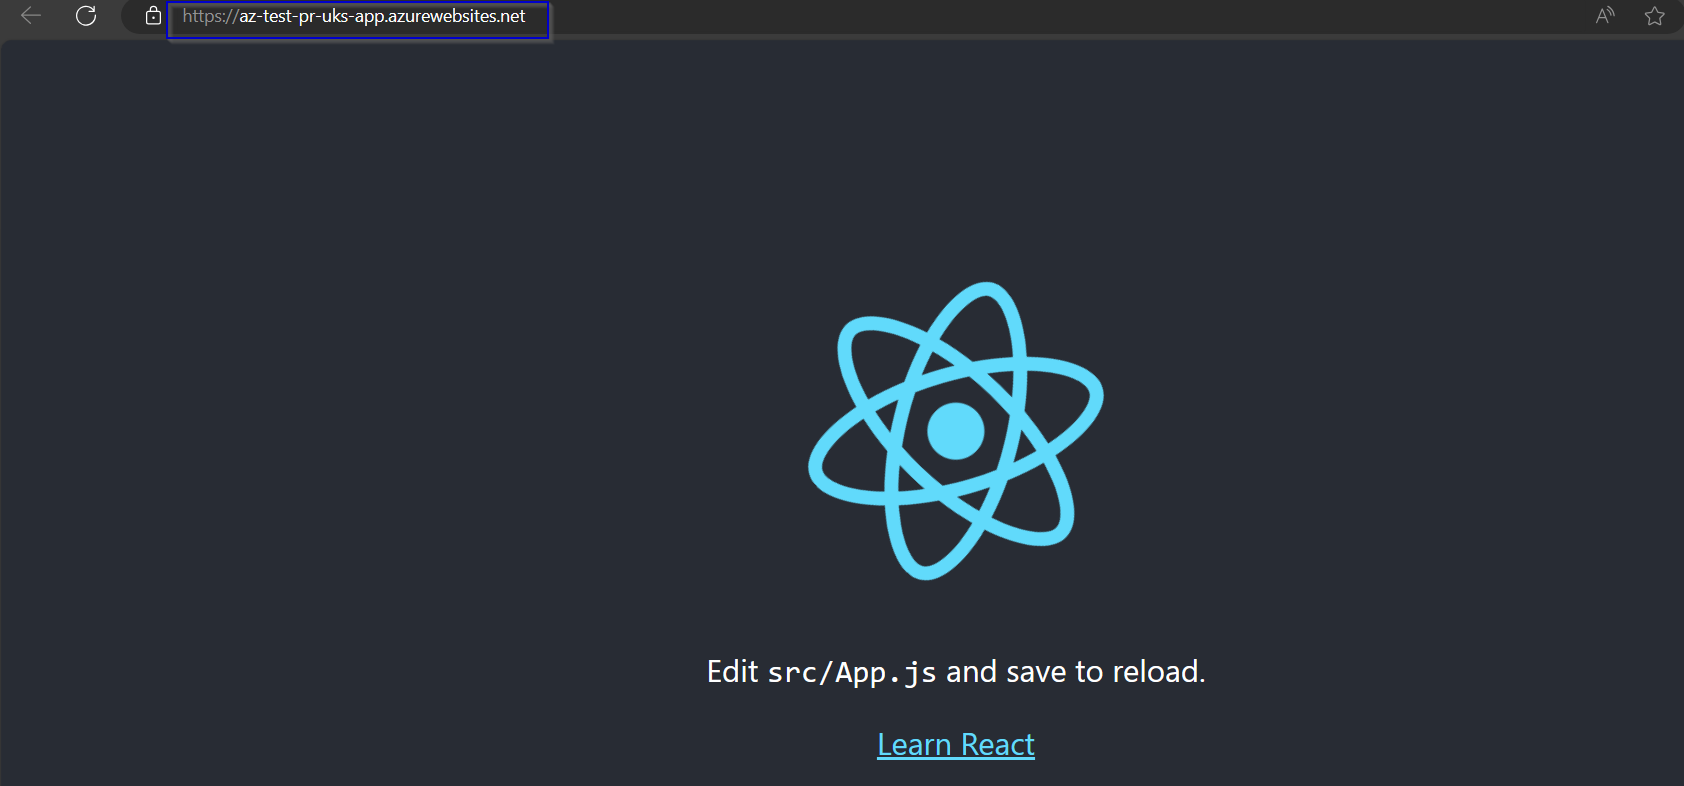
Step 4 : Now lets check whether the sample application is pushed to Azure App service.

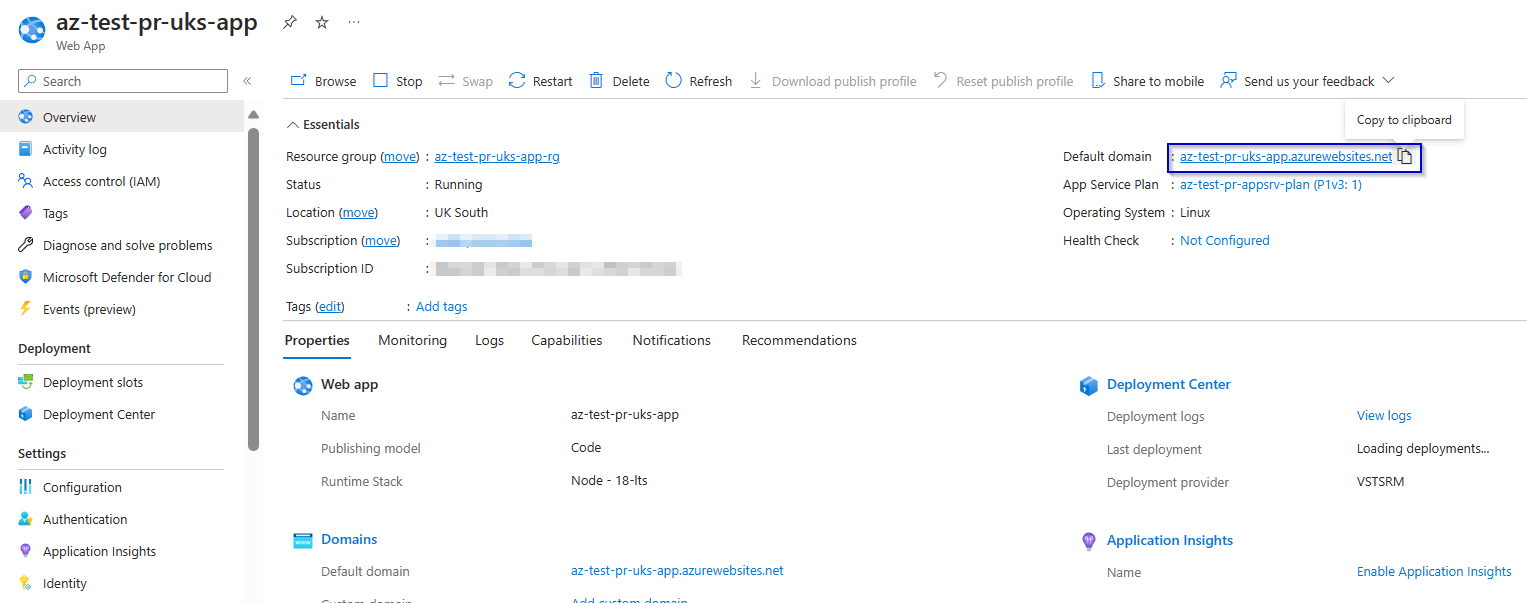
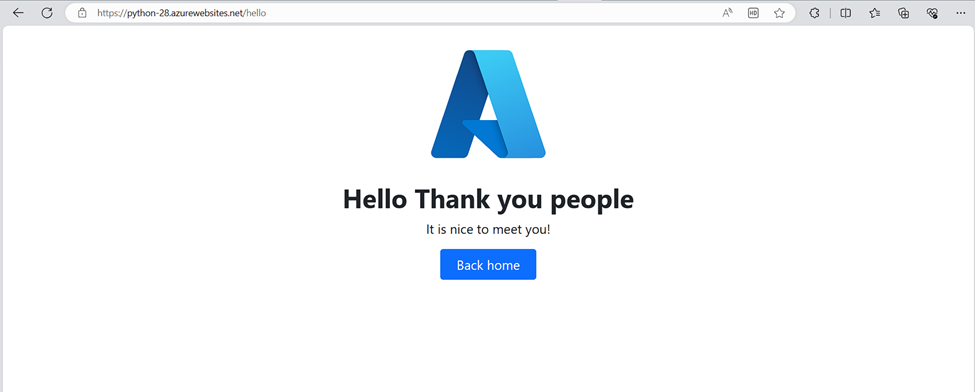
The Sample Application React JS is successfully deployed to Azure App Service.

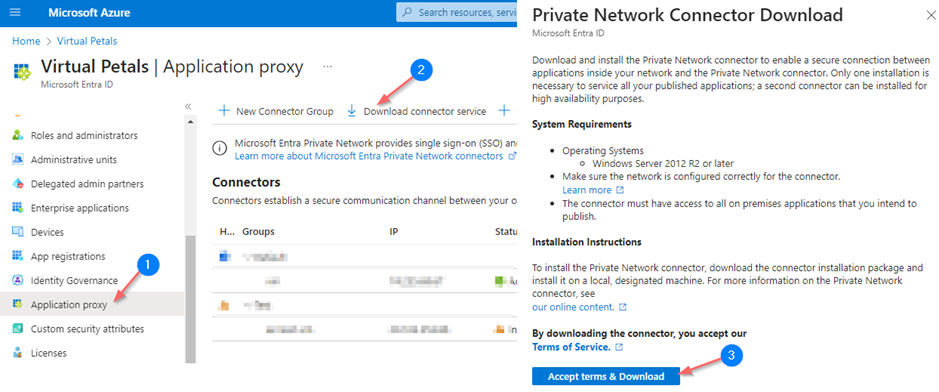
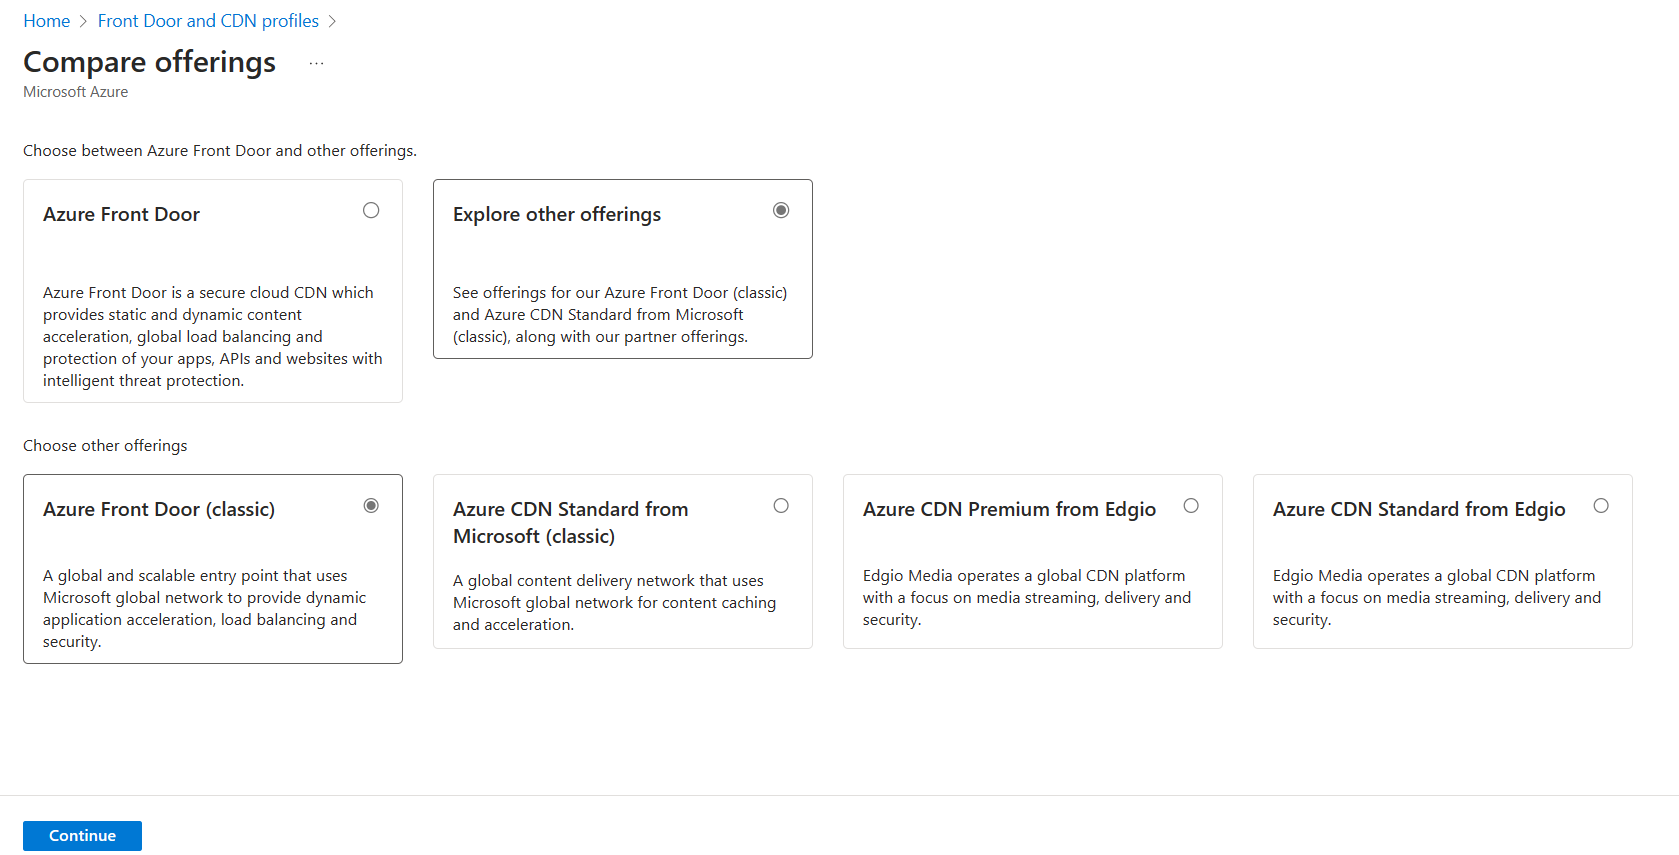
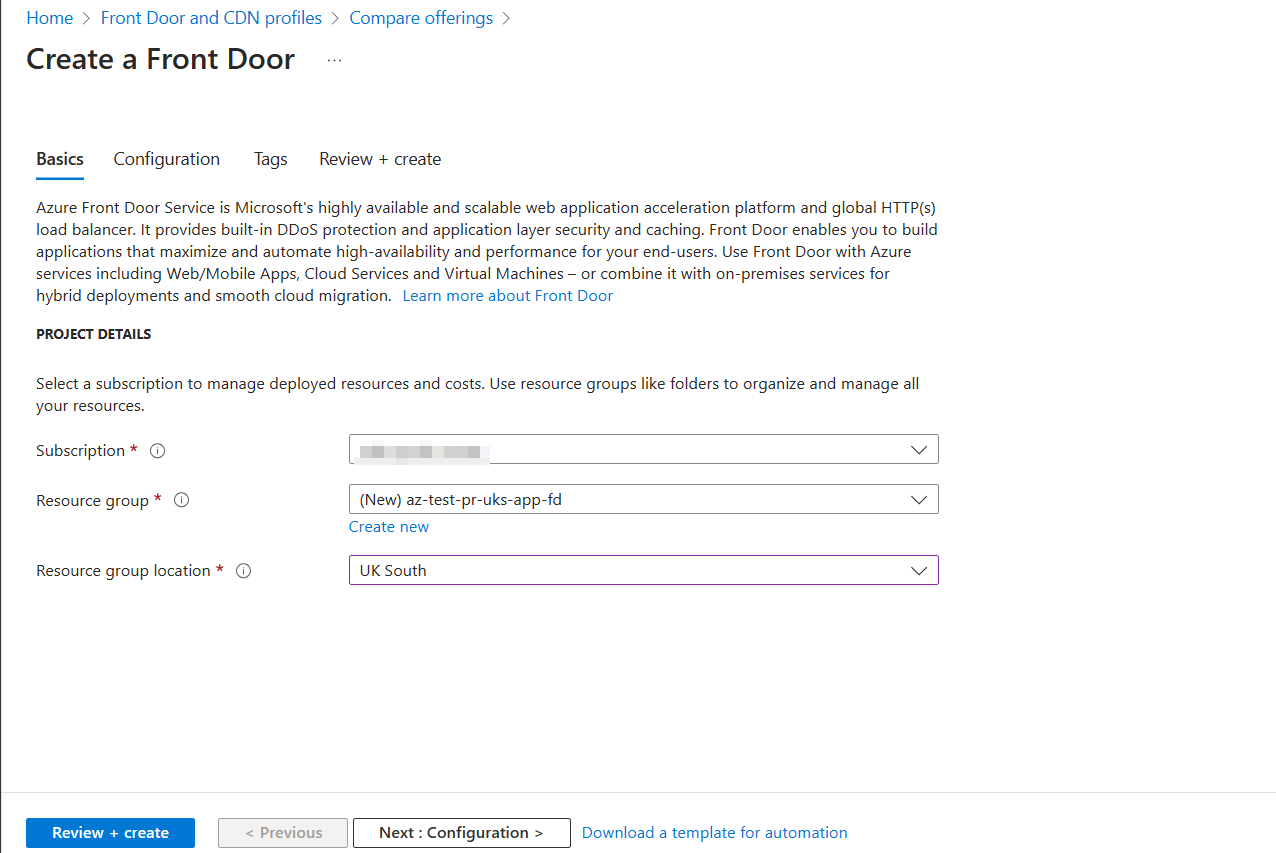
Step 5 : Lets start creating a Azure Front Door. Here I have used a Classic method to create Azure Front Door.

.

Select or Create a resource group and a location.

.

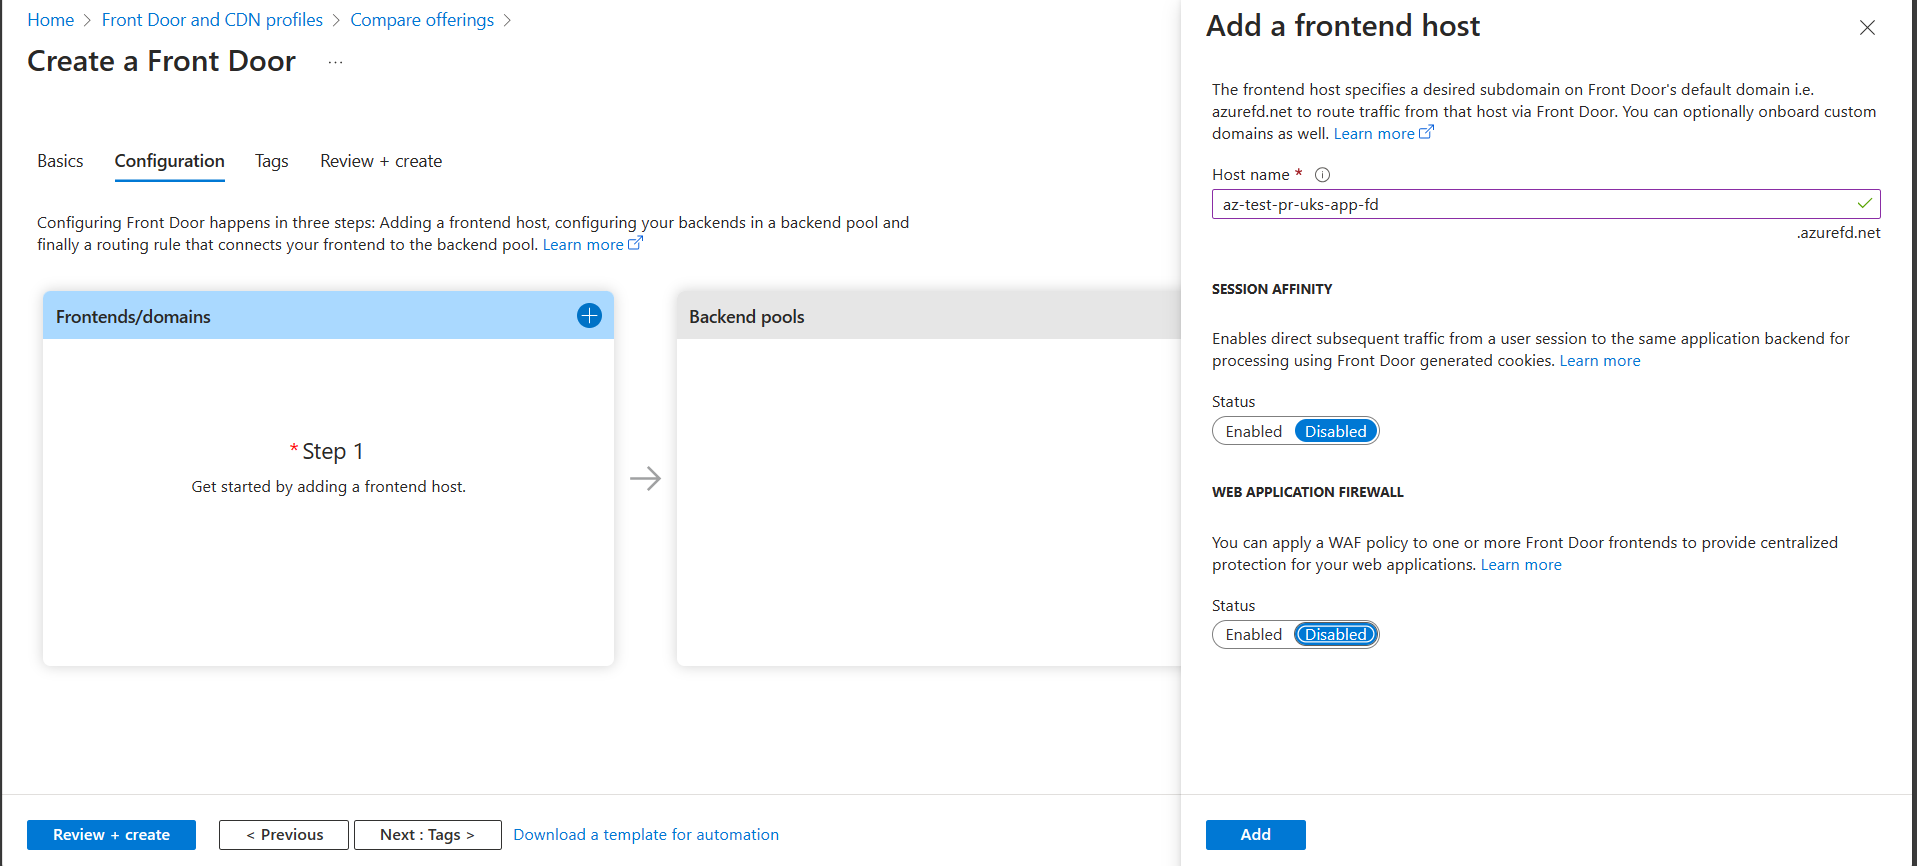
Step 6 : Create a Domain for Azure Front Door. This URL will be used to view our Sample Application.

.

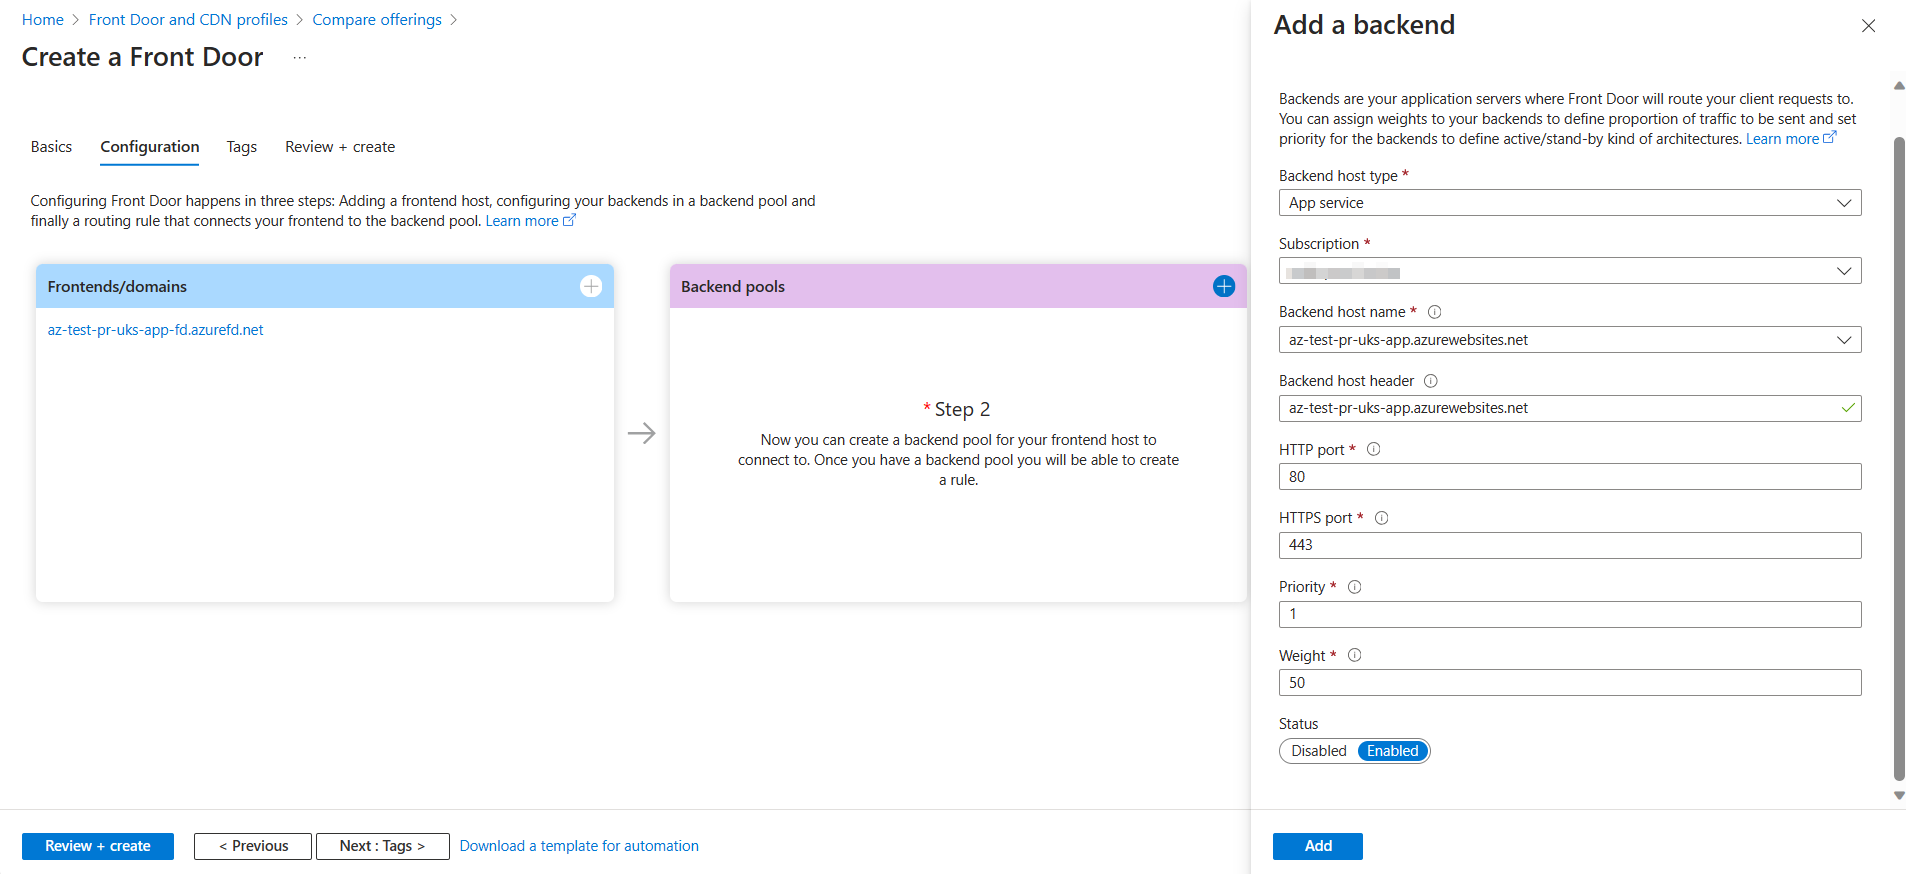
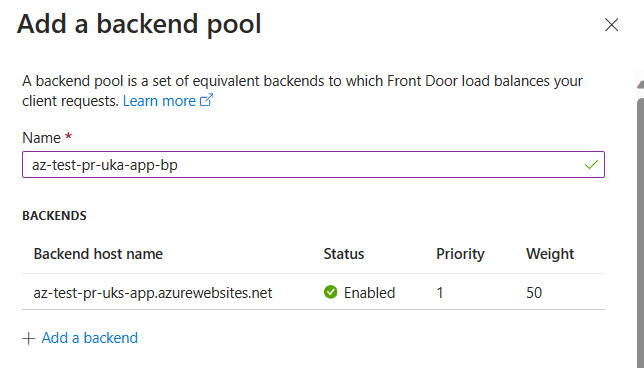
Step 7 : Provide a Backend Pool name and select the backend pool(Azure App Service)

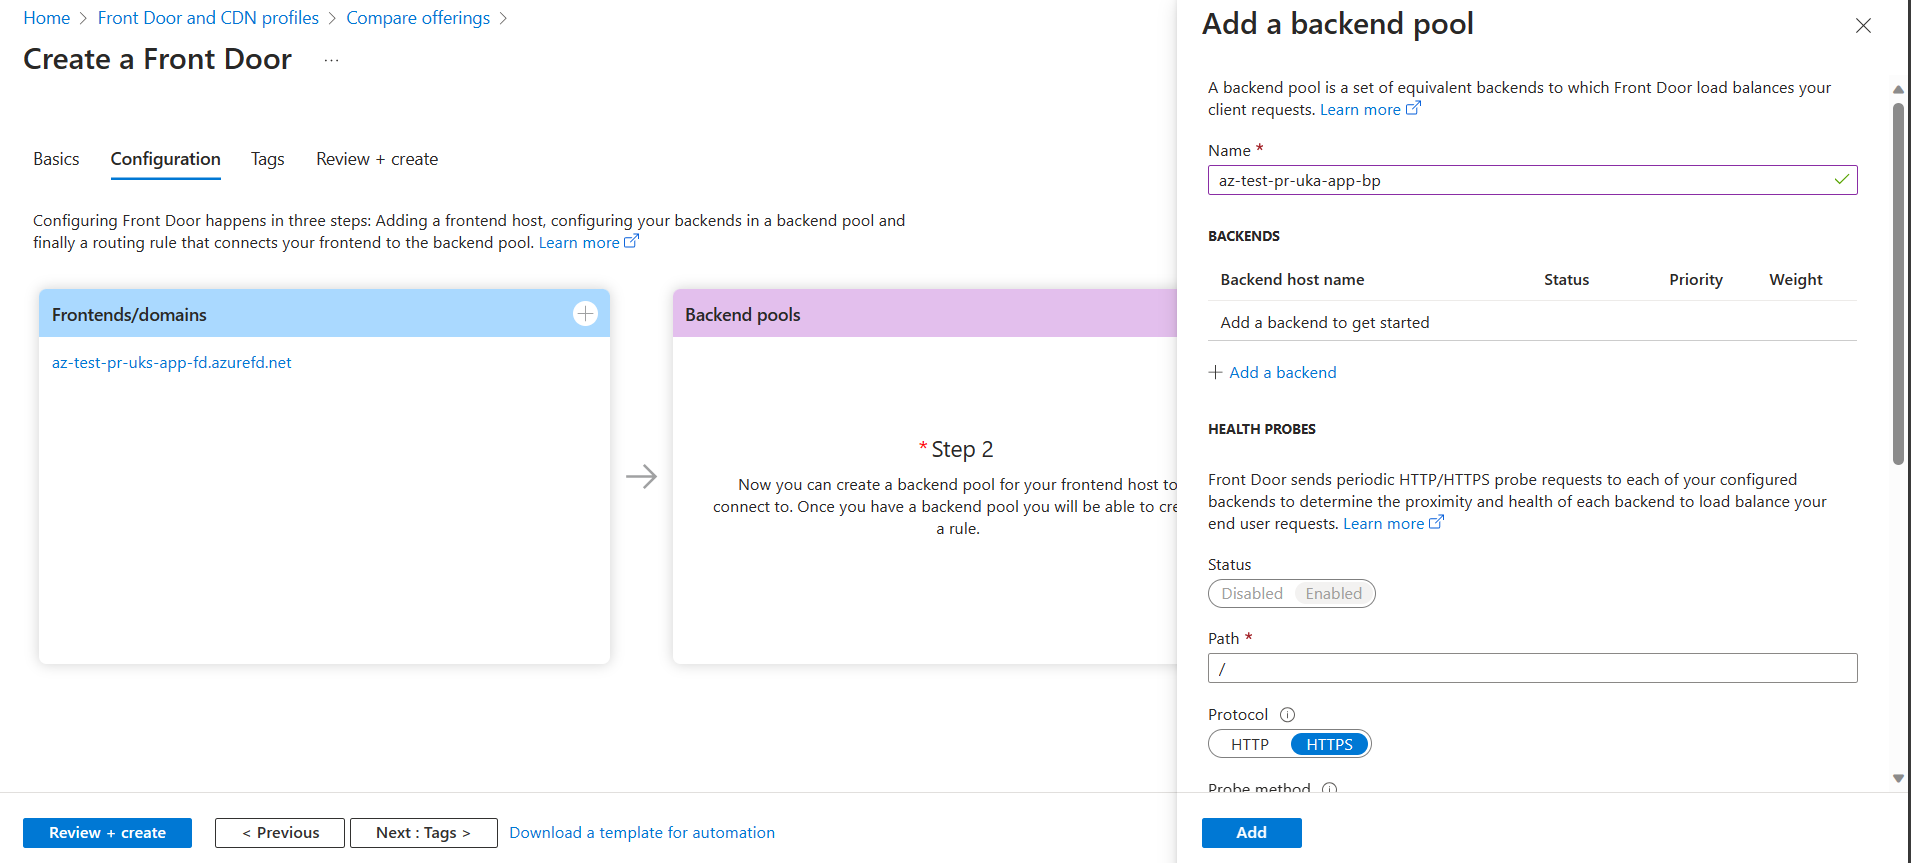
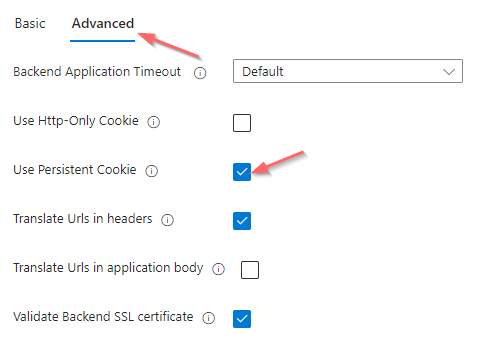
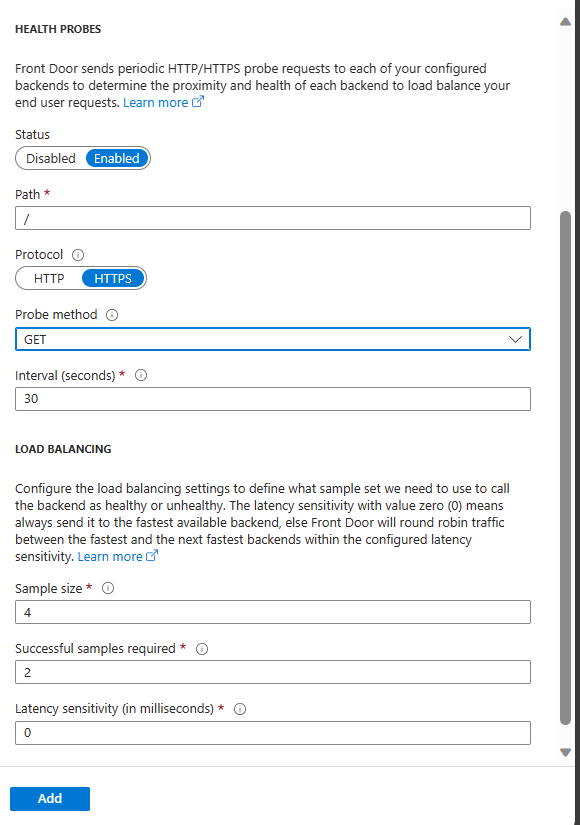
Configure the port settings for the Backend Pool.

.

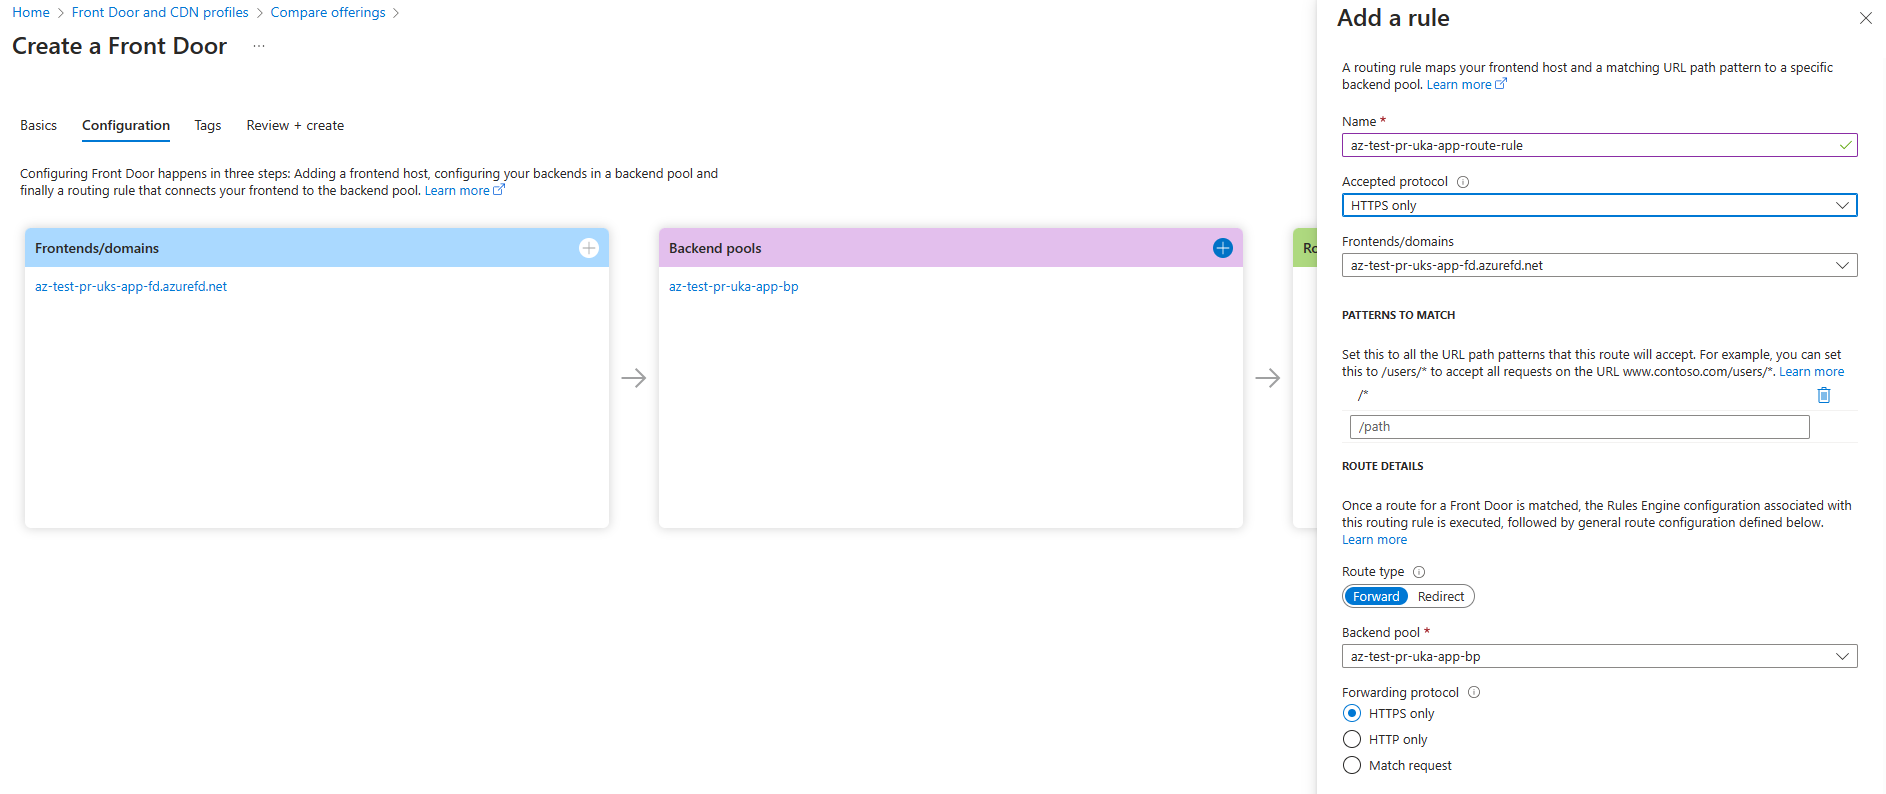
Step 8 : Provide the Routing rules for connecting with the sample application.

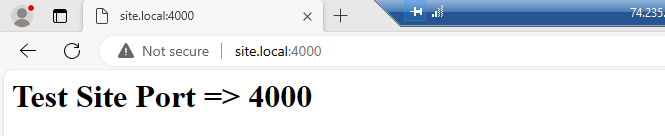
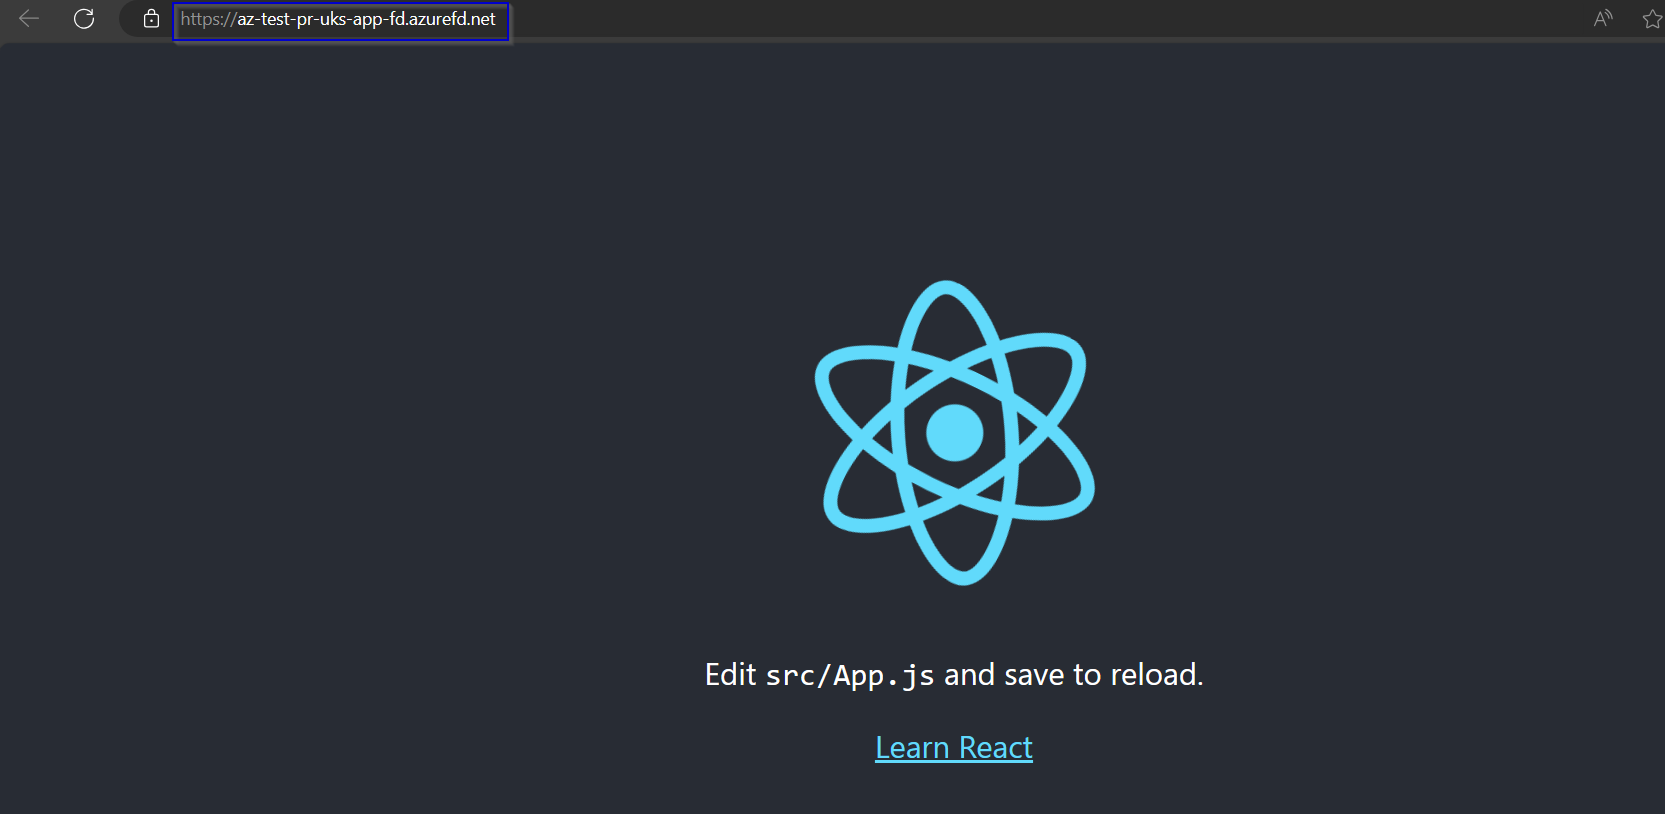
Step 9 : After Azure Front Door creation check whether the application is hosted through Azure Front Door.

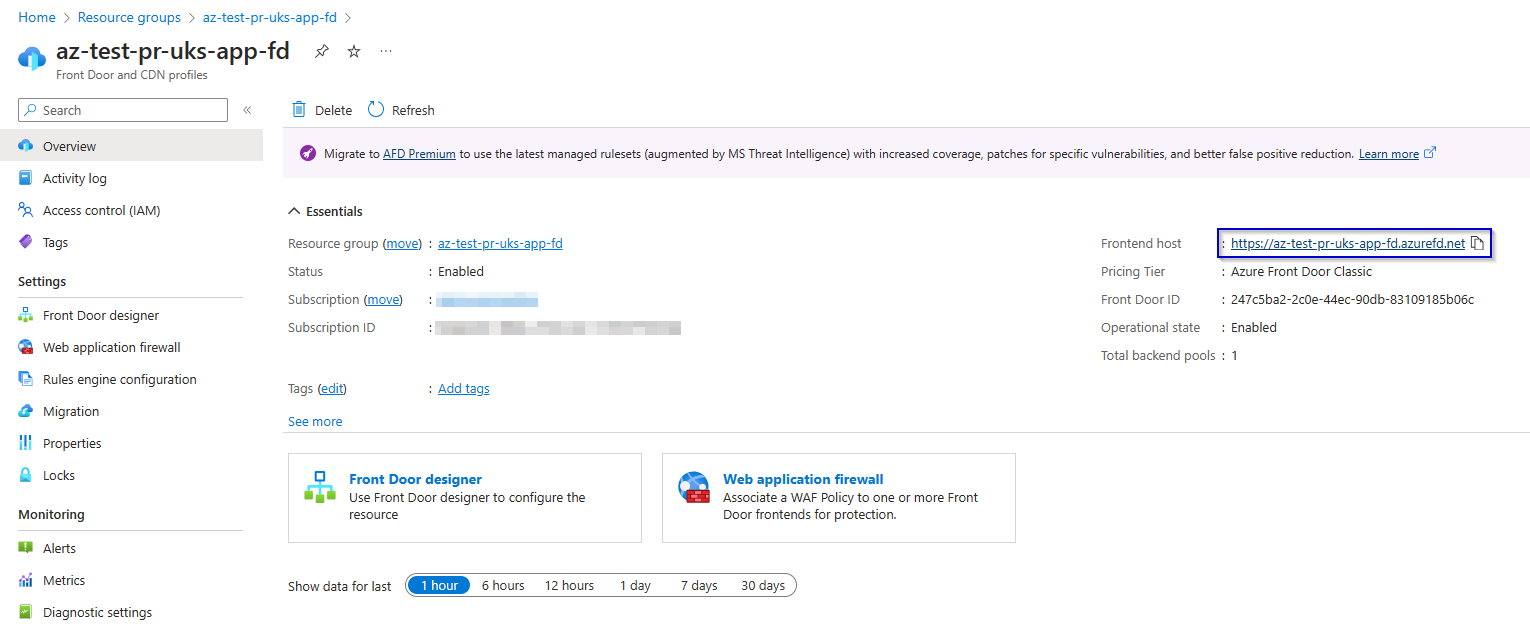
Azure Front Door is successfully hosting the sample application.

Step 10 : Create a WAF policy to protect your application.

Note : 1.Select the Tier to Classic, other tiers do not support Azure Front Door.

2.Set Policy mode to Prevention.

.

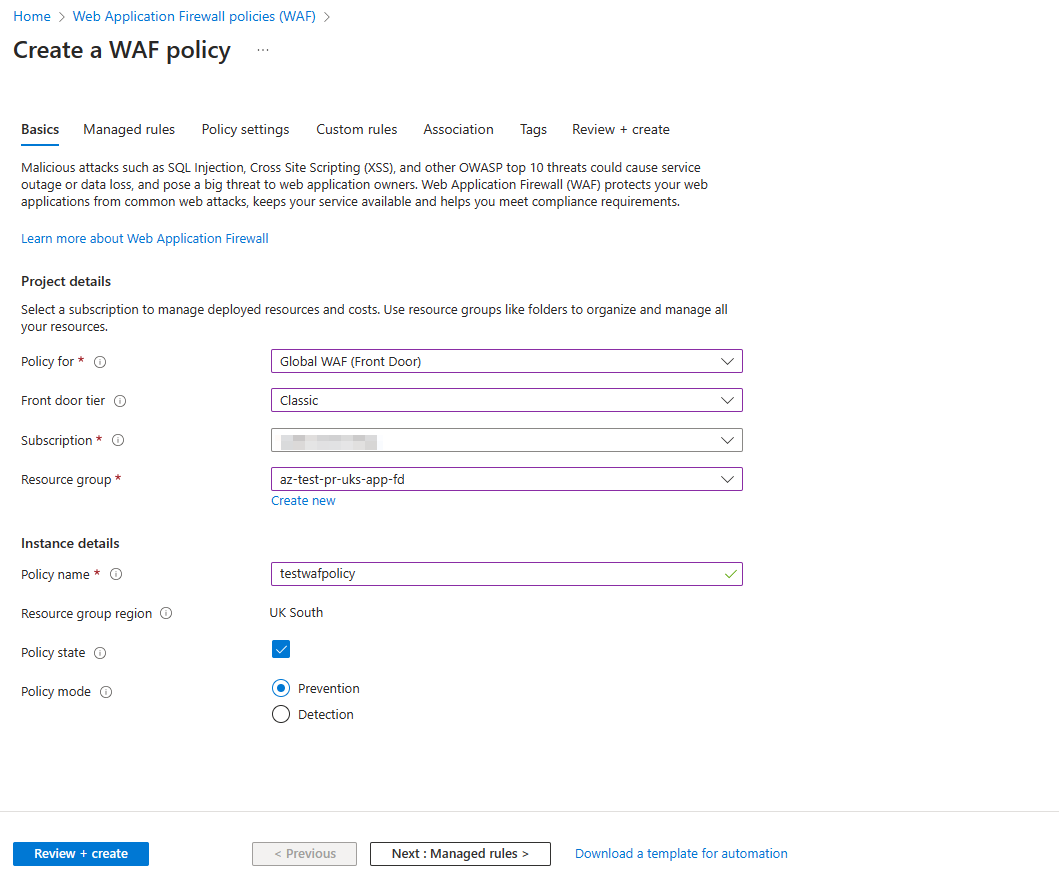
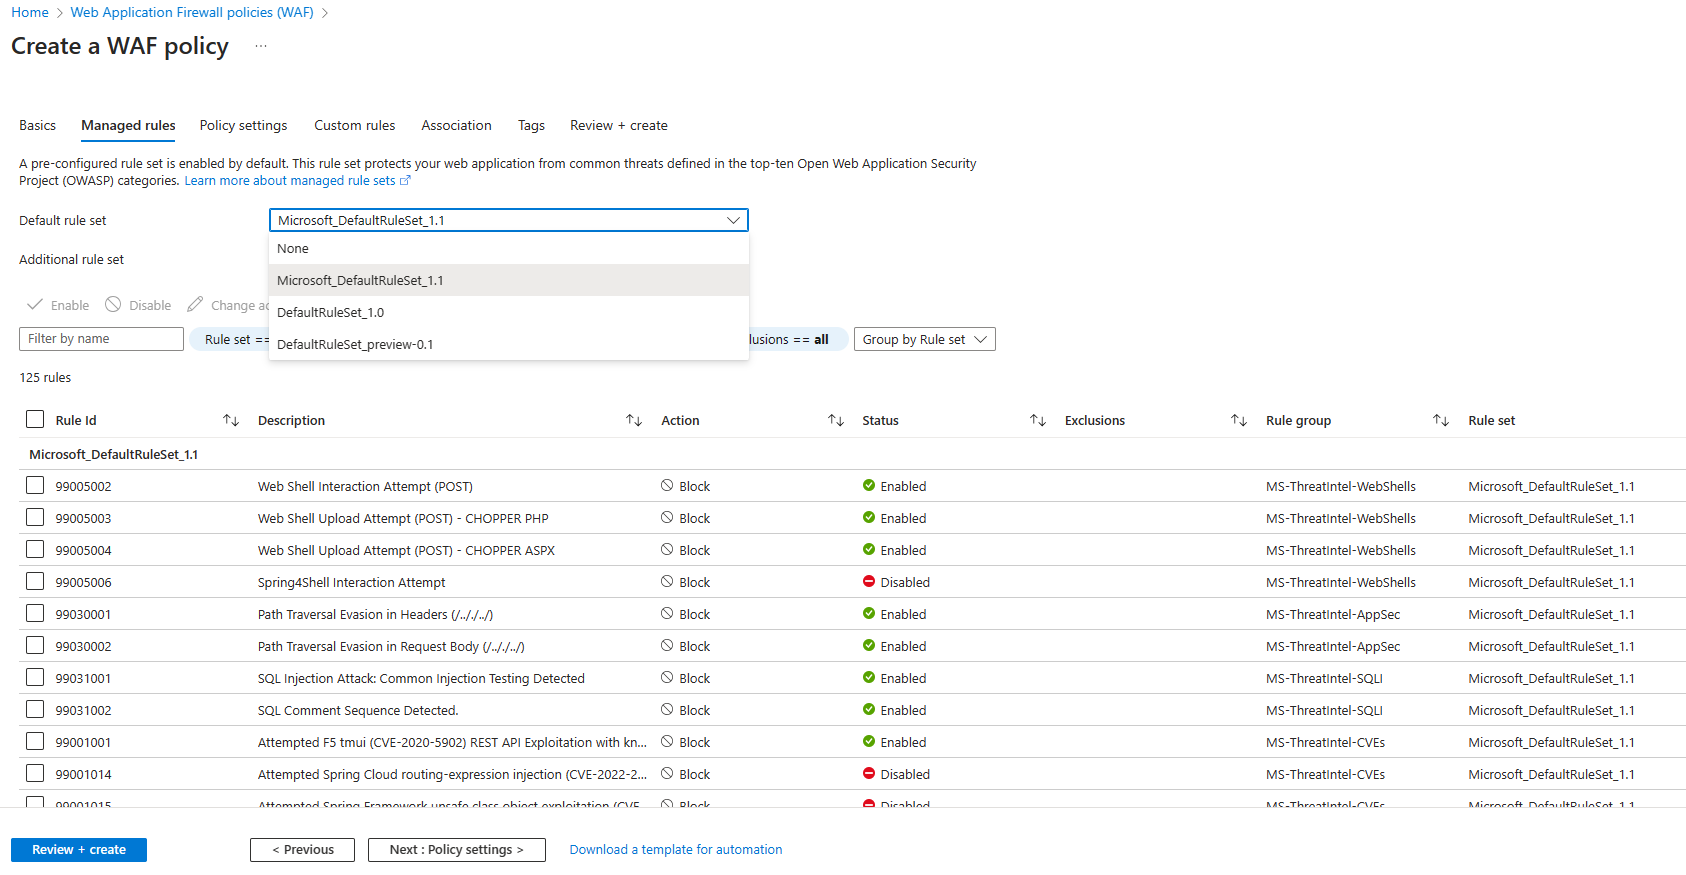
Select the type of WAF policy you want and add it.

Step 11 : Add the Host for for the policy by selecting the Azure Front Door that has been created.

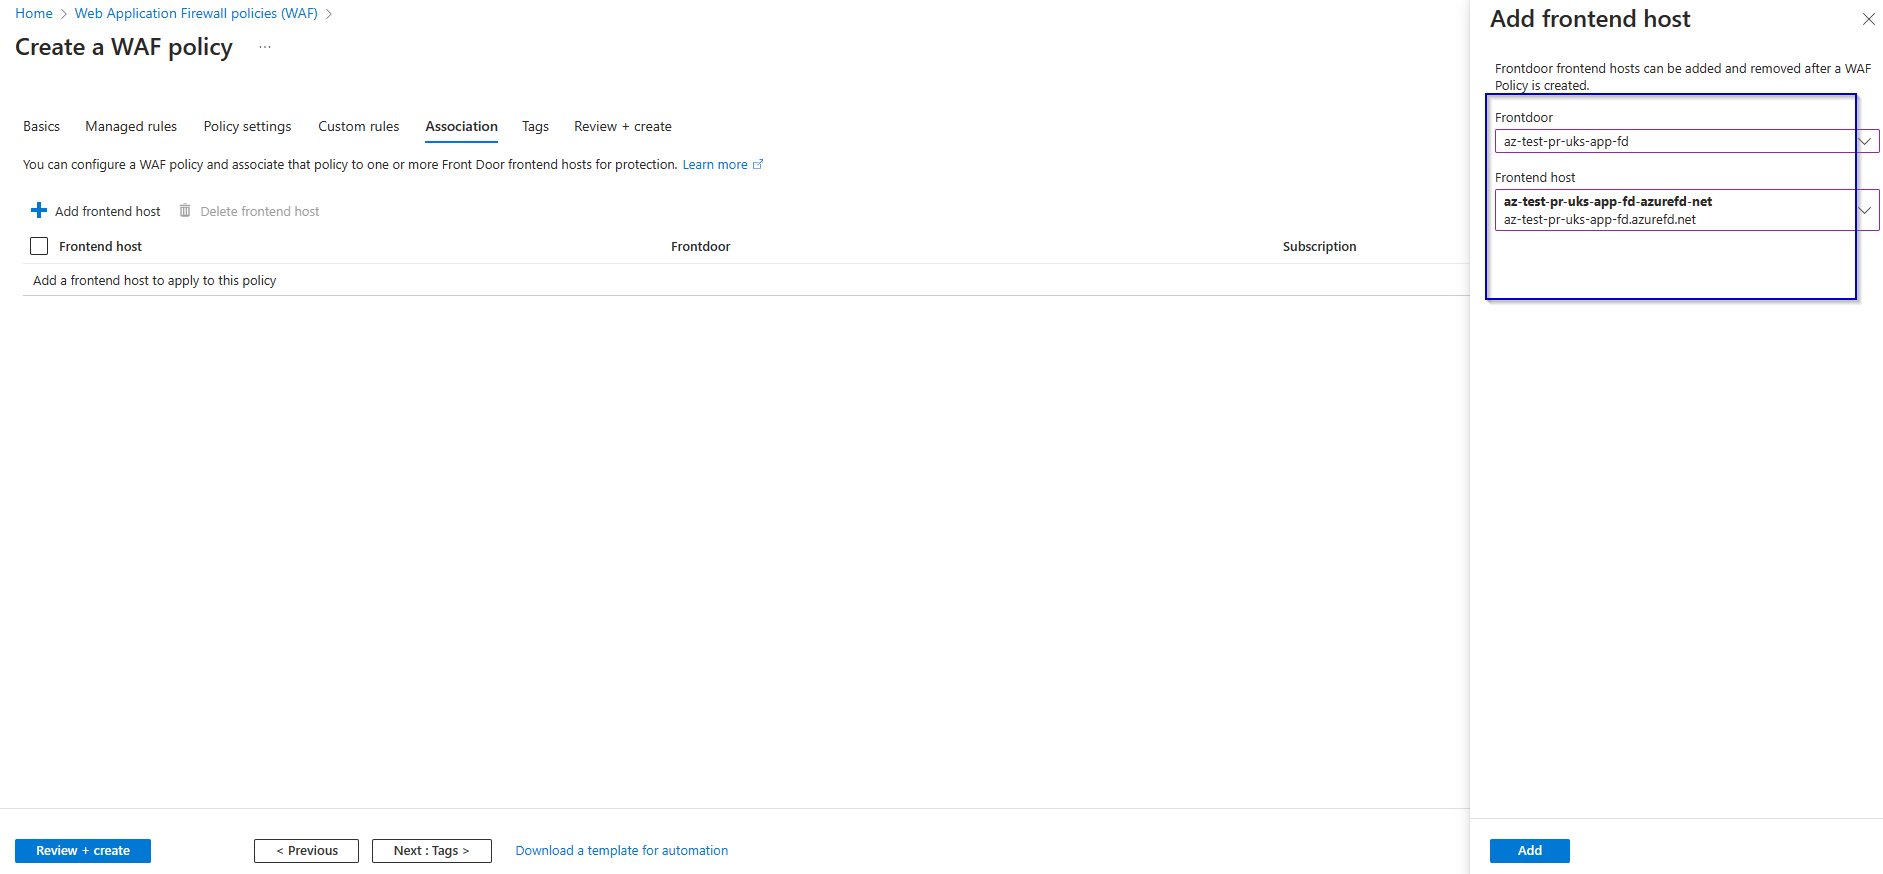
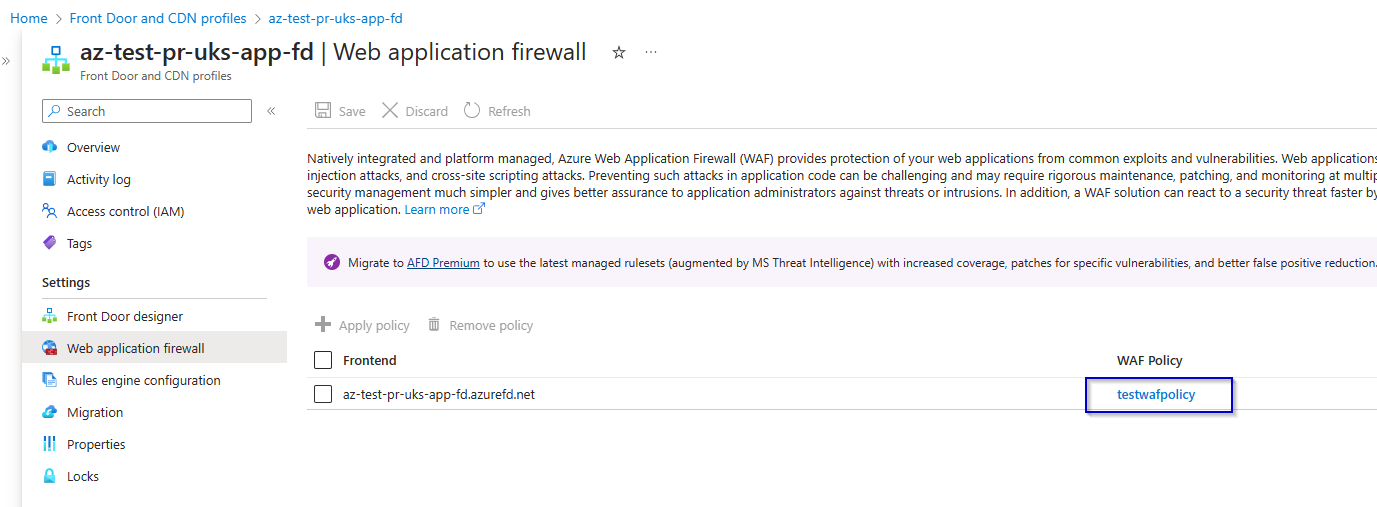
Now one we deploy the WAF policy it is added to the Azure Front Door.

  1. Successfully created a CI/CD pipeline for the Sample React JS application.
  2. Deployed a Azure Front Door by setting the Azure app service which is hosting the application.
  3. Deployed a WAF policy and associated it with Azure Front Door for protection of the Application.

Azure Cosmos DB Operations (Rest API) with Postman

The process consist on the next steps:

  1. Get Cosmos DB URI and KEY.
  2. Create a new Postman Collection.
  3. Create Postman Collection variables.

Next we are going to see each step in a detailed way.

Step1

Create azure cosmos DB Account

Choose azure cosmos for NOSQL.

Step 2

Download simple document dB Microsoft postman.

Document link blow Here

GitHub – Aionsphere/cosmosdb-postman-collection: Postman collection demonstrating REST access for DocumentDB

After Download extra file

Step 3

How to Import file to Postman

Step 4

Select folder import files here.

Step 5

One other thing you need to setup is the environment variable as you see we are using some of the configured variables in the script, you can create a new environment variable using Postman by navigating to environments and add new environment with configured variables

Step 6

once you create the Cosmos DB account on Azure and navigate to the keys section on the left pane. You will see two types of tabs on the Keys. There are two types of keys, one type of users having the Key can Read and Write. Other type of users having the key can only Read.

Let’s understand different terms used while making a connection to Cosmos DB

Master Keys are keys are created when the Cosmos DB Account is created. This key can be regenerated by clicking on refresh icon to regenerate them in the Azure portal. When you are using Cosmos DB emulator you won’t be able to generate it. These keys are very sensitive ones and provide access to the administrative resources. We should be very careful when weneed to store them. Recommended way is to use Read-Only Keys as much as we can.


Resource Tokens are responsible for providing access to specific containers, documents, attachments, stored procedures, triggers, and UDFs. Each user must have a resource token. It is mandatory that every application needs to use a resource token to call Cosmos DB API.


Users are specific for Cosmos DB databases. You can attach specific permissions or roles to each user like the way we do in SQL server

Cosmos DB API

As i mentioned earlier we have many options to access to CosmosDB. Rest API is one of these options and it is the low level access way to Cosmos DB. Most of the features supported with SDK are available and you can customize all options of CosmosDB by using REST API. To customize the calls, and pass the required authorization information, you need to use http headers.

In the following example, I am going to try to create a database in CosmosDB emulator by using the REST API. First let’s look at the required header fields for this request. These requirement applies to all other REST API calls too.

x-ms-version : As the name indicates this is the version of the REST API. You can find the available versions here. If you are confused on what to use always use the latest one.

x-MS-date : This is the date of your request. It must be formatted by Coordinated Universal Time. (ex: Sun, 18 Jan 2024 05:00:23 GMT)

x-ms-session-token: It is required if you want to use session consistency. For each of your new write request in Session consistency, CosmosDB assings a new SessionToken to the calls. You need to track the right session token and use it in this header property to keep usng the same session. SDK does this for you in the background, if you want to use the REST API, you need to do this manually.

Authorization: This one is the most important and tricky one. This needs to get generated for each of your call to Cosmos DB. It must be in the following format

How to Call APIs with Postman:

To call Cosmos DB directly from POSTMAN, you need to get the Cosmosdb account URL we need to use. I will be using the account created in Azure protal

we need to look at the documentation of CosmosDB Rest API. You can find all URL locations from this link. Since I am trying to list the databases inside a collection, I am going to use the following path.

https://postmandemo.documents.azure.com:443/


Step 7

As we are requesting to get the list of databases, we are ready to add values to headers section. Click on Headers link, and add the following headers. These are the required HTTP headers for all CosmosDB REST API calls.

x-ms-version : 2019-06-30
(This is the latest version. You can find the other versions here.)

x-ms-date : {{utcDate}}
(This is the parameter we just created in POSTMAN Environment. We are going to generate its value in script.)

authorization : {{authToken}}
(This is the other parameter we just created. We are going to generate its value in script.)

Accept application/json.
(This is required since this is going to be a GET Http Action.)

Your screen should looks like this

We are done with all the things needed to get the list of databases. Click on the send button to see the list of databases as response

Great! Look at all that information we received back in the body of the Response.

This is the way to test Cosmos DB API with POSTMAN. You can try different APIs with the simple collection we’ve created here. Now it becomes easy for developers to leverage the Cosmos DB api and to play around with it.

Successful send azure cosmos DB

Step-by-Step Guide to Building and Deploying Python Web Applications with Azure DevOps

Prerequisites

  • An Azure account with active subscription.
  • Azure DevOps (https://dev.azure.com/)
  • Code editor (Vscode.)
  • Download Python 3.12.0

Step 1: Creating the Python App and Test Locally.

This quick start can be completed using either Flask or Django. A sample application in each framework is provided to help you follow along with this quick start. Download or clone the sample application to your local workstation

git clone https://github.com/Azure-Samples/msdocs-python-flask-webapp-quickstart

Application folder

cd msdocs-python-flask-webapp-quickstart

Create a virtual environment for the app for window :

py -m venv .venv
.venv\scripts\activate

Install the dependencies

pip install -r requirements.txt

Run the Application

flask run

Sample Application at http://localhost: http://127.0.0.1:5000  in a web browser

Step 2: Configure Azure App Service

Login into https://portal.azure.com

  • Create an App Service with a basic B1 App service Plan.

Step 3: Create the Azure DevOps Project and connect to the App service instance

Copy HTTPS link clone

  • Push from the local to remote repository using the below git commands on Git bash.
git init
 git add
Code: git commit -m “<commit message>”
git push 
  • This brings a prompt, login into your Azure DevOps portal then this shows that the App has been push to the Azure repo

Step 4: Create a build pipeline, release pipeline, and deploy to Azure

  • Click ‘Setup build automated’; it will prompt you to configure your pipeline. On the configuration page, Azure Pipelines has detected the language from the repository as Python, which is correct. Select ‘Python to Linux Web App on Azure’ as the desired configuration
  • In the pop-up for Python to Linux Web App on Azure, select your Azure subscription
  • Select the Web App previously created, then click on “Validate and configure”

Trigger and Variables


trigger:
- main

variables:
  # Azure Resource Manager connection created during pipeline creation
  azureServiceConnectionId: 'XXX-0000-xyxyx-0000'

  # Web app name
  webAppName: 'python28'

  # Agent VM image name
  vmImageName: 'ubuntu-latest'

  # Environment name
  environmentName: 'pythonwebappstanley'

  # Project root folder. Point to the folder containing manage.py file.
  projectRoot: $(System.DefaultWorkingDirectory)

  # Python version: 3.7
  pythonVersion: '3.7'
  • The trigger element indicates which branch in the repository should activate the pipeline when commits are made to that branch.
  • The variables element contains various variables used in the build and deploy stages, such as the Web App name, the VM image set to use an ‘ubuntu-latest’ distro, and the Azure Service Connection ID that connects the pipeline to the App service instance.

Build stage

The yaml file contains two stages, a build stage and the deploy, the code snippet below is of the build stage

stages:
- stage: Build
  displayName: Build stage
  jobs:
  - job: BuildJob
    pool:
      vmImage: $(vmImageName)
    steps:
    - task: UsePythonVersion@0
      inputs:
        versionSpec: '$(pythonVersion)'
      displayName: 'Use Python $(pythonVersion)'

    - script: |
        python -m venv antenv
        source antenv/bin/activate
        python -m pip install --upgrade pip
        pip install setup
        pip install -r requirements.txt
      workingDirectory: $(projectRoot)
      displayName: "Install requirements"

    - task: ArchiveFiles@2
      displayName: 'Archive files'
      inputs:
        rootFolderOrFile: '$(projectRoot)'
        includeRootFolder: false
        archiveType: zip
        archiveFile: $(Build.ArtifactStagingDirectory)/$(Build.BuildId).zip
        replaceExistingArchive: true

    - upload: $(Build.ArtifactStagingDirectory)/$(Build.BuildId).zip
      displayName: 'Upload package'
      artifact: drop
  • The build stage comprises two tasks. The first task, -task: UsePythonVersion@0, specifies the Python version to be used on the build agent—a virtual machine employed by Azure to execute the steps within the pipeline, operating as a pool. This task also executes the -script, establishing a virtual environment in the build agent and installing the requirements outlined in the requirements.txt file in the repository. If your web app has specific requirements, you can also include them. The second task in the build stage is -task: ArchiveFiles@2, responsible for creating the build artifact—a .zip file. This artifact is stored in the project root folder and will be utilized in the deploy stage

Deploy stage:

  • Just like the build stage, the deploy stage has two tasks, the code snippet below is of the deploy stage
- stage: Deploy
  displayName: 'Deploy Web App'
  dependsOn: Build
  condition: succeeded()
  jobs:
  - deployment: DeploymentJob
    pool:
      vmImage: $(vmImageName)
    environment: $(environmentName)
    strategy:
      runOnce:
        deploy:
          steps:

          - task: UsePythonVersion@0
            inputs:
              versionSpec: '$(pythonVersion)'
            displayName: 'Use Python version'

          - task: AzureWebApp@1
            displayName: 'Deploy Azure Web App : pythonwebappstanley'
            inputs:
              azureSubscription: $(azureServiceConnectionId)
              appName: $(webAppName)
              package: $(Pipeline.Workspace)/drop/$(Build.BuildId).zip
  • The deployment stage relies on the successful completion of the build stage; only upon a successful build will a deployment be triggered. The initial task, “task: UsePythonVersion@0,” also specifies the Python version to be used in our environment.
  • The subsequent task, “task: AzureWebApp@1,” instructs the pipeline to utilize the artifact generated in the build stage and deploy it to our previously created web app.
  • Now that we comprehend the file’s contents, navigate to the pipelines page, click on “Save and run,” enter a commit message, and select “Save and run” again. This action will promptly initiate the pipeline
  • Grab a cup of coffee ? or your favorite drink, come back when the deployment is completed

Step 5: Reviewing the pipeline

Once the build and deployment is completed, you can review the pipeline stages and the logs for any errors

With a successful deployment, we can now visit the running Python Quick Start at the Web App URL (python-28.azurewebsites.net).

Azure Active Directory – Application Proxy

Access any local On-Premises or Cloud sites using Azure AD Credentials with a Secured Azure URL.

Prerequisites: –

1. Running On-premises or cloud application

2. Windows 2019 or higher OS (minimal hardware required)

3. Azure P1, P2 or Business Premium Licenses

For this lab, I have created an IIS test website on port 4000.

1. IIS Machine => 10.1.2.5

2. URL => site.local:4000.

3. Open port 4000 on the Windows firewall, which allows you to access the site locally.

Connector Installation.

1. Connector VM => 10.1.2.4

Preparing the Device.

HTTP2:-

If you’re installing the connector on Windows Server 2019 or later, you must disable HTTP2 protocol support in the WinHttp component for Kerberos Constrained Delegation to properly work. This is disabled by default in earlier versions of supported operating systems. Adding the following registry key and restarting the server disables it on Windows Server 2019. Note that this is a machine-wide registry key.

Windows Registry Editor Version 5.00

[HKEY_LOCAL_MACHINE\SOFTWARE\Microsoft\Windows\CurrentVersion\Internet Settings\WinHttp]
"EnableDefaultHTTP2"=dword:00000000

TLS requirements:-

The Windows connector server needs to have TLS 1.2 enabled before you install the Application Proxy connector.

1. To enable TLS 1.2:

Windows Registry Editor Version 5.00

[HKEY_LOCAL_MACHINE\SYSTEM\CurrentControlSet\Control\SecurityProviders\SCHANNEL\Protocols\TLS 1.2]
[HKEY_LOCAL_MACHINE\SYSTEM\CurrentControlSet\Control\SecurityProviders\SCHANNEL\Protocols\TLS 1.2\Client]
"DisabledByDefault"=dword:00000000
"Enabled"=dword:00000001
[HKEY_LOCAL_MACHINE\SYSTEM\CurrentControlSet\Control\SecurityProviders\SCHANNEL\Protocols\TLS 1.2\Server]
"DisabledByDefault"=dword:00000000
"Enabled"=dword:00000001
[HKEY_LOCAL_MACHINE\SOFTWARE\Microsoft\.NETFramework\v4.0.30319]
"SchUseStrongCrypto"=dword:00000001

2. Also check the same internal url working in connector server

3. Run the registries and restart the Server

Azure Application Proxy Set-Up

1. Login to Azure Portal & Download the connector.

2. Set up the connector.

Check for the active status of the connection server.

3. Configure the Application Proxy

Point No. 2 => Name the application

Point No. 3 => Add the internal URL that is http://site.local:4000

Point No. 4 => Customize external URL

Point No. 5 => Point to default group of the active application

Add the selected user or group to access the application

Testing the application using public URL

External URL => https://testapp01-virtualpetals.msappproxy.net

Azure AD login to React app

Overview

show you how easy it is to integrate Azure AD as an Authentication mechanism for your React Application

Prerequisites

Create a AD User for testing purposes 

App Registration

Search for App Registration in Azure, and create a new App Registration. Fill in the fields below. For this example we’ll leave the callback URL as localhost

STEP 1

STEP 2

STEP 3

STEP 4

Take note of the Application (Client ID).

In the Authentication section, tick the ID Token checkbox

React App

Download and Install NodeJS. Open a command prompt or terminal and create a react application

npx create-react-app my-app
cd my-app

Install the AAD Microsoft Authentication Library for React

npm install react-aad-msal msal –save

Add the following authProvider.js file, replacing the placeholders for Client ID with the one we generated above

//my-app/src/authProvider.jsimport { MsalAuthProvider, LoginType } from 'react-aad-msal';
 
// Msal Configurations
const config = {
  auth: {
    authority: 'https://login.microsoftonline.com/common',
    clientId: '<Client ID>',
    redirectUri: 'http://localhost:3000/callback'
  },
  cache: {
    cacheLocation: "localStorage",
    storeAuthStateInCookie: true
  }
};
 
// Authentication Parameters
const authenticationParameters = {
  scopes: [
    'user.read'
  ]
}
 
// Options
const options = {
  loginType: LoginType.Popup,
  tokenRefreshUri: window.location.origin + '/auth.html'
}
 
export const authProvider = new MsalAuthProvider(config, authenticationParameters, options)

Update index.js with the below. This will just prompt for authentication straight away when you navigate to your app

//my-app/src/index.jsimport React from 'react';
import ReactDOM from 'react-dom';
import { AzureAD } from 'react-aad-msal';
 
import App from './App';
import { authProvider } from './authProvider';
 
ReactDOM.render(
  <AzureAD provider={authProvider} forceLogin={true}>
    <App />
  </AzureAD>,
  document.getElementById('root'),

Update App.js with the below. We’re just adding an Auth section to the sample provided to display the username as well as the actual JWT token for this tutorial purposes

//my-app/src/App.jsimport logo from './logo.svg';
import './App.css';
import { authProvider } from './authProvider';
import { AzureAD, AuthenticationState } from 'react-aad-msal';function App() {
 
  return (
    
    <div className="App">
 <AzureAD provider={authProvider}>
      <span>Only authenticated users can see me.</span>
    </AzureAD>
 
 <AzureAD provider={authProvider} forceLogin={true}>
  {
    ({login, logout, authenticationState, error, accountInfo}) => {
      switch (authenticationState) {
        case AuthenticationState.Authenticated:
          return (
            <p>
              <span>Welcome, {accountInfo.account.userName}!</span>
              <span>{accountInfo.jwtIdToken}</span>
              <button onClick={logout}>Logout</button>
            </p>
          );
        case AuthenticationState.Unauthenticated:
          return (
            <div>
              {error && <p><span>An error occured during authentication, please try again!</span></p>}
              <p>
                <span>Hey stranger, you look new!</span>
                <button onClick={login}>Login</button>
              </p>
            </div>
          );
        case AuthenticationState.InProgress:
          return (<p>Authenticating...</p>);
      }
    }
  }
</AzureAD>
      <header className="App-header">
        <img src={logo} className="App-logo" alt="logo" />
        <p>
          Edit <code>src/App.js</code> and save to reload.
        </p>
        <a
          className="App-link"
          href="https://reactjs.org"
          target="_blank"
          rel="noopener noreferrer"
        >
          Learn React
        </a>
      </header>
    </div>
  );
}export default App;

Run

npm start

The ID token above can now be used as a bearer token when talking to a services backend. Here you can validate the ID token so you can then trust the claims in this token

Implement App Protection Policy in Microsoft Endpoint Manager.

App Protection Policies in Microsoft 365 are a part of the Microsoft Endpoint Manager suite designed to enhance security for mobile apps and protect organizational data on devices enrolled in the system. These policies provide a set of rules and restrictions that can be enforced on apps to safeguard corporate data while maintaining user privacy.

App Protection Policy for iOS/iPadOS devices.

.
.

Data Protection

Access Requirements

Conditional Launch

Assignments

App Protection Policy For Android Devices

Data Protection

Access Requirements

Conditional Launch

Assignments

App Protection for both iOS/iPadOS and Android has been created.

× How can I help you?