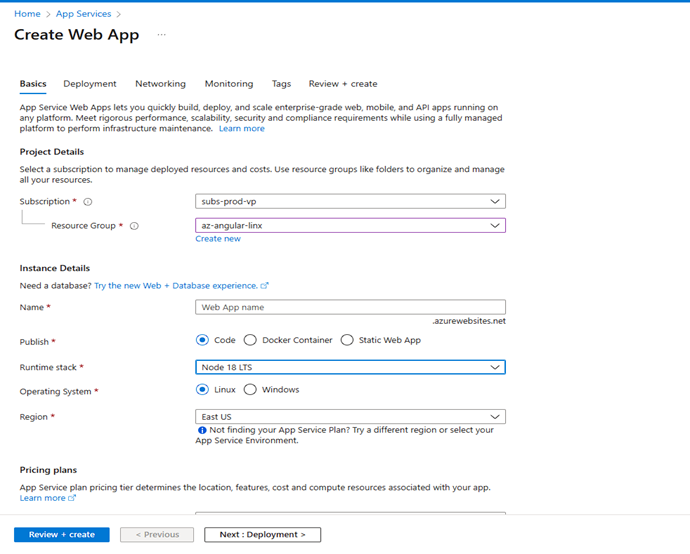
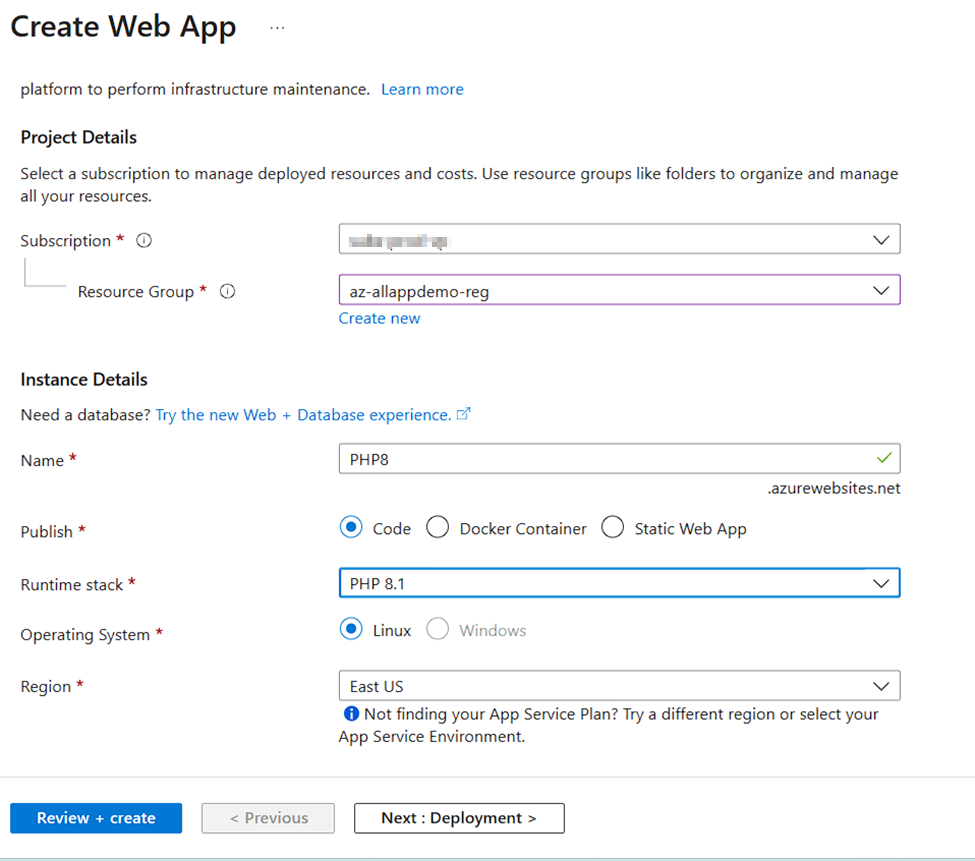
Create an App Service with a basic B1 App service Plan.
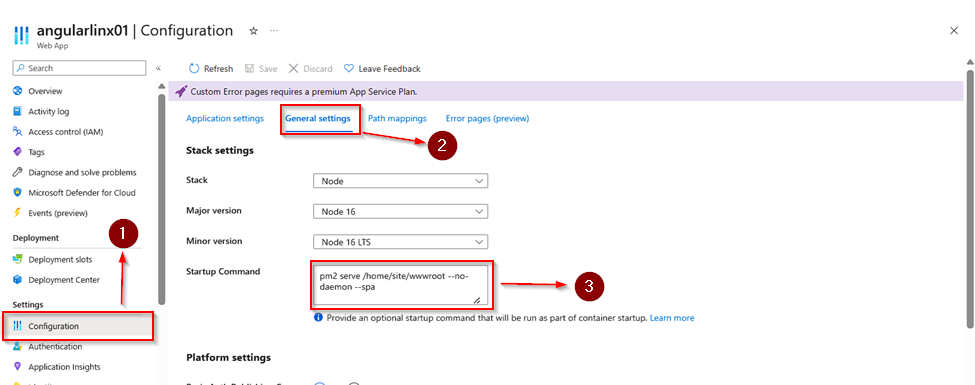
PM2 is an Advanced production process manager for node.js. This allows us to run applications and run processes inside Node. In order to configure it, go to the App Service you just created > Configuration > and in the “Startup Command” add the command
pm2 serve /home/site/wwwroot -no-daemon-spa
click in Save:
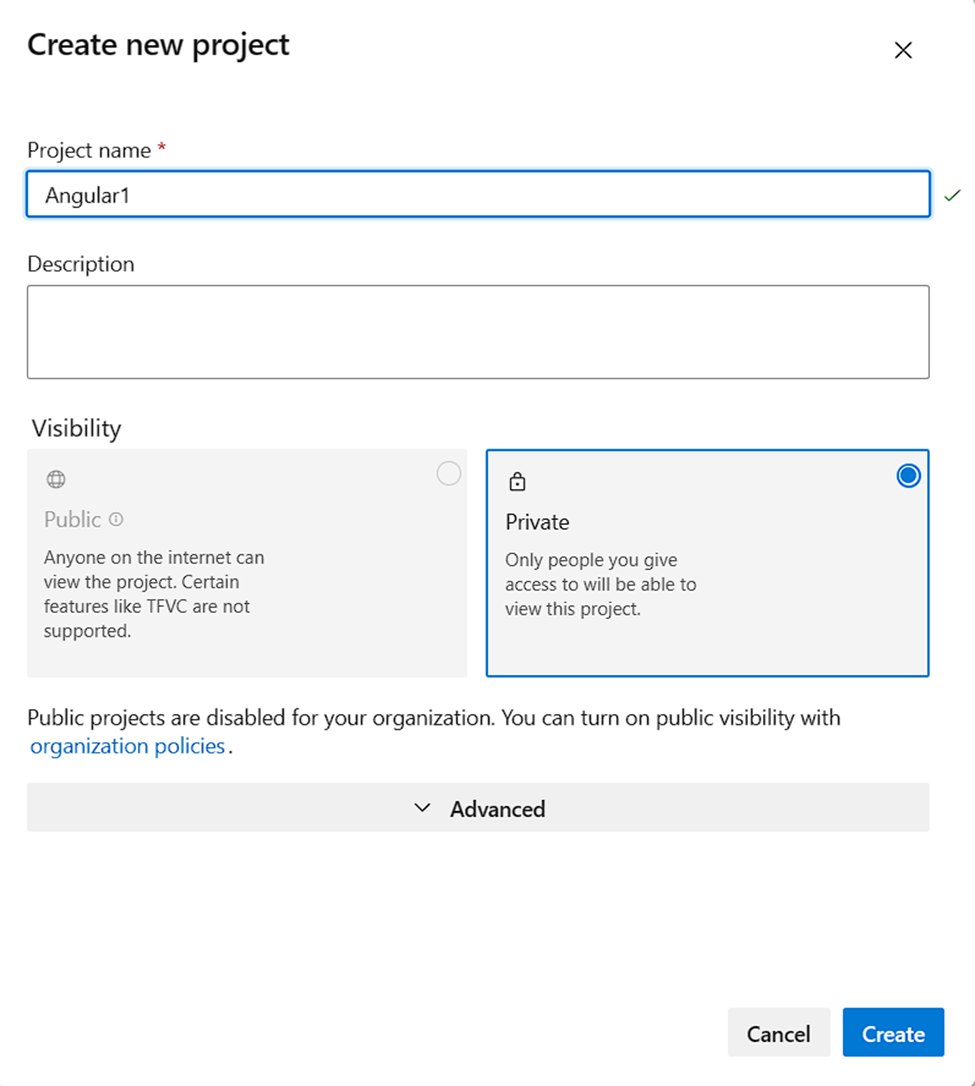
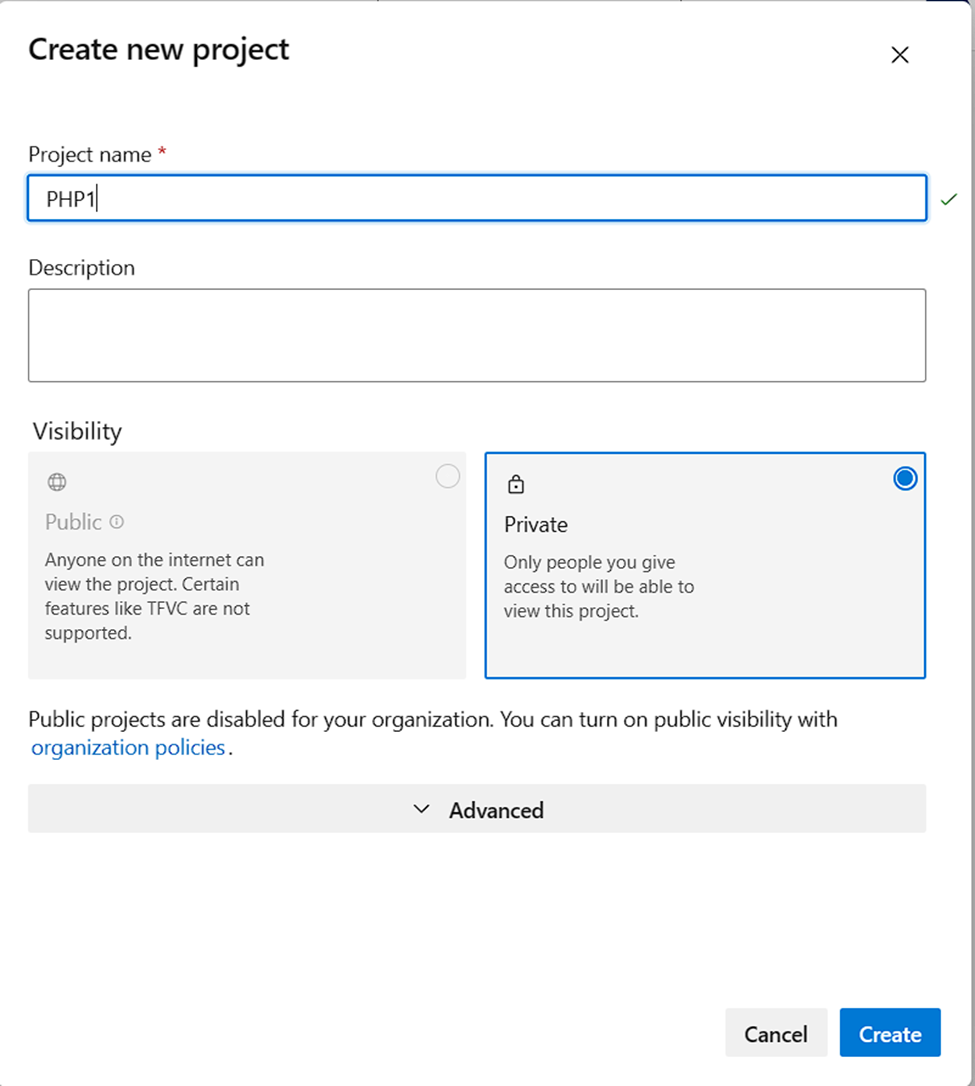
Step 3: Create the Azure DevOps Project and connect to the App service instance.
Terraform, an innovative Infrastructure as Code (IaC) tool, empowers organizations to efficiently create, manage, and scale their cloud infrastructure with remarkable agility and precision. By codifying infrastructure provisioning and configuration, Terraform enables the automation of complex deployment processes, resulting in reduced human error, increased consistency, and enhanced collaboration among development and operations teams.
Amazon Web Services (AWS), Terraform is a foundational pillar for implementing cloud architecture. Its declarative language allows developers to describe their desired infrastructure state in code, which Terraform interprets to create and manage AWS resources. The benefits are manifold:
Let’s Start creating an infrastructure for AWS in Terraform.
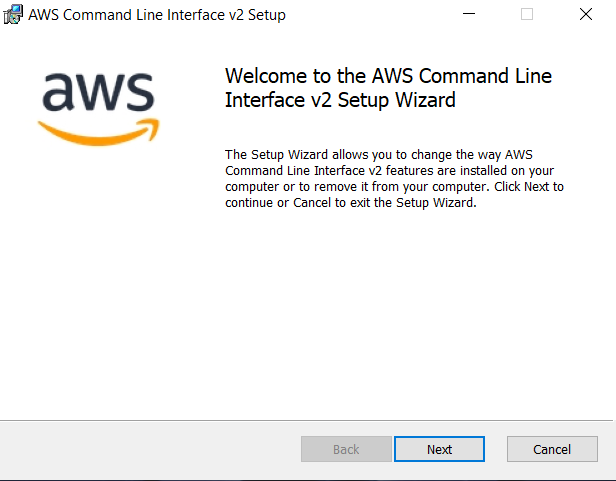
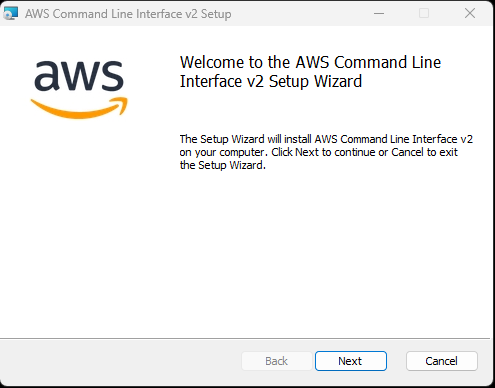
To connect your Terraform codes with the AWS platform, install the latest version of AWS CLI in your system.
.
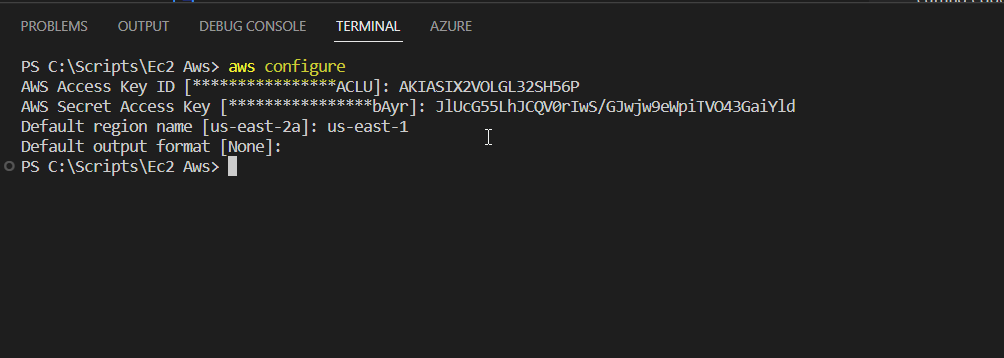
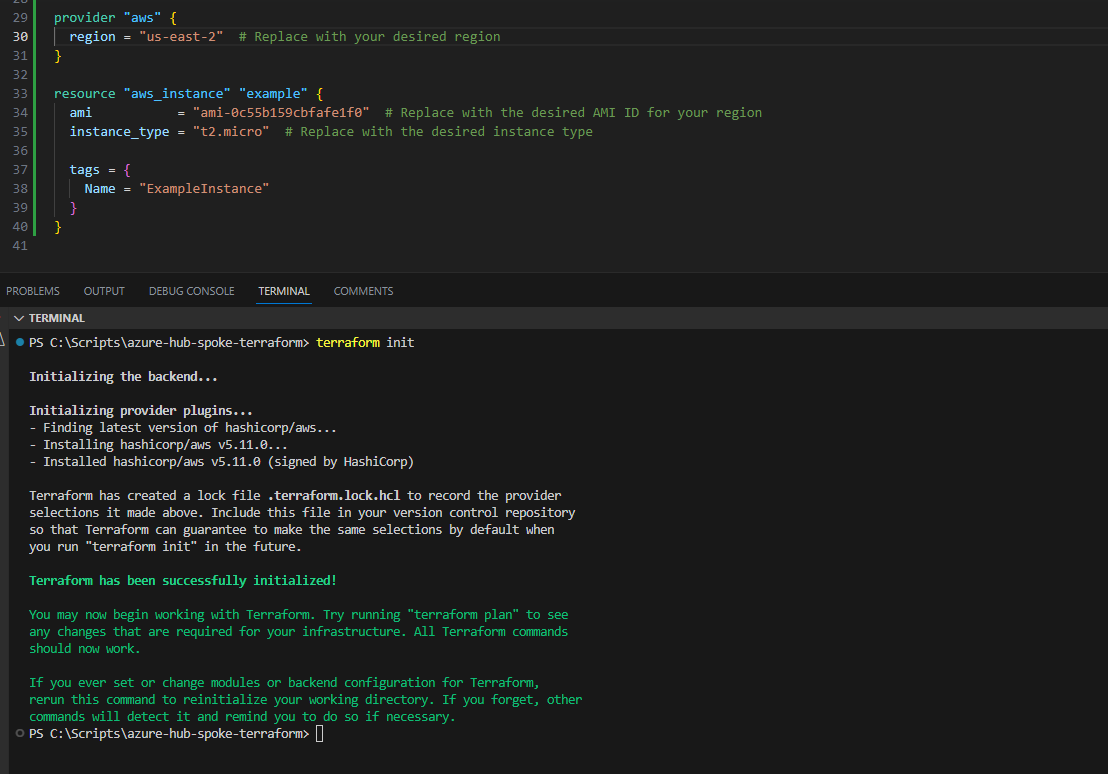
Connect the Terraform code to the AWS platform using the following commands in Visual Studio Code.
.
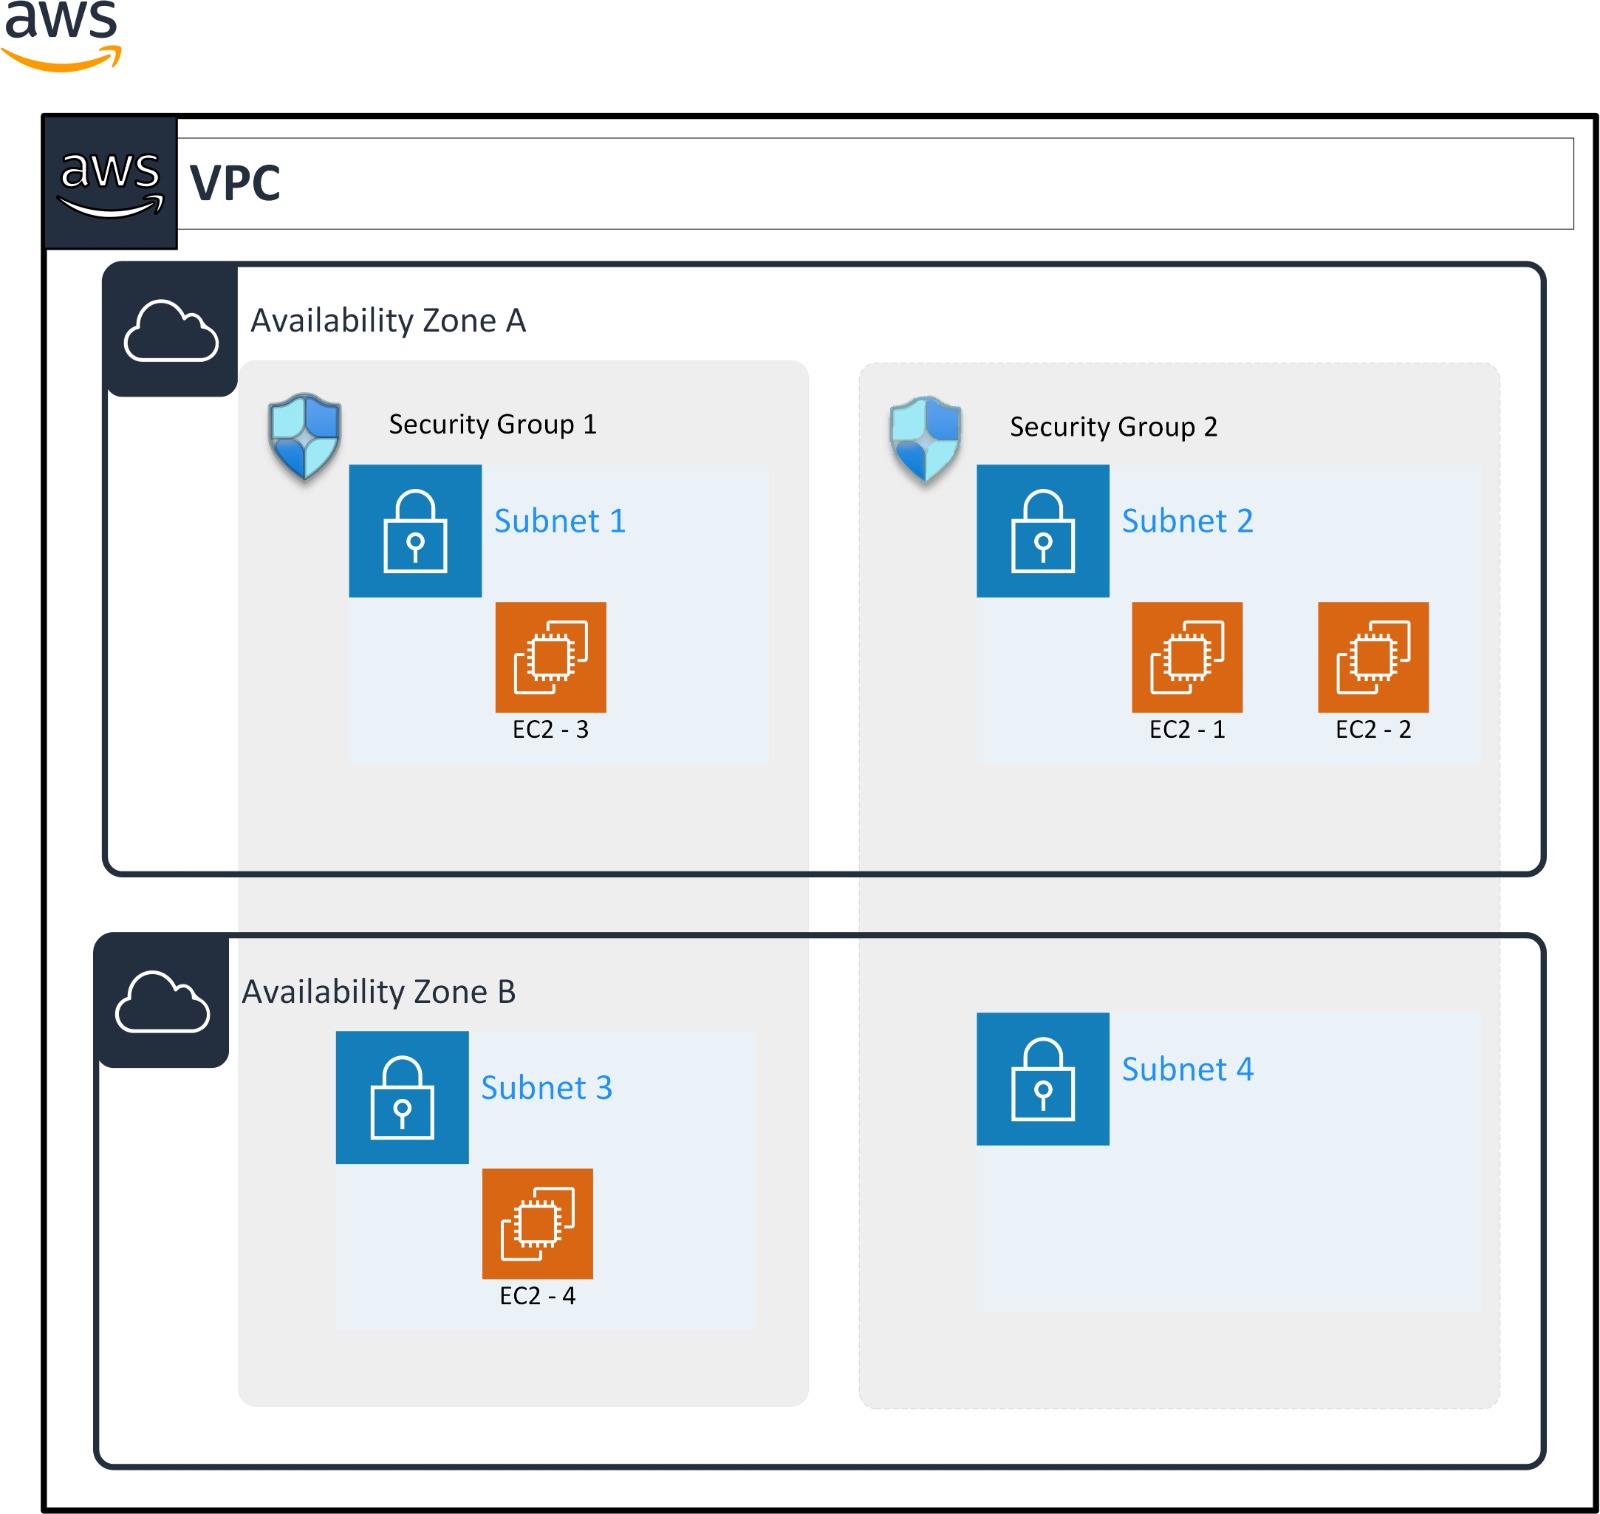
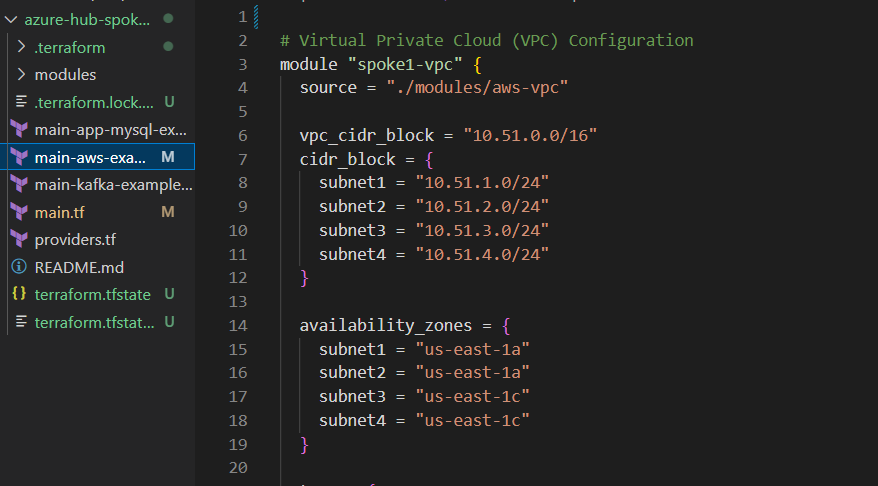
Now, prepare the Terraform codes for the Architecture you want to implement in your AWS tenant.
In this case, I have created,
VPC network
Subnets
EC2 with external disks
Availability Zones
Security Groups and Tags.
Diagrammatic representation of the Infrastructure.
Now uncommand this file main-aws-example and remove other main.tf files.
Needed Resources –
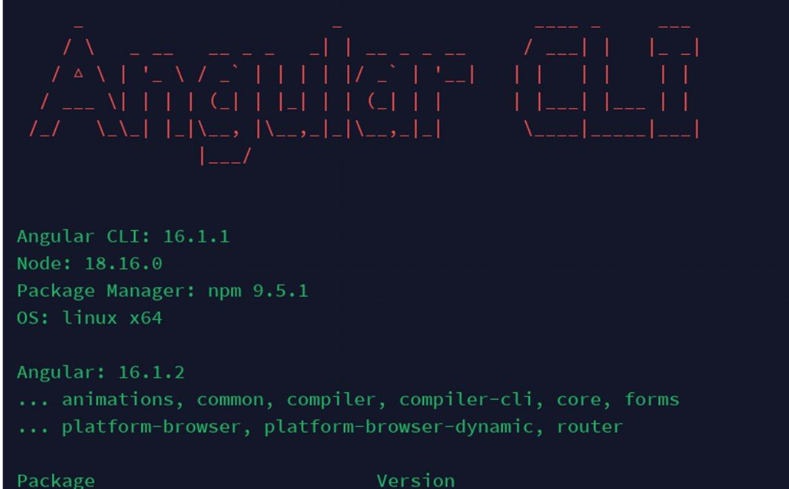
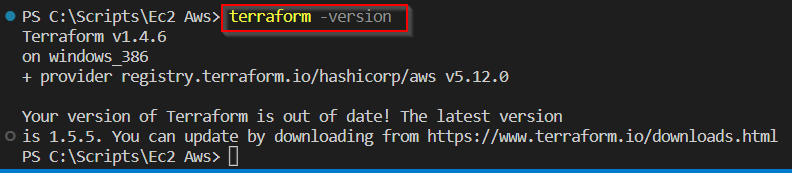
Terraform latest version is installed.
terraform -version
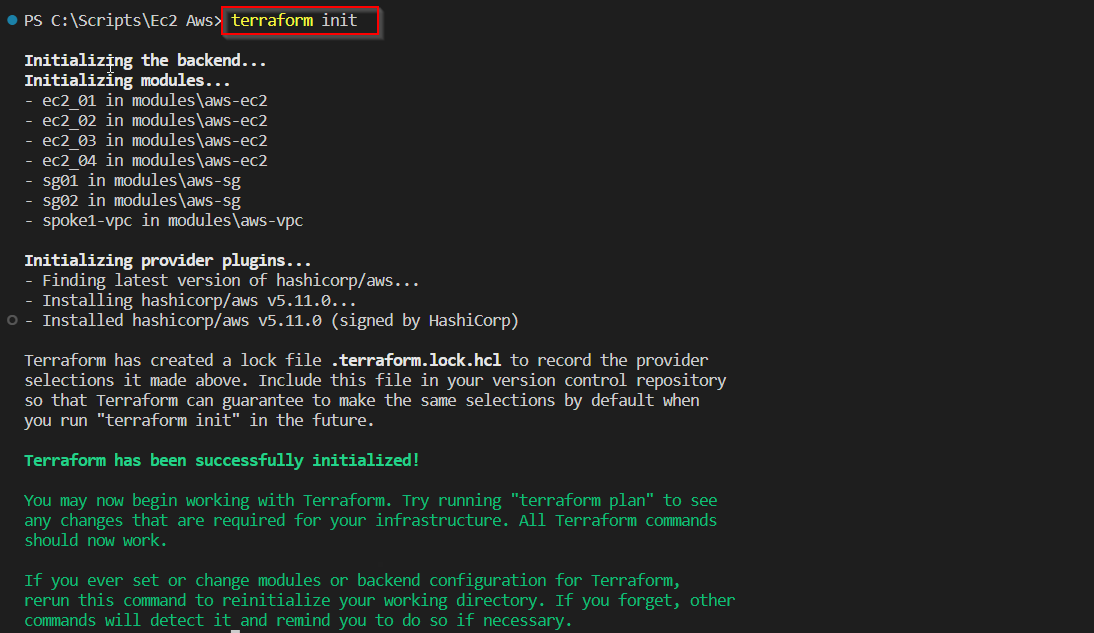
The requested infrastructure has to be implemented to the AWS use the following commands to execute.
terraform init
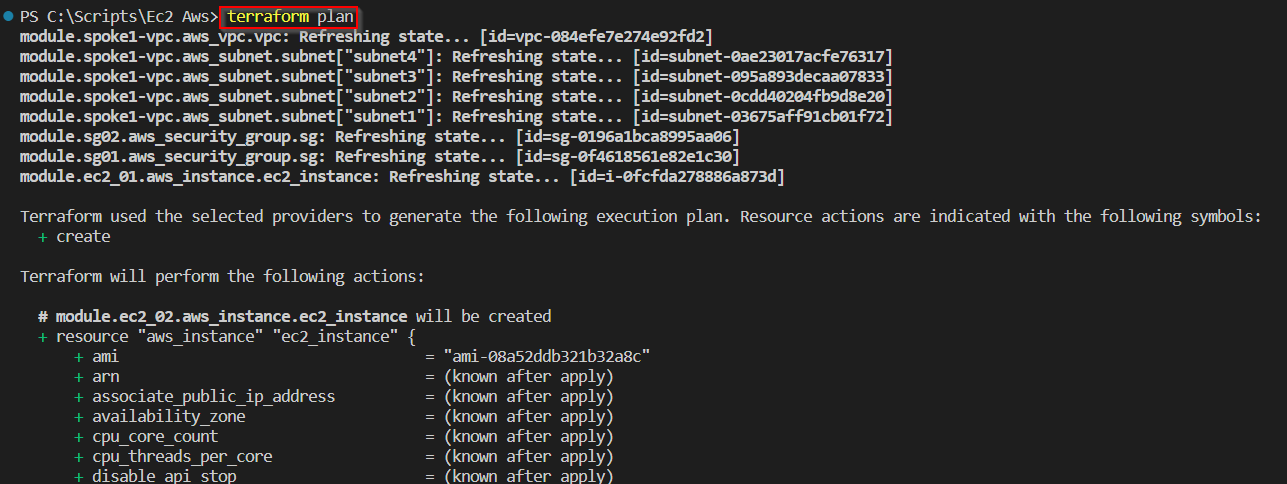
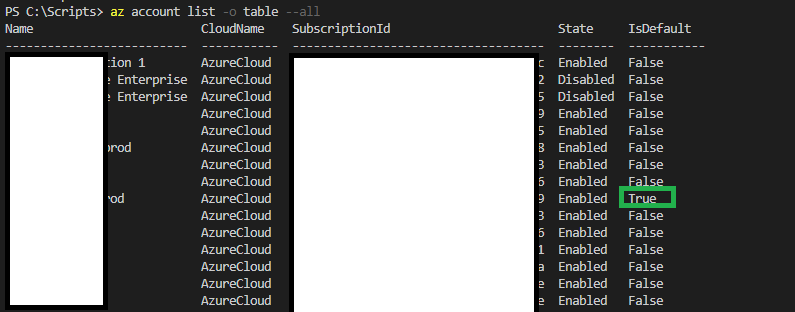
Make sure you are running on the right subscription. If you have access to multiple subscriptions
terraform plan
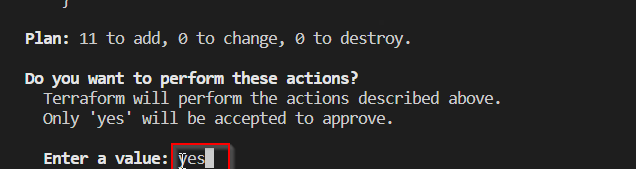
Now terraform apply command is used to create the resources.
terraform apply
.
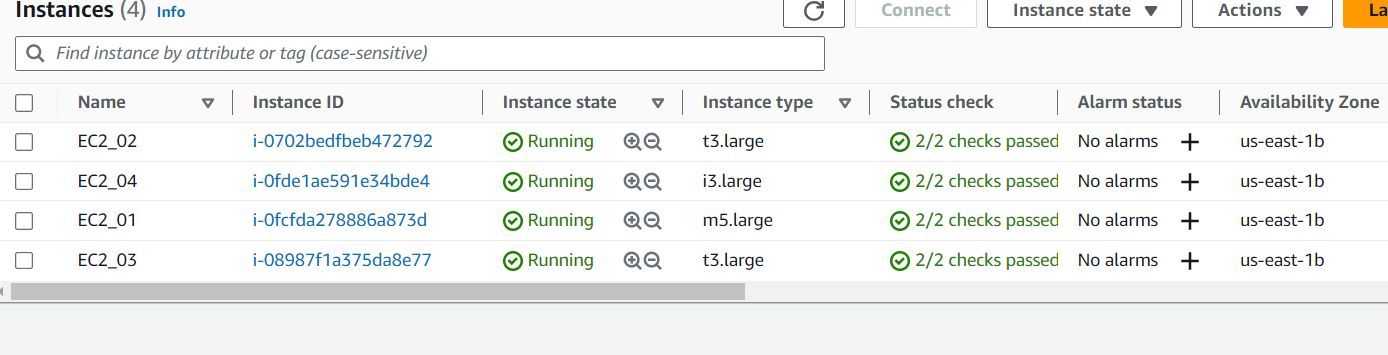
And once all the steps are done, the Infrastructure will be created in the AWS tenant id.
1.EC2
2. VPC
3. Subnets
4. Security Groups
The entire Infrastructure is created and managed through Terraform. We can make any alterations and follow the previous steps to apply them to your tenant.
Now terraform destroy command is used to clean up the resources.
az keyvault secret set --vault-name az-azure365pro-tf-kv --name sp-client-id --value xxxxx-19e2-4b37-bd22-48d364a7ab80
az keyvault secret set --vault-name az-azure365pro-tf-kv --name sp-client-secret --value xxxxxxxx~~hKZMB6Wa0j0xxx.1OCts65
az keyvault secret set --vault-name az-azure365pro-tf-kv --name sp-tenant-id --value xxxxxxx-9352-4fa4-xxxx-112da2837c29
az keyvault secret set --vault-name az-azure365pro-tf-kv --name sp-subscription-id --value xxxxxx-b524-46f9-aa1a-3c583ee00d65</pre>

az keyvault secret set --vault-name az-azure365pro-tf-kv --name sp-key-1 --value xxxxxx-b524-46f9-aa1a-xxxxxxxxx
az keyvault secret set --vault-name az-azure365pro-tf-kv --name sp-key-2 –value xxxxxxxxxxxxxxxxxxxxMirqY58sJAdB0bwFLPogQt/95cWWPnbwnpCbYtUnvxMYJ+c/Q==
Storage Accounts Recommended Configuration –
Turn ON No Delete locks
Turn ON Versioning
Turn on Soft delete for 60 days
Turn on Point in time restore for containers
To Get an Image list from azure to update terraform script with appropriate sku and offer.
az vm image list
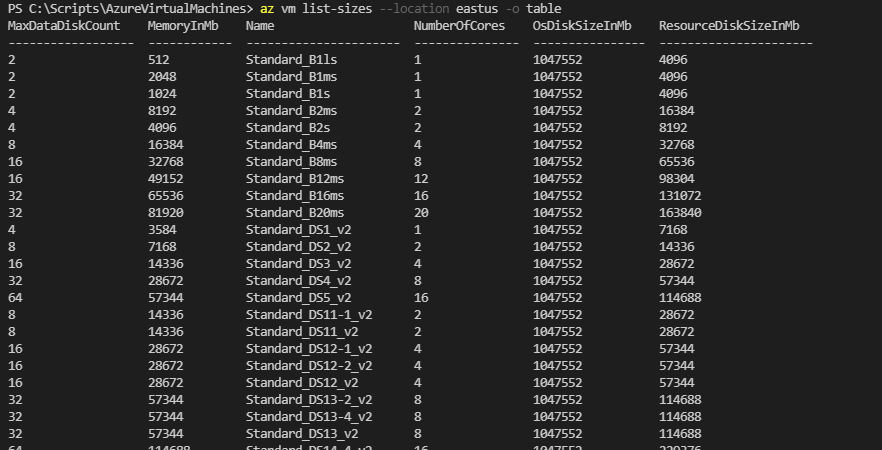
To Get VM Size list from azure to update terraform script with appropriate sizing.
az vm list-sizes --location eastus -o table
To Get Windows 10/11 Image list
az vm image list --publisher "MicrosoftWindowsDesktop" -o table --all
Terraform check state list and remove something from the state for example.
terraform state list
terraform state rm azurerm_virtual_machine.main
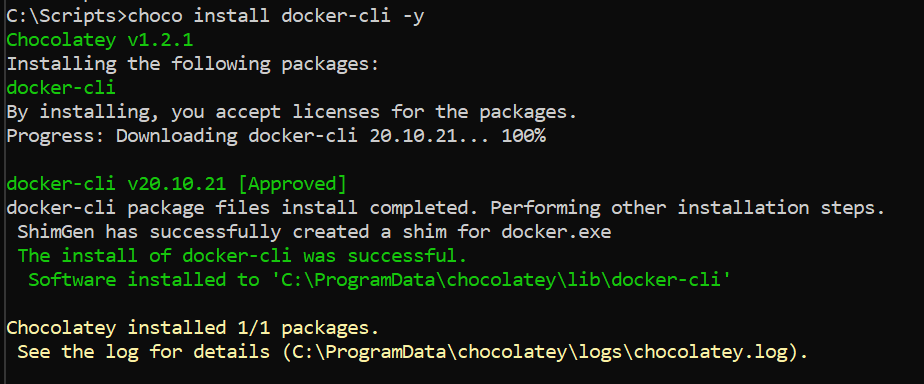
Installing Docker CLI
choco install docker-cli -y
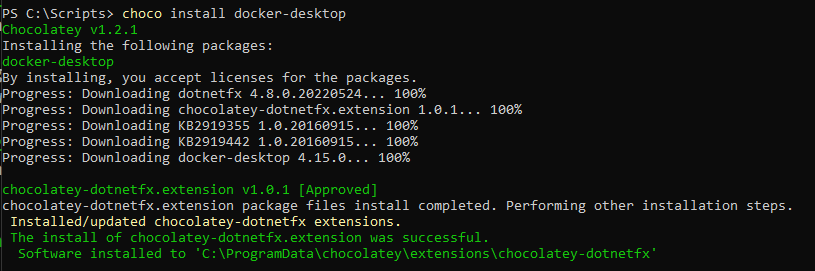
Installing docker desktop
choco install docker-desktop
AWS Cli
aws configure / Get access key from AWS Users
You can use AWS Provider.
.
Pushing docker image to aks from Azure Container Registry
az login
az acr login --name az365propreusacr
docker build -t sampledocx .
docker tag sampledocx az365propreusacr.azurecr.io/sampledocx:v2
docker push az365propreusacr.azurecr.io/sampledocx:v2
kubectl apply -f sampledocx.yaml
kubectl get pods -n document-processing
kubectl describe pods sampledocx-deployment-6b98886447-n4g2m
kubectl exec -n document-processing -it sampledocx-deployment-6b98886447-n4g2m -- sh
ls
ps aux
Some more docker commands
az login
az acr login --name az365propreusacr
docker build -t azsaferpruksacr.azurecr.io/safer-ar-fe:latest .
docker push azsaferpruksacr.azurecr.io/safer-ar-fe

docker build .
docker compose up
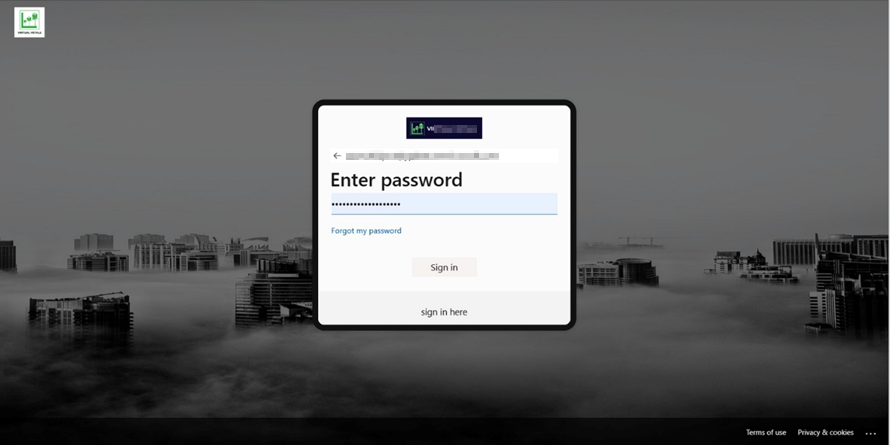
This evolution, which is now in public preview, enables beyond customizing the image or background color, the company logo and an explanatory text to manage:
A favicon for the browser tab
A header with a reminder of the organization’s logo
A footer with links to the terms of use, and a description of privacy and cookies
A template between a predefined template (either classic or ADFS) or a custom template
This article aims to present how these evolutions will enable you to enhance the initial perception of your Office 365 tenant. The goal will be to adapt the corporate identity to create the best sign-in experience for the end users and the organization’s partners.
A reminder of the legacy company branding
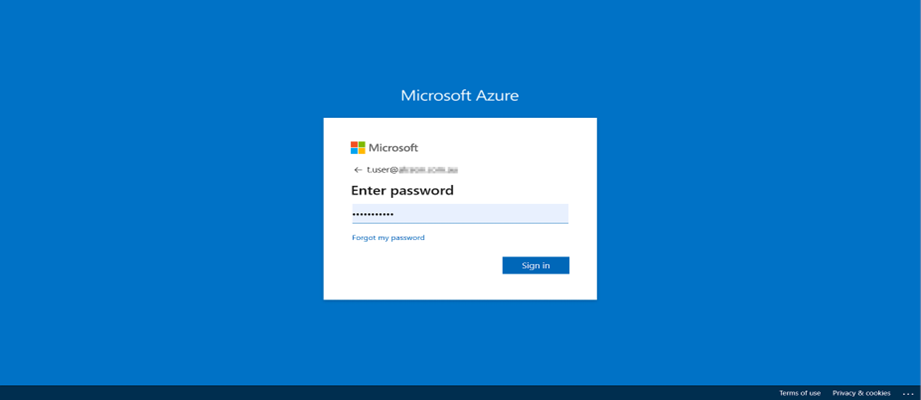
It’s not big news, but the default sign-in page is not very user-friendly
Introduction of the new company branding capabilities
Now let’s deep dive into the new capabilities.
How to switch to the new company branding experience
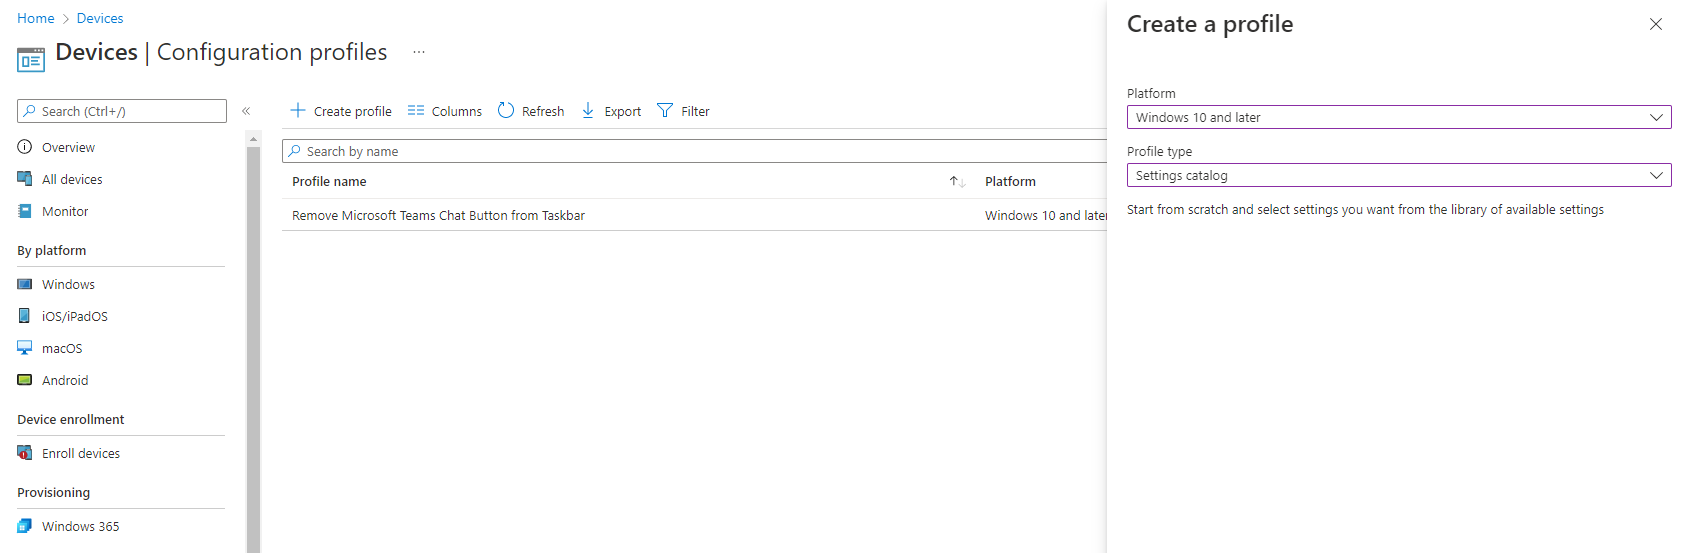
The first thing to do is to activate the functionality that is still in preview. For this, you have two possibilities:
Either you are already using the existing functionality and you just have to switch to the preview
Or you can directly create a new template in the new experience (the latter being activated by default for tenants without company branding).
How to configure the new company branding
To configure the new company branding experience, 5 simple steps are required. The hardest part is to get the images and icons in the right size and format.
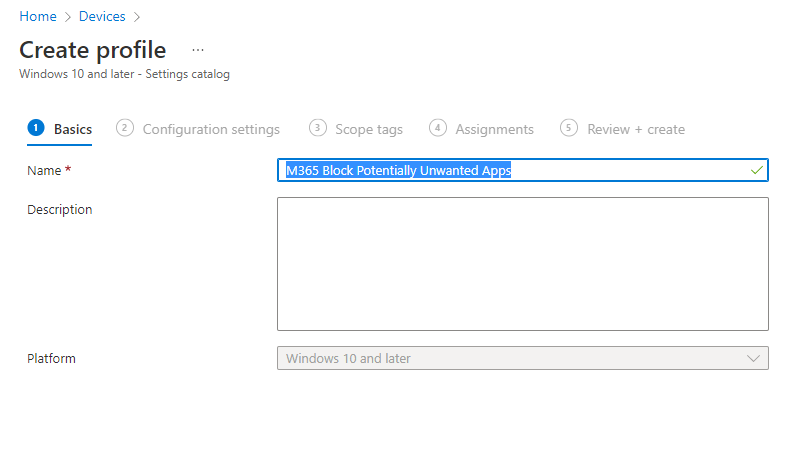
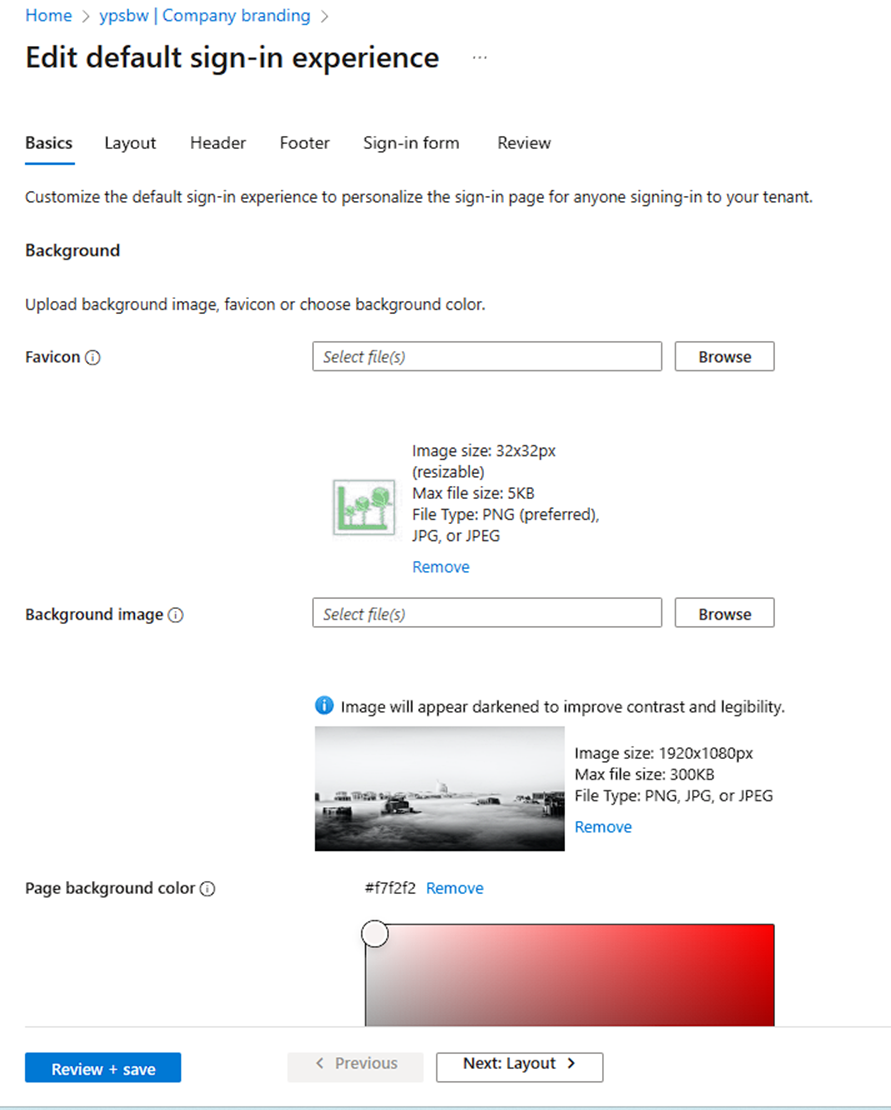
1. Basics:
In this first section, we find the main graphic elements:
Favicon for the icon visible on the web tabs
Background image for the main background image of the sign-in page
Background color for the background color in case of failure to load the background image
From what I’ve seen, it’s not essential, even if recommended, to follow the dimensions of the images. It is possible to do more or less. On the contrary, the indicated sizes are maximum (even if the error message is not very explicit: “The file type uploaded for this image type is too large”.)
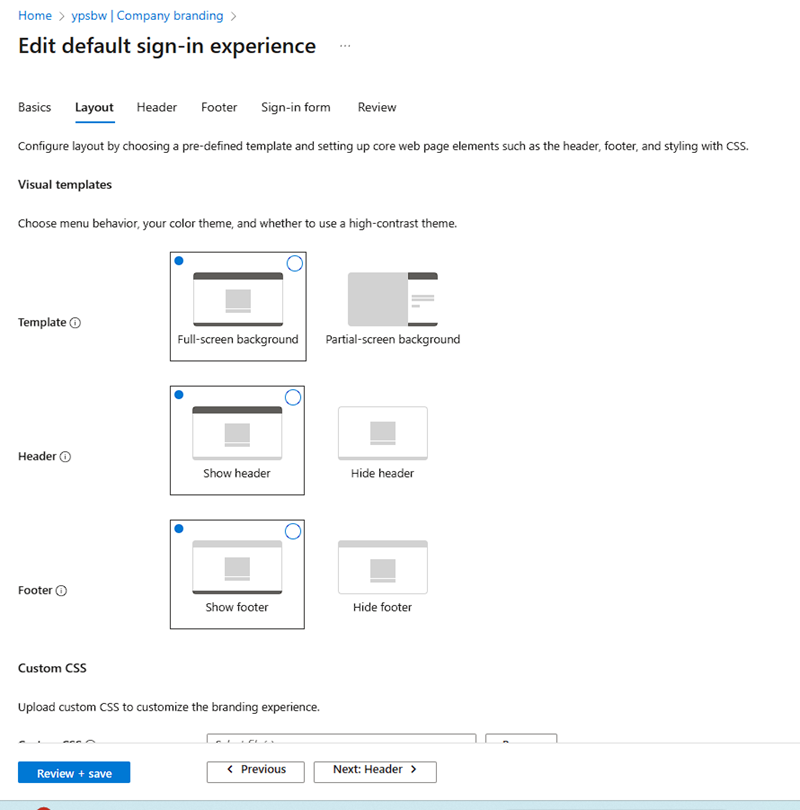
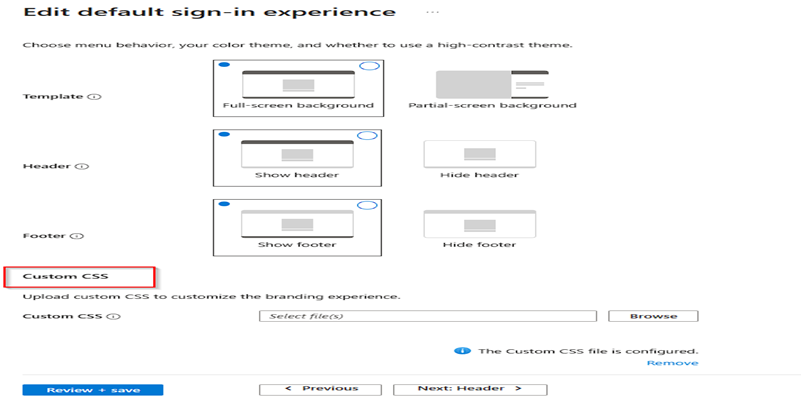
2. Layout
In this new part, 3 parameters are available to manage the layout of the page:
Template: Choice between the classic Azure AD or ADFS login experience
Header: Display or hide the header (with the logo)
Footer: Display or hide the footer (with terms of use and cookies)
It is also possible to upload a CSS file to customize the page layout, but I will return to that at the end of the article.
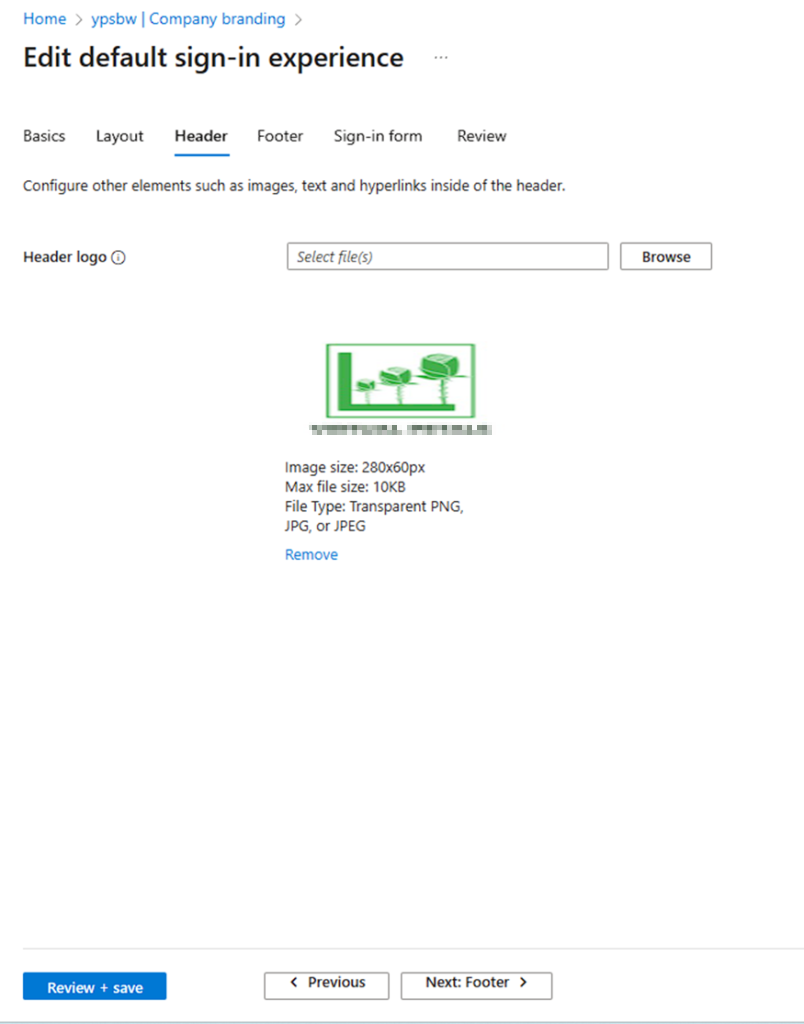
3. Header
The customization of the header is very simple, as it contains only the logo of the page, displayed by default in the upper right corner
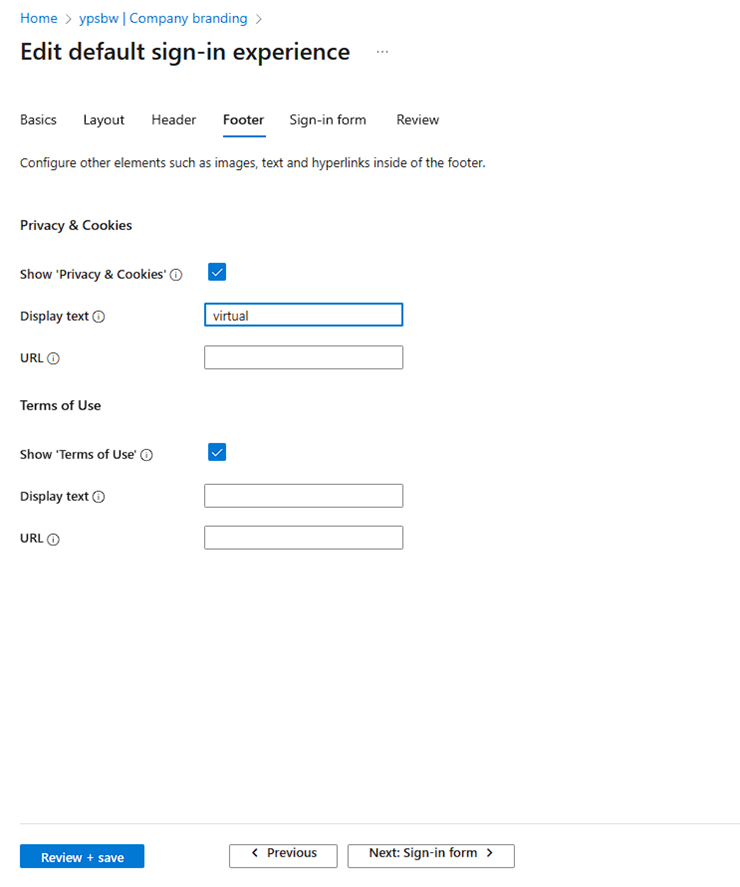
4. Footer
The footer contains the “Terms of Use” and the “Privacy & Cookies” description.
Until now, these two elements were not manageable by the organization and referred to the information of Microsoft :
With the new experience, it is possible to decide whether to display or not these elements and modify the texts or the URL.
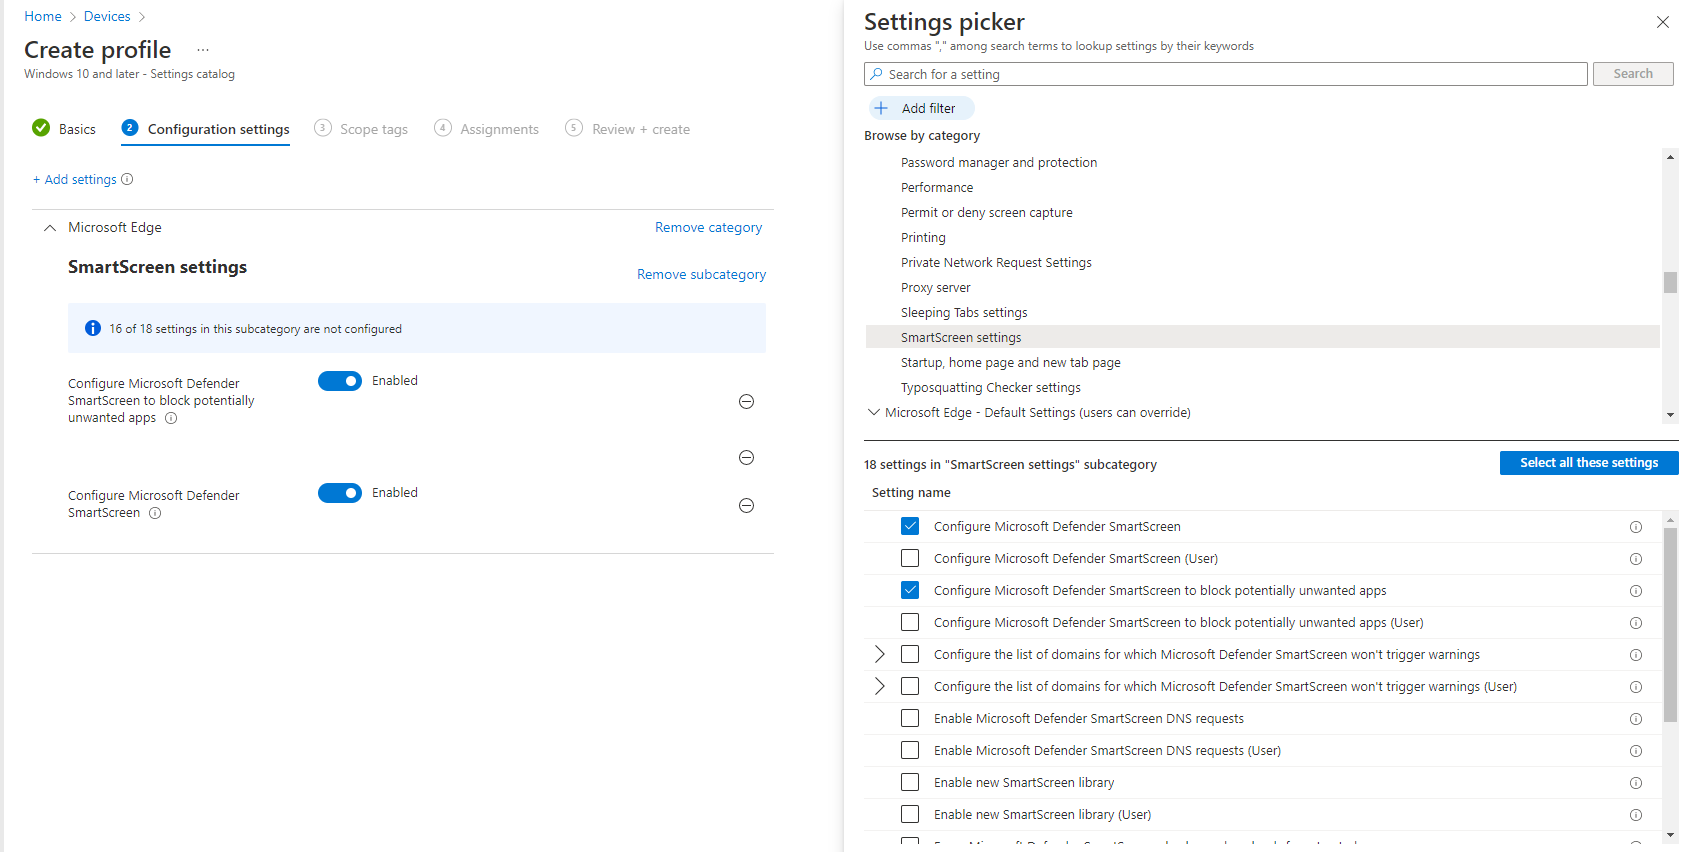
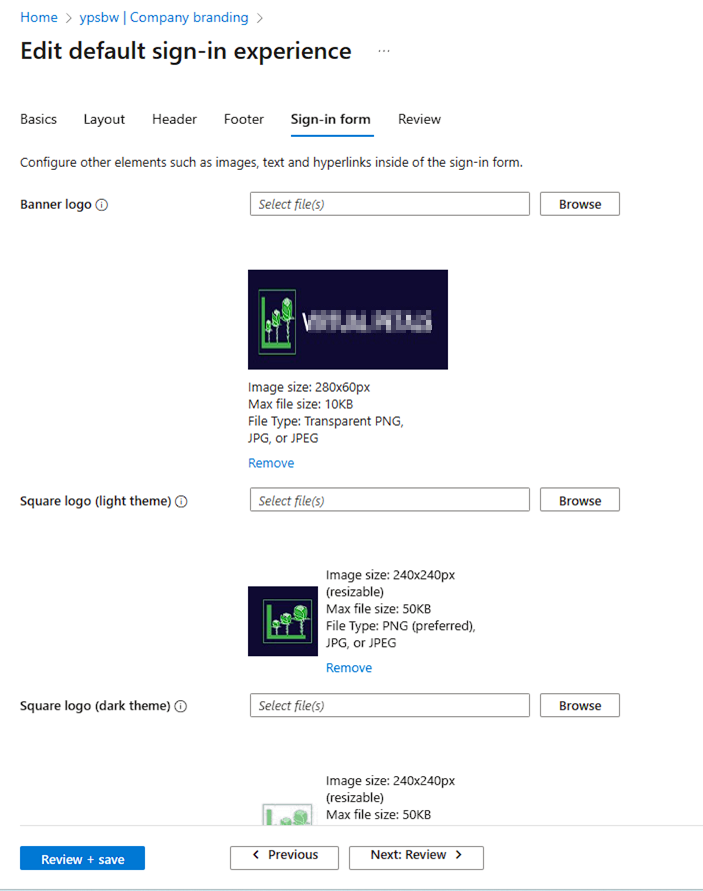
5. Sign In Form
Banner logo: Select a PNG or JPG image file of a banner-sized logo (short and wide) to appear on the sign-in pages.
Square logo (light theme): Select a square PNG or JPG image file of your logo to be used in browsers that are using a light color theme. This logo is used to represent your organization on the Azure AD web interface and in Windows.
Square logo (dark theme) Select a square PNG or JPG image file of your logo to be used in browsers that are using a dark color theme. This logo is used to represent your organization on the Azure AD web interface and in Windows. If your logo looks good on light and dark backgrounds, there’s no need to add a dark theme logo.
Username hint text: Enter hint text for the username input field on the sign-in page. If guests use the same sign-in page, we don’t recommend using hint text here.
Sign-in page text: Enter text that appears on the bottom of the sign-in page. You can use this text to communicate additional information, such as the phone number to your help desk or a legal statement. This page is public, so don’t provide sensitive information here. This text must be Unicode and can’t exceed 1024 characters.
To begin a new paragraph, use the enter key twice. You can also change text formatting to include bold, italics, an underline, or clickable link. Use the following syntax to add formatting to text:
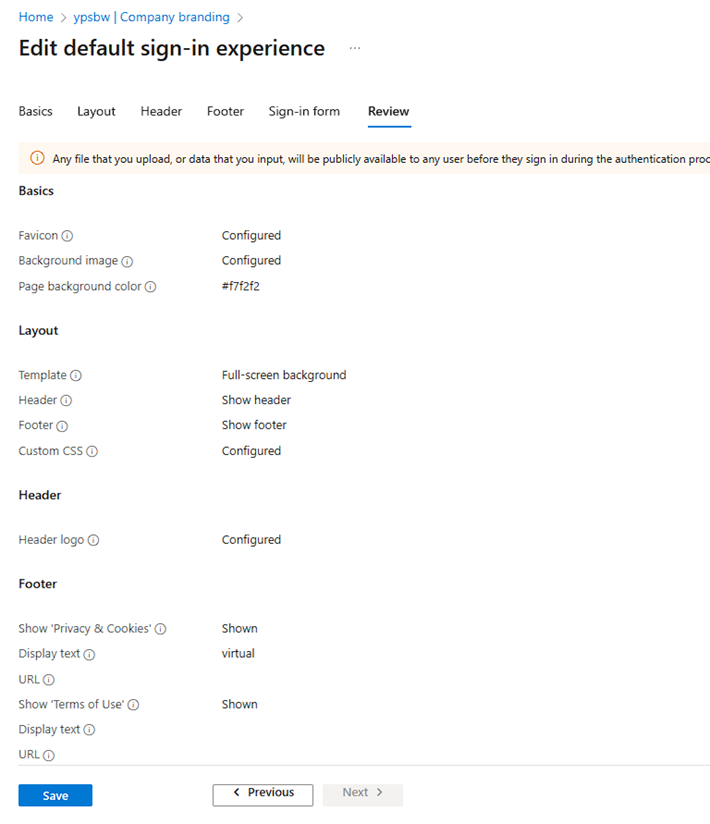
5. Review
The last page usually allows you to review all the parameters defined for the company branding.
How to go further with the custom templates
The improvements introduced in the UI (favicon, default template, header, footer, SSPR customization) are nice. But what is most interesting for the sign-in experience is the custom templates part.
This new feature allows administrators to manage the layout of the page. For this, Microsoft provides a CSS template in which 45 elements can be customized, such as :
.ext-header-logo: Styles for the header logo at the top of the page
.ext-sign-in-box: Styles for the sign-in box container
.ext-banner-logo: Styles for the banner logo displayed inside the sign-in box
.ext-boilerplate-text: Styles for the custom message text at the bottom of the sign-in box
.ext-promoted-fed-cred-box: Styles for sign-in options text box
1. Developers pull remote repository on local machine and apply latest changes
2. Commit code and push to Azure repository develop branch
3. The latest changes are reviewed and merged to Azure repository main or master branch
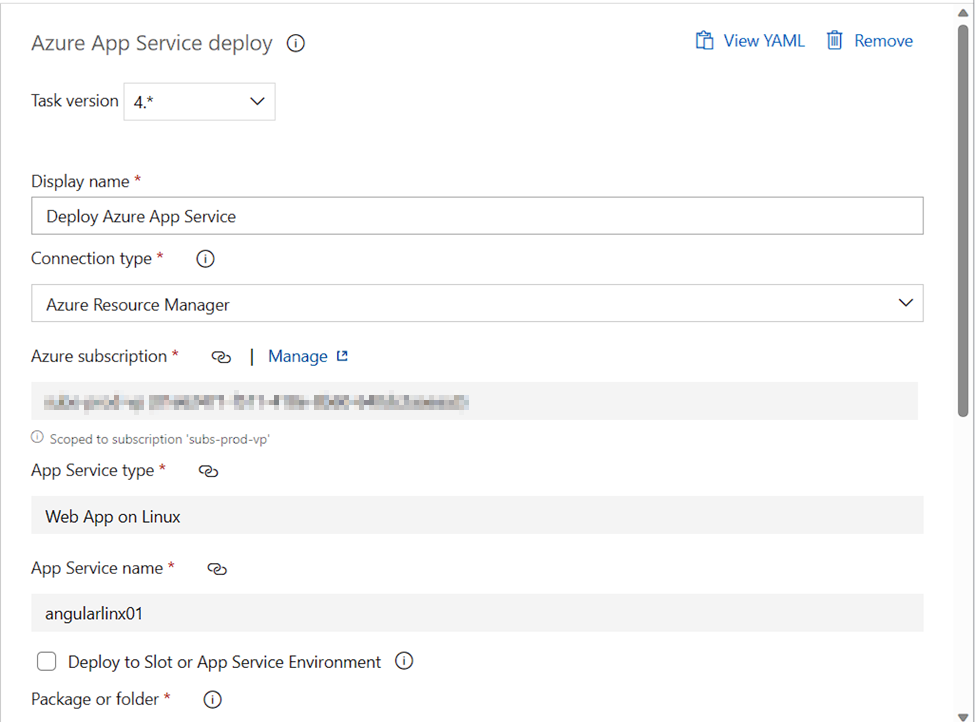
4. Automatically trigger the build and deploy web app on Azure app service
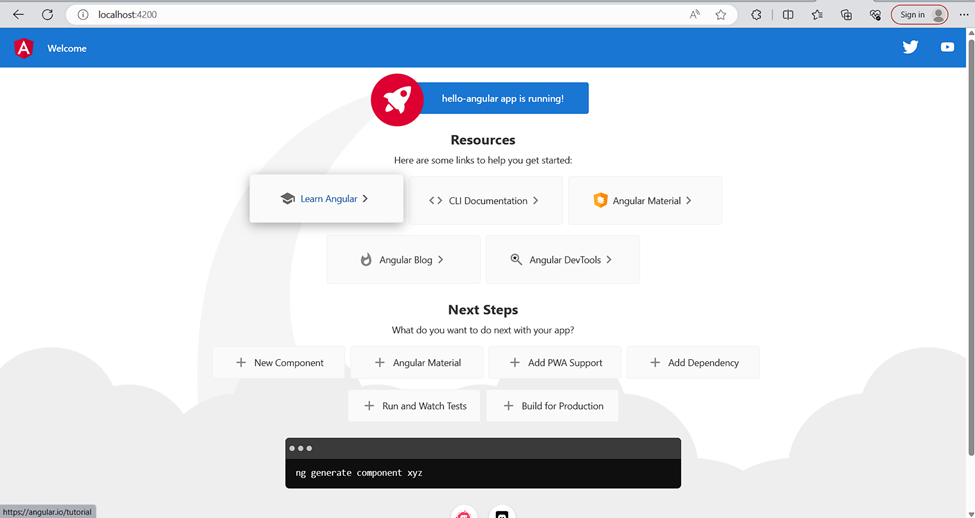
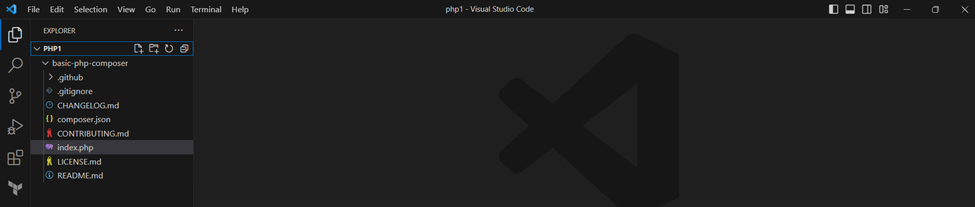
Step 1: Creating the PHP Web app and Test Locally.
To connect to the App Service from DevOps, we will need to first setup a service connection. Start by opening up DevOps, and select “Project Settings”.
In the Pipelines section, select “Service Connections” and hit the “Create service connection” button.
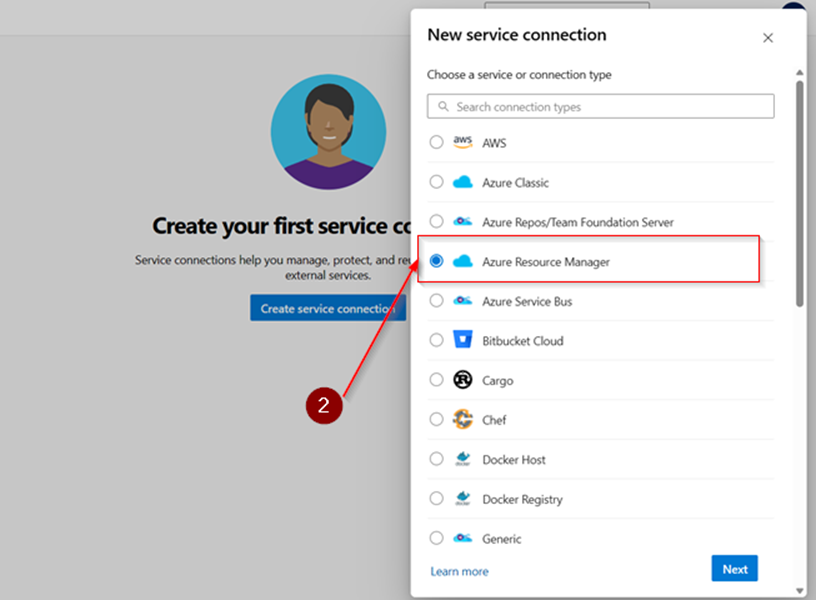
We will select “Azure Resource Manager” as the type, and hit next
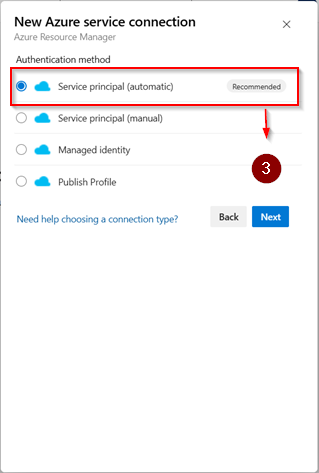
Keep “Service Principle (automatic)” as the Authentication method.
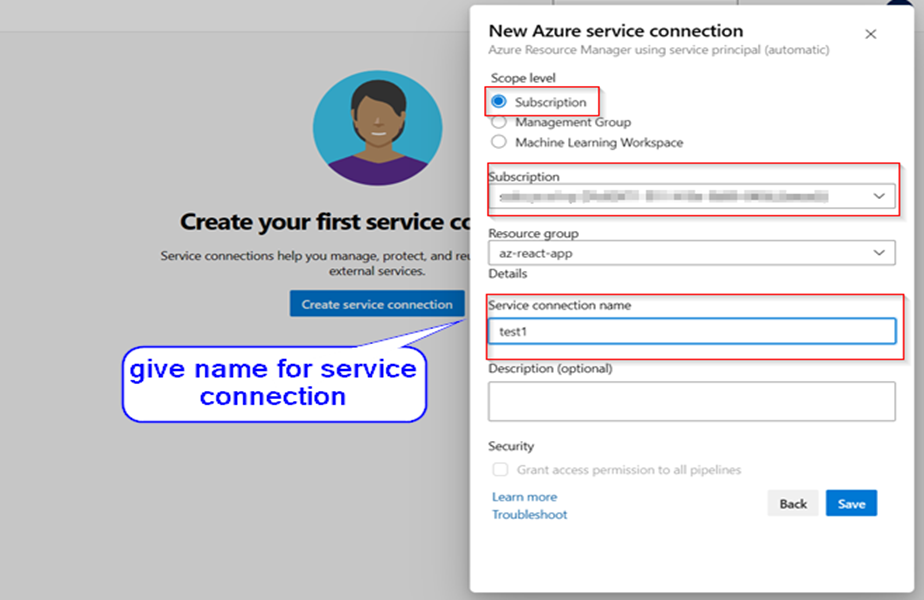
Keep “Subscription” as the scope and make sure the correct one is selected. Then make sure to choose the same Resource Group that you created for the App Service above. We will also need to create and note a “Service Connection Name” that you will be using in the pipeline next. After you are finished, hit “Save” to create your service connection.
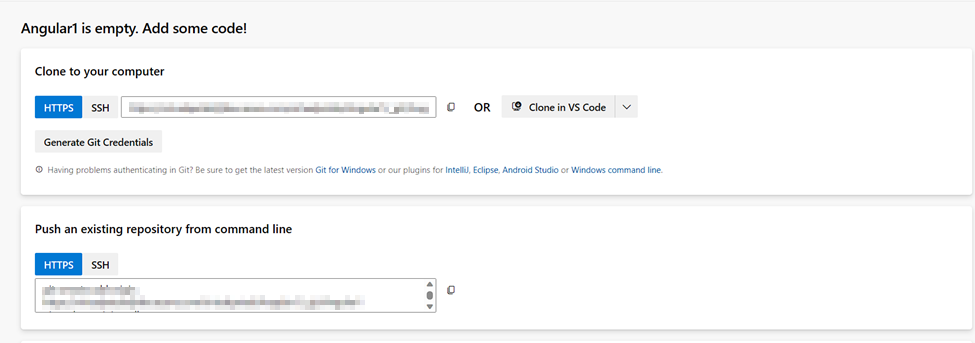
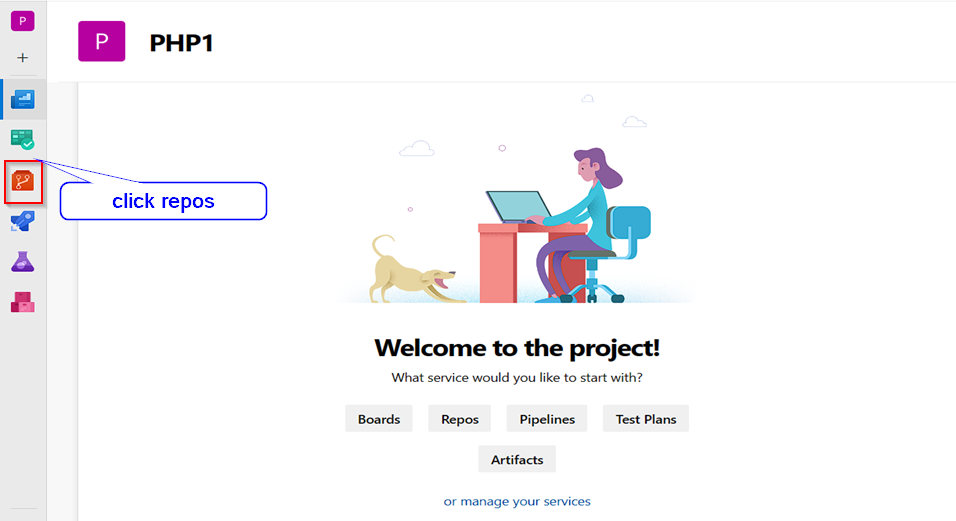
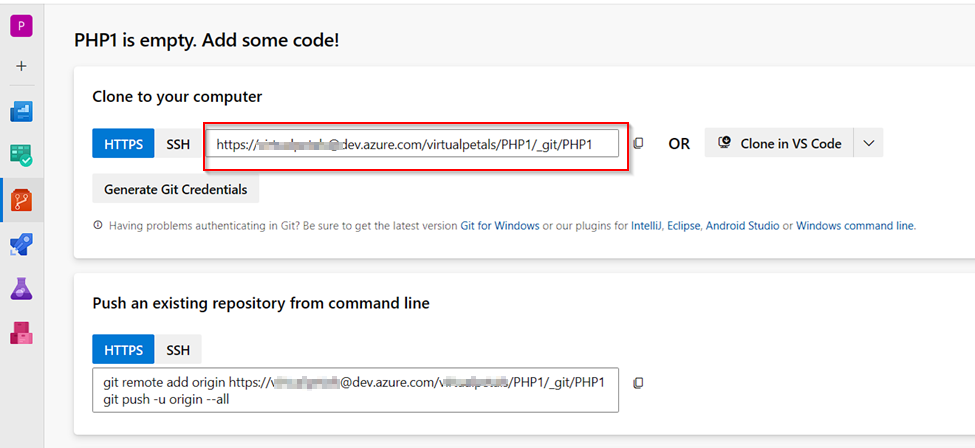
Click on repos to copy the Git credentials on a notepad.
Push from the local to remote repository using the below git commands on Git bash.
git init
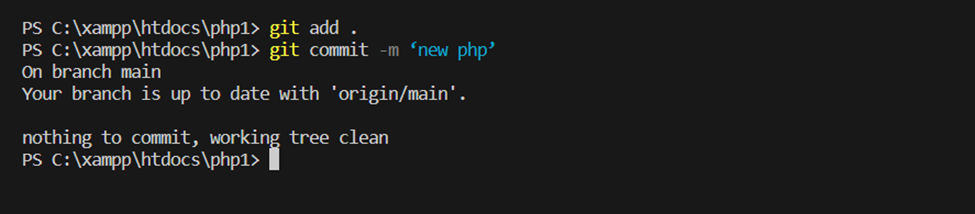
git add .
git commit -m ‘initial commit’
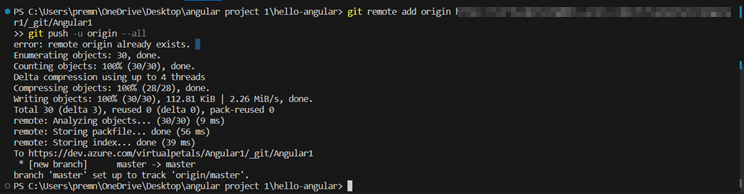
git push
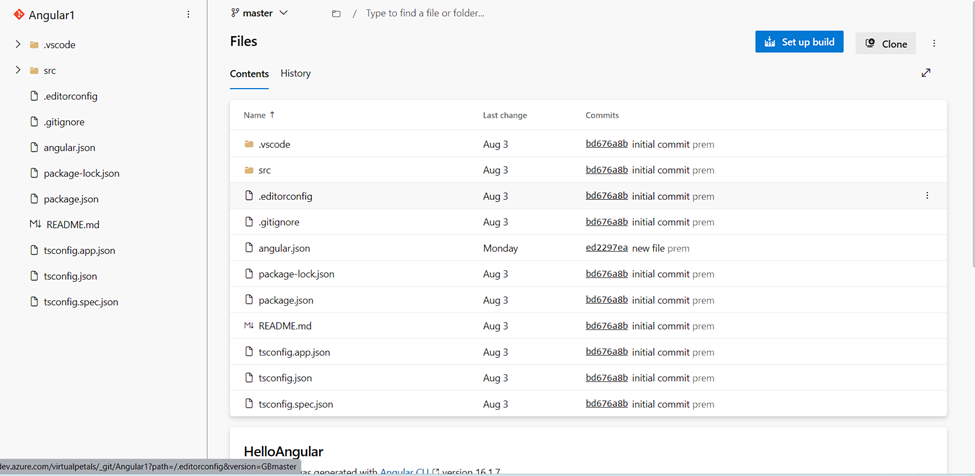
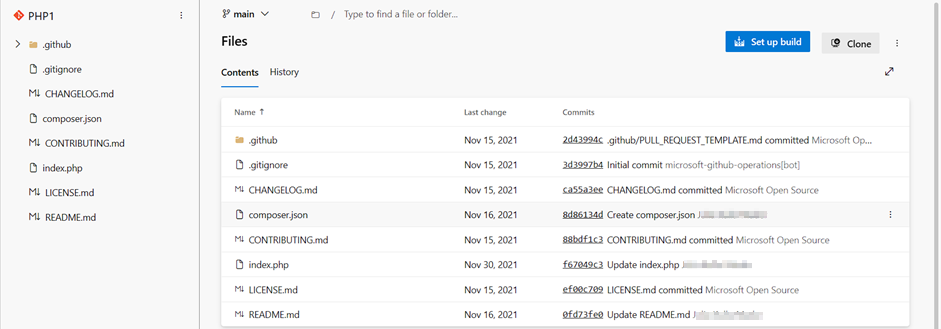
This brings a prompt, login into your Azure DevOps portal then this shows that the App has been push to the Azure repo.
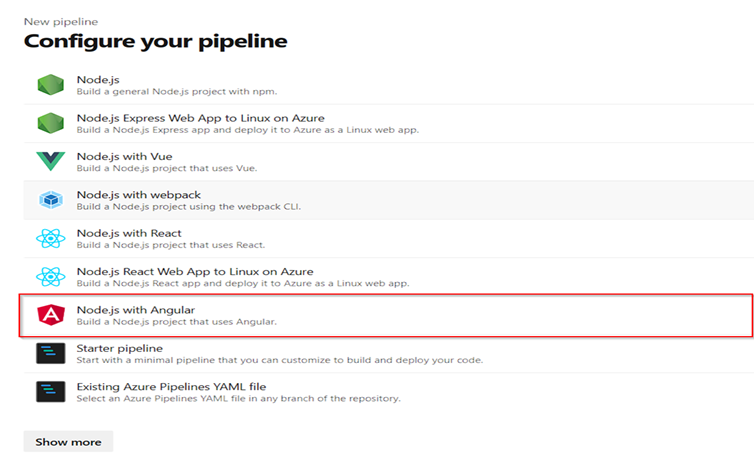
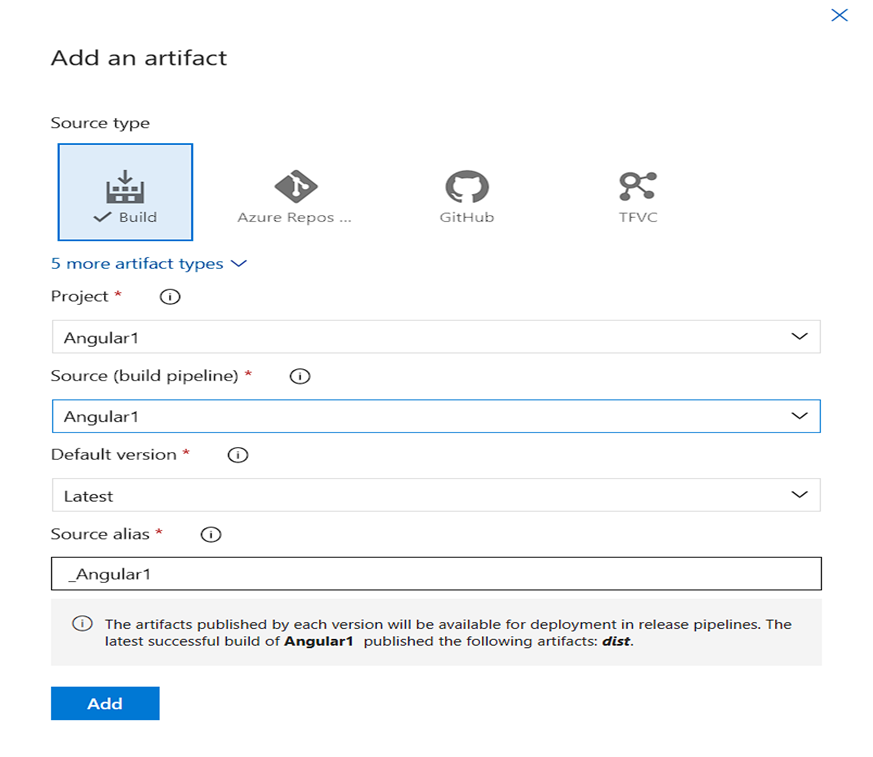
Step 4: Create a Build Pipeline.
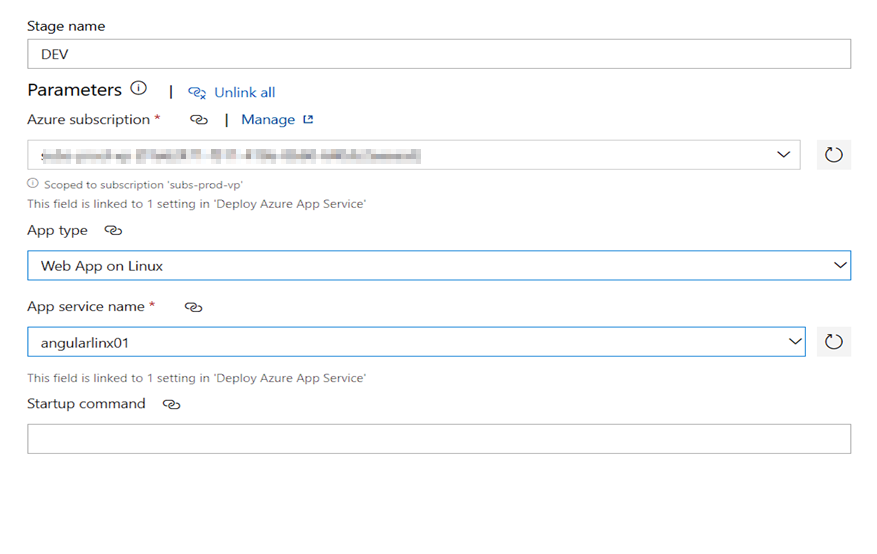
To connect the pipeline to the App service instance created.
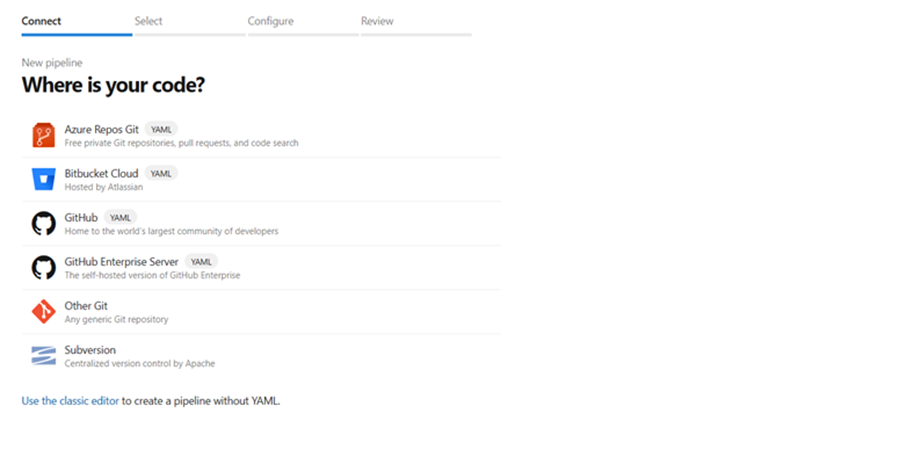
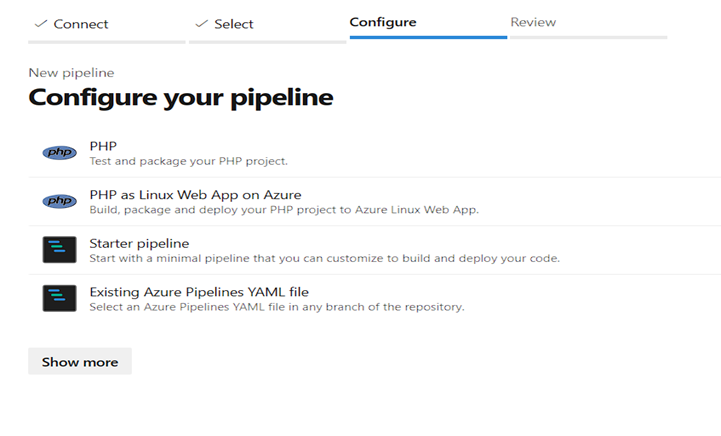
1.Create pipeline.
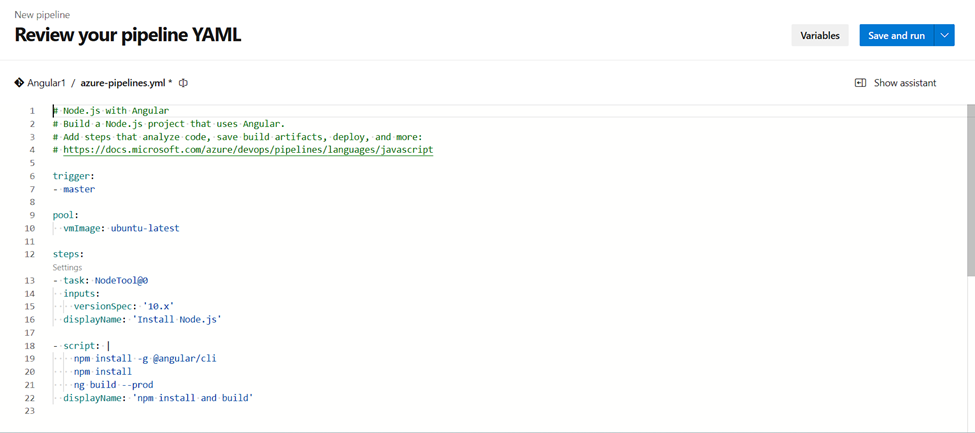
2.Choose Azure repose (YAML)
Select PHP as Linux Web App on Azure to configure your pipeline.
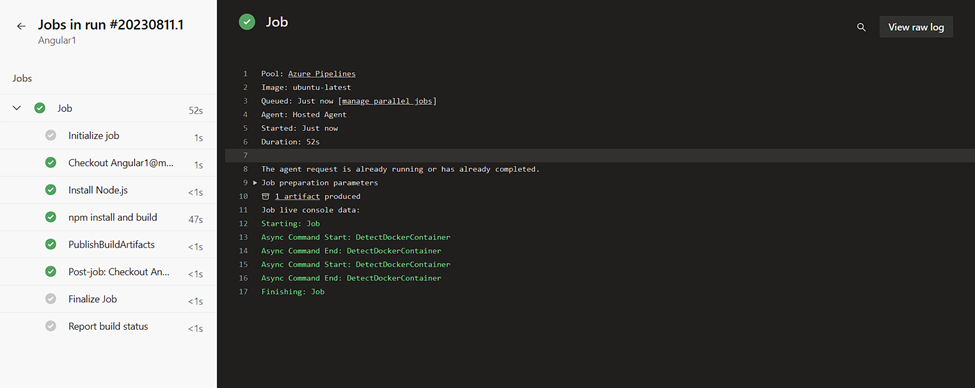
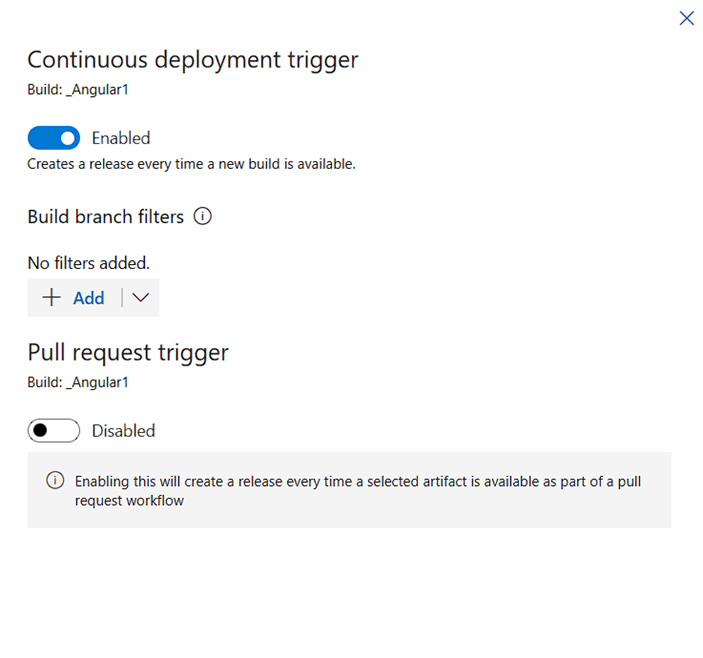
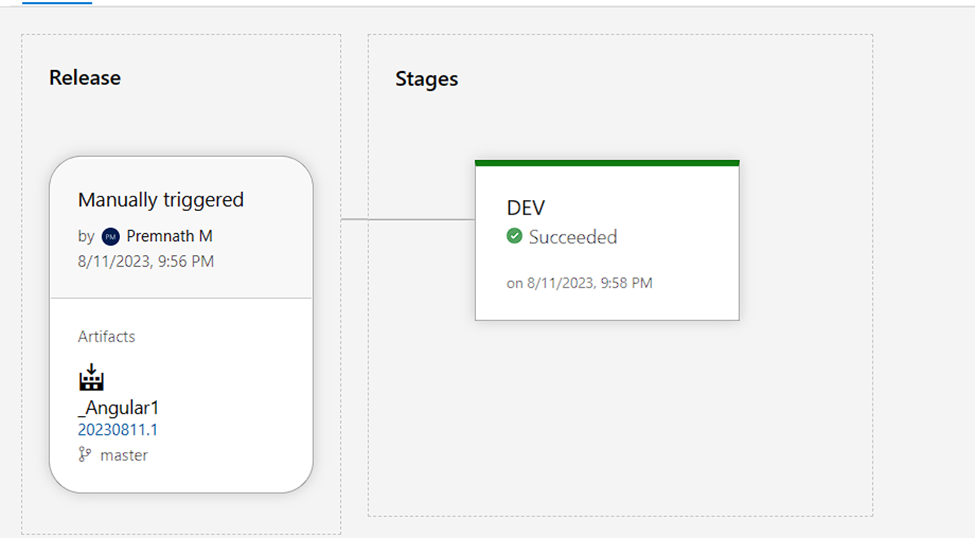
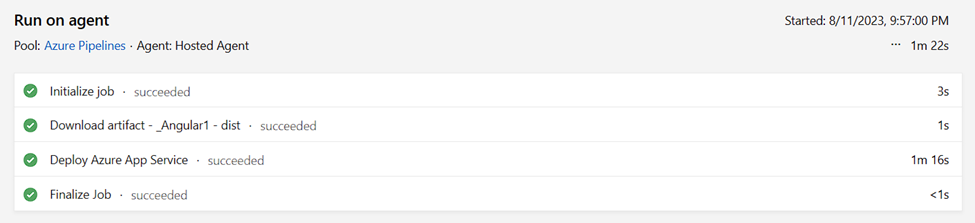
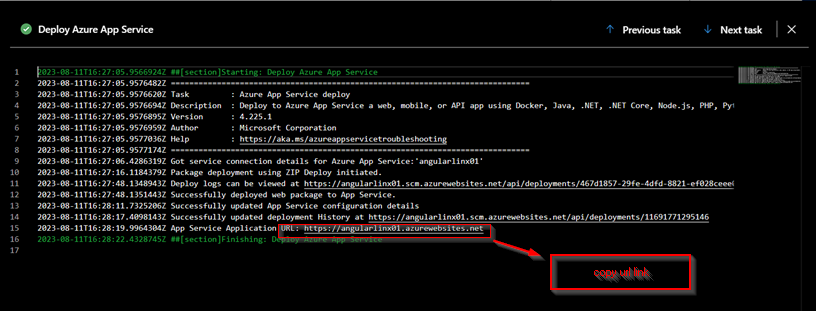
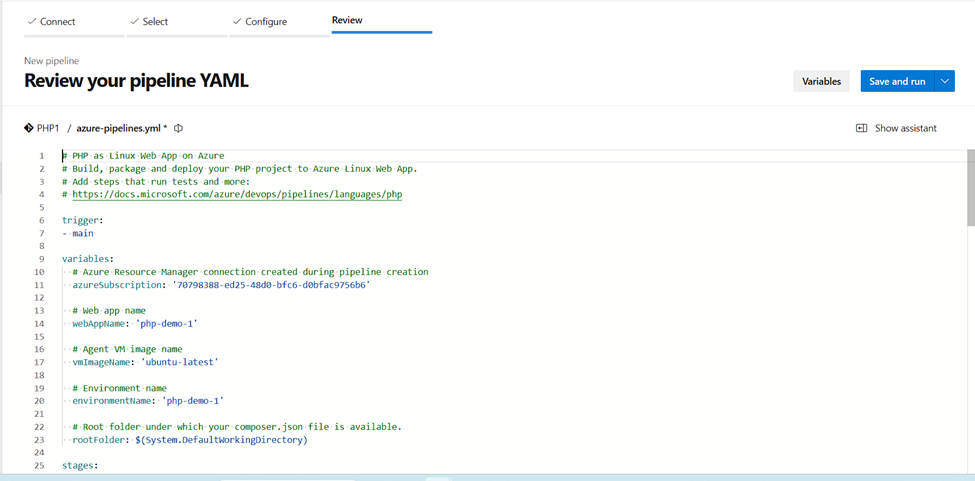
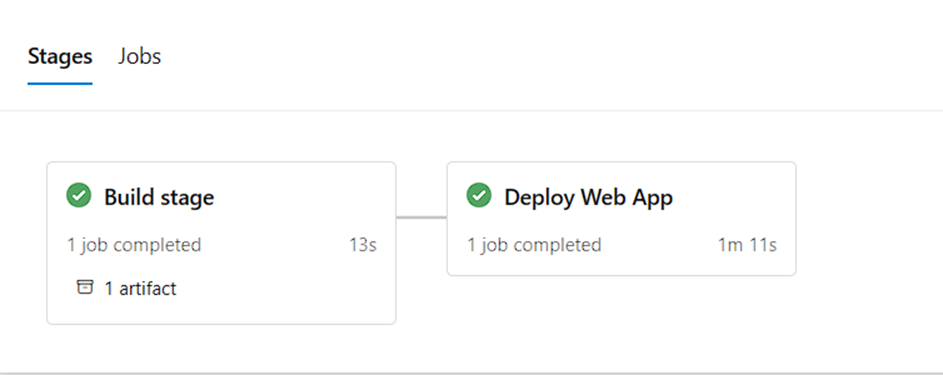
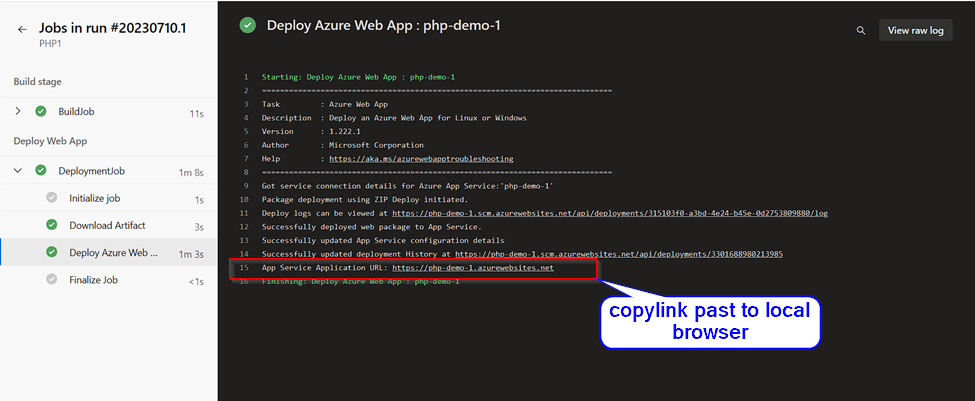
The YAML file configuration triggers the pipeline to run whenever there is any update in the main branch of the repository. It builds and releases the code without having to make separate release pipeline. The stages will show that the code has been archived and deployed and the changes can be verified by reloading app service URL.
Local Browser
Key notes
composer. Json files is important to set upbuild. otherwise, it is failed to build job.