")
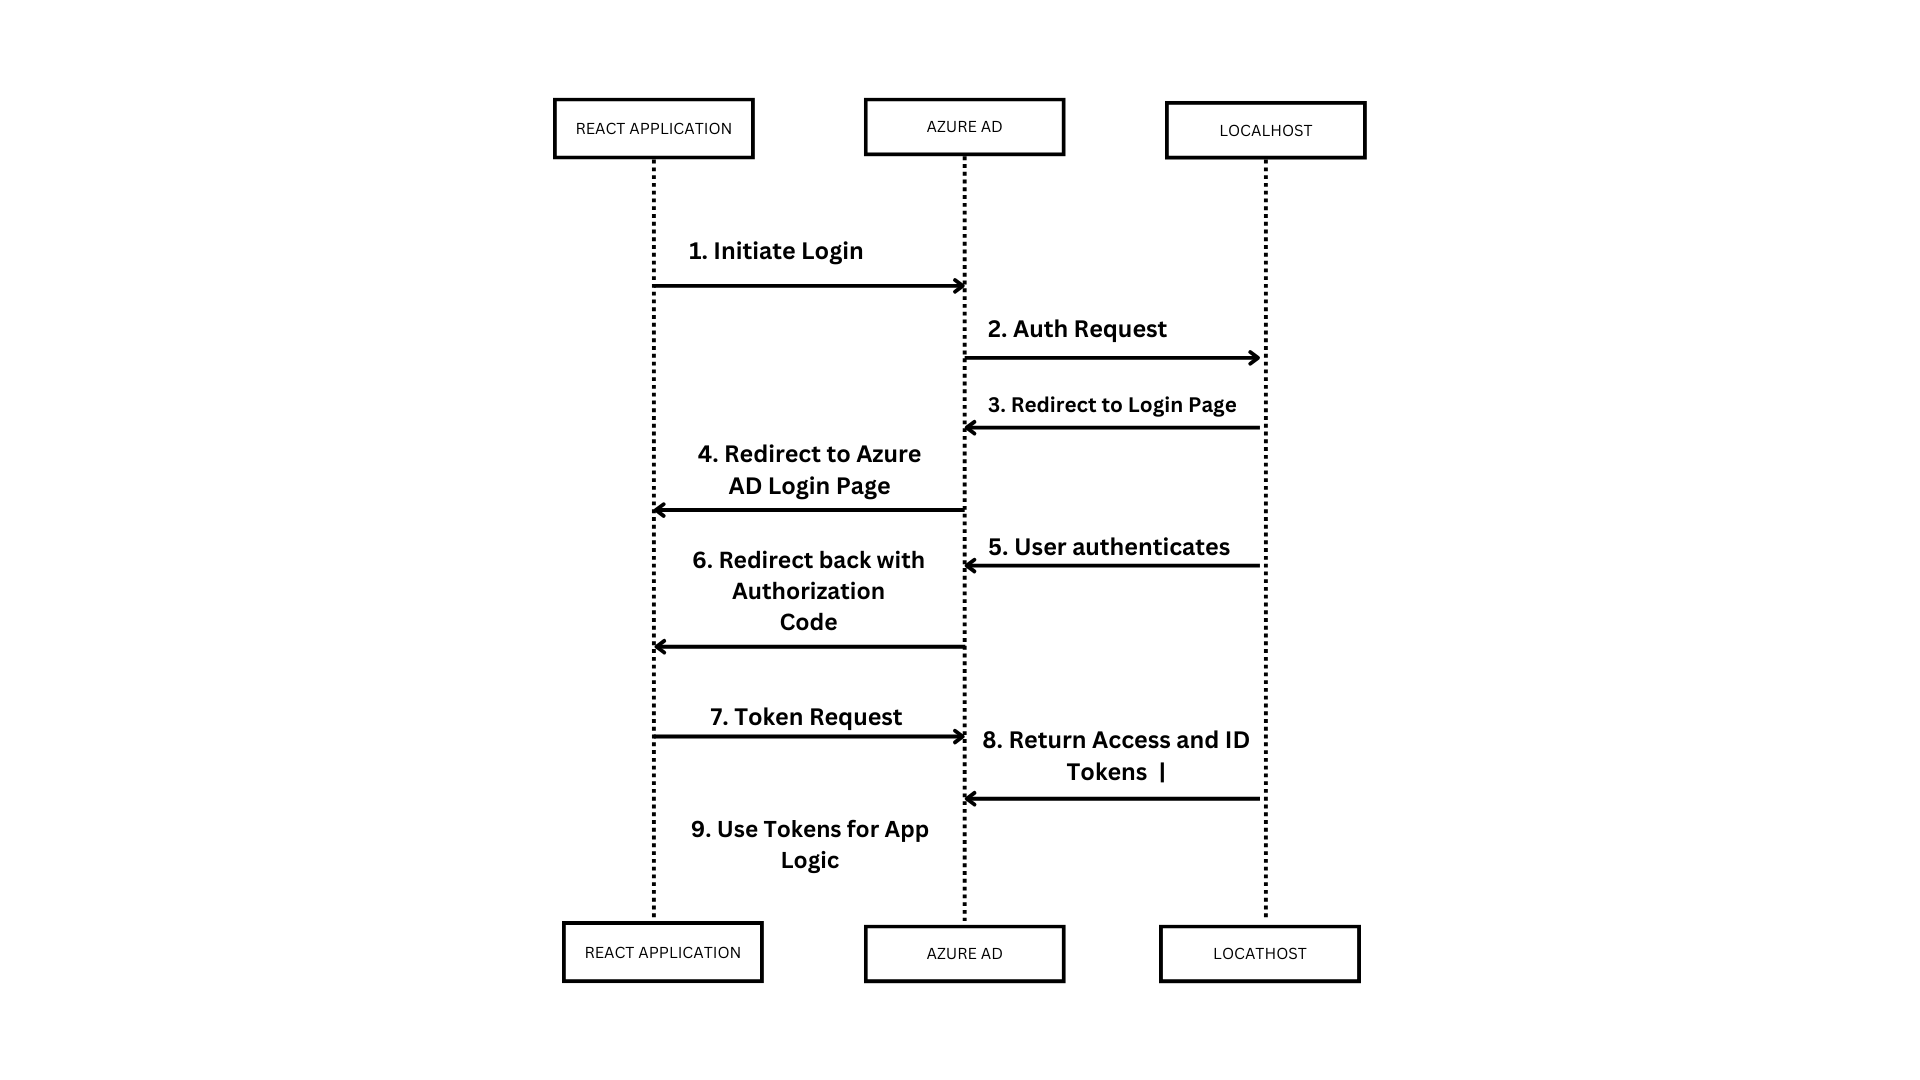
Overview
show you how easy it is to integrate Azure AD as an Authentication mechanism for your React Application
Prerequisites
Create a AD User for testing purposes
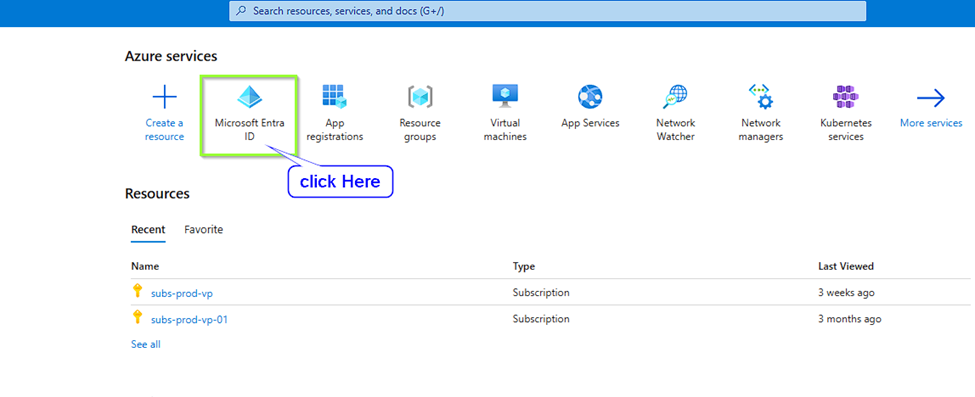
App Registration
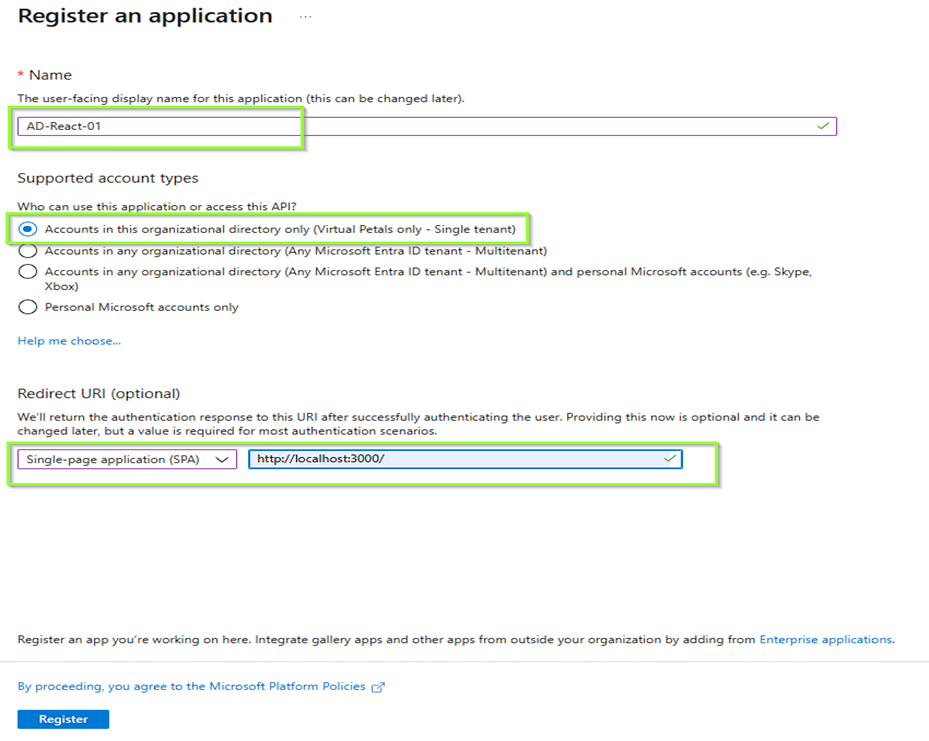
Search for App Registration in Azure, and create a new App Registration. Fill in the fields below. For this example we’ll leave the callback URL as localhost
STEP 1
STEP 2

STEP 3
STEP 4
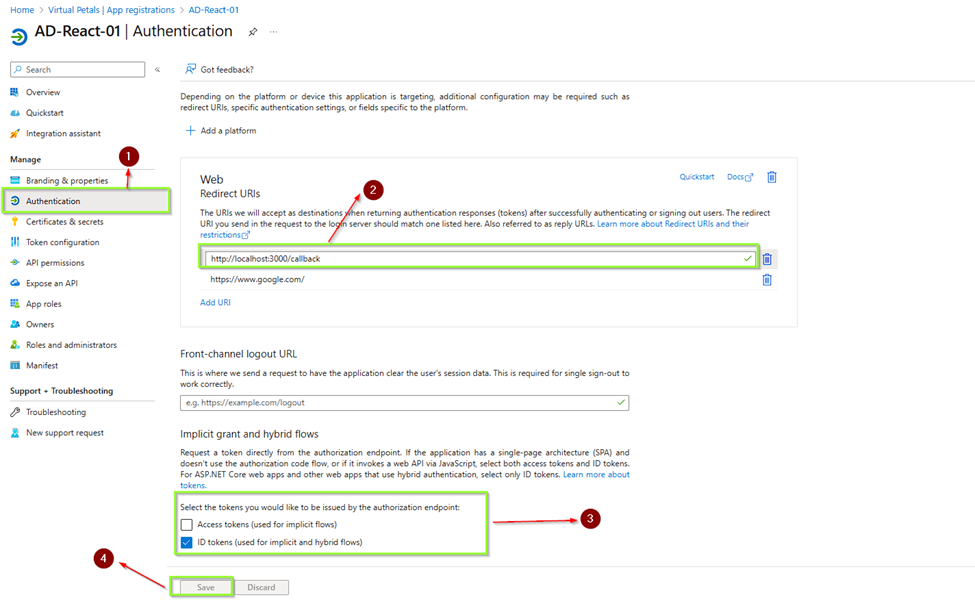
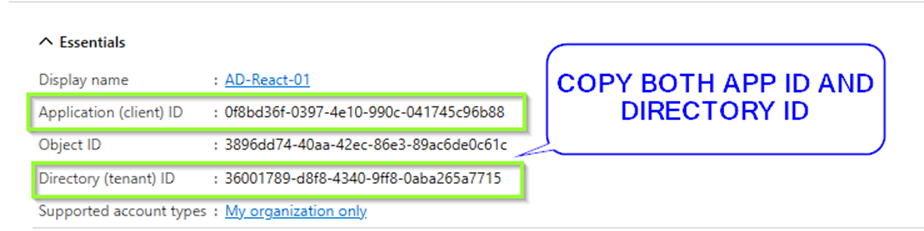
Take note of the Application (Client ID).
In the Authentication section, tick the ID Token checkbox
React App
Download and Install NodeJS. Open a command prompt or terminal and create a react application
npx create-react-app my-app
cd my-app
Install the AAD Microsoft Authentication Library for React
npm install react-aad-msal msal –saveAdd the following authProvider.js file, replacing the placeholders for Client ID with the one we generated above
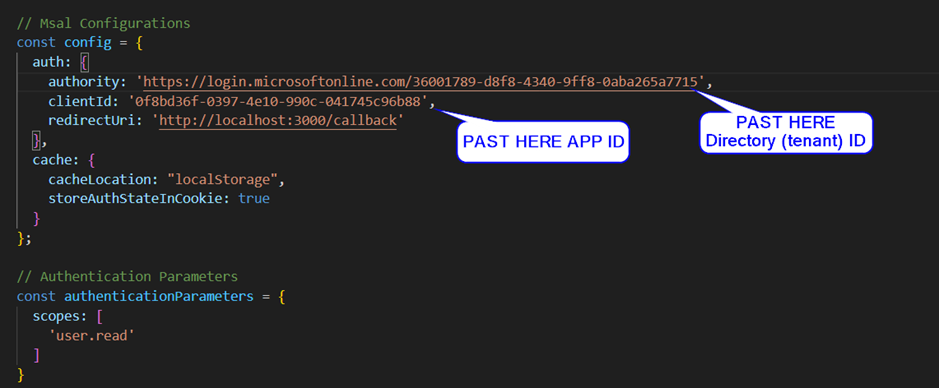
//my-app/src/authProvider.jsimport { MsalAuthProvider, LoginType } from 'react-aad-msal';

// Msal Configurations
const config = {
  auth: {
    authority: 'https://login.microsoftonline.com/common',
    clientId: '<Client ID>',
    redirectUri: 'http://localhost:3000/callback'
  },
  cache: {
    cacheLocation: "localStorage",
    storeAuthStateInCookie: true
  }
};

// Authentication Parameters
const authenticationParameters = {
  scopes: [
    'user.read'
  ]
}

// Options
const options = {
  loginType: LoginType.Popup,
  tokenRefreshUri: window.location.origin + '/auth.html'
}

export const authProvider = new MsalAuthProvider(config, authenticationParameters, options)
Update index.js with the below. This will just prompt for authentication straight away when you navigate to your app
//my-app/src/index.jsimport React from 'react';
import ReactDOM from 'react-dom';
import { AzureAD } from 'react-aad-msal';

import App from './App';
import { authProvider } from './authProvider';

ReactDOM.render(
  <AzureAD provider={authProvider} forceLogin={true}>
    <App />
  </AzureAD>,
  document.getElementById('root'),
Update App.js with the below. We’re just adding an Auth section to the sample provided to display the username as well as the actual JWT token for this tutorial purposes
//my-app/src/App.jsimport logo from './logo.svg';
import './App.css';
import { authProvider } from './authProvider';
import { AzureAD, AuthenticationState } from 'react-aad-msal';function App() {

  return (

    <div className="App">
 <AzureAD provider={authProvider}>
      <span>Only authenticated users can see me.</span>
    </AzureAD>

 <AzureAD provider={authProvider} forceLogin={true}>
  {
    ({login, logout, authenticationState, error, accountInfo}) => {
      switch (authenticationState) {
        case AuthenticationState.Authenticated:
          return (
            <p>
              <span>Welcome, {accountInfo.account.userName}!</span>
              <span>{accountInfo.jwtIdToken}</span>
              <button onClick={logout}>Logout</button>
            </p>
          );
        case AuthenticationState.Unauthenticated:
          return (
            <div>
              {error && <p><span>An error occured during authentication, please try again!</span></p>}
              <p>
                <span>Hey stranger, you look new!</span>
                <button onClick={login}>Login</button>
              </p>
            </div>
          );
        case AuthenticationState.InProgress:
          return (<p>Authenticating...</p>);
      }
    }
  }
</AzureAD>
      <header className="App-header">
        <img src={logo} className="App-logo" alt="logo" />
        <p>
          Edit <code>src/App.js</code> and save to reload.
        </p>
        <a
          className="App-link"
          href="https://reactjs.org"
          target="_blank"
          rel="noopener noreferrer"
        >
          Learn React
        </a>
      </header>
    </div>
  );
}export default App;
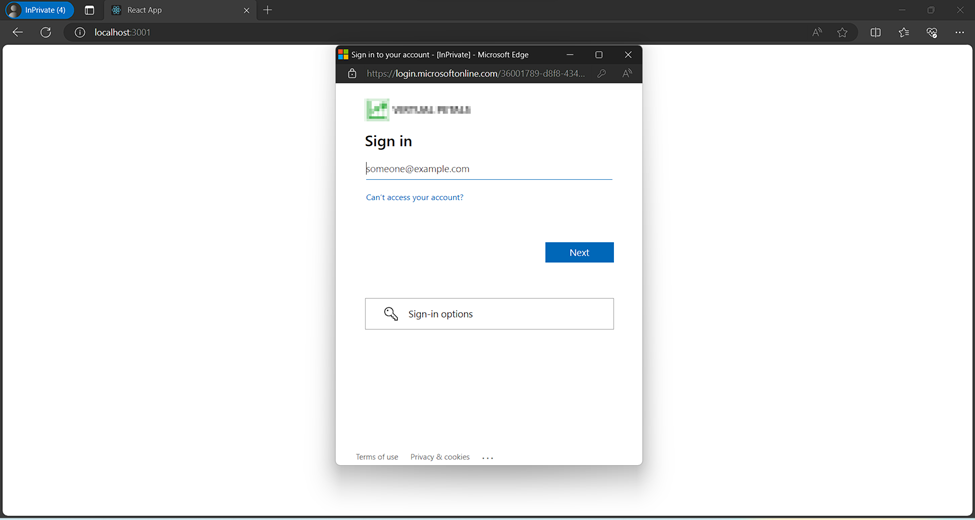
Run
npm start
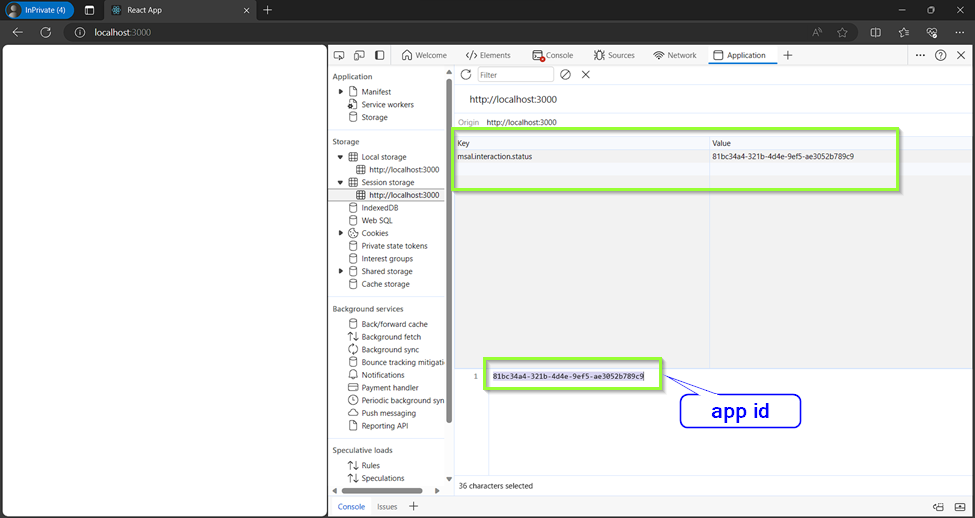
The ID token above can now be used as a bearer token when talking to a services backend. Here you can validate the ID token so you can then trust the claims in this token

 using Microsoft Authentication Library (MSAL) and OAuth 2.0. Learn to implement a robust authentication flow, ensuring a secure and user-friendly experience. Dive into the world of React and Azure AD, providing your users with a reliable and trusted authentication mechanism for your web application .)