
.
if you want to change the spring boot profile in run time from azure-pipelines.yaml
trigger:
  branches:
    include:
      - main
      - develop

pool:
  vmImage: 'Ubuntu-latest'

steps:
  - task: Maven@3
    inputs:
      mavenPomFile: 'pom.xml'
      mavenOptions: '-Xmx3072m'
      javaHomeOption: 'JDKVersion'
      jdkVersionOption: '17'
      jdkArchitectureOption: 'x64'
      publishJUnitResults: false
      testResultsFiles: '**/surefire-reports/TEST-*.xml'
      goals: '-Dspring.profiles.active=local package'
  - task: CopyFiles@2
    displayName: 'Copy Files to artifact staging directory'
    inputs:
      SourceFolder: '$(System.DefaultWorkingDirectory)'
      Contents: '**/target/*.?(war|jar)'
      TargetFolder: $(Build.ArtifactStagingDirectory)
  - task: PublishBuildArtifacts@1
    inputs:
      pathToPublish: $(Build.ArtifactStagingDirectory)
      artifactName: SampleSpringBootBuild
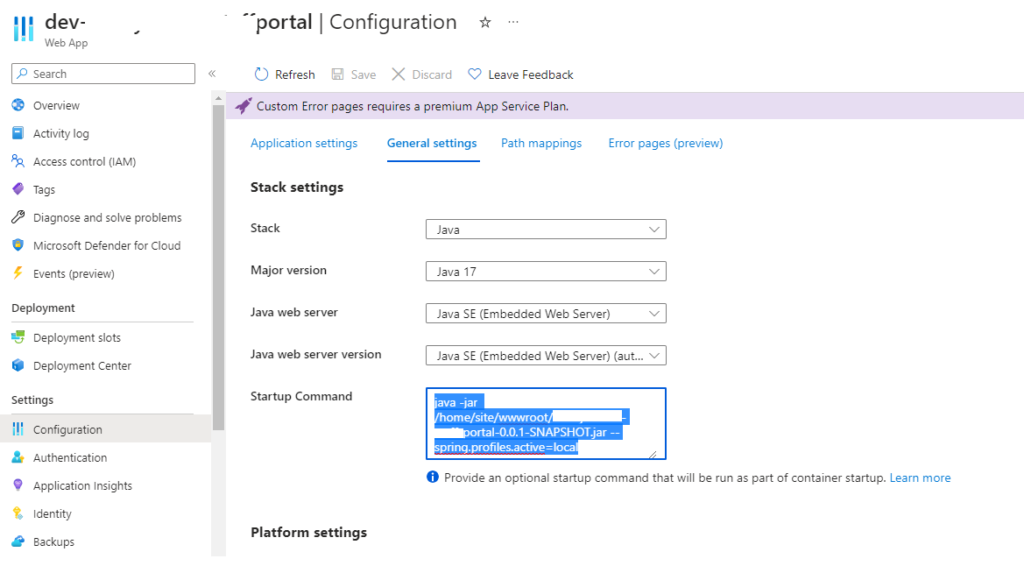
If you wish to startup App service on a specific spring boot profile

Replace with your Artifact jar file name
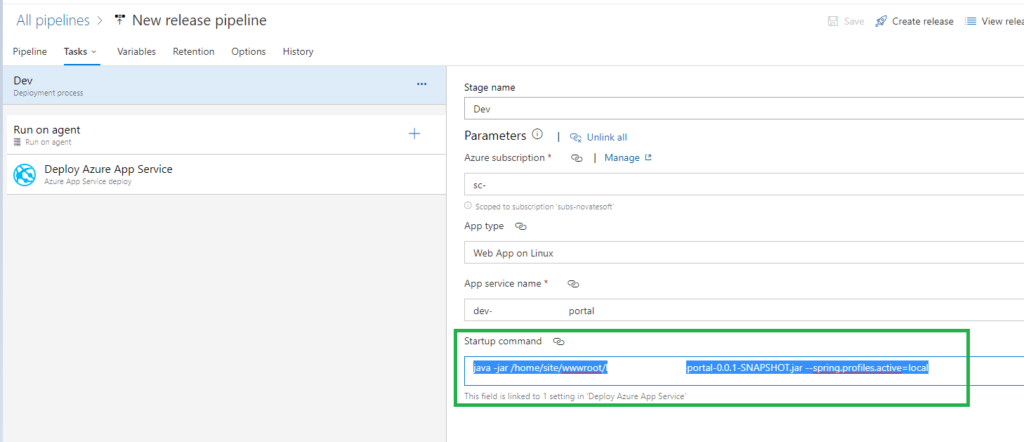
java -jar /home/site/wwwroot/portal-0.0.1-SNAPSHOT.jar --spring.profiles.active=local
Startup Command to be set if you are using release pipelines.

This blog post will explore how to use Spring Boot profiles with an application.yaml file in Visual Studio Code. Spring Boot provides a convenient way to manage application configurations for different environments using profiles. By leveraging profiles, developers can easily switch between different sets of configuration properties based on the current environment, such as development, testing, or production.
To start, we need to create an application.yaml file in our Spring Boot project. This file will contain the configuration properties for our application. In this example, we have defined a server configuration with the port set to 8081 and a servlet context path set to “/portal/”. Additionally, we have specified that the active profile is “dev” using the spring.profiles.active property.
To make use of the application.yaml file, we must ensure that our project is set up with the necessary dependencies. In Visual Studio Code, we can easily manage our project dependencies using the built-in Maven or Gradle support. To enable web application development, we should include the required Spring Boot starter dependencies, such as spring-boot-starter-web.
Next, we can create a Spring Boot application class that will serve as the entry point for our application. This class should be annotated with @SpringBootApplication, which will enable auto-configuration and component scanning. With this setup, our application will automatically detect the application.yaml file and load the configuration properties defined within it.
We can run the application in Visual Studio Code to test our configuration. By default, Spring Boot will use the “dev” profile since it was specified as the active profile in the application.yaml file. However, we can easily switch profiles by modifying the spring.profiles.active property in the application.yaml file or by passing the –spring.profiles.active command-line argument when running the application.
Using profiles with the application.yaml file provides a flexible and convenient way to manage configurations for different environments in a Spring Boot application. With Visual Studio Code’s support for Maven or Gradle, developers can easily set up and manage dependencies, making it a suitable choice for developing Spring Boot applications.


