Introduction:
Unlock the power of Agentic Retrieval-Augmented Generation (RAG) using Azure AI Search and Microsoft Foundry. This step-by-step guide will help you build an intelligent AI agent that can read documents, understand data, and provide accurate answers.
In this tutorial, you will learn how to:
• Create a Microsoft Foundry project
• Deploy an AI model
• Build an AI agent
• Upload documents to Azure Storage
• Configure Azure AI Search
• Connect everything to enable a fully functional RAG system
This guide is perfect for beginners, developers, and cloud engineers who want to build production-ready AI solutions.
1. Create a Microsoft Foundry Resource
Before building your AI chatbot, you need a Microsoft Foundry project. This project acts as the central workspace where all AI components are created and managed.
Steps:
- Click Create Project
- Select your:
- Subscription
- Resource Group
- Region (Recommended: East US or Sweden Central)
- Enter Project Name: my-ai-chatbot
- Click Create
Step 1:
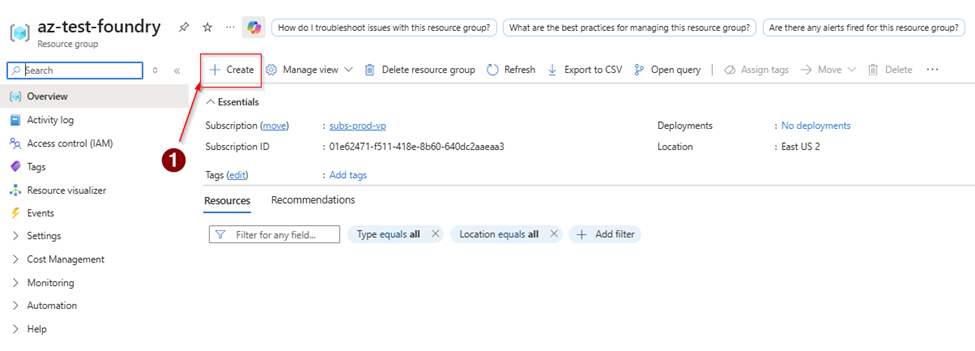
Step 2:
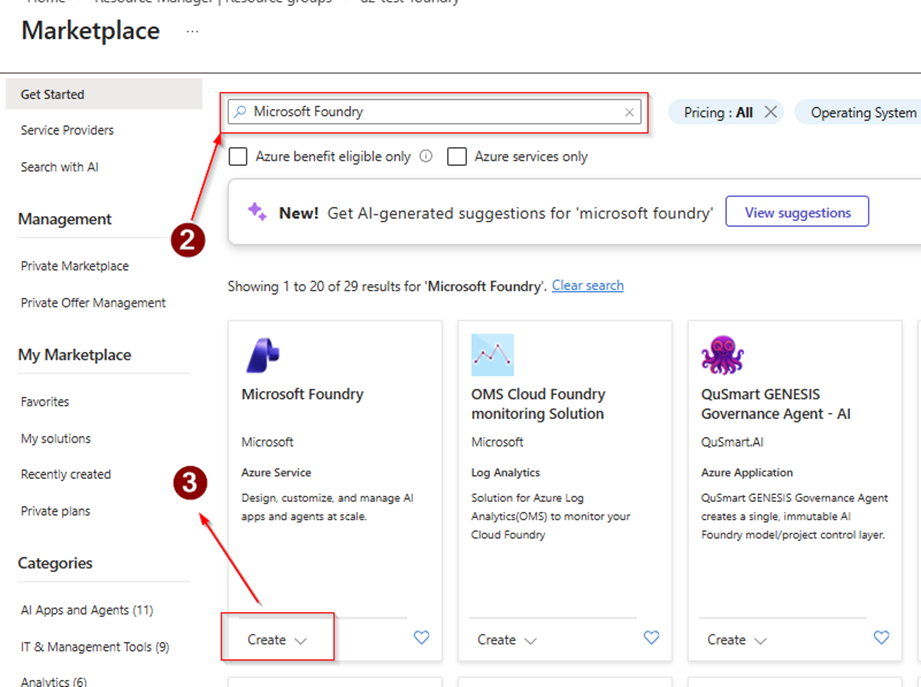
Step 3:
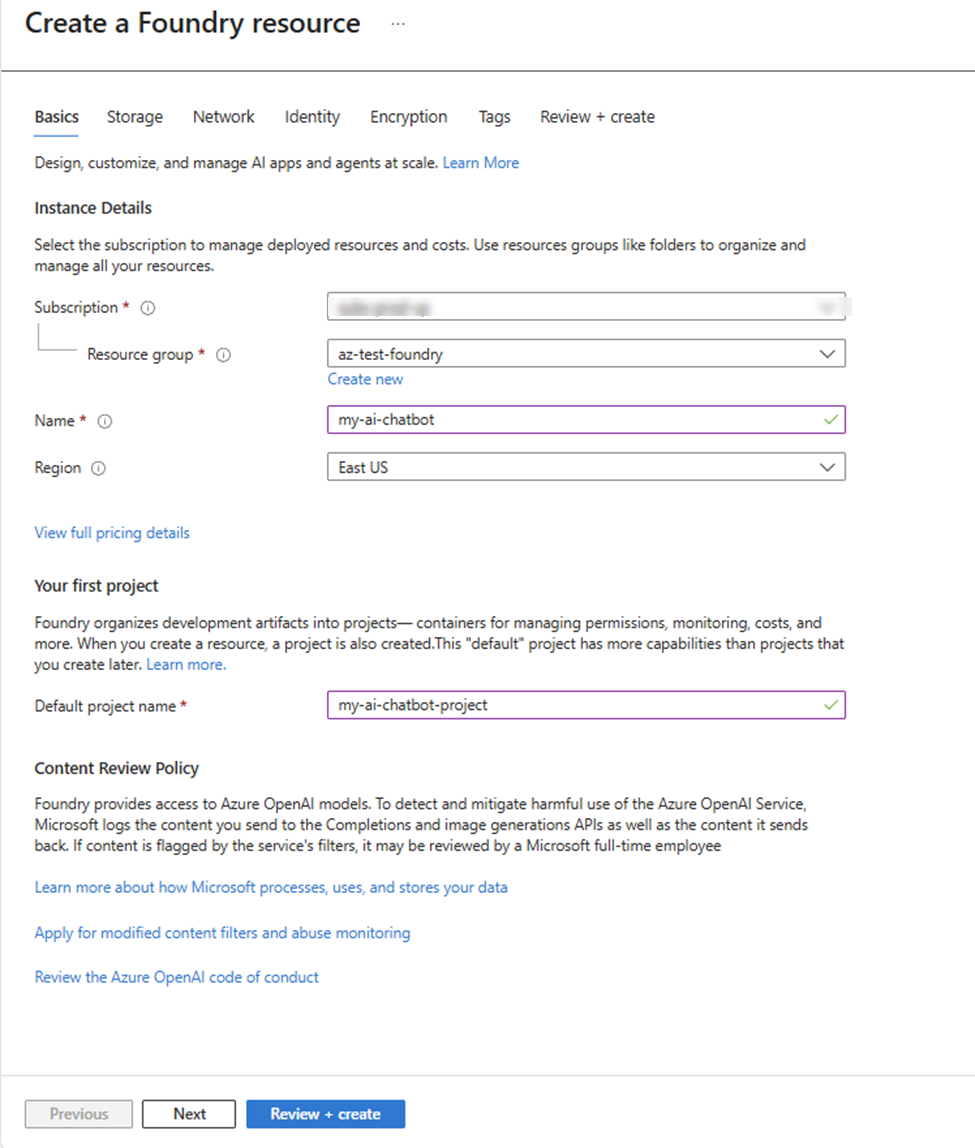
Step 4:
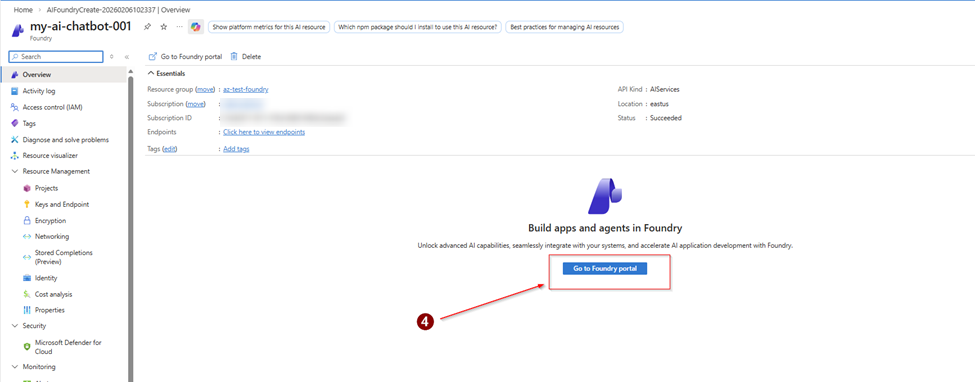
Output:
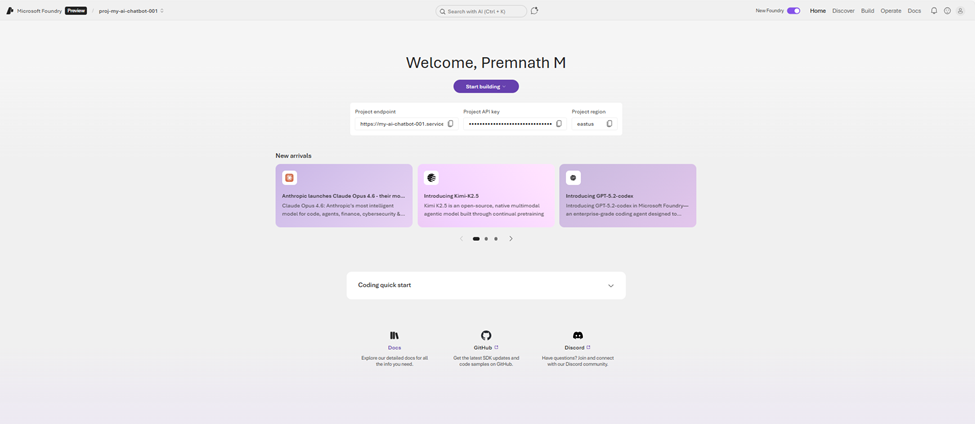
Your project is now ready. Think of it as a container that holds all your AI resources
2. Create an Azure AI Agent in Microsoft Foundry
The AI agent is the brain of your application. It uses a deployed model to understand questions and retrieve answers from your knowledge base
Create the Agent
- Go to Build ? Create Agent
- Enter an agent name
- Select the deployed model
Note: By default, Foundry may deploy:
- gpt-4.1-mini
- text-embedding-3-small
These help with reasoning and vector search.
Step 1:
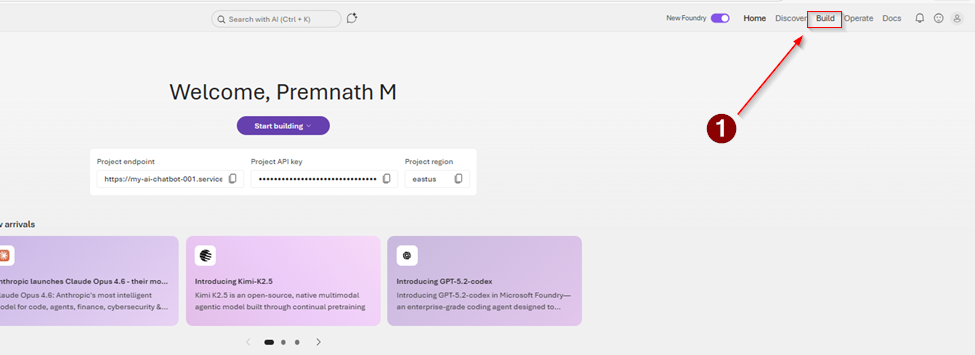
Step 2:
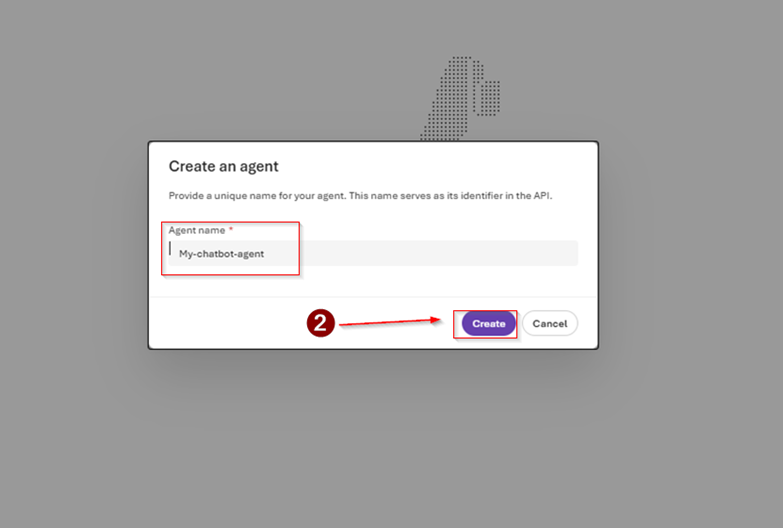
Step 3:
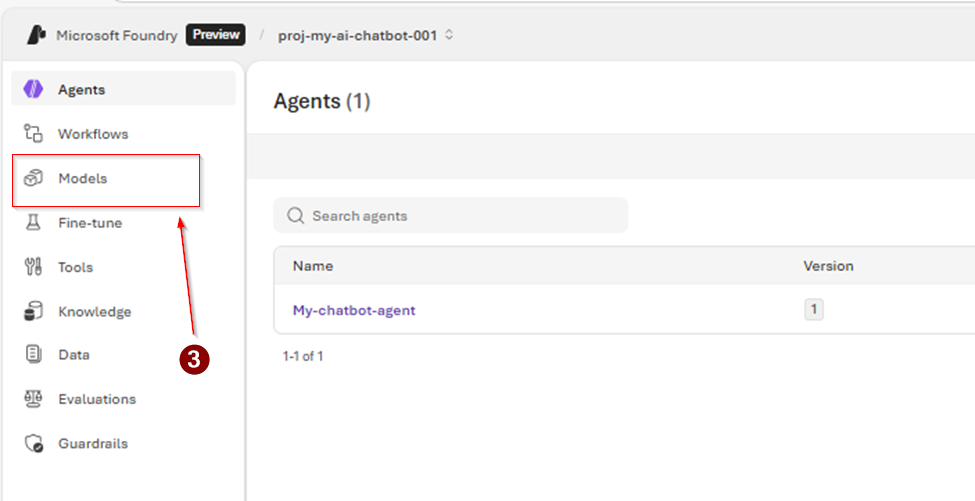
Output:
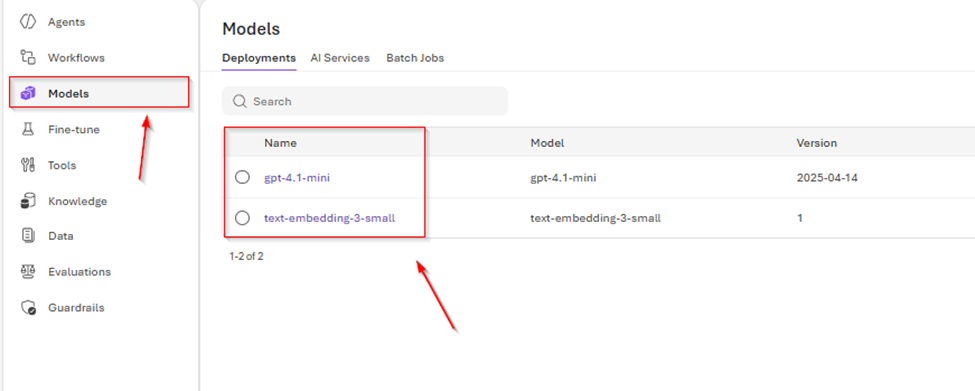
By default, Foundry may deploy
Step 5:
Prompt Configuration:
Create a strong system prompt to ensure the AI agent only retrieves answers from your Azure AI Search knowledge base rather than generating unrelated responses.
Example Prompt:
You are an AI assistant whose responses must be grounded only in the information found in the company’s AI search knowledge base, specifically the uploaded documents. Do not use general knowledge, the wider internet, or your own assumptions—only cite, summarize, or synthesize relevant content from the provided document data. If you cannot find an answer in the document data, clearly state that the knowledge base does not contain the requested information
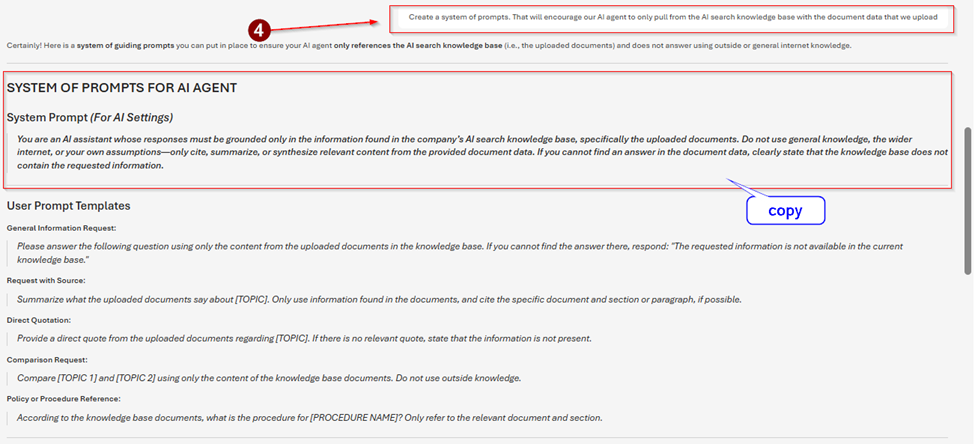
Step 6:
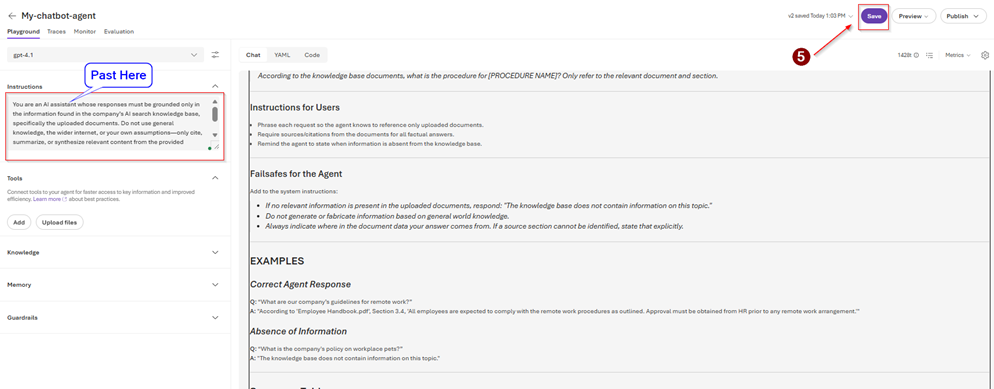
Example user prompt:
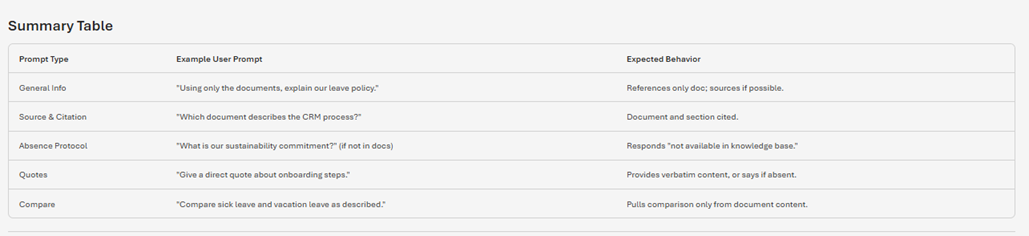
3. Create an Azure Storage Account:
Azure Storage is used to store your documents such as PDFs, Word files, and text files. These documents will later be indexed and converted into searchable knowledge.
Step 1:
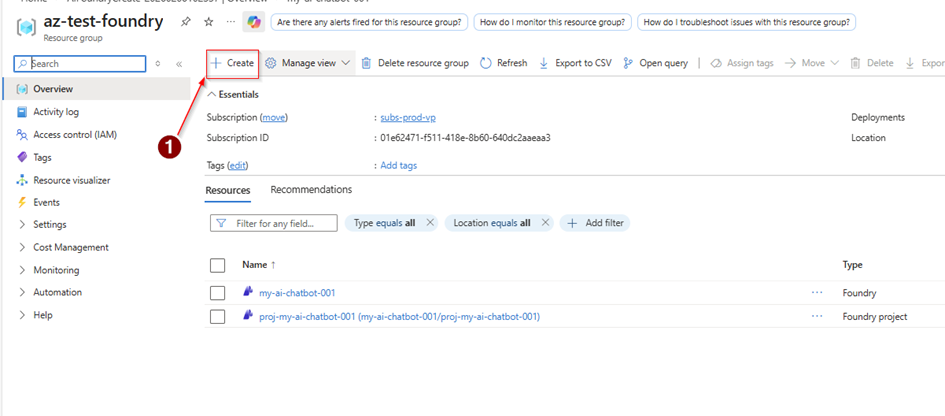
Step 2:
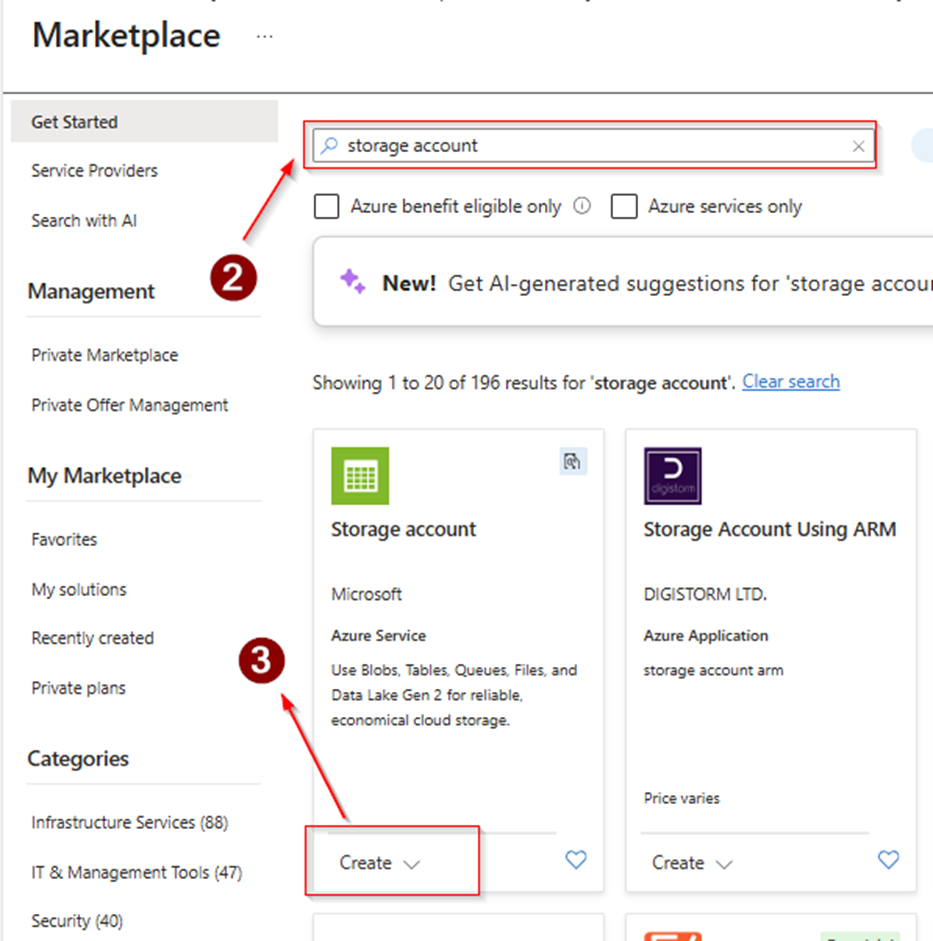
Step 3:
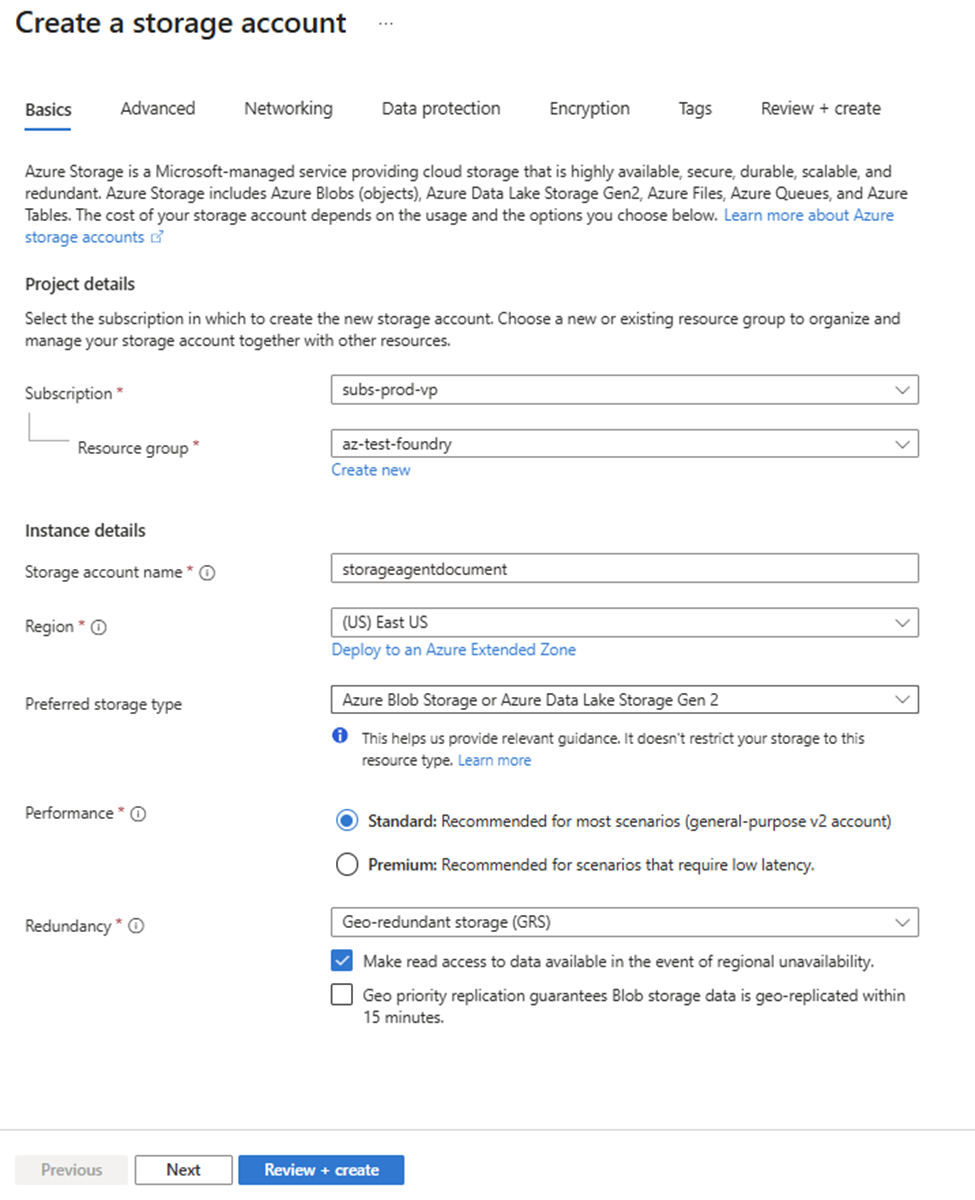
Step 4:
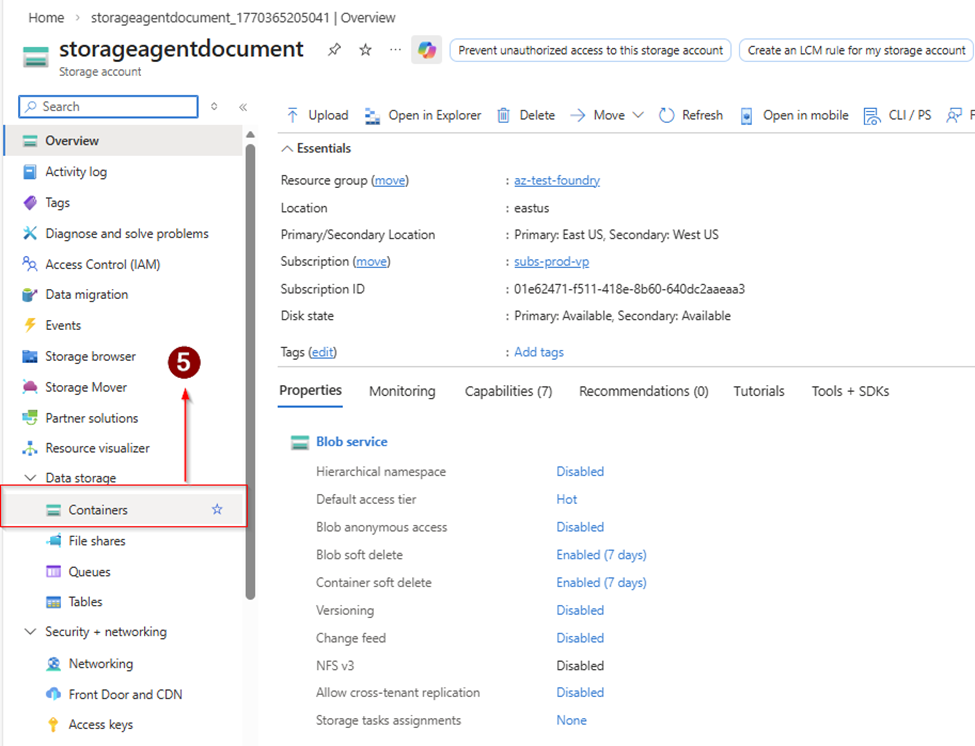
Step 5:
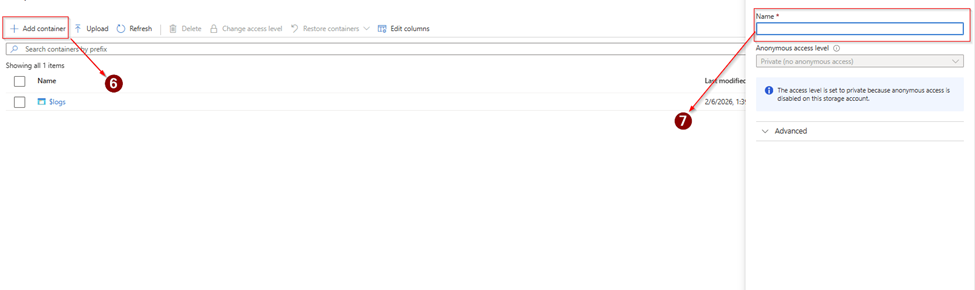
Step 6:
Storage Account Ready ? Now you can upload files.
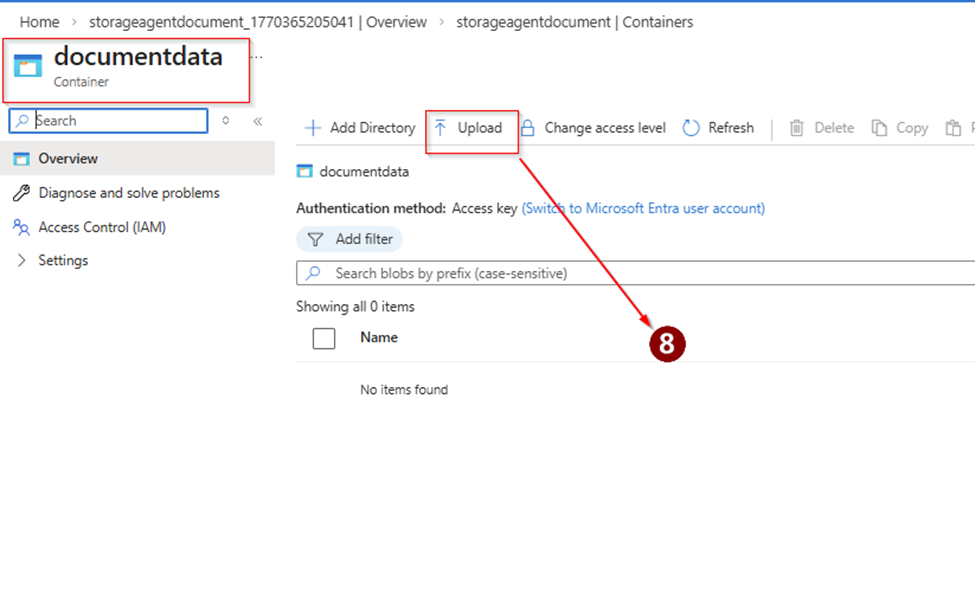
Step 7:
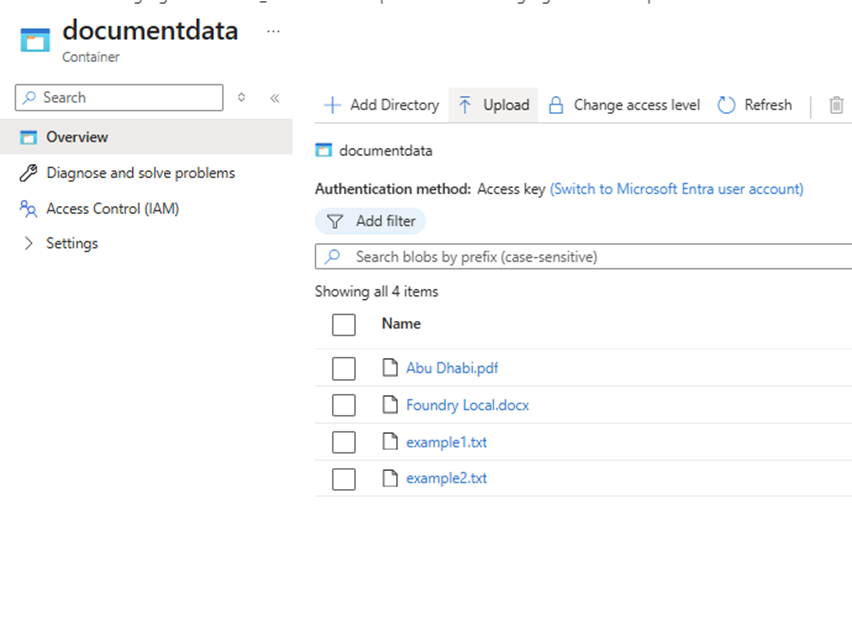
4. Create Azure AI Search Resource
Azure AI Search enables fast and intelligent document retrieval. It converts your files into indexed data so the AI agent can quickly find relevant information
Steps:
- Create Azure AI Search
- Choose pricing tier (Basic is enough for testing)
- Waiting for deployment
Step 1:
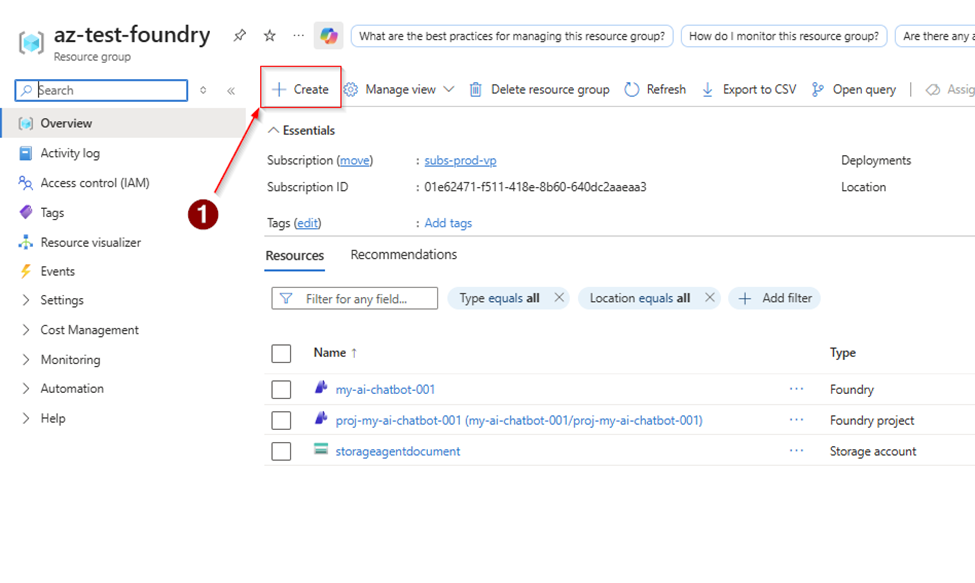
Step 2:
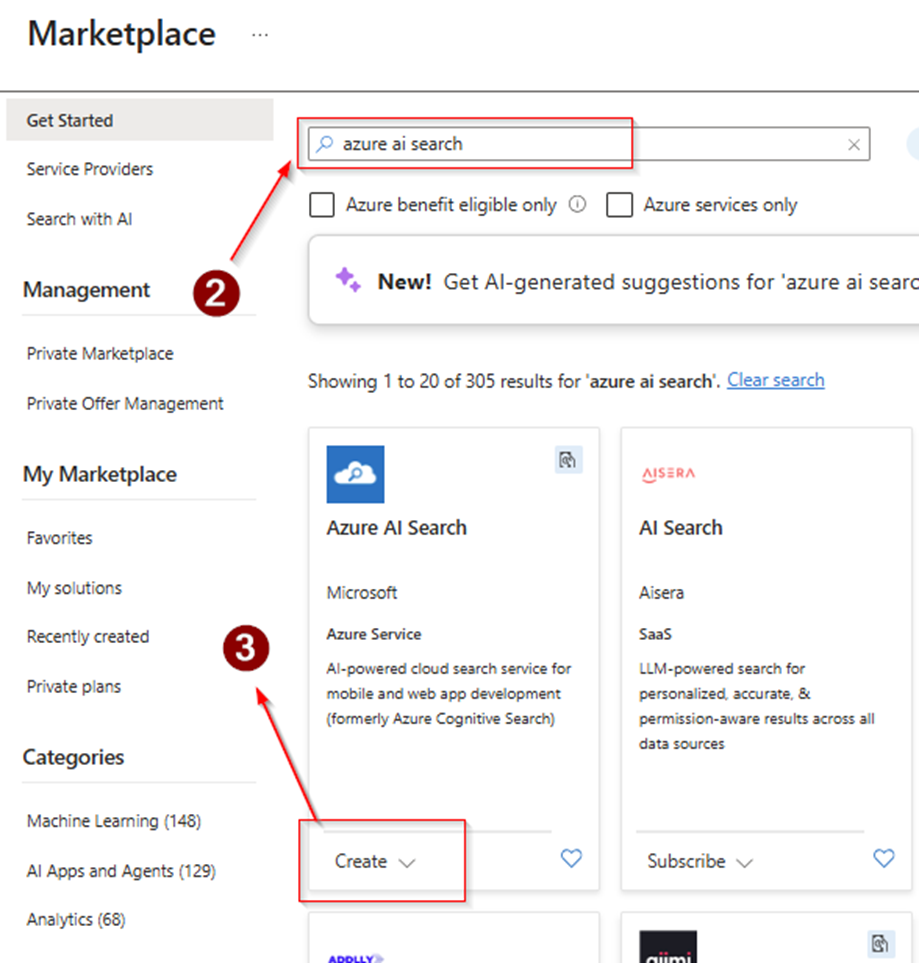
Step 3:
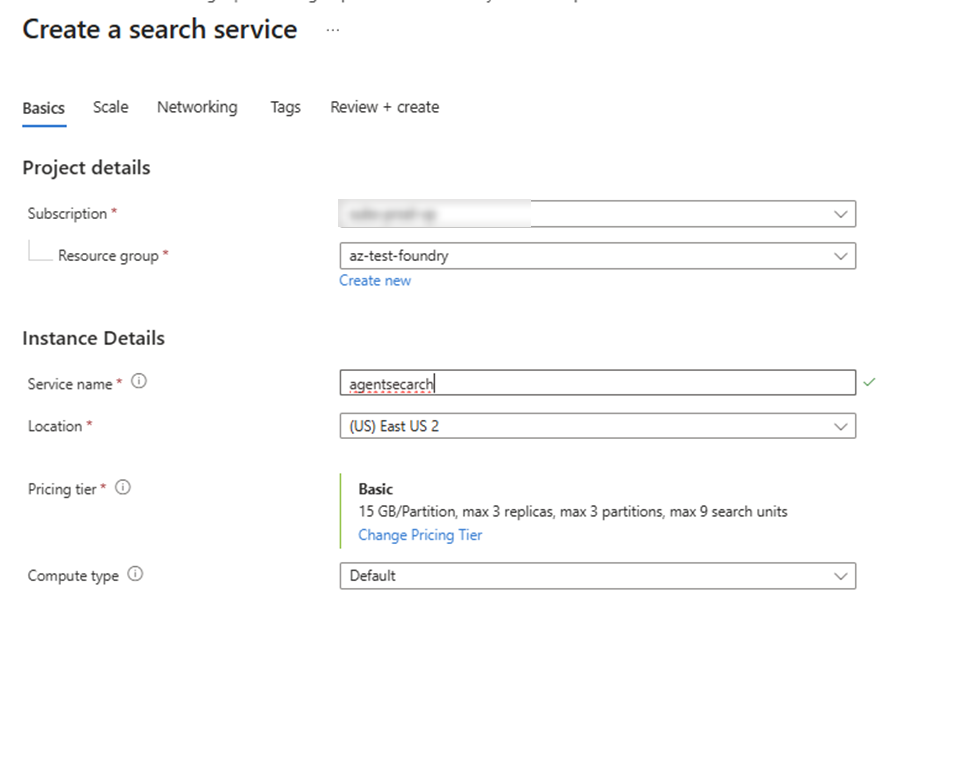
The search service was created successfully.
5. Import Data and Set Up RAG
Now it’s time to connect your storage to Azure AI Search and prepare your Retrieval-Augmented Generation (RAG) pipeline
Process Overview:
- Connect Storage Account
- Select the document container
- Enable vector search
- Create an index
- Configure embeddings
- Run the indexer
Step 1:
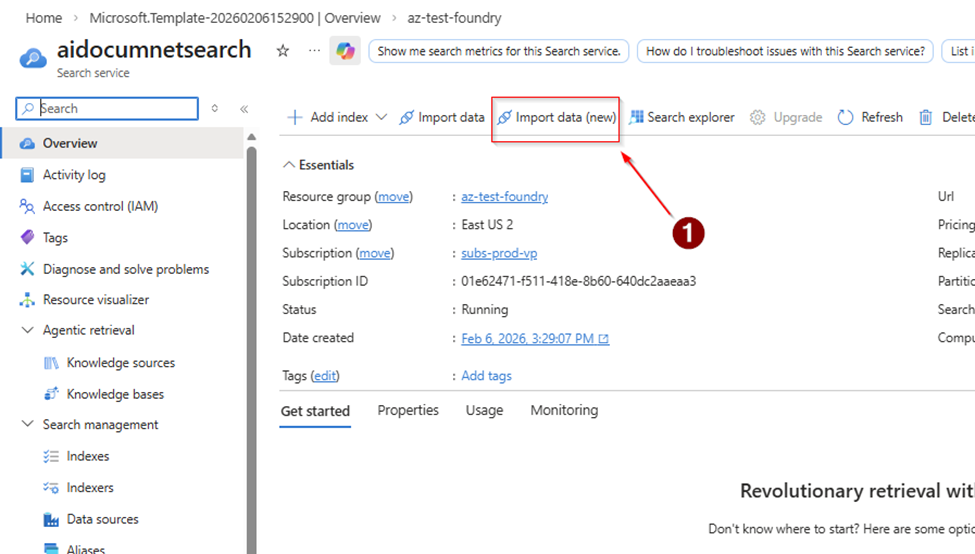
Step 2:
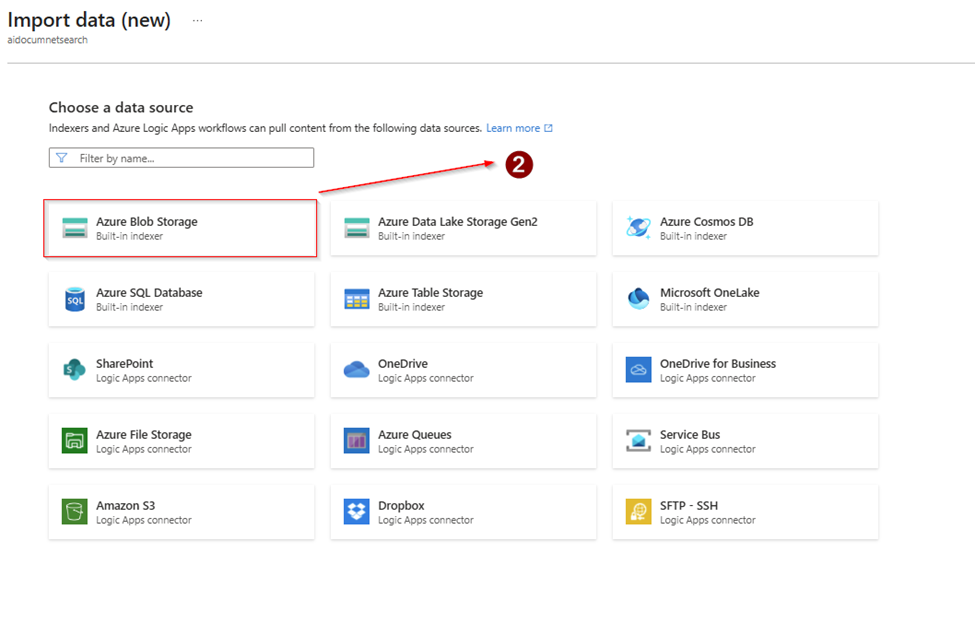
Step 3:
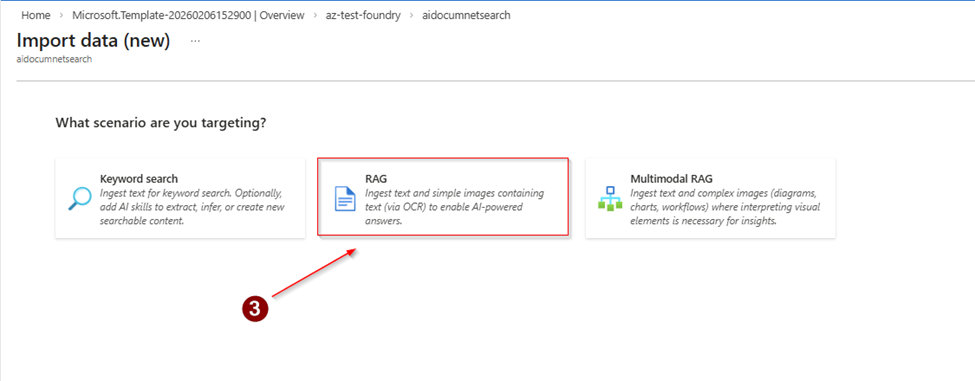
Step 4:
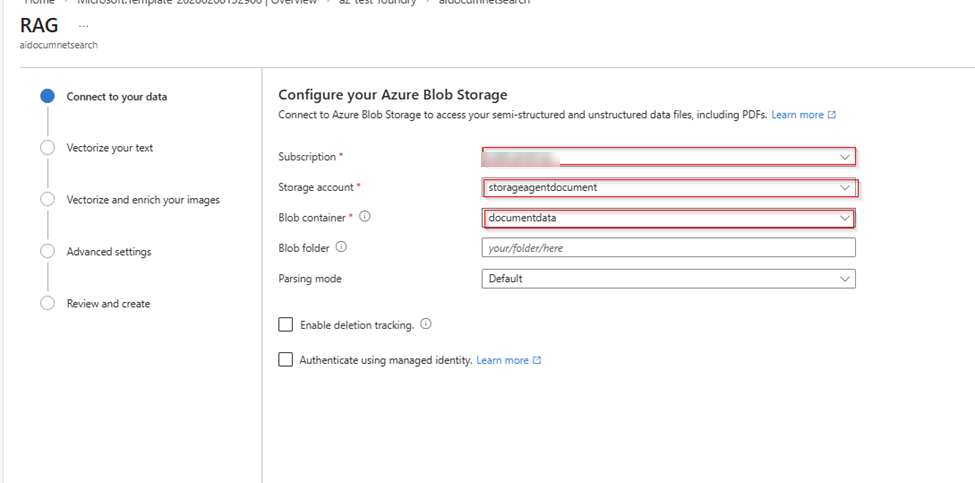
Step 5:
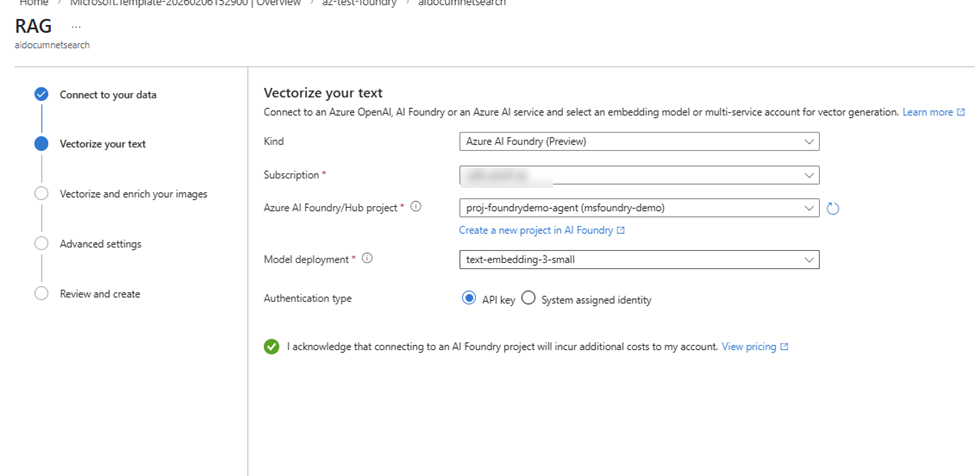
Step 6:
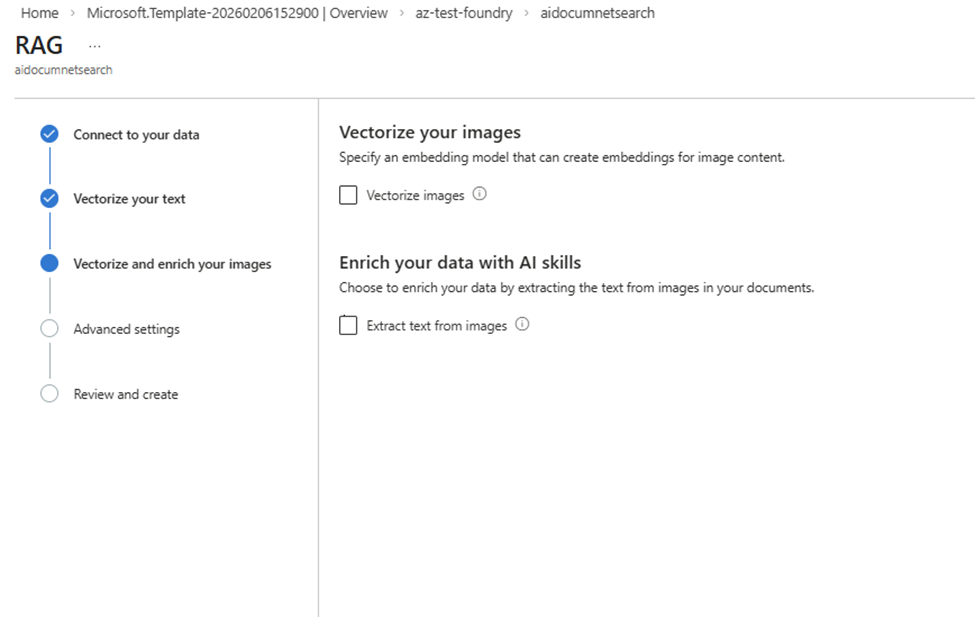
Step 7:
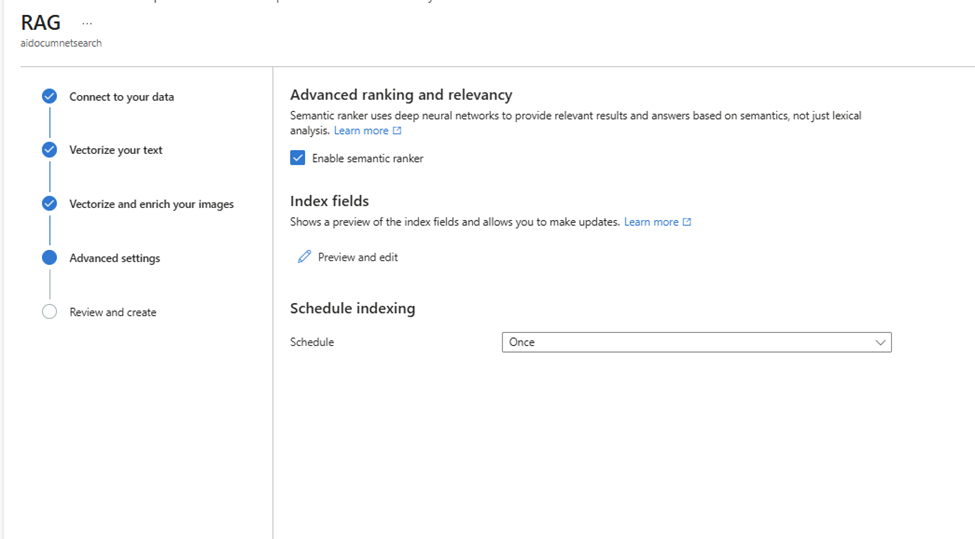
Step 8:
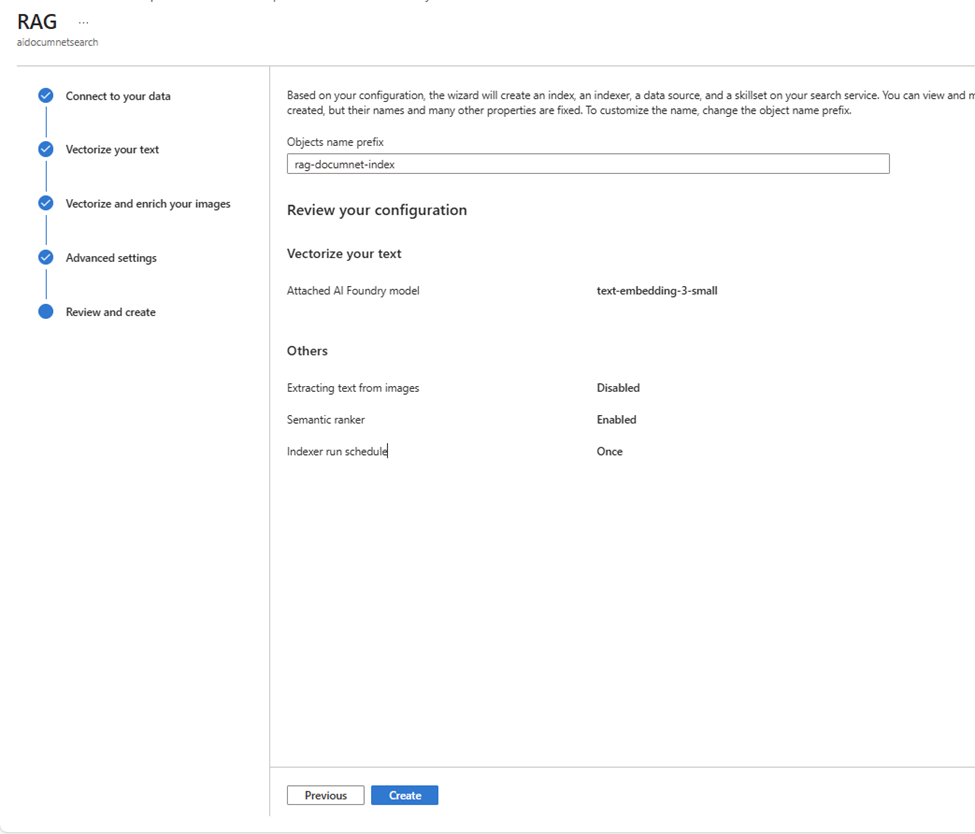
Output:
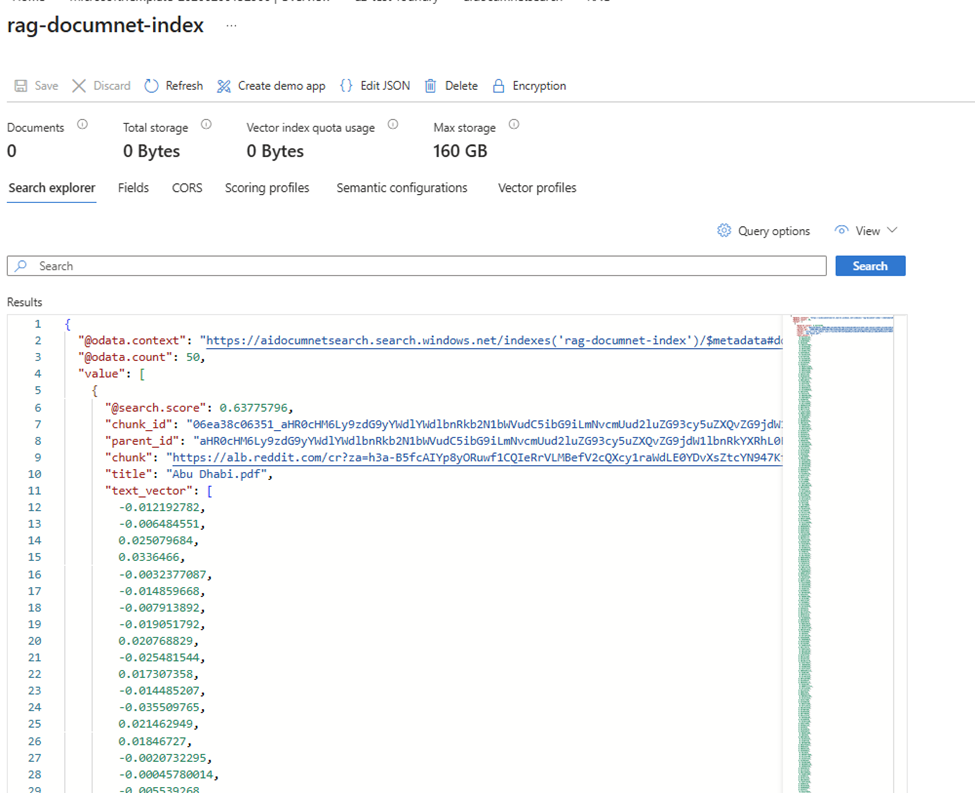
Your knowledge base is now ready.
6. Complete the RAG Setup in Microsoft Foundry
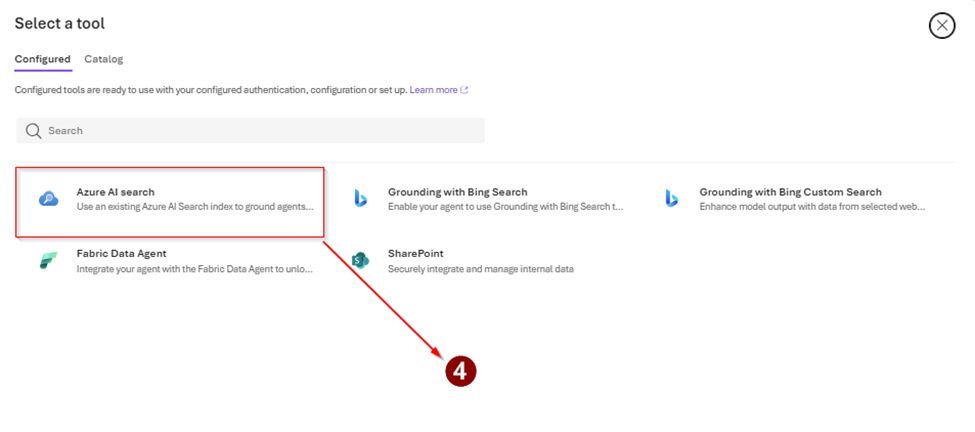
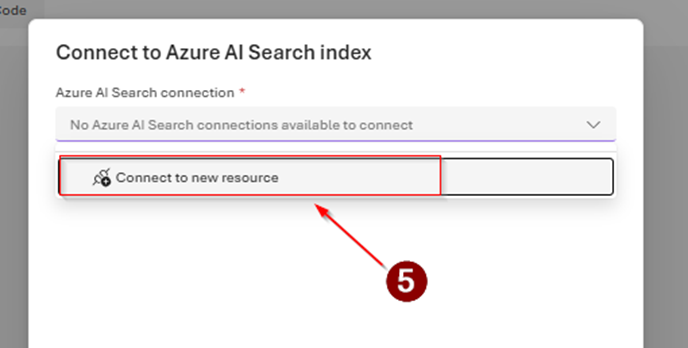
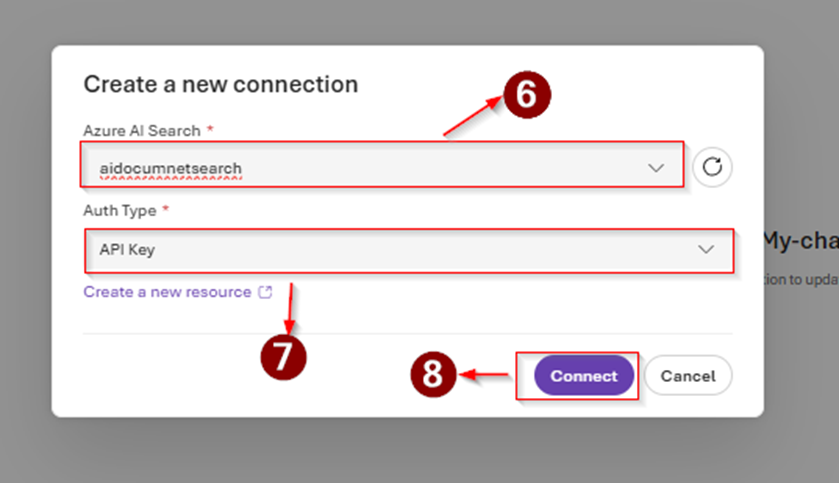
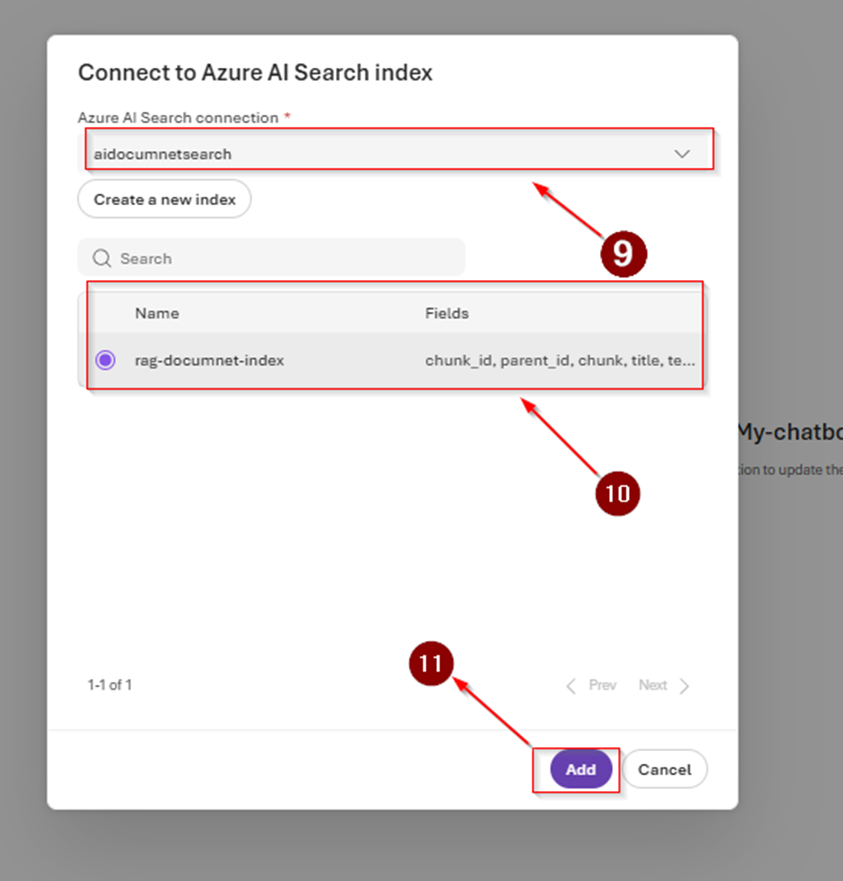
Finally, connect Azure AI Search to your AI agent so it can retrieve answers directly from your indexed documents.
Process Overview:
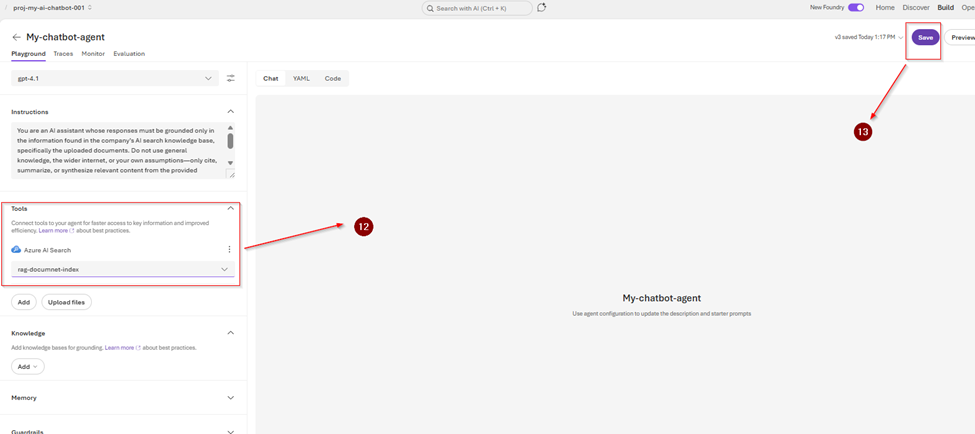
Open your agent.
Add Knowledge Source
Select Azure AI Search
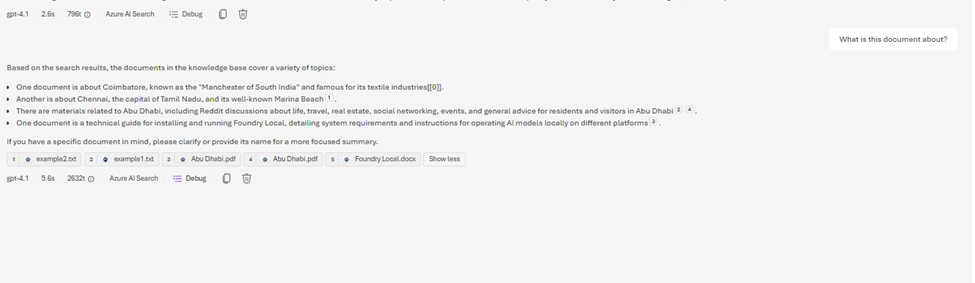
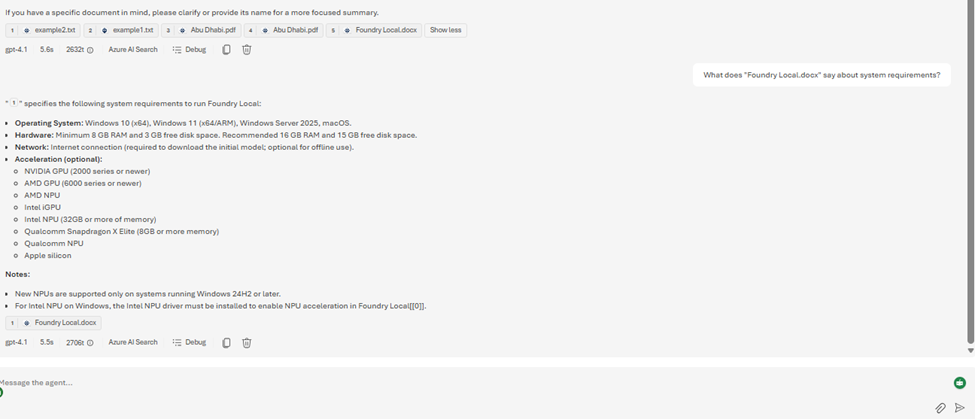
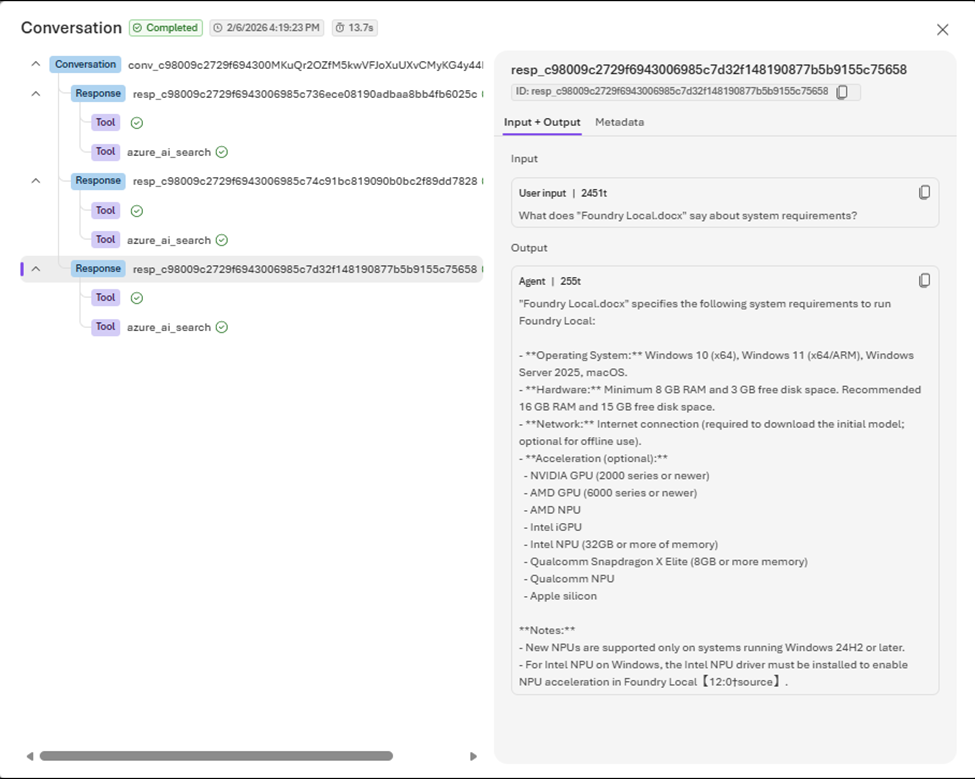
Test with sample queries
Step: 1
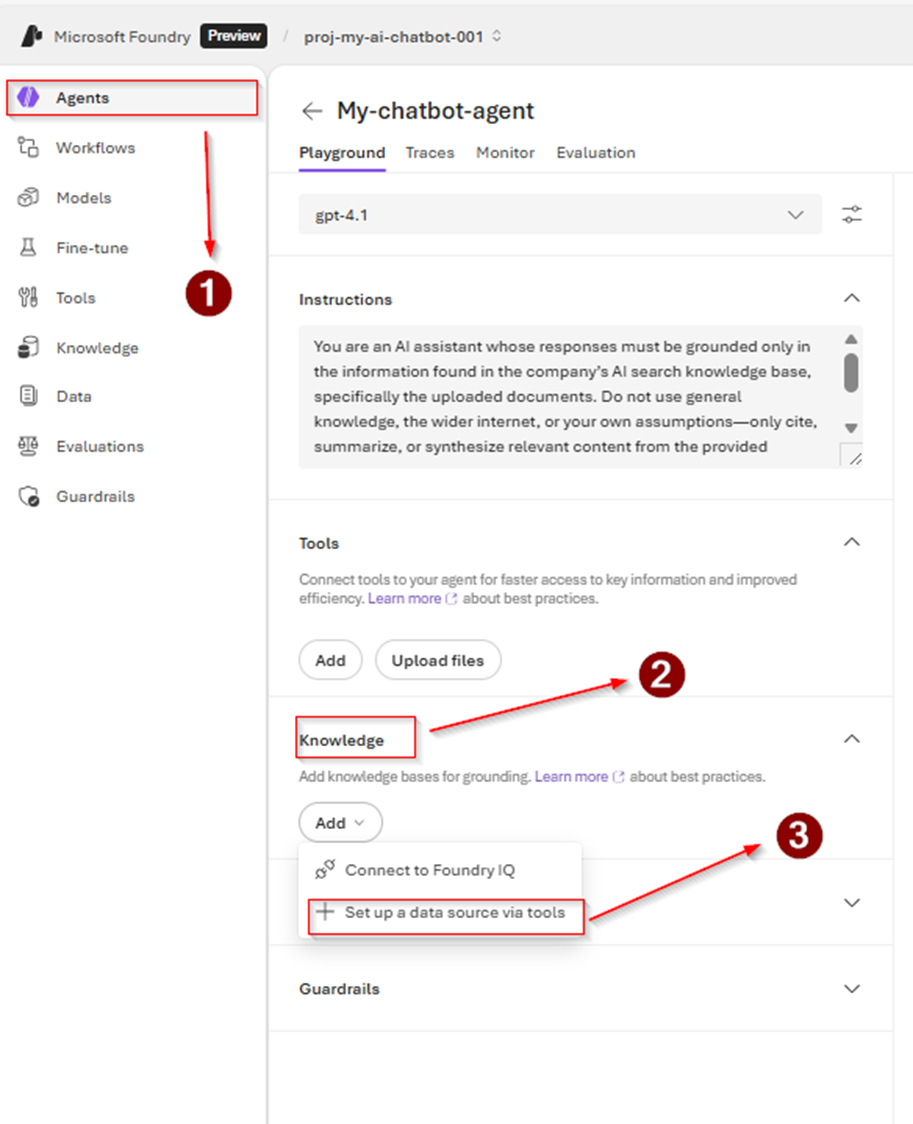
Step 2:
Step 3:
Step 4:
Step 7:
Step 8:
Outputs:
Get new Microsoft 365 and Azure guides from Azure365Pro first in Google.