Step 1:
Create an Azure Virtual Machine and Install Internet Information Services (IIS) Manager on the VM, as shown below, and verify.
Do this inside your Azure Windows VM
1. Open PowerShell as Administrator.
2. Install IIS + Management Tools by running thisInstall-WindowsFeature -name Web-Server -IncludeManagementTools
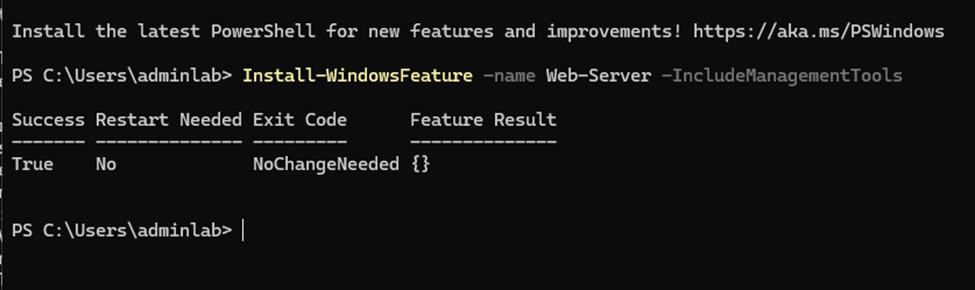
- Confirm IIS is installed:
- Open a browser in your VM ? go to http://localhost
You should see the IIS Welcome Page
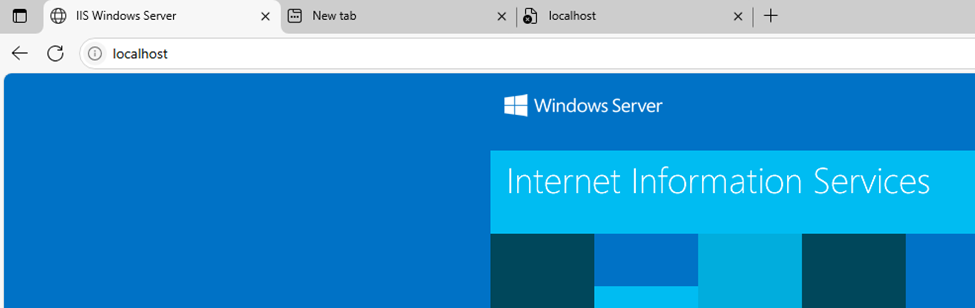
Optional: Restart the IIS service (after installation)iisreset
Step 2:
Inside the Azure VM, React application, push to Azure Repos or GitHub
git init  # If not already initialized
git remote add azure <azure-repo-url>
git add .
git commit -m "Your commit message"
git push azure master  # Or your branch name instead of master
STEP 3: Build and deploy the artifact file
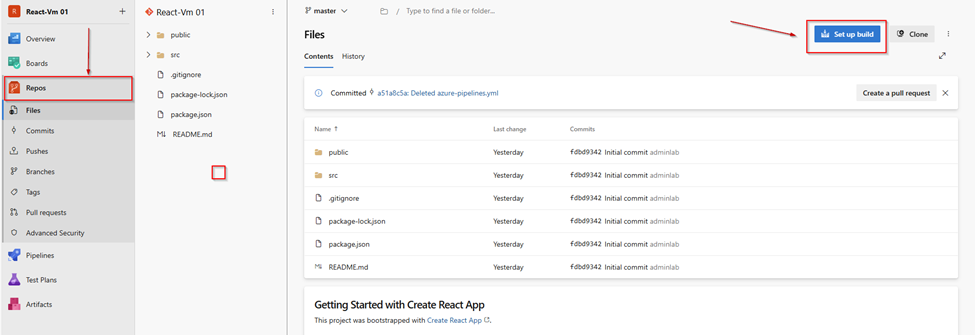
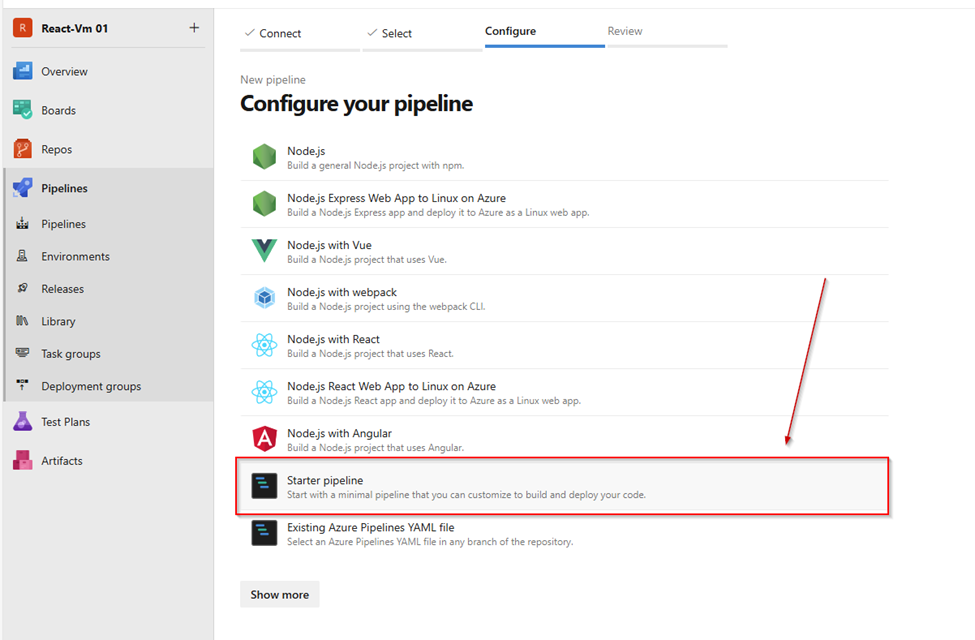
Past yaml code Here
trigger:
  - main  # Change this if your branch is different

pool:
  vmImage: 'ubuntu-latest'

variables:
  buildDir: 'build'

stages:
  - stage: Build
    displayName: 'Build React App'
    jobs:
      - job: BuildJob
        displayName: 'Build Job'
        steps:
          - task: NodeTool@0
            inputs:
              versionSpec: '18.x'
            displayName: 'Install Node.js'

          - script: |
              npm install
              npm run build
            displayName: 'Install dependencies and build React app'

          - task: CopyFiles@2
            inputs:
              sourceFolder: '$(Build.SourcesDirectory)/$(buildDir)'
              contents: '**'
              targetFolder: '$(Build.ArtifactStagingDirectory)/reactapp'
            displayName: 'Copy build output to staging directory'

          - task: PublishBuildArtifacts@1
            inputs:
              PathtoPublish: '$(Build.ArtifactStagingDirectory)/reactapp'
              ArtifactName: 'reactapp'
              publishLocation: 'Container'
            displayName: 'Publish build artifacts'
Step 4: Go to Azure DevOps > Pipelines > Deployment Groups to create a new.
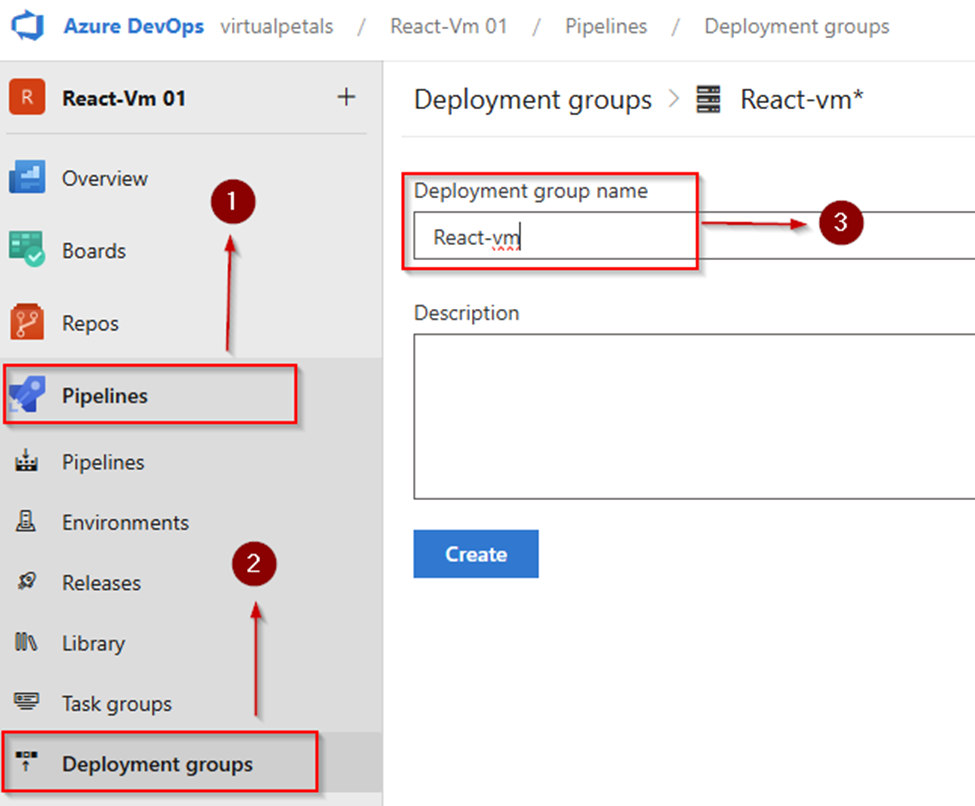
Deployment group and copy the PowerShell script
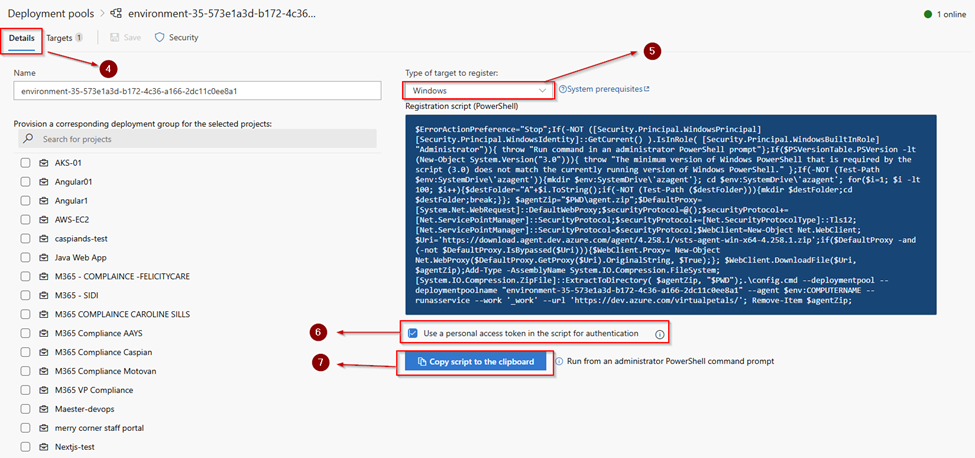
Step 5: Go to VM > PowerShell> paste the script and run with default values.
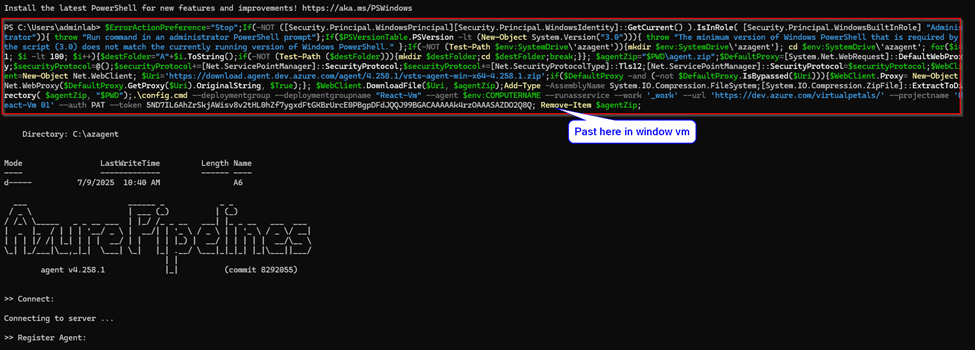
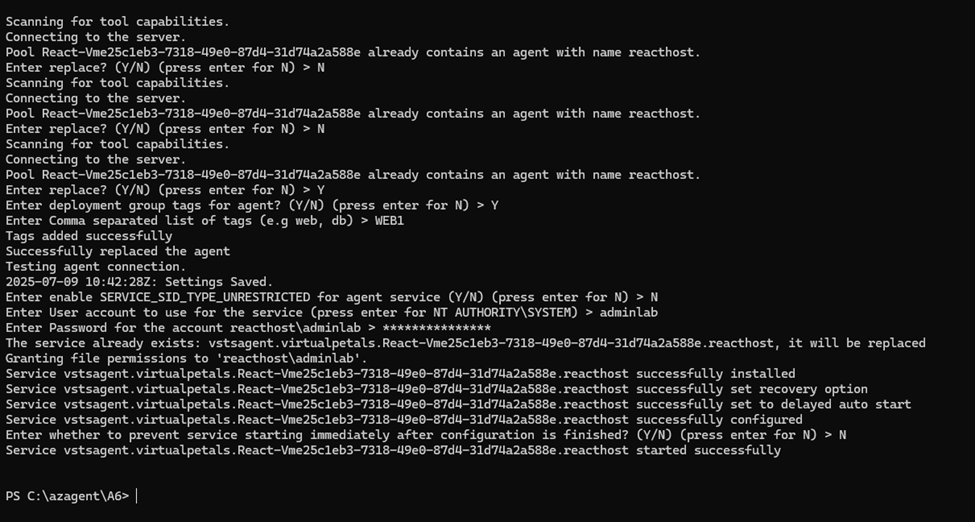
Once you successfully run the script in the VM, you will see the VM is online in Azure DevOps.
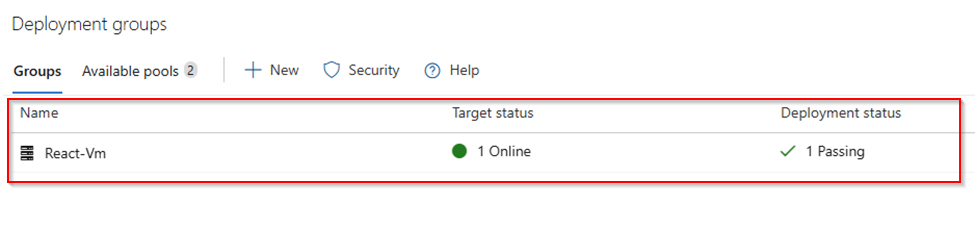
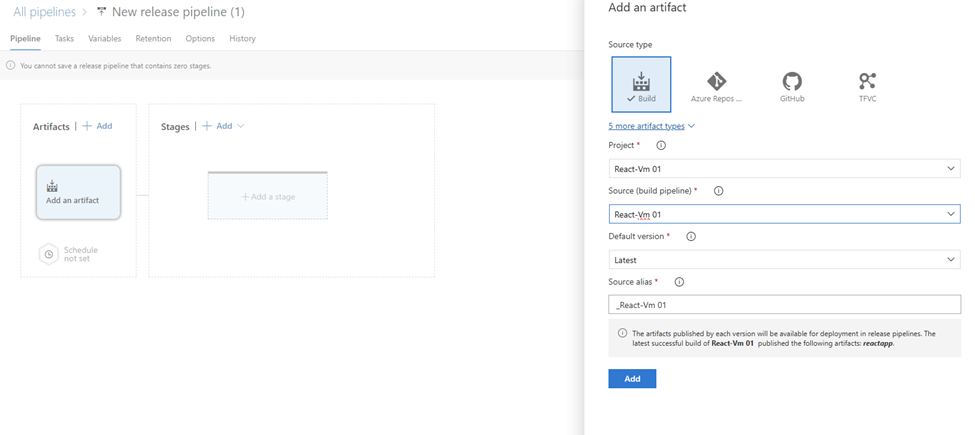
Step 6: Go to Release pipelines > Click new pipeline Add an artifact file
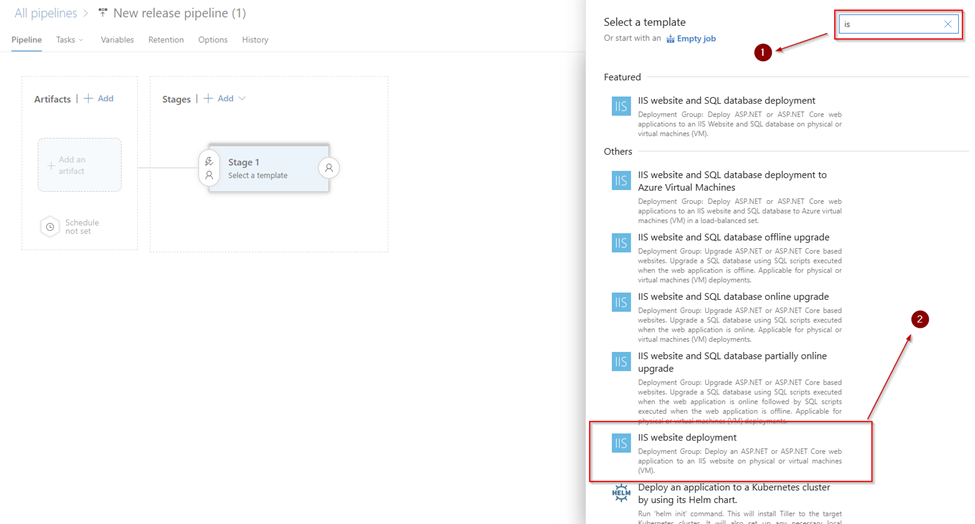
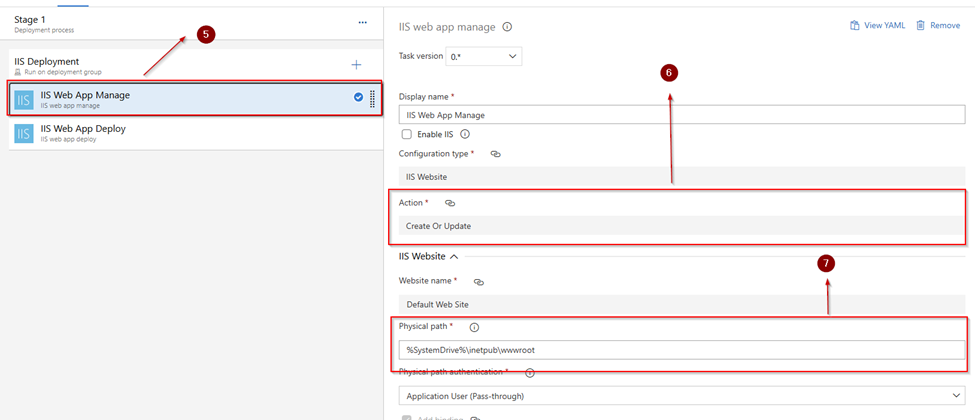
Select the IIS Website Deployment template.
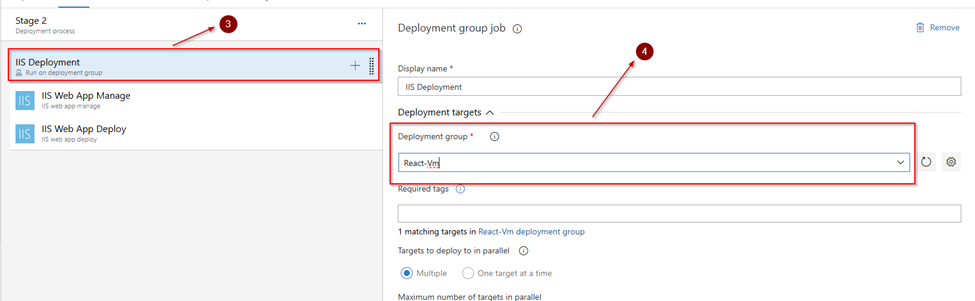
Select the deployment group you have created
Check the action and physical path
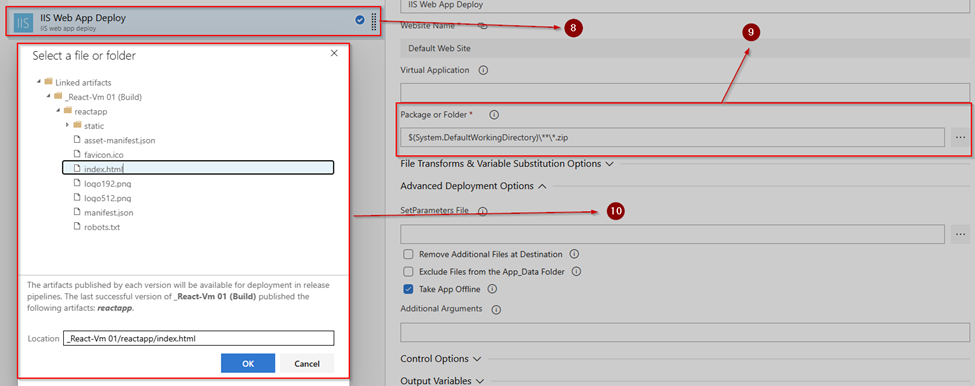
Make sure you have provided the correct path for the artifacts folder to deploy
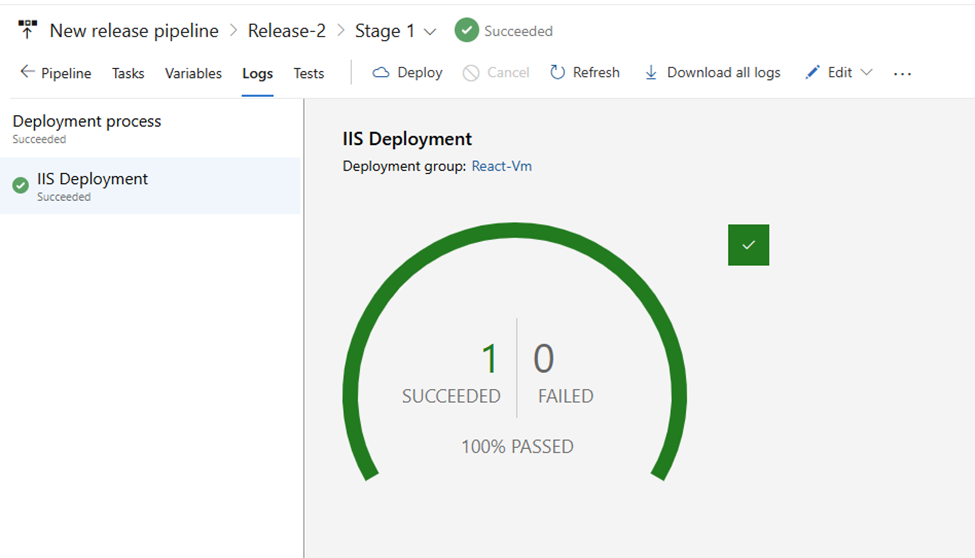
Step 7: Run the pipeline and check the output:
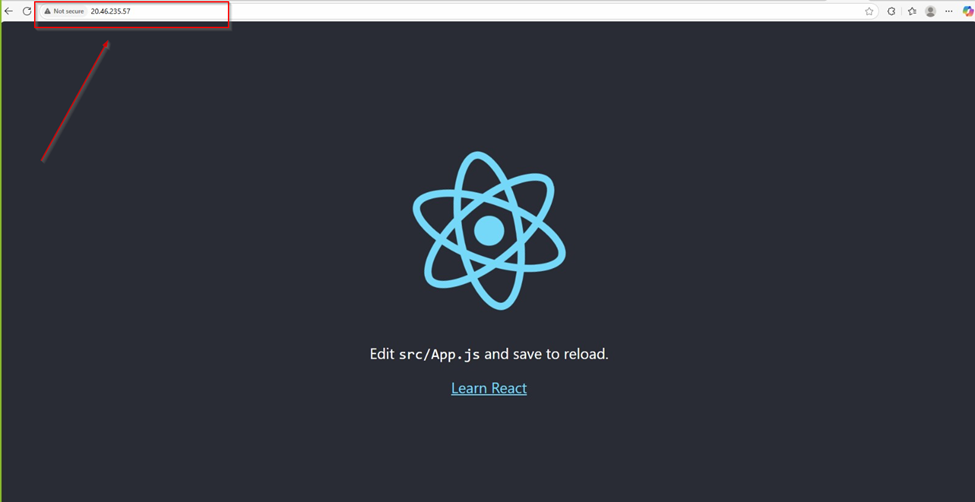
Outputs:
Get new Microsoft 365 and Azure guides from Azure365Pro first in Google.